Un diseño de mapa es un conjunto de personalizaciones visuales sobre los componentes de mapa que asocias a un ID de mapa. Luego, debes hacer referencia al ID de mapa en el código de la aplicación para mostrar el mapa personalizado.
Puedes crear un diseño de mapa antes de tener un ID de mapa, pero, para utilizarlo, debes asociarlo con un ID de mapa. Para usar un diseño de mapa, debes seguir todos los pasos que se indican a continuación:
En la consola de Google Cloud, ve a Diseños de mapa y selecciona un proyecto si es necesario.
En Diseños de mapa, haz clic en Crear diseño.
En el diálogo, en la pestaña Estilos de Google, selecciona una de las siguientes opciones:
Light para crear un diseño de mapa claro, en el que el tipo de mapa es de ruta.
scienceOscuro para crear un diseño de mapa oscuro, en el que el tipo de mapa es oscuro de hoja de ruta.
(Opcional) Para aplicar la variación monocromática a tu diseño de mapa, selecciona Monocromático.
Selecciona Personalizar para crear un nuevo estilo sin título.
Selecciona los componentes de mapa que desees y cambia su diseño según tus necesidades.
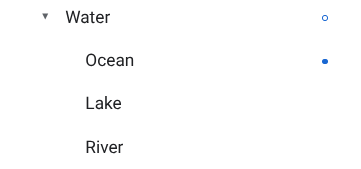
Los componentes de mapa con diseños personalizados tienen un punto azul a su lado. Si personalizas un diseño secundario, el diseño superior mostrará un círculo azul. Para obtener más información sobre la jerarquía de los diseños de mapas, consulta Conceptos básicos sobre la herencia y la jerarquía de los diseños de mapas.
Haz clic en Guardar.
En el cuadro Guardar y publicar el diseño de mapa, ingresa el nombre de tu diseño y, opcionalmente, una descripción, y haz clic en Guardar.
El diseño se publicará automáticamente, y podrás ver la página principal de tu nuevo diseño.
Cómo duplicar un diseño
Ve a Diseños de mapa y selecciona un proyecto, si es necesario.
Selecciona uno de tus diseños existentes.
En la página del diseño, haz clic en Duplicar.
En el cuadro Duplicar diseño de mapa, ingresa el nuevo nombre del mapa y, opcionalmente, una descripción.
Haz clic en Guardar.
El diseño se publicará automáticamente, y podrás ver la página principal de tu nuevo diseño. Asocia el diseño a un ID de mapa para poder usarlo en tus mapas. Para obtener más detalles, consulta Cómo asociar un ID de mapa a un diseño de mapa.
Si deseas modificar el diseño, haz clic en Personalizar, realiza los cambios y, luego, haz clic en Guardar.
Cómo publicar un diseño
Cuando creas un diseño de mapa nuevo, esa primera instancia del diseño de mapa nuevo se publica automáticamente. Luego, podrás guardar los cambios como borrador y publicarlos cuando te sientas a gusto con ellos.
Aplica los cambios al diseño de mapa (original o duplicado). Para obtener más detalles, consulta Cómo cambiar un diseño.
Haz clic en Guardar para guardar los cambios como borrador.
Cuando los cambios estén listos y desees publicarlos en un ID de mapa que use ese diseño de mapa, haz clic en Publicar.
Diseños de mapa publicados y borradores
Diseño publicado: Es un diseño de mapa publicado. Cualquier mapa que use este diseño mostrará la versión publicada.
Borrador: Las versiones de borrador de los diseños de mapa se encuentran en proceso y no se muestran en los mapas si no las publicas.
Cómo cambiar un diseño
Si quieres realizar cambios en tu diseño de mapa, puedes hacerlo desde el Editor de diseños. Cuando actualizas un diseño, tienes varias opciones:
Si quieres que los cambios se publiquen no bien termines de realizarlos: Haz clic en Personalizar y aplica los cambios. Haz clic en Guardar para guardar los cambios como borrador y, luego, haz clic en Publicar cuando termines.
Si quieres probar los cambios en un entorno de pruebas antes de publicarlos: En vez de aplicar los cambios directamente en el diseño de mapa, primero duplica el primer diseño. Para obtener más detalles, consulta Cómo duplicar un diseño y Prueba las actualizaciones de diseño de mapa.
Una vez que hayas creado un diseño de mapa, puedes aplicarle cambios desde la página principal del diseño de las siguientes maneras:
Cuando vinculas un diseño de mapa claro que tiene habilitados el diseño basado en datos o los conjuntos de datos a un ID de mapa, las capas habilitadas también están disponibles para el diseño de mapa oscuro science.
Para usar el diseño basado en datos o los conjuntos de datos con un diseño de mapa oscuro de science, debes hacer lo siguiente en la consola de Google Cloud:
Ve a Diseños de mapa y selecciona un diseño de mapa claro o crea uno.
En la página principal del diseño, habilita las capas que elijas en un diseño de mapa claro.
Asocia tu diseño a un ID de mapa para mostrar tu diseño personalizado en tu sitio web y en tu app. Un ID de mapa solo puede tener asociado un diseño claro (tipo de mapa de ruta) y un diseño oscuro science (tipo de mapa de ruta oscuro).
Para cambiar el estilo asociado a un ID de mapa, haz lo siguiente en Google Cloud Console:
Ve a Administración de mapas y selecciona un ID de mapa.
En la sección Diseños de mapa, haz clic en Cambiar diseño para seleccionar un diseño de mapa claro u oscuro.
El panel solo muestra diseños con un tipo de mapa de hoja de ruta para los diseños claros y solo diseños con un tipo de mapa de hoja de ruta science oscuro para los diseños oscuros.
En el panel, selecciona uno de los diseños para asociarlo a este ID de mapa.
Haz clic en Listo.
Haz clic en Guardar para aplicar todos los cambios.
Para buscar componentes de mapa con el filtro, en Componentes del mapa, ingresa un término en el cuadro Filtro.
Si no encuentras un componente de mapa, ten en cuenta lo siguiente:
No uses términos en plural. Todas las categorías se presentan en singular.
Prueba con un término más genérico para el componente. Por ejemplo, en vez de "pizzería" o "comida rápida", busca "restaurante".
Prueba con una categoría más amplia y, luego, explórala para hallar el componente de mapa más próximo. Por ejemplo, en vez de "teatro", busca "entretenimiento".
Inspecciona los componentes de mapa
Para encontrar componentes del mapa con el inspector de mapas, sigue estos pasos:
Haz clic con el botón izquierdo en cualquier parte del mapa para abrir el inspector en el punto en el que hiciste clic.
Selecciona un componente de mapa en el inspector de mapas para abrirlo en el panel Componentes del mapa.
[[["Fácil de comprender","easyToUnderstand","thumb-up"],["Resolvió mi problema","solvedMyProblem","thumb-up"],["Otro","otherUp","thumb-up"]],[["Falta la información que necesito","missingTheInformationINeed","thumb-down"],["Muy complicado o demasiados pasos","tooComplicatedTooManySteps","thumb-down"],["Desactualizado","outOfDate","thumb-down"],["Problema de traducción","translationIssue","thumb-down"],["Problema con las muestras o los códigos","samplesCodeIssue","thumb-down"],["Otro","otherDown","thumb-down"]],["Última actualización: 2025-09-05 (UTC)"],[[["\u003cp\u003eA map style is a customizable set of visual elements applied to a map using a map ID, which is referenced in your application code.\u003c/p\u003e\n"],["\u003cp\u003eYou can create a map style by starting fresh, duplicating an existing style/version, or importing JSON styling code.\u003c/p\u003e\n"],["\u003cp\u003eMap styles exist as either draft or published versions, with published versions actively displayed on maps using the associated map ID.\u003c/p\u003e\n"],["\u003cp\u003eOnce a map style is created, you can further customize its appearance, manage version history, associate it with map IDs, and perform other actions like renaming, duplicating, or deleting it.\u003c/p\u003e\n"],["\u003cp\u003eStyles can be associated with multiple map IDs for use across various Google Maps applications, but each map ID can only be linked to one style at a time.\u003c/p\u003e\n"]]],["Map styles are customized sets for map IDs, with published styles being live and draft styles being in progress. Creating a new style can be done by starting from scratch, duplicating an existing style or version, or importing JSON. Styles can be managed by editing, renaming, duplicating, or deleting. Version history allows for restoring previous styles. Map IDs must be associated with a style to display it in apps, with one map ID linked to one style. Association and removal of map IDs can be managed.\n"],null,["Select platform: [Android](/maps/documentation/android-sdk/cloud-customization/map-styles \"View this page for the Android platform docs.\") [iOS](/maps/documentation/ios-sdk/cloud-customization/map-styles \"View this page for the iOS platform docs.\") [JavaScript](/maps/documentation/javascript/cloud-customization/map-styles \"View this page for the JavaScript platform docs.\") [Web Service](/maps/documentation/maps-static/cloud-customization/map-styles \"View this page for the Web Service platform docs.\")\n\n\u003cbr /\u003e\n\nA map style is a set of visual customizations to map features\nthat you associate with a map ID. You then reference the\nmap ID in your application code to display the customized map.\n\nYou can create a map style before you have a map ID; however, to use\nthe style, you must associate the style with a map ID. To use a map style,\nyou must take all of these steps:\n\n1. **Create and publish a map Style** . For details, see\n [Create a style](#create-style) and [Publish a style](#publish-style).\n\n2. **Create a map ID** . For details, see\n [Create a map ID](../map-ids/get-map-id).\n\n3. **Associate the map style with a map ID** . For details, see\n [Associate a map ID to a map style](#associate-style-with-map-id).\n\n4. **Add the map ID to your app** to display your style. For details, see\n [Add the map ID to your map](../map-ids/get-map-id#add-a-map-id-to-your-app).\n\n| **Tip**: Once the map ID is in your application code, you can change the map style without any changes in your application code, and your end users don't have to upgrade to see updated map styles. Instead, you edit the map style associated with the map ID, and changes show up in your application maps.\n\nThis document describes how to create, edit, and publish map styles and how to\nassociate them to a map ID.\n\nCreate a map style\n\nCreate a map style using one of these methods:\n\n- [Create](#create-new-style) a new style using the default Google map style.\n\n- [Duplicate](#duplicate-style) and modify an existing standard or customized style.\n\n- [Import a JSON map style](/maps/documentation/javascript/cloud-customization/json#json-import) to use as a customized style.\n\nCreate a new style [Experimental](/maps/launch-stages#experimental) feature.\n\n1. In the Google Cloud console,\n go to [**Map Styles**](https://console.cloud.google.com/google/maps-apis/studio/styles), and select a project, if needed.\n\n2. In **Map styles** , click **Create style**.\n\n3. In the dialog, under the **Google styles** tab, select one of the following:\n\n - **Light** to create a light map style, where the map type is roadmap.\n - science **Dark** to create a dark map style, where the map type is roadmap dark.\n4. (Optional) To apply the monochrome variation to your map style, select **Monochrome**.\n\n5. Select **Customize** to create a new untitled style.\n\n6. Select map features and change their style to create the map style you want.\n\n Map features with custom styles have a solid blue dot next to them. If you\n customize a child style, the parent style displays a blue circle. For more\n information on map style hierarchy, see\n [Understand map style inheritance and hierarchy](/maps/documentation/javascript/cloud-customization/map-hier).\n | **Note:** Not all styles appear at all zoom levels. For more information, see [Style zoom levels](/maps/documentation/javascript/cloud-customization/zoom-levels).\n7. Click **Save**.\n\n8. In the **Save and publish map style** box, enter a name for your style and\n optionally a description, and click **Save**.\n\nThe style is automatically published, and you see your new style's\nmain page.\n| **Caution:** Making style changes but not explicitly saving them creates **Unsaved Changes** in your map style's version history. These versions are lost when you close the browser tab or when your Cloud console session ends.\n\nDuplicate a style\n\n1. Go to [**Map Styles**](https://console.cloud.google.com/google/maps-apis/studio/styles), and select a project, if needed.\n\n2. Select one of your existing styles.\n\n3. On the style page, click **Duplicate**.\n\n4. In the **Duplicate Map Style** box, enter a new map name and optionally\n a description.\n\n5. Click **Save**.\n\n The style is automatically published, and you can see your new style's\n main page. Associate it with a map ID to use it for your maps. For details,\n see [Associate a map ID to a map style](#associate-style-with-map-id).\n6. If you want to modify the style, click **Customize** , make changes,\n and click **Save**.\n\nPublish a style\n\nWhen you first create a new map style, that first instance of\nthe new map style is automatically published. After that, you save changes\nas a draft and when you're happy with the changes, you must publish.\n\n1. Make the changes to the map style or duplicated map style. For details, see\n [Change a style](#update-style).\n\n2. Click **Save** to save changes as a draft.\n\n3. When you're ready to publish and have your changes go live for any map IDs\n using that map style, click **Publish**.\n\nPublished versus Draft map styles\n\n**Published**: A published map style is live. Any maps that use the map style\ndisplay the published version of it.\n| **Note:** Style changes can take a few hours to propagate to your apps websites, and apps can take longer if the devices aren't connected to the internet. If you're still not seeing your style changes after a few hours, see [My style changes aren't updating](/maps/documentation/javascript/cloud-customization/troubleshoot#style-delay).\n\n**Draft**: Draft versions of a map style are works in progress\nand aren't displayed in maps until you publish them.\n\nChange a style\n\nIf you want to make changes to your map style, you can make the changes right\nin the style editor. You have a couple of choices when you update a style:\n\n- **If you want changes to go live as soon as you're ready** : Click\n **Customize** and make your changes. Click **Save** to save your\n changes as a draft, and then click **Publish** when you are ready.\n\n- **If you want to test your changes in a test environment first** : Instead of\n making changes directly in the map style, duplicate the style first. For\n details, see [Duplicate a style](#duplicate-style) and\n [Test map style updates](/maps/documentation/javascript/cloud-customization/test-style-updates).\n\nOnce you've created a map style, you can make changes to it on the style's\nmain page in any of the following ways:\n\n- **Edit** : Click **Customize**.\n\n- **Duplicate** : For details, see\n [Duplicate a style](/maps/documentation/javascript/cloud-customization/map-styles#duplicate-style).\n\n- **Rename**: Rename the map style.\n\n- **Delete**: Delete the map style.\n\nUse data-driven styling and datasets [Experimental](/maps/launch-stages#experimental) feature.\n\nIn the style's main page, you can enable and view layers for\n[data-driven styling for boundaries](../dds-boundaries/overview) and\n[data-driven styling for datasets](../dds-datasets/overview) on light map styles.\n\nWhen you link a light map style that has data-driven styling or datasets enabled\nto a [map ID](../map-ids/mapid-over), the enabled layers are also available for\nthe science dark map style.\n\nTo use data-driven styling or datasets with a science dark map style,\nyou must do the following in the Google Cloud console:\n\n1. Go to **Map Styles** and either select a light map style or\n [create one](#create-style).\n\n2. In the style main page, enable the your choice of layers on a light map\n style.\n\n3. [Associate the light map style to the same map\n ID](#associate-style-with-map-id) as the dark map style.\n\nAssociate your style to a map ID [Experimental](/maps/launch-stages#experimental) feature.\n\nAssociate your style to a map ID to display your custom style on your website\nand in your app. A map ID can have only one light style (roadmap type) and one\nscience dark style (roadmap dark type) associated with it.\n\nTo change the associated style for a map ID, do the following in the\nGoogle Cloud console:\n\n1. Go to **Map Management** and select a map ID.\n\n2. In the Map styles section, click **Change style** for a light or dark map style.\n\n The panel displays only styles with a roadmap map type for light styles, and\n only styles with a science roadmap dark map type for dark styles.\n3. In the panel, select one of the styles to associate to this map ID.\n\n4. Click **Done**.\n\n5. Click **Save** to apply all changes.\n\nTo use your cloud-based map style,\n[add the map ID to your app](../map-ids/get-map-id#add-a-map-id-to-your-app).\n\nNavigate on the preview map\n\nYou navigate on the preview map in the same way you navigate on any Google map:\n\n- Enter an address or location in the **Search Address** box.\n\n- Click the compass to center on your location. You may also have to grant\n location permissions.\n\n- Drag to move the map.\n\n- Zoom in or out using the plus (+) and minus (-).\n\nFind map features\n\nTo find a map feature that you want to style, you can use the filter or the map\ninspector.\n\nYou can also expand and collapse map feature categories to find the map\nfeature you want. Browse the list of map features at [What you can style on a map](/maps/documentation/javascript/cloud-customization/taxonomy).\n\nFilter map features\n\nTo find map features using the filter, under **Map Features** , enter a\nterm in the **Filter** box.\n\nIf you can't find a map feature:\n\n- Don't use plurals. All of the categories are singular.\n\n- Try using a more generic term for the feature. For example, instead of\n \"pizza parlor\" or \"fast food,\" search for \"restaurant.\"\n\n- Try using a broader category, and then explore that category for the closest\n map feature. For example, instead of \"theater,\" search for \"entertainment.\"\n\nInspect map features\n\nTo find map features using the map inspector, perform the following steps:\n\n1. Left-click anywhere on the map to open the map inspector at your click point.\n\n2. Select a map feature in the map inspector to open it in the **Map Features** pane."]]