
Page Summary
-
Data-driven styling for boundaries requires a JavaScript vector map with a custom style associated with a map ID.
-
You can select specific boundary feature layers (like localities or states) to display in the Google API Console to optimize performance.
-
Initialize your map with the designated map ID and API key, ensuring they are linked to the same Google Cloud project.
-
Utilize
map.getFeatureLayer()to access and interact with specific feature layers on your map. -
Verify the availability of data-driven styling by using
map.getMapCapabilities()before implementation.
To use data-driven styling for boundaries you must create a map ID that uses the JavaScript vector map. Next, you must create a new map style, select the boundary feature layers, and associate the style with your map ID.
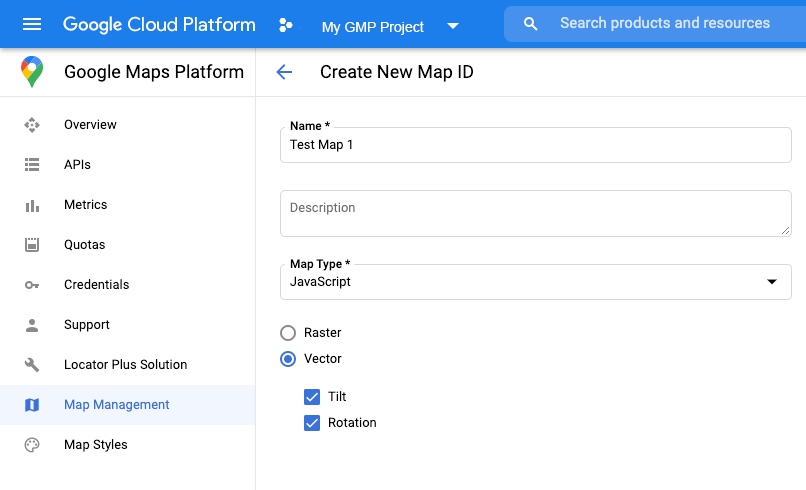
Create a map ID
To create a new map ID, follow the steps in Cloud customization. Set the Map type to JavaScript, and select the Vector option. Check Tilt and Rotation to enable tilt and rotation on the map. If the use of tilt or heading adversely affects your app, leave Tilt and Rotation un-checked so users cannot adjust them.
Create a new map style
To create a new map style, follow the instructions in Manage map styles to create the style, and associate the style with the map ID you just created.
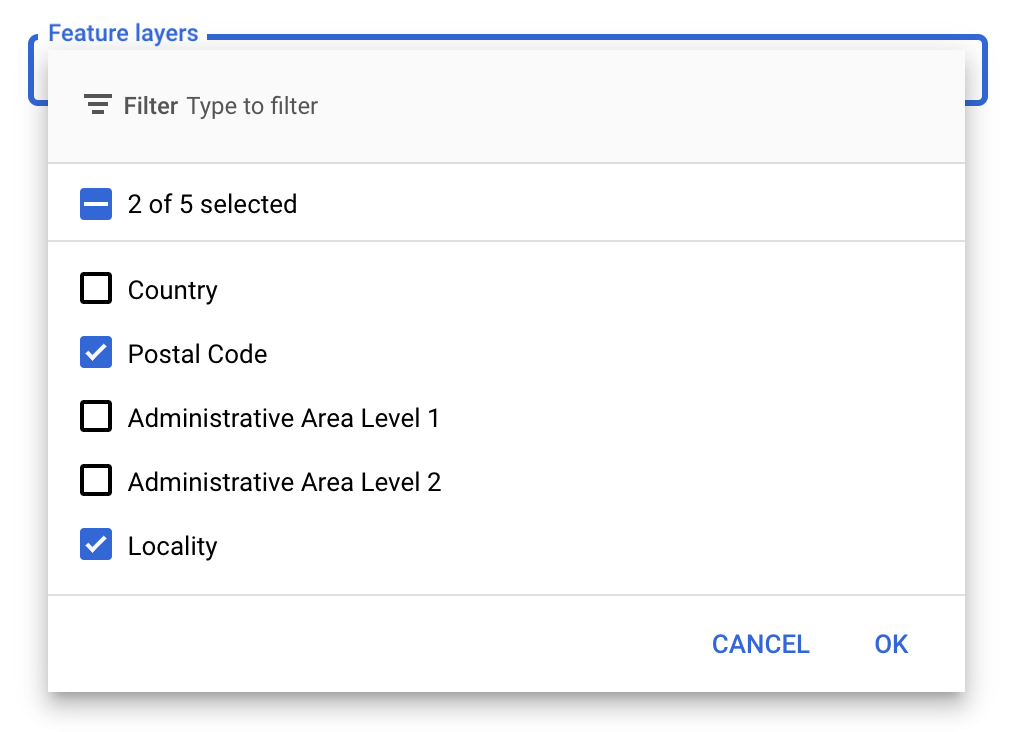
Select feature layers
In the Google API Console you can select which feature layers to display. This determines which kinds of boundaries will appear on the map (for example localities, states, and so on).
To manage feature layers
- In the Google API Console, go to the Map Styles page.
- Select a project if prompted.
- Select a map style.
- Click the Feature layers drop-down to add or remove layers.
- Click Save to save your changes and make them available to your maps.
Update your map initialization code
This requires the map ID you just created. It can be found on your Maps Management page.
- Load the Maps JavaScript API by adding the inline bootstrap loader to your application code, as shown in the following snippet:
<script>
  (g=>{var h,a,k,p="The Google Maps JavaScript API",c="google",l="importLibrary",q="__ib__",m=document,b=window;b=b[c]||(b[c]={});var d=b.maps||(b.maps={}),r=new Set,e=new URLSearchParams,u=()=>h||(h=new Promise(async(f,n)=>{await (a=m.createElement("script"));e.set("libraries",[...r]+"");for(k in g)e.set(k.replace(/[A-Z]/g,t=>"_"+t[0].toLowerCase()),g[k]);e.set("callback",c+".maps."+q);a.src=`https://maps.${c}apis.com/maps/api/js?`+e;d[q]=f;a.onerror=()=>h=n(Error(p+" could not load."));a.nonce=m.querySelector("script[nonce]")?.nonce||"";m.head.append(a)}));d[l]?console.warn(p+" only loads once. Ignoring:",g):d[l]=(f,...n)=>r.add(f)&&u().then(()=>d[l](f,...n))})({
    key: "YOUR_API_KEY",
    v: "weekly",
    // Use the 'v' parameter to indicate the version to use (weekly, beta, alpha, etc.).
    // Add other bootstrap parameters as needed, using camel case.
  });
</script>
Provide a map ID when you instantiate the map using the
mapIdproperty. This should be the map ID that you configured using a map style with feature layers enabled.map = new google.maps.Map(document.getElementById('map'), { center: {lat: -34.397, lng: 150.644}, zoom: 8, mapId: 'MAP_ID' // A map ID using a style with one or more feature layers enabled. });
Learn more about loading the Maps JavaScript API.
Add feature layers to a map
To get a reference to a feature layer on your map, call map.getFeatureLayer()
when the map initializes:
function initMap() {
  map = new google.maps.Map(document.getElementById("map"), {
    center: { lat: 20.773, lng: -156.01 },
    zoom: 12,
    mapId: 'MAP_ID',
  });

  // Add a feature layer for localities.
  localityLayer = map.getFeatureLayer('LOCALITY');
  ...
}
Check map capabilities
Data-driven styling for boundaries requires capabilities which are enabled in the
Google API Console, and associated with a map ID. Because map IDs are ephemeral
and subject to change, you can call map.getMapCapabilities()
to verify whether a certain capability (for example data-driven styling) is
available prior to calling it. This check is optional.
The following example shows adding a listener to subscribe to map capability changes:
// subscribe to changes
map.addListener('mapcapabilities_changed', () => {
  const mapCapabilities = map.getMapCapabilities();

  if (!mapCapabilities.isDataDrivenStylingAvailable) {
    // Data-driven styling is *not* available, add a fallback.
    // Existing feature layers are also unavailable.
  }
});
Next steps
- Style a boundary polygon
- Make a choropleth map
- Handle mouse events
- Get a place ID for a region
- Use the Geocoding and Places APIs with data-driven styling for boundaries