

บทนำ
เครื่องหมายจะระบุตำแหน่งบนแผนที่ โดยค่าเริ่มต้น เครื่องหมายจะใช้รูปภาพมาตรฐาน แต่สามารถแสดงรูปภาพที่กำหนดเองได้ ซึ่งในกรณีนี้มักเรียกว่า
"ไอคอน" เครื่องหมายและไอคอนเป็นออบเจ็กต์ประเภท
Marker คุณสามารถตั้งค่าไอคอนที่กำหนดเองได้ภายในตัวสร้างของเครื่องหมาย หรือโดยการ
เรียกใช้ setIcon() ในเครื่องหมาย ดูข้อมูลเพิ่มเติมเกี่ยวกับ
การปรับแต่งรูปภาพเครื่องหมาย
โดยทั่วไปแล้ว เครื่องหมายเป็นโอเวอร์เลย์ประเภทหนึ่ง ดูข้อมูลเกี่ยวกับโอเวอร์เลย์ประเภทอื่นๆ ได้ที่ การวาดบนแผนที่
เครื่องหมายได้รับการออกแบบมาให้โต้ตอบได้ เช่น โดยค่าเริ่มต้น เครื่องหมายจะได้รับเหตุการณ์ 'click' คุณจึงเพิ่ม Listener เหตุการณ์เพื่อแสดงหน้าต่างข้อมูลที่แสดงข้อมูลที่กำหนดเองได้ นอกจากนี้ คุณยังอนุญาตให้ผู้ใช้ย้ายเครื่องหมายบน
แผนที่ได้โดยตั้งค่าพร็อพเพอร์ตี้ draggable ของเครื่องหมายเป็น
true ดูข้อมูลเพิ่มเติมเกี่ยวกับเครื่องหมายที่ลากได้ที่ด้านล่าง
เพิ่มเครื่องหมาย
google.maps.Markerตัวสร้างรับออบเจ็กต์Marker optionsลิเทอรัลรายการเดียว ซึ่งระบุพร็อพเพอร์ตี้เริ่มต้นของเครื่องหมาย
ช่องต่อไปนี้มีความสำคัญเป็นพิเศษและมักจะตั้งค่าเมื่อ สร้างเครื่องหมาย
-
position(ต้องระบุ) จะระบุLatLngที่ระบุตำแหน่งเริ่มต้นของเครื่องหมาย วิธีหนึ่งในการดึงข้อมูลLatLngคือการใช้ บริการเข้ารหัสพิกัดภูมิศาสตร์ -
map(ไม่บังคับ) จะระบุMapที่จะ วางเครื่องหมาย หากไม่ระบุแผนที่เมื่อสร้าง เครื่องหมาย ระบบจะสร้างเครื่องหมายแต่จะไม่แนบ (หรือแสดง) บนแผนที่ คุณสามารถเพิ่มเครื่องหมายในภายหลังได้โดยเรียกใช้เมธอดsetMap()ของเครื่องหมาย
ตัวอย่างต่อไปนี้จะเพิ่มเครื่องหมายอย่างง่ายลงในแผนที่ที่ Uluru ซึ่งอยู่ใจกลางออสเตรเลีย:
TypeScript
function initMap(): void { const myLatLng = { lat: -25.363, lng: 131.044 }; const map = new google.maps.Map( document.getElementById("map") as HTMLElement, { zoom: 4, center: myLatLng, } ); new google.maps.Marker({ position: myLatLng, map, title: "Hello World!", }); } declare global { interface Window { initMap: () => void; } } window.initMap = initMap;
JavaScript
function initMap() { const myLatLng = { lat: -25.363, lng: 131.044 }; const map = new google.maps.Map(document.getElementById("map"), { zoom: 4, center: myLatLng, }); new google.maps.Marker({ position: myLatLng, map, title: "Hello World!", }); } window.initMap = initMap;
ในตัวอย่างข้างต้น เครื่องหมายจะวางบนแผนที่เมื่อสร้างเครื่องหมายโดยใช้พร็อพเพอร์ตี้ map ในตัวเลือกเครื่องหมาย
หรือคุณจะเพิ่มเครื่องหมายลงในแผนที่โดยตรงโดยใช้
เมธอด setMap() ของเครื่องหมายก็ได้ ดังที่แสดงในตัวอย่างด้านล่าง
var myLatlng = new google.maps.LatLng(-25.363882,131.044922);
var mapOptions = {
  zoom: 4,
  center: myLatlng
}
var map = new google.maps.Map(document.getElementById("map"), mapOptions);

var marker = new google.maps.Marker({
    position: myLatlng,
    title:"Hello World!"
});

// To add the marker to the map, call setMap();
marker.setMap(map);
title ของตัวทำเครื่องหมายจะปรากฏเป็นเคล็ดลับเครื่องมือ
หากไม่ต้องการส่ง Marker options ใดๆ ใน
ตัวสร้างของเครื่องหมาย ให้ส่งออบเจ็กต์ว่าง {} ใน
อาร์กิวเมนต์สุดท้ายของตัวสร้างแทน
นำเครื่องหมายออก
หากต้องการนำเครื่องหมายออกจากแผนที่ ให้เรียกใช้เมธอด setMap()
โดยส่ง null เป็นอาร์กิวเมนต์
marker.setMap(null);
โปรดทราบว่าเมธอดด้านบนไม่ได้ลบเครื่องหมาย แต่จะนำเครื่องหมายออกจากแผนที่
หากต้องการลบเครื่องหมาย ให้คุณ
นำเครื่องหมายออกจากแผนที่ แล้วตั้งค่าเครื่องหมายเองเป็น
null
หากต้องการจัดการชุดเครื่องหมาย คุณควรสร้างอาร์เรย์เพื่อเก็บ
เครื่องหมาย จากนั้นใช้อาร์เรย์นี้เรียกใช้ setMap() ใน
เครื่องหมายแต่ละรายการในอาร์เรย์ตามลำดับเมื่อต้องการนำเครื่องหมายออก คุณ
สามารถลบเครื่องหมายได้โดยนำเครื่องหมายออกจากแผนที่ แล้วตั้งค่า
length ของอาร์เรย์เป็น0 ซึ่งจะนำการอ้างอิงทั้งหมด
ไปยังเครื่องหมายออก
ปรับแต่งรูปภาพเครื่องหมาย
คุณสามารถปรับแต่งลักษณะที่ปรากฏของเครื่องหมายได้โดยระบุ ไฟล์รูปภาพ หรือ ไอคอนแบบเวกเตอร์เพื่อแสดงแทนไอคอนหมุดปักเริ่มต้นของ Google Maps นอกจากนี้ คุณยังเพิ่มข้อความด้วย ป้ายกำกับเครื่องหมาย และใช้ ไอคอนที่ซับซ้อนเพื่อกำหนดภูมิภาคที่คลิกได้ รวมถึงตั้งค่าลำดับการซ้อนของเครื่องหมายได้ด้วย
เครื่องหมายที่มีไอคอนรูปภาพ
ในกรณีพื้นฐานที่สุด ไอคอนสามารถระบุรูปภาพที่จะใช้แทน
ไอคอนหมุดปักเริ่มต้นของ Google Maps ได้ หากต้องการระบุไอคอนดังกล่าว ให้ตั้งค่าพร็อพเพอร์ตี้ icon ของเครื่องหมายเป็น URL ของรูปภาพ Maps JavaScript API จะปรับขนาดไอคอนโดยอัตโนมัติ
TypeScript
// This example adds a marker to indicate the position of Bondi Beach in Sydney, // Australia. function initMap(): void { const map = new google.maps.Map( document.getElementById("map") as HTMLElement, { zoom: 4, center: { lat: -33, lng: 151 }, } ); const image = "https://developers.google.com/maps/documentation/javascript/examples/full/images/beachflag.png"; const beachMarker = new google.maps.Marker({ position: { lat: -33.89, lng: 151.274 }, map, icon: image, }); } declare global { interface Window { initMap: () => void; } } window.initMap = initMap;
JavaScript
// This example adds a marker to indicate the position of Bondi Beach in Sydney, // Australia. function initMap() { const map = new google.maps.Map(document.getElementById("map"), { zoom: 4, center: { lat: -33, lng: 151 }, }); const image = "https://developers.google.com/maps/documentation/javascript/examples/full/images/beachflag.png"; const beachMarker = new google.maps.Marker({ position: { lat: -33.89, lng: 151.274 }, map, icon: image, }); } window.initMap = initMap;
เครื่องหมายที่มีไอคอนแบบเวกเตอร์
คุณสามารถใช้เส้นทางเวกเตอร์ SVG ที่กำหนดเองเพื่อกำหนดลักษณะที่ปรากฏของ
เครื่องหมายได้ โดยส่งออบเจ็กต์นิยามคู่ Symbol ที่มีเส้นทางที่ต้องการไปยังพร็อพเพอร์ตี้ icon ของเครื่องหมาย คุณสามารถกำหนดเส้นทางที่กำหนดเองได้โดยใช้สัญกรณ์เส้นทาง SVG หรือใช้เส้นทางที่กำหนดไว้ล่วงหน้าเส้นทางใดเส้นทางหนึ่งในgoogle.maps.SymbolPath คุณต้องระบุพร็อพเพอร์ตี้ anchor เพื่อให้เครื่องหมายแสดงผลอย่างถูกต้องเมื่อระดับการซูมเปลี่ยนแปลง ดูข้อมูลเพิ่มเติมเกี่ยวกับ
การใช้สัญลักษณ์เพื่อสร้างไอคอนแบบเวกเตอร์
สำหรับเครื่องหมาย (และเส้นหลายเส้น)
TypeScript
// This example uses SVG path notation to add a vector-based symbol // as the icon for a marker. The resulting icon is a marker-shaped // symbol with a blue fill and no border. function initMap(): void { const center = new google.maps.LatLng(-33.712451, 150.311823); const map = new google.maps.Map( document.getElementById("map") as HTMLElement, { zoom: 9, center: center, } ); const svgMarker = { path: "M-1.547 12l6.563-6.609-1.406-1.406-5.156 5.203-2.063-2.109-1.406 1.406zM0 0q2.906 0 4.945 2.039t2.039 4.945q0 1.453-0.727 3.328t-1.758 3.516-2.039 3.070-1.711 2.273l-0.75 0.797q-0.281-0.328-0.75-0.867t-1.688-2.156-2.133-3.141-1.664-3.445-0.75-3.375q0-2.906 2.039-4.945t4.945-2.039z", fillColor: "blue", fillOpacity: 0.6, strokeWeight: 0, rotation: 0, scale: 2, anchor: new google.maps.Point(0, 20), }; new google.maps.Marker({ position: map.getCenter(), icon: svgMarker, map: map, }); } declare global { interface Window { initMap: () => void; } } window.initMap = initMap;
JavaScript
// This example uses SVG path notation to add a vector-based symbol // as the icon for a marker. The resulting icon is a marker-shaped // symbol with a blue fill and no border. function initMap() { const center = new google.maps.LatLng(-33.712451, 150.311823); const map = new google.maps.Map(document.getElementById("map"), { zoom: 9, center: center, }); const svgMarker = { path: "M-1.547 12l6.563-6.609-1.406-1.406-5.156 5.203-2.063-2.109-1.406 1.406zM0 0q2.906 0 4.945 2.039t2.039 4.945q0 1.453-0.727 3.328t-1.758 3.516-2.039 3.070-1.711 2.273l-0.75 0.797q-0.281-0.328-0.75-0.867t-1.688-2.156-2.133-3.141-1.664-3.445-0.75-3.375q0-2.906 2.039-4.945t4.945-2.039z", fillColor: "blue", fillOpacity: 0.6, strokeWeight: 0, rotation: 0, scale: 2, anchor: new google.maps.Point(0, 20), }; new google.maps.Marker({ position: map.getCenter(), icon: svgMarker, map: map, }); } window.initMap = initMap;
ป้ายกำกับเครื่องหมาย
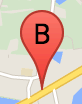
ป้ายกำกับเครื่องหมายคือตัวอักษรหรือตัวเลขที่ปรากฏภายในเครื่องหมาย รูปภาพเครื่องหมายในส่วนนี้แสดงป้ายกำกับเครื่องหมายที่มีตัวอักษร "B" คุณสามารถระบุป้ายกำกับเครื่องหมายเป็นสตริงหรือ
MarkerLabel
ออบเจ็กต์ที่มีสตริงและพร็อพเพอร์ตี้อื่นๆ ของป้ายกำกับก็ได้
เมื่อสร้างเครื่องหมาย คุณสามารถระบุพร็อพเพอร์ตี้ label ใน
MarkerOptions
ออบเจ็กต์ได้ หรือจะเรียกใช้ setLabel() ในออบเจ็กต์ Marker เพื่อตั้งค่าป้ายกำกับในเครื่องหมายที่มีอยู่ก็ได้
ตัวอย่างต่อไปนี้จะแสดงเครื่องหมายที่มีป้ายกำกับเมื่อผู้ใช้คลิกบน แผนที่
TypeScript
// In the following example, markers appear when the user clicks on the map. // Each marker is labeled with a single alphabetical character. const labels = "ABCDEFGHIJKLMNOPQRSTUVWXYZ"; let labelIndex = 0; function initMap(): void { const bangalore = { lat: 12.97, lng: 77.59 }; const map = new google.maps.Map( document.getElementById("map") as HTMLElement, { zoom: 12, center: bangalore, } ); // This event listener calls addMarker() when the map is clicked. google.maps.event.addListener(map, "click", (event) => { addMarker(event.latLng, map); }); // Add a marker at the center of the map. addMarker(bangalore, map); } // Adds a marker to the map. function addMarker(location: google.maps.LatLngLiteral, map: google.maps.Map) { // Add the marker at the clicked location, and add the next-available label // from the array of alphabetical characters. new google.maps.Marker({ position: location, label: labels[labelIndex++ % labels.length], map: map, }); } declare global { interface Window { initMap: () => void; } } window.initMap = initMap;
JavaScript
// In the following example, markers appear when the user clicks on the map. // Each marker is labeled with a single alphabetical character. const labels = "ABCDEFGHIJKLMNOPQRSTUVWXYZ"; let labelIndex = 0; function initMap() { const bangalore = { lat: 12.97, lng: 77.59 }; const map = new google.maps.Map(document.getElementById("map"), { zoom: 12, center: bangalore, }); // This event listener calls addMarker() when the map is clicked. google.maps.event.addListener(map, "click", (event) => { addMarker(event.latLng, map); }); // Add a marker at the center of the map. addMarker(bangalore, map); } // Adds a marker to the map. function addMarker(location, map) { // Add the marker at the clicked location, and add the next-available label // from the array of alphabetical characters. new google.maps.Marker({ position: location, label: labels[labelIndex++ % labels.length], map: map, }); } window.initMap = initMap;
ไอคอนที่ซับซ้อน
คุณสามารถระบุรูปร่างที่ซับซ้อนเพื่อระบุภูมิภาคที่คลิกได้ และ
ระบุวิธีที่ไอคอนควรปรากฏเทียบกับโอเวอร์เลย์อื่นๆ (ลำดับการซ้อน) ไอคอนที่ระบุในลักษณะนี้ควรตั้งค่า
icon
พร็อพเพอร์ตี้เป็นออบเจ็กต์ประเภท
Icon
Icon
ออบเจ็กต์จะกำหนดรูปภาพ นอกจากนี้ยังกำหนด size ของไอคอน, origin ของไอคอน (เช่น หากรูปภาพที่ต้องการเป็นส่วนหนึ่งของรูปภาพที่ใหญ่กว่าในสไปรต์) และ anchor ที่ควรวางฮอตสปอตของไอคอน (ซึ่งอิงตามต้นทาง)
หากใช้ ป้ายกำกับ กับเครื่องหมายที่กำหนดเอง คุณสามารถวางป้ายกำกับได้โดยใช้พร็อพเพอร์ตี้ labelOrigin ในออบเจ็กต์ Icon
TypeScript
// The following example creates complex markers to indicate beaches near // Sydney, NSW, Australia. Note that the anchor is set to (0,32) to correspond // to the base of the flagpole. function initMap(): void { const map = new google.maps.Map( document.getElementById("map") as HTMLElement, { zoom: 10, center: { lat: -33.9, lng: 151.2 }, } ); setMarkers(map); } // Data for the markers consisting of a name, a LatLng and a zIndex for the // order in which these markers should display on top of each other. const beaches: [string, number, number, number][] = [ ["Bondi Beach", -33.890542, 151.274856, 4], ["Coogee Beach", -33.923036, 151.259052, 5], ["Cronulla Beach", -34.028249, 151.157507, 3], ["Manly Beach", -33.80010128657071, 151.28747820854187, 2], ["Maroubra Beach", -33.950198, 151.259302, 1], ]; function setMarkers(map: google.maps.Map) { // Adds markers to the map. // Marker sizes are expressed as a Size of X,Y where the origin of the image // (0,0) is located in the top left of the image. // Origins, anchor positions and coordinates of the marker increase in the X // direction to the right and in the Y direction down. const image = { url: "https://developers.google.com/maps/documentation/javascript/examples/full/images/beachflag.png", // This marker is 20 pixels wide by 32 pixels high. size: new google.maps.Size(20, 32), // The origin for this image is (0, 0). origin: new google.maps.Point(0, 0), // The anchor for this image is the base of the flagpole at (0, 32). anchor: new google.maps.Point(0, 32), }; // Shapes define the clickable region of the icon. The type defines an HTML // <area> element 'poly' which traces out a polygon as a series of X,Y points. // The final coordinate closes the poly by connecting to the first coordinate. const shape = { coords: [1, 1, 1, 20, 18, 20, 18, 1], type: "poly", }; for (let i = 0; i < beaches.length; i++) { const beach = beaches[i]; new google.maps.Marker({ position: { lat: beach[1], lng: beach[2] }, map, icon: image, shape: shape, title: beach[0], zIndex: beach[3], }); } } declare global { interface Window { initMap: () => void; } } window.initMap = initMap;
JavaScript
// The following example creates complex markers to indicate beaches near // Sydney, NSW, Australia. Note that the anchor is set to (0,32) to correspond // to the base of the flagpole. function initMap() { const map = new google.maps.Map(document.getElementById("map"), { zoom: 10, center: { lat: -33.9, lng: 151.2 }, }); setMarkers(map); } // Data for the markers consisting of a name, a LatLng and a zIndex for the // order in which these markers should display on top of each other. const beaches = [ ["Bondi Beach", -33.890542, 151.274856, 4], ["Coogee Beach", -33.923036, 151.259052, 5], ["Cronulla Beach", -34.028249, 151.157507, 3], ["Manly Beach", -33.80010128657071, 151.28747820854187, 2], ["Maroubra Beach", -33.950198, 151.259302, 1], ]; function setMarkers(map) { // Adds markers to the map. // Marker sizes are expressed as a Size of X,Y where the origin of the image // (0,0) is located in the top left of the image. // Origins, anchor positions and coordinates of the marker increase in the X // direction to the right and in the Y direction down. const image = { url: "https://developers.google.com/maps/documentation/javascript/examples/full/images/beachflag.png", // This marker is 20 pixels wide by 32 pixels high. size: new google.maps.Size(20, 32), // The origin for this image is (0, 0). origin: new google.maps.Point(0, 0), // The anchor for this image is the base of the flagpole at (0, 32). anchor: new google.maps.Point(0, 32), }; // Shapes define the clickable region of the icon. The type defines an HTML // <area> element 'poly' which traces out a polygon as a series of X,Y points. // The final coordinate closes the poly by connecting to the first coordinate. const shape = { coords: [1, 1, 1, 20, 18, 20, 18, 1], type: "poly", }; for (let i = 0; i < beaches.length; i++) { const beach = beaches[i]; new google.maps.Marker({ position: { lat: beach[1], lng: beach[2] }, map, icon: image, shape: shape, title: beach[0], zIndex: beach[3], }); } } window.initMap = initMap;
การแปลงออบเจ็กต์ MarkerImage เป็นประเภท Icon
จนถึง Maps JavaScript API เวอร์ชัน 3.10 ไอคอนที่ซับซ้อน
กำหนดเป็น MarkerImage ออบเจ็กต์ ออบเจ็กต์นิยามคู่
Icon ได้รับการเพิ่มในเวอร์ชัน 3.10 และจะแทนที่
MarkerImage ตั้งแต่เวอร์ชัน 3.11 เป็นต้นไป
ออบเจ็กต์นิยามคู่ Icon รองรับพารามิเตอร์เดียวกับ
MarkerImage ซึ่งช่วยให้คุณแปลง
MarkerImage เป็น Icon ได้อย่างง่ายดายโดยนำ
เครื่องมือสร้างออก รวมพารามิเตอร์ก่อนหน้าใน {}'s และ
เพิ่มชื่อของแต่ละพารามิเตอร์ เช่น
var image = new google.maps.MarkerImage(
    place.icon,
    new google.maps.Size(71, 71),
    new google.maps.Point(0, 0),
    new google.maps.Point(17, 34),
    new google.maps.Size(25, 25));
กลายเป็น
var image = {
  url: place.icon,
  size: new google.maps.Size(71, 71),
  origin: new google.maps.Point(0, 0),
  anchor: new google.maps.Point(17, 34),
  scaledSize: new google.maps.Size(25, 25)
};
เพิ่มประสิทธิภาพเครื่องหมาย
การเพิ่มประสิทธิภาพจะช่วยปรับปรุงประสิทธิภาพโดยการแสดงเครื่องหมายจำนวนมากเป็นองค์ประกอบแบบคงที่รายการเดียว ซึ่งมีประโยชน์ในกรณีที่ต้องใช้เครื่องหมายจำนวนมาก โดยค่าเริ่มต้น Maps JavaScript API จะตัดสินใจ ว่าจะเพิ่มประสิทธิภาพเครื่องหมายหรือไม่ เมื่อมีเครื่องหมายจำนวนมาก Maps JavaScript API จะพยายามแสดง เครื่องหมายด้วยการเพิ่มประสิทธิภาพ แต่ไม่ใช่เครื่องหมายทั้งหมดที่จะเพิ่มประสิทธิภาพได้ ในบางสถานการณ์ Maps JavaScript API อาจต้องแสดงเครื่องหมายโดยไม่มีการเพิ่มประสิทธิภาพ ให้ปิดใช้การแสดงผลที่เพิ่มประสิทธิภาพสำหรับ GIF หรือ PNG แบบเคลื่อนไหว หรือเมื่อต้องแสดงเครื่องหมายแต่ละรายการเป็นองค์ประกอบ DOM แยกกัน ตัวอย่างต่อไปนี้แสดงการสร้างเครื่องหมายที่เพิ่มประสิทธิภาพ
var marker = new google.maps.Marker({
    position: myLatlng,
    title:"Hello World!",
    optimized: true
});
ทำให้เครื่องหมายเข้าถึงได้
คุณสามารถทำให้ตัวทำเครื่องหมายเข้าถึงได้โดยเพิ่มฟังก์ชันรอคลิก และ
ตั้งค่า optimized เป็น false ฟังก์ชันรอคลิก
ทำให้ตัวทำเครื่องหมายมีความหมายเชิงความหมายของปุ่ม ซึ่งเข้าถึงได้โดยใช้
การนำทางด้วยแป้นพิมพ์ โปรแกรมอ่านหน้าจอ และอื่นๆ ใช้ตัวเลือก
title เพื่อแสดงข้อความที่เข้าถึงได้สำหรับเครื่องหมาย
ในตัวอย่างต่อไปนี้ เครื่องหมายแรกจะได้รับโฟกัสเมื่อกด Tab แล้ว คุณจะใช้ปุ่มลูกศรเพื่อย้ายไปมาระหว่างเครื่องหมายได้ กด Tab อีกครั้งเพื่อย้ายไปยังส่วนควบคุมแผนที่ที่เหลือ หากเครื่องหมายมีหน้าต่างข้อมูล คุณสามารถเปิดหน้าต่างข้อมูลได้โดยคลิกเครื่องหมาย หรือโดย กดปุ่ม Enter หรือ Spacebar เมื่อเลือกเครื่องหมาย เมื่อหน้าต่างข้อมูลปิดลง โฟกัสจะกลับไปที่เครื่องหมายที่เชื่อมโยง
TypeScript
// The following example creates five accessible and // focusable markers. function initMap(): void { const map = new google.maps.Map( document.getElementById("map") as HTMLElement, { zoom: 12, center: { lat: 34.84555, lng: -111.8035 }, } ); // Set LatLng and title text for the markers. The first marker (Boynton Pass) // receives the initial focus when tab is pressed. Use arrow keys to // move between markers; press tab again to cycle through the map controls. const tourStops: [google.maps.LatLngLiteral, string][] = [ [{ lat: 34.8791806, lng: -111.8265049 }, "Boynton Pass"], [{ lat: 34.8559195, lng: -111.7988186 }, "Airport Mesa"], [{ lat: 34.832149, lng: -111.7695277 }, "Chapel of the Holy Cross"], [{ lat: 34.823736, lng: -111.8001857 }, "Red Rock Crossing"], [{ lat: 34.800326, lng: -111.7665047 }, "Bell Rock"], ]; // Create an info window to share between markers. const infoWindow = new google.maps.InfoWindow(); // Create the markers. tourStops.forEach(([position, title], i) => { const marker = new google.maps.Marker({ position, map, title: `${i + 1}. ${title}`, label: `${i + 1}`, optimized: false, }); // Add a click listener for each marker, and set up the info window. marker.addListener("click", () => { infoWindow.close(); infoWindow.setContent(marker.getTitle()); infoWindow.open(marker.getMap(), marker); }); }); } declare global { interface Window { initMap: () => void; } } window.initMap = initMap;
JavaScript
// The following example creates five accessible and // focusable markers. function initMap() { const map = new google.maps.Map(document.getElementById("map"), { zoom: 12, center: { lat: 34.84555, lng: -111.8035 }, }); // Set LatLng and title text for the markers. The first marker (Boynton Pass) // receives the initial focus when tab is pressed. Use arrow keys to // move between markers; press tab again to cycle through the map controls. const tourStops = [ [{ lat: 34.8791806, lng: -111.8265049 }, "Boynton Pass"], [{ lat: 34.8559195, lng: -111.7988186 }, "Airport Mesa"], [{ lat: 34.832149, lng: -111.7695277 }, "Chapel of the Holy Cross"], [{ lat: 34.823736, lng: -111.8001857 }, "Red Rock Crossing"], [{ lat: 34.800326, lng: -111.7665047 }, "Bell Rock"], ]; // Create an info window to share between markers. const infoWindow = new google.maps.InfoWindow(); // Create the markers. tourStops.forEach(([position, title], i) => { const marker = new google.maps.Marker({ position, map, title: `${i + 1}. ${title}`, label: `${i + 1}`, optimized: false, }); // Add a click listener for each marker, and set up the info window. marker.addListener("click", () => { infoWindow.close(); infoWindow.setContent(marker.getTitle()); infoWindow.open(marker.getMap(), marker); }); }); } window.initMap = initMap;
สร้างภาพเคลื่อนไหวให้เครื่องหมาย
คุณสามารถสร้างภาพเคลื่อนไหวให้เครื่องหมายเพื่อให้เครื่องหมายแสดงการเคลื่อนไหวแบบไดนามิกในสถานการณ์ต่างๆ ได้
หากต้องการระบุวิธีสร้างภาพเคลื่อนไหวให้เครื่องหมาย ให้ใช้
พร็อพเพอร์ตี้ animation ของเครื่องหมาย ซึ่งมีประเภทเป็น
google.maps.Animation ระบบรองรับค่า
Animation ต่อไปนี้
-
DROPระบุว่าเครื่องหมายควรเลื่อนลงจากด้านบนของ แผนที่ไปยังตำแหน่งสุดท้ายเมื่อวางบนแผนที่ครั้งแรก ภาพเคลื่อนไหว จะหยุดลงเมื่อเครื่องหมายหยุดนิ่งและanimationจะ กลับไปเป็นnullโดยปกติแล้วจะระบุภาพเคลื่อนไหวประเภทนี้ระหว่างการสร้างMarker -
BOUNCEระบุว่าเครื่องหมายควรเด้งอยู่กับที่ เครื่องหมายที่เด้งจะเด้งต่อไปจนกว่าจะตั้งค่าพร็อพเพอร์ตี้animationเป็นnullอย่างชัดเจน
คุณสามารถเริ่มภาพเคลื่อนไหวในเครื่องหมายที่มีอยู่ได้โดยเรียกใช้
setAnimation() ในออบเจ็กต์ Marker
TypeScript
// The following example creates a marker in Stockholm, Sweden using a DROP // animation. Clicking on the marker will toggle the animation between a BOUNCE // animation and no animation. let marker: google.maps.Marker; function initMap(): void { const map = new google.maps.Map( document.getElementById("map") as HTMLElement, { zoom: 13, center: { lat: 59.325, lng: 18.07 }, } ); marker = new google.maps.Marker({ map, draggable: true, animation: google.maps.Animation.DROP, position: { lat: 59.327, lng: 18.067 }, }); marker.addListener("click", toggleBounce); } function toggleBounce() { if (marker.getAnimation() !== null) { marker.setAnimation(null); } else { marker.setAnimation(google.maps.Animation.BOUNCE); } } declare global { interface Window { initMap: () => void; } } window.initMap = initMap;
JavaScript
// The following example creates a marker in Stockholm, Sweden using a DROP // animation. Clicking on the marker will toggle the animation between a BOUNCE // animation and no animation. let marker; function initMap() { const map = new google.maps.Map(document.getElementById("map"), { zoom: 13, center: { lat: 59.325, lng: 18.07 }, }); marker = new google.maps.Marker({ map, draggable: true, animation: google.maps.Animation.DROP, position: { lat: 59.327, lng: 18.067 }, }); marker.addListener("click", toggleBounce); } function toggleBounce() { if (marker.getAnimation() !== null) { marker.setAnimation(null); } else { marker.setAnimation(google.maps.Animation.BOUNCE); } } window.initMap = initMap;
หากมีเครื่องหมายจำนวนมาก คุณอาจไม่ต้องการวางเครื่องหมายทั้งหมดลงในแผนที่พร้อมกัน
คุณสามารถใช้ setTimeout() เพื่อเว้นระยะภาพเคลื่อนไหวของเครื่องหมายโดยใช้รูปแบบที่แสดงด้านล่าง
function drop() {
  for (var i =0; i < markerArray.length; i++) {
    setTimeout(function() {
      addMarkerMethod();
    }, i * 200);
  }
}
ทำให้เครื่องหมายลากได้
หากต้องการอนุญาตให้ผู้ใช้ลากเครื่องหมายไปยังตำแหน่งอื่นบนแผนที่ ให้ตั้งค่า
draggable เป็น true ในตัวเลือกเครื่องหมาย
var myLatlng = new google.maps.LatLng(-25.363882,131.044922);
var mapOptions = {
  zoom: 4,
  center: myLatlng
}
var map = new google.maps.Map(document.getElementById("map"), mapOptions);

// Place a draggable marker on the map
var marker = new google.maps.Marker({
    position: myLatlng,
    map: map,
    draggable:true,
    title:"Drag me!"
});
การปรับแต่งเครื่องหมายเพิ่มเติม
ดูส่วนขยายเพิ่มเติมของคลาสเครื่องหมาย การจัดกลุ่มและการจัดการเครื่องหมาย รวมถึงการปรับแต่งโอเวอร์เลย์ได้ที่ ไลบรารีโอเพนซอร์ส