
บทนำ
บทแนะนำนี้จะแสดงวิธีเพิ่มแผนที่ Google ที่มีเครื่องหมายลงในหน้าเว็บ โดยใช้ HTML, CSS และ JavaScript นอกจากนี้ยังแสดงวิธีตั้งค่าตัวเลือกแผนที่และ วิธีใช้การจัดช่องควบคุมเพื่อเพิ่มป้ายกำกับลงในแผนที่
ด้านล่างนี้คือแผนที่ที่คุณจะสร้างโดยใช้บทแนะนำนี้ เครื่องหมายนี้อยู่ที่อุลูรู (หรือที่รู้จักกันในชื่อแอร์ส ร็อก) ใน อุทยานแห่งชาติอุลูรู-คาตา ทจูตา
เริ่มต้นใช้งาน
การสร้างแผนที่ Google ที่มีเครื่องหมายในหน้าเว็บมี 3 ขั้นตอนดังนี้
คุณต้องมีเว็บเบราว์เซอร์ เลือกเบราว์เซอร์ที่รู้จักกันดี เช่น Google Chrome (แนะนำ), Firefox, Safari หรือ Edge โดยอิงตามแพลตฟอร์มของคุณจากรายการเบราว์เซอร์ที่รองรับ
ขั้นตอนที่ 1: รับคีย์ API
ส่วนนี้อธิบายวิธีตรวจสอบสิทธิ์แอปกับ Maps JavaScript API โดยใช้คีย์ API ของคุณเอง
ทำตามขั้นตอนต่อไปนี้เพื่อรับคีย์ API
ไปที่ คอนโซล Google Cloud
สร้างหรือเลือกโปรเจ็กต์
คลิกต่อไปเพื่อเปิดใช้ API และบริการที่เกี่ยวข้อง
ในหน้าข้อมูลเข้าสู่ระบบ ให้รับคีย์ API (และตั้งค่าข้อจำกัดของคีย์ API) หมายเหตุ: หากมีคีย์ API ที่ไม่มีข้อจำกัดอยู่แล้ว หรือคีย์ที่มีข้อจำกัดของเบราว์เซอร์ คุณก็ใช้คีย์นั้นได้
ดูวิธีป้องกันการขโมยโควต้าและรักษาคีย์ API ให้ปลอดภัยได้ที่ การใช้คีย์ API
เปิดใช้การเรียกเก็บเงิน ดูข้อมูลเพิ่มเติมได้ที่การใช้งานและการเรียกเก็บเงิน
เมื่อได้คีย์ API แล้ว ให้เพิ่มคีย์ลงในข้อมูลโค้ดต่อไปนี้โดยคลิก "YOUR_API_KEY" คัดลอกและวางแท็กสคริปต์ Bootloader เพื่อใช้ใน หน้าเว็บของคุณเอง
<script>
  (g=>{var h,a,k,p="The Google Maps JavaScript API",c="google",l="importLibrary",q="__ib__",m=document,b=window;b=b[c]||(b[c]={});var d=b.maps||(b.maps={}),r=new Set,e=new URLSearchParams,u=()=>h||(h=new Promise(async(f,n)=>{await (a=m.createElement("script"));e.set("libraries",[...r]+"");for(k in g)e.set(k.replace(/[A-Z]/g,t=>"_"+t[0].toLowerCase()),g[k]);e.set("callback",c+".maps."+q);a.src=`https://maps.${c}apis.com/maps/api/js?`+e;d[q]=f;a.onerror=()=>h=n(Error(p+" could not load."));a.nonce=m.querySelector("script[nonce]")?.nonce||"";m.head.append(a)}));d[l]?console.warn(p+" only loads once. Ignoring:",g):d[l]=(f,...n)=>r.add(f)&&u().then(()=>d[l](f,...n))})({
    key: "YOUR_API_KEY",
    v: "weekly",
    // Use the 'v' parameter to indicate the version to use (weekly, beta, alpha, etc.).
    // Add other bootstrap parameters as needed, using camel case.
  });
</script>
ขั้นตอนที่ 2: สร้างหน้า HTML
โค้ดสำหรับหน้าเว็บ HTML พื้นฐานมีดังนี้
<!DOCTYPE html>
<!--
 @license
 Copyright 2025 Google LLC. All Rights Reserved.
 SPDX-License-Identifier: Apache-2.0
-->

<html>
  <head>
    <title>Add a Map</title>

    <link rel="stylesheet" type="text/css" href="./style.css" />
    <script type="module" src="./index.js"></script>
    <!-- prettier-ignore -->
    <script>(g=>{var h,a,k,p="The Google Maps JavaScript API",c="google",l="importLibrary",q="__ib__",m=document,b=window;b=b[c]||(b[c]={});var d=b.maps||(b.maps={}),r=new Set,e=new URLSearchParams,u=()=>h||(h=new Promise(async(f,n)=>{await (a=m.createElement("script"));e.set("libraries",[...r]+"");for(k in g)e.set(k.replace(/[A-Z]/g,t=>"_"+t[0].toLowerCase()),g[k]);e.set("callback",c+".maps."+q);a.src=`https://maps.${c}apis.com/maps/api/js?`+e;d[q]=f;a.onerror=()=>h=n(Error(p+" could not load."));a.nonce=m.querySelector("script[nonce]")?.nonce||"";m.head.append(a)}));d[l]?console.warn(p+" only loads once. Ignoring:",g):d[l]=(f,...n)=>r.add(f)&&u().then(()=>d[l](f,...n))})
        ({key: "YOUR_API_KEY", v: "weekly"});</script>
  </head>
  <body>

    <!-- The map, centered at Uluru, Australia. -->
    <gmp-map center="-25.344,131.031" zoom="4" map-id="DEMO_MAP_ID">
    </gmp-map>

  </body>
</html>
นี่คือหน้า HTML พื้นฐานมากซึ่งใช้gmp-map เพื่อแสดงแผนที่ในหน้าเว็บ แผนที่จะว่างเปล่าเนื่องจากเรายังไม่ได้เพิ่มโค้ด JavaScript
ทำความเข้าใจโค้ด
ในตัวอย่างนี้ เรามีสิ่งต่อไปนี้
- ประกาศแอปพลิเคชันเป็น HTML5 โดยใช้การประกาศ
!DOCTYPE html - โหลด Maps JavaScript API โดยใช้โปรแกรมโหลด Bootstrap
- สร้างองค์ประกอบ
gmp-mapเพื่อเก็บแผนที่
ประกาศแอปพลิเคชันเป็น HTML5
เราขอแนะนำให้คุณประกาศ DOCTYPE ที่ถูกต้องภายในเว็บแอปพลิเคชัน
ในตัวอย่างที่นี่ เราได้ประกาศแอปพลิเคชันเป็น HTML5 โดยใช้
HTML5 DOCTYPE ดังที่แสดงด้านล่าง
<!DOCTYPE html>
เบราว์เซอร์ส่วนใหญ่ในปัจจุบันจะแสดงเนื้อหาที่ประกาศด้วย DOCTYPE
ใน "โหมดมาตรฐาน" ซึ่งหมายความว่าแอปพลิเคชันของคุณควรเป็นไปตาม
ข้อกำหนดของเบราว์เซอร์ต่างๆ มากขึ้น นอกจากนี้ DOCTYPE ยังออกแบบมาให้ลดระดับลงอย่างราบรื่นด้วย เบราว์เซอร์ที่ไม่เข้าใจจะเพิกเฉยต่อแท็กนี้ และใช้ "โหมดที่ไม่มาตรฐาน" เพื่อ แสดงเนื้อหา
โปรดทราบว่า CSS บางรายการที่ใช้ได้ในโหมดประหลาดจะใช้ไม่ได้ใน
โหมดมาตรฐาน กล่าวคือ ขนาดที่เป็นเปอร์เซ็นต์ทั้งหมดต้องสืบทอด
จากองค์ประกอบบล็อกระดับบน และหากบรรพบุรุษเหล่านั้นไม่ระบุขนาด
ระบบจะถือว่ามีขนาด 0 x 0 พิกเซล ด้วยเหตุนี้ เราจึงขอstyleประกาศดังต่อไปนี้
<style>
  gmp-map {
    height: 100%;
  }
  html, body {
    height: 100%;
    margin: 0;
    padding: 0;
  }
</style>
โหลด Maps JavaScript API
โปรแกรมโหลด Bootstrap จะเตรียม Maps JavaScript API ให้โหลด (จะไม่มีการโหลดไลบรารีจนกว่าจะมีการเรียกใช้ importLibrary())
<script>
  (g=>{var h,a,k,p="The Google Maps JavaScript API",c="google",l="importLibrary",q="__ib__",m=document,b=window;b=b[c]||(b[c]={});var d=b.maps||(b.maps={}),r=new Set,e=new URLSearchParams,u=()=>h||(h=new Promise(async(f,n)=>{await (a=m.createElement("script"));e.set("libraries",[...r]+"");for(k in g)e.set(k.replace(/[A-Z]/g,t=>"_"+t[0].toLowerCase()),g[k]);e.set("callback",c+".maps."+q);a.src=`https://maps.${c}apis.com/maps/api/js?`+e;d[q]=f;a.onerror=()=>h=n(Error(p+" could not load."));a.nonce=m.querySelector("script[nonce]")?.nonce||"";m.head.append(a)}));d[l]?console.warn(p+" only loads once. Ignoring:",g):d[l]=(f,...n)=>r.add(f)&&u().then(()=>d[l](f,...n))})({
    key: "YOUR_API_KEY",
    v: "weekly",
    // Use the 'v' parameter to indicate the version to use (weekly, beta, alpha, etc.).
    // Add other bootstrap parameters as needed, using camel case.
  });
</script>
ดูวิธีการรับคีย์ API ของคุณเองได้ที่ขั้นตอนที่ 3: รับคีย์ API
ในขั้นตอนนี้ของบทแนะนำ หน้าต่างว่างเปล่าจะปรากฏขึ้น โดยแสดงเฉพาะ ข้อความป้ายกำกับที่ไม่ได้จัดรูปแบบ เนื่องจากเรายังไม่ได้เพิ่มโค้ด JavaScript
สร้างองค์ประกอบ gmp-map
เราต้องจองพื้นที่สำหรับแผนที่เพื่อให้แสดงในหน้าเว็บได้ โดยทั่วไป เราจะทำเช่นนี้ด้วยการสร้างองค์ประกอบ gmp-map และรับการอ้างอิงถึงองค์ประกอบนี้ใน Document Object Model (DOM) ของเบราว์เซอร์ คุณยังใช้องค์ประกอบ
div เพื่อดำเนินการนี้ได้ด้วย (ดูข้อมูลเพิ่มเติม)
แต่ขอแนะนำให้ใช้องค์ประกอบ gmp-map
โค้ดด้านล่างกำหนดองค์ประกอบ gmp-map และตั้งค่าพารามิเตอร์ center, zoom และ map-id
<gmp-map center="-25.344,131.031" zoom="4" map-id="DEMO_MAP_ID">
</gmp-map>
ตัวเลือก center และ zoom เป็นตัวเลือกที่ต้องระบุเสมอ ในโค้ดด้านบน พร็อพเพอร์ตี้
center จะบอก API ว่าจะวางแผนที่ไว้ตรงไหน และพร็อพเพอร์ตี้ zoom จะ
ระบุระดับการซูมสำหรับแผนที่ การซูม: 0 คือการซูมต่ำสุดและแสดง
ทั้งโลก ตั้งค่าการซูมให้สูงขึ้นเพื่อซูมเข้าโลกที่ความละเอียดสูงขึ้น
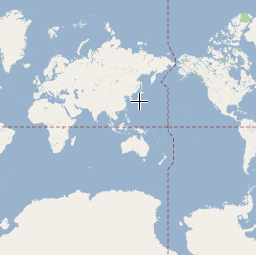
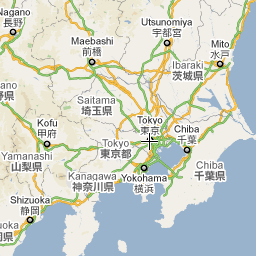
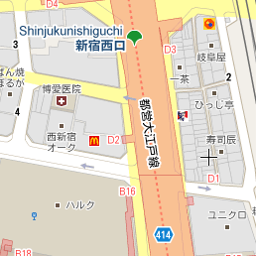
ระดับการซูม
การแสดงแผนที่ทั้งโลกเป็นรูปภาพเดียวจะต้องใช้แผนที่ขนาดใหญ่มากหรือแผนที่ขนาดเล็กที่มีความละเอียดต่ำมาก ด้วยเหตุนี้ รูปภาพแผนที่ ใน Google Maps และ Maps JavaScript API จึงแบ่งออกเป็น "ไทล์" ของแผนที่ และ "ระดับการซูม" ที่ระดับการซูมต่ำ ชุดไทล์แผนที่ขนาดเล็กจะครอบคลุมพื้นที่กว้าง ส่วนที่ระดับการซูมสูง ไทล์จะมีความละเอียดสูงขึ้นและครอบคลุมพื้นที่เล็กลง ระดับความละเอียดโดยประมาณที่คุณคาดว่าจะเห็นในแต่ละระดับการซูมมีดังนี้
- 1: โลก
- 5: แผ่นดินหรือทวีป
- 10: เมือง
- 15: ถนน
- 20: สิ่งปลูกสร้าง
รูปภาพ 3 รูปต่อไปนี้แสดงตำแหน่งเดียวกันในโตเกียวที่ระดับการซูม 0, 7 และ 18
โค้ดด้านล่างอธิบาย CSS ที่กำหนดขนาดขององค์ประกอบ gmp-map
/* Set the size of the gmp-map element that contains the map */
gmp-map {
    height: 400px; /* The height is 400 pixels */
    width: 100%; /* The width is the width of the web page */
}
ในโค้ดด้านบน องค์ประกอบ style จะกำหนดขนาดของ gmp-map กำหนด
ความกว้างและความสูงให้มากกว่า 0px เพื่อให้แผนที่ปรากฏ ในกรณีนี้ gmp-map มีความสูง 400 พิกเซล และความกว้าง 100% เพื่อแสดงความกว้างของหน้าเว็บ ขอแนะนำให้ตั้งค่ารูปแบบความสูงและความกว้างอย่างชัดเจนเสมอ
การจัดช่องควบคุม
คุณใช้การจัดช่องควบคุมเพื่อเพิ่มการควบคุมแบบ HTML ลงในแผนที่ได้ ช่องคือตำแหน่งที่กำหนดไว้ล่วงหน้าบนแผนที่ ใช้แอตทริบิวต์ slot เพื่อตั้งค่าตำแหน่งที่ต้องการสำหรับองค์ประกอบ และซ้อนองค์ประกอบภายในองค์ประกอบ gmp-map
ข้อมูลโค้ดต่อไปนี้แสดงการเพิ่มป้ายกำกับ HTML ที่มุมซ้ายบนของ
แผนที่
<!-- The map, centered at Uluru, Australia. -->
<gmp-map center="-25.344,131.031" zoom="4" map-id="DEMO_MAP_ID">
  <div id="controls" slot="control-inline-start-block-start">
    <h3>My Google Maps Demo</h3>
  </div>
</gmp-map>
ขั้นตอนที่ 3: เพิ่มโค้ด JavaScript
ส่วนนี้จะแสดงวิธีโหลด Maps JavaScript API ลงในหน้าเว็บ และวิธีเขียน JavaScript ของคุณเองที่ใช้ API เพื่อเพิ่มแผนที่พร้อมเครื่องหมาย
TypeScript
async function init(): Promise<void> { // Request the needed libraries. const [{ AdvancedMarkerElement }] = await Promise.all([ google.maps.importLibrary('marker'), google.maps.importLibrary('maps'), ]); // Get the gmp-map element. const mapElement = document.querySelector('gmp-map')!; // Get the inner map. const innerMap = mapElement.innerMap; // Set map options. innerMap.setOptions({ mapTypeControl: false, }); // Add a marker positioned at the map center (Uluru). new AdvancedMarkerElement({ map: innerMap, position: mapElement.center, title: 'Uluru/Ayers Rock', }); } void init();
JavaScript
async function init() { // Request the needed libraries. const [{ AdvancedMarkerElement }] = await Promise.all([ google.maps.importLibrary('marker'), google.maps.importLibrary('maps'), ]); // Get the gmp-map element. const mapElement = document.querySelector('gmp-map'); // Get the inner map. const innerMap = mapElement.innerMap; // Set map options. innerMap.setOptions({ mapTypeControl: false, }); // Add a marker positioned at the map center (Uluru). new AdvancedMarkerElement({ map: innerMap, position: mapElement.center, title: 'Uluru/Ayers Rock', }); } void init();
โค้ดข้างต้นจะทำสิ่งต่อไปนี้เมื่อมีการเรียกใช้ initMap()
- โหลดไลบรารี
mapsและmarker - รับองค์ประกอบแผนที่จาก DOM
- ตั้งค่าตัวเลือกแผนที่เพิ่มเติม ในแผนที่ด้านใน
- เพิ่มเครื่องหมายลงในแผนที่
รับออบเจ็กต์แผนที่และตั้งค่าตัวเลือก
innerMap แสดงอินสแตนซ์ของคลาส Map
หากต้องการตั้งค่าตัวเลือกแผนที่ ให้รับอินสแตนซ์ innerMap
จากองค์ประกอบแผนที่ แล้วเรียกใช้ setOptions
ข้อมูลโค้ดต่อไปนี้แสดงการรับอินสแตนซ์ innerMap จาก DOM จากนั้น
เรียกใช้ setOptions
// Get the gmp-map element.
const mapElement = document.querySelector(
  "gmp-map"
) as google.maps.MapElement;

// Get the inner map.
const innerMap = mapElement.innerMap;

// Set map options.
innerMap.setOptions({
  mapTypeControl: false,
});
รอให้แผนที่โหลด
เมื่อใช้องค์ประกอบ gmp-map แผนที่จะโหลดแบบไม่พร้อมกัน ซึ่งอาจส่งผลให้เกิดสภาวะแข่งขันหากมีการส่งคำขออื่นๆ ในช่วงการเริ่มต้น (เช่น คำขอตำแหน่งทางภูมิศาสตร์หรือคำขอรายละเอียดสถานที่) หากต้องการให้โค้ดทำงานหลังจากโหลดแผนที่เสร็จสมบูรณ์แล้วเท่านั้น ให้ใช้addListenerOnceตัวแฮนเดิลเหตุการณ์ที่ไม่ได้ใช้งาน
ในฟังก์ชันการเริ่มต้น ดังที่แสดงที่นี่
// Do things once the map has loaded.
google.maps.event.addListenerOnce(innerMap, 'idle', () => {
    // Run this code only after the map has loaded.
    console.log("The map is now ready!");
});
การทำเช่นนี้จะช่วยให้มั่นใจได้ว่าโค้ดจะทำงานหลังจากโหลดแผนที่แล้วเท่านั้น และ handler จะทริกเกอร์เพียงครั้งเดียวในวงจรของแอป
โค้ดตัวอย่างที่สมบูรณ์
ดูโค้ดตัวอย่างที่สมบูรณ์ได้ที่นี่
TypeScript
async function init(): Promise<void> { // Request the needed libraries. const [{ AdvancedMarkerElement }] = await Promise.all([ google.maps.importLibrary('marker'), google.maps.importLibrary('maps'), ]); // Get the gmp-map element. const mapElement = document.querySelector('gmp-map')!; // Get the inner map. const innerMap = mapElement.innerMap; // Set map options. innerMap.setOptions({ mapTypeControl: false, }); // Add a marker positioned at the map center (Uluru). new AdvancedMarkerElement({ map: innerMap, position: mapElement.center, title: 'Uluru/Ayers Rock', }); } void init();
JavaScript
async function init() { // Request the needed libraries. const [{ AdvancedMarkerElement }] = await Promise.all([ google.maps.importLibrary('marker'), google.maps.importLibrary('maps'), ]); // Get the gmp-map element. const mapElement = document.querySelector('gmp-map'); // Get the inner map. const innerMap = mapElement.innerMap; // Set map options. innerMap.setOptions({ mapTypeControl: false, }); // Add a marker positioned at the map center (Uluru). new AdvancedMarkerElement({ map: innerMap, position: mapElement.center, title: 'Uluru/Ayers Rock', }); } void init();
CSS
/* * Always set the map height explicitly to define the size of the div element * that contains the map. */ gmp-map { height: 100%; } /* * Optional: Makes the sample page fill the window. */ html, body { height: 100%; margin: 0; padding: 0; }
HTML
<html>
<head>
<title>Add a Map</title>
<link rel="stylesheet" type="text/css" href="./style.css" />
<script type="module" src="./index.js"></script>
<script>
// prettier-ignore
(g=>{var h,a,k,p="The Google Maps JavaScript API",c="google",l="importLibrary",q="__ib__",m=document,b=window;b=b[c]||(b[c]={});var d=b.maps||(b.maps={}),r=new Set,e=new URLSearchParams,u=()=>h||(h=new Promise(async(f,n)=>{await (a=m.createElement("script"));e.set("libraries",[...r]+"");for(k in g)e.set(k.replace(/[A-Z]/g,t=>"_"+t[0].toLowerCase()),g[k]);e.set("callback",c+".maps."+q);a.src=`https://maps.${c}apis.com/maps/api/js?`+e;d[q]=f;a.onerror=()=>h=n(Error(p+" could not load."));a.nonce=m.querySelector("script[nonce]")?.nonce||"";m.head.append(a)}));d[l]?console.warn(p+" only loads once. Ignoring:",g):d[l]=(f,...n)=>r.add(f)&&u().then(()=>d[l](f,...n))})({
key: "AIzaSyA6myHzS10YXdcazAFalmXvDkrYCp5cLc8"
});
</script>
</head>
<body>
<!-- The map, centered at Uluru, Australia. -->
<gmp-map center="-25.344,131.031" zoom="4" map-id="DEMO_MAP_ID">
<div id="controls" slot="control-inline-start-block-start">
<h3>My Google Maps Demo</h3>
</div>
</gmp-map>
</body>
</html>ลองใช้ตัวอย่าง
ดูข้อมูลเพิ่มเติมเกี่ยวกับเครื่องหมาย
เคล็ดลับและการแก้ปัญหา
- ดูข้อมูลเพิ่มเติมเกี่ยวกับการรับพิกัดละติจูด/ลองจิจูด หรือการแปลงที่อยู่เป็นพิกัดทางภูมิศาสตร์
- คุณสามารถปรับแต่งตัวเลือกต่างๆ เช่น รูปแบบและพร็อพเพอร์ตี้ เพื่อปรับแต่งแผนที่ ดูข้อมูลเพิ่มเติมเกี่ยวกับการปรับแต่งแผนที่ได้ที่คำแนะนำเกี่ยวกับ การจัดรูปแบบและ การวาดบนแผนที่
- ใช้คอนโซลเครื่องมือสำหรับนักพัฒนาซอฟต์แวร์ในเว็บเบราว์เซอร์เพื่อทดสอบและเรียกใช้โค้ด อ่านรายงานข้อผิดพลาด และแก้ปัญหาเกี่ยวกับโค้ด
- ใช้แป้นพิมพ์ลัดต่อไปนี้เพื่อเปิดคอนโซลใน Chrome
Command+Option+J (ใน Mac) หรือ Control+Shift+J (ใน Windows) ทำตามขั้นตอนด้านล่างเพื่อดูพิกัดละติจูดและ ลองจิจูดของสถานที่ใน Google Maps
- เปิด Google Maps ในเบราว์เซอร์
- คลิกขวาที่ตำแหน่งที่แน่นอนบนแผนที่ที่คุณต้องการ พิกัด
- เลือกพิกัดละติจูดและลองจิจูดจากเมนู
คุณสามารถแปลงที่อยู่เป็นพิกัดละติจูดและลองจิจูดได้โดยใช้บริการ Geocoding คู่มือนักพัฒนาแอปมีข้อมูลโดยละเอียดเกี่ยวกับการเริ่มต้นใช้งานบริการ Geocoding