Page Summary
-
The
Export.map.toCloudStorage()function exports a pyramid of map tiles from raster data to a Cloud Storage bucket for online map display. -
These map tiles use Google Map Tile Coordinates and are compatible with various mapping platforms like Google Maps Platform, Google Earth for web, and others.
-
Settings such as Access Level and JS Access (CORS) options are crucial for determining how and where your exported map tiles can be used and published.
-
Previewing your exported tiles is possible in Google Maps and Google Earth using the provided index.html and earth.html files in your output directory.
-
Different platforms have specific requirements for tile access and settings, and you may need a Google Maps Platform API Key for certain uses, especially with Google Maps APIs.
For information on exporting to other formats including images, videos and tables (vector data), see Exporting Data.
Overview
To display image data (raster data) on an online map, you can export map
tiles using Export.map.toCloudStorage(). This function
exports a pyramid of map tiles to a Cloud Storage bucket, from where it
can be served publicly or privately. It's useful when your image data is
too large to overlay as a single image. These tiles use
Google Map Tile Coordinates
and are suitable for display using Google Maps Platform (Maps APIs),
Google Earth for web, and other mapping platforms. The tiles can easily be
previewed in Google Maps or Earth using HTML files provided as part of the
export.
There are a number of settings and steps for the export, which may or may not be necessary, depending on how you plan to use or publish your tiles. Some mapping platforms require that the tiles be publicly accessible, while some will work with private tiles. If using one of the Google Maps APIs, you likely need to have a Google Maps Platform API Key. If you are serving tiles to Google Earth or other mapping platforms, then you will likely need to set the appropriate Access Level and JS Access (CORS) options, depending on how you plan to use your tiles. See the platform specific guidelines section below for required settings.
Exporting Map Tiles To Cloud Storage
The following example exports tiles from a Landsat image for an area in California.
Code Editor (JavaScript)
// --- Example Export Map Tiles - basic ---
// Specify area to clip/export, setup image and preview on map.
var exportRegion = ee.Geometry.BBox(-122.9, 37.1, -121.2, 38.2);
var landsatImage = ee.Image('LANDSAT/LC09/C02/T1_TOA/LC09_044034_20220111')
  .select(['B4', 'B3', 'B2'])
  .visualize({min: 0.02, max: 0.4, gamma: 1.2})
  .clip(exportRegion);
Map.addLayer(landsatImage, {}, 'landsatImage');
Map.centerObject(exportRegion);

// Set up Export task.
Export.map.toCloudStorage({
  image: landsatImage,
  description: 'mapTilesForEE',
  bucket: 'yourBucketName',  // replace with your GCS bucket name
  fileFormat: 'auto',
  maxZoom: 13,
  region: exportRegion,
  writePublicTiles: true
});
import ee
import geemap.core as geemap
Colab (Python)
# --- Example Export Map Tiles - basic ---
# Specify area to clip/export, setup image and preview on map.
export_region = ee.Geometry.BBox(-122.9, 37.1, -121.2, 38.2)
landsat_image = (
    ee.Image('LANDSAT/LC09/C02/T1_TOA/LC09_044034_20220111')
    .select(['B4', 'B3', 'B2'])
    .visualize(min=0.02, max=0.4, gamma=1.2)
    .clip(export_region)
)
m = geemap.Map()
m.add_layer(landsat_image, {}, 'landsatImage')
m.center_object(export_region)
display(m)

# Set up Export task.
task = ee.batch.Export.map.toCloudStorage(
    image=landsat_image,
    description='mapTilesForEE',
    bucket='yourBucketName',  # replace with your GCS bucket name
    fileFormat='auto',
    maxZoom=13,
    region=export_region,
    writePublicTiles=True,
)
task.start()
Note that this creates a new directory in the specified Cloud Storage
bucket, named according to the description parameter by
default. You can change the name of the directory or specify
subdirectories with the path parameter. You can use the
index.html and earth.html files in your output directory to preview
the tiles in Maps or Earth.
ACLs and CORS options
The example above sets the tiles' ACLs (Access Control List) to make
them publicly accessible via direct request, but does not set the
bucket's JS Access (CORS settings) to allow web apps to access them.
This means that these exported tiles can be viewed in the maps and
Earth previews, but will not be useful for other platforms which
require JS Access. You are assumed to be the owner of the output bucket.
If you are a writer on the specified output bucket (but not the owner),
set writePublicTiles to false to use the
output bucket's default object ACL.
If you wish to open your tiles to public access by all web apps, add
bucketCorsUris: ['*'] to the task parameters. Note that
full public JS Access may be undesirable when there is a risk of 3rd
parties using your tiles and incurring cloud costs. To limit this, you
can restrict JS Access to only web apps at specific domains or URLs.
Note that JS Access (CORS) settings are applied at the entire bucket
level, not at the folder or object level.
ACLs and CORS can be set using the writePublicTiles and
bucketCorsUris parameters respectively, or from the export
task dialog as shown below:

Export.map.toCloudStorage() task dialog.
- View/download access. If you want access at all (e.g. from the Code Editor or Earth Engine Apps), then you will need to make the tiles 'Publicly accessible.'
- JS access. The bucket into which the map is exported must allow for readability if you want the Code Editor, Earth Engine Apps or other web apps to have access to the tiles. These cross-origin request settings (CORS) must be configured at the bucket level. For convenience, the Earth Engine export dialog allows you to configure CORS for your bucket at the time of export.
- NOTE: The JS Access / CORS settings are applied at the bucket level, NOT at the folder or object level, so changing the settings will update them for all folders and objects in the bucket. Learn more in the Cloud Storage CORS documentation, including how to view the current CORS configuration for a bucket.
Parameter list
Below is a list of all the parameters for a map tile export task, showing the name of the parameter (argument) in code, and the corresponding field in the task dialog (if applicable). Note that some fields are mutually exclusive (e.g. maxzoom and scale). See the Export.map documentation for more details.
| Argument in code | Field in task dialog | Notes |
|---|---|---|
| image | n/a | The image to export as tiles. Must be an Image, not an ImageCollection. |
| description | Task name | A human-readable name of the task. Defaults to "myExportMapTask". This is also used as the folder name for the tiles, if the 'path' (Output prefix) parameter is not specified. |
| bucket | GCS bucket name | The destination bucket to write to. |
| fileFormat | File format | The map tiles' file format, one of: "auto", "png", or "jpg". Defaults to "auto", which means that opaque tiles will be encoded as "jpg" and tiles with transparency will be encoded as "png". |
| path | Output prefix | The string used as the output's path. A trailing "/" is optional. Defaults to the task's description (Task Name) |
| writePublicTiles | View/download access level | Whether to write public tiles instead of using the bucket's default object ACL. Defaults to true and invoker to be OWNER of the bucket. |
| maxZoom | Maximum resolution & Maximum Zoom | The maximum zoom level of the map tiles to export. |
| scale | Maximum resolution & Maximum Scale | The max image resolution in meters per pixel, as an alternative to "maxZoom". The scale will be converted to the most appropriate maximum zoom level at the equator. |
| minZoom | Maximum resolution & Minimum Zoom | The optional minimum zoom level of the map tiles to export. Defaults to zero. |
| region | n/a | A LinearRing, Polygon, or coordinates representing region to export. See docs for details. |
| skipEmptyTiles | n/a | If true, skip writing empty (i.e. fully-transparent) map tiles. Defaults to false. |
| mapsApiKey | Maps API Key | Used in index.html to initialize the Google Maps API. This removes the "development purposes only" message from the map. |
| bucketCorsUris | Add JS Access (& Website to allow) | A list of domains (e.g. https://code.earthengine.google.com) which are allowed to retrieve the exported tiles via JavaScript (CORS). |
Scale and Zoom
In the previous example, maxZoom is set to 13.
Zoom levels correspond to different sized grids of pixels with which to
display a global map. (See the
pixel coordinates reference
for details.) Due to Earth's curvature, the resolution of pixels at a
given zoom level varies by latitude. Specifically, meters per pixel goes
down by a factor of cos(latitude). The following table shows
meters per pixel, at each zoom level, at the equator for
the Google Mercator projection:
| Zoom Level | Pixel Size (at equator) | Zoom Level | Pixel Size (at equator) |
|---|---|---|---|
| 0 | 156 km | 10 | 152 m |
| 1 | 78 km | 11 | 76 m |
| 2 | 39 km | 12 | 38 m |
| 3 | 20 km | 13 | 19 m |
| 4 | 10 km | 14 | 9.6 m |
| 5 | 4.9 km | 15 | 4.8 m |
| 6 | 2.4 km | 16 | 2.4 m |
| 7 | 1.2 km | 17 | 1.2 m |
| 8 | 611 m | 18 | 0.6 m |
| 9 | 305 m | 19 | 0.3 m |
| 20 | 0.15 m |
Observe from the previous table that the maxZoom set in the
example corresponds to 19 meters at the equator, smaller at higher
latitudes. This is less than the nominal 30 arc-seconds per pixel
resolution of the input image. As a result, the map displayed in the
output
index.html
can be zoomed in until pixels in native resolution are visible in the map.
To limit the map display to native pixel resolution, set
maxZoom to a value that corresponds to the native resolution
or less.
Platform Specific Guidelines
Below are a number of platforms where you might want to view and use map tiles. Each section indicates which settings are required for the tiles to work with that platform, and a copy of the example code with the necessary parameters.
Using map tiles in Earth Engine (Code Editor or EE Apps)
If you want to export map tiles only for re-use in Google Earth Engine or EE Apps, then set "Access Level" to 'Publicly Accessible', and set "JS Access Level" (in the task dialog) to 'Add Earth Engine Access' or 'Add Public Access'. Alternatively, you can set these parameters in code:
writePublicTiles: true,
bucketCorsUris: ['https://code.earthengine.google.com','https://*.earthengine.app']
Once you export the tiles, they will then be accessible in Earth Engine.
Code Editor (JavaScript)
// --- Export Map Tiles for use in EE ---
// Use image setup code from example at top of the page.
// Set up Export task.
Export.map.toCloudStorage({
  image: landsatImage,
  description: 'mapTilesForEE',
  bucket: 'yourBucketName',  // replace with your GCS bucket name
  fileFormat: 'auto',
  maxZoom: 13,
  region: exportRegion,
  writePublicTiles: true,
  bucketCorsUris: ['https://code.earthengine.google.com','https://*.earthengine.app']
});
import ee
import geemap.core as geemap
Colab (Python)
# --- Export Map Tiles for use in EE ---
# Use image setup code from example at top of the page.
# Set up Export task.
task = ee.batch.Export.map.toCloudStorage(
    image=landsat_image,
    description='mapTilesForEE',
    bucket='yourBucketName',  # replace with your GCS bucket name
    fileFormat='auto',
    maxZoom=13,
    region=export_region,
    writePublicTiles=True,
    bucketCorsUris=[
        'https://code.earthengine.google.com',
        'https://*.earthengine.app',
    ],
)
task.start()
Viewing a Google Maps Preview
To preview your map tiles on Google Maps, go to the output folder on Google Cloud Storage, and open the "index.html" file in your browser. This will open a full-page map showing your tiles on Google Maps using the Google Maps Platform Javascript API, like this one: index.html. A basic export will result in basemap tiles that are grayed out and watermarked "For Development Purposes Only". To avoid this and show standard Google basemap tiles, generate an API key and include it in your export settings.
If you provide an API Key at the time of export, this preview page is publicly viewable, can be embedded on other pages, and does not require the viewer to be a registered Earth Engine user.
Code Editor (JavaScript)
// --- Export Map Tiles for use with Map Preview ---
// Use image setup code from example at top of the page.
// Set up Export task.
Export.map.toCloudStorage({
  image: landsatImage,
  description: 'mapTilesForMapPreview',
  bucket: 'yourBucketName',  // replace with your GCS bucket name
  fileFormat: 'auto',
  maxZoom: 13,
  region: exportRegion,
  writePublicTiles: true,
  mapsApiKey: 'fakeMapsApiKey012345' // replace with a valid API Key
});
import ee
import geemap.core as geemap
Colab (Python)
# --- Export Map Tiles for use with Map Preview ---
# Use image setup code from example at top of the page.
# Set up Export task.
task = ee.batch.Export.map.toCloudStorage(
    image=landsat_image,
    description='mapTilesForMapPreview',
    bucket='yourBucketName',  # replace with your GCS bucket name
    fileFormat='auto',
    maxZoom=13,
    region=export_region,
    writePublicTiles=True,
    mapsApiKey='fakeMapsApiKey012345',  # replace with a valid API Key
)
task.start()
Viewing a Google Earth Preview
To preview your map tiles in Google Earth on the web, make sure you export your tiles with the Access Level set to 'Publicly Accessible'. Then go to the output folder on Google Cloud Storage, open the "earth.html" file in your browser, like this one: earth.html and click the "Open in Google Earth" button that appears. This will open Google Earth and show your tiles on the 3D map. It is best practice to also set the "JS Access" level to 'Publicly Accessible', which will allow you to use the tiles in Google Earth without the preview file (which uses a proxy server if the tiles do not have the necessary JS Access/CORS settings).
To download a KML file that contains a link to your data, click the 3-dot menu in Google Earth and select 'Export as KML file'. Note: The KML file generated in this manner is NOT compatible with Google Earth Pro (the desktop version of Earth).
Code Editor (JavaScript)
// --- Export Map Tiles for use with Earth Preview ---
// Use image setup code from example at top of the page.
// Set up Export task.
Export.map.toCloudStorage({
  image: landsatImage,
  description: 'mapTilesForEarthPreview',
  bucket: 'yourBucketName',  // replace with your GCS bucket name
  fileFormat: 'auto',
  maxZoom: 13,
  region: exportRegion,
  writePublicTiles: true,
  bucketCorsUris: []  // leaving blank is ok for Earth Preview only
  // for direct use in Earth, set to: ['https://earth.google.com']
  // or set to public: ['*'] (risk of misuse)
});
import ee
import geemap.core as geemap
Colab (Python)
# --- Export Map Tiles for use with Earth Preview ---
# Use image setup code from example at top of the page.
# Set up Export task.
task = ee.batch.Export.map.toCloudStorage(
    image=landsat_image,
    description='mapTilesForEarthPreview',
    bucket='yourBucketName',  # replace with your GCS bucket name
    fileFormat='auto',
    maxZoom=13,
    region=export_region,
    writePublicTiles=True,
    bucketCorsUris=[],  # leaving blank is ok for Earth Preview only
    # for direct use in Earth, set to: ['https://earth.google.com']
    # or set to public: ['*'] (risk of misuse)
)
task.start()
Publishing with Google Maps Platform (Maps APIs)
To create a set of map tiles ready for publishing publicly via the Google
Maps Platform, you will need to have or create an API key, and make sure
the Access Level is set to 'Publicly Accessible'. Depending on how your
Maps API application accesses the tiles, you may also need to set an
appropriate "JS Access Level" for your site. Once you have exported your
tiles, the output in the code editor Task tab provides a URL for your
tiles with the appropriate variables for use with Google Maps API, for
example:
https://storage.googleapis.com/my_bucket/my_test_tiles/{Z}/{X}/{Y}
Code Editor (JavaScript)
// --- Export Map Tiles for use with Maps Platform APIs ---
// Use image setup code from example at top of the page.
// Set up Export task.
Export.map.toCloudStorage({
  image: landsatImage,
  description: 'mapTilesForMapsPlatform',
  bucket: 'yourBucketName',  // replace with your GCS bucket name
  fileFormat: 'auto',
  maxZoom: 13,
  region: exportRegion,
  writePublicTiles: true,
  bucketCorsUris: ['*'],  // '*' = All domains = risk of misuse
  // For better protection, specify the domain(s) where the
  // tiles will be used, eg: ['https://mysite.mydomain.com']
  mapsApiKey: 'fakeMapsApiKey012345' // replace with a valid API Key
});
import ee
import geemap.core as geemap
Colab (Python)
# --- Export Map Tiles for use with Maps Platform APIs ---
# Use image setup code from example at top of the page.
# Set up Export task.
task = ee.batch.Export.map.toCloudStorage(
    image=landsat_image,
    description='mapTilesForMapsPlatform',
    bucket='yourBucketName',  # replace with your GCS bucket name
    fileFormat='auto',
    maxZoom=13,
    region=export_region,
    writePublicTiles=True,
    bucketCorsUris=['*'],  # '*' = All domains = risk of misuse
    # For better protection, specify the domain(s) where the
    # tiles will be used, eg: ['https://mysite.mydomain.com']
    mapsApiKey='fakeMapsApiKey012345',  # replace with a valid API Key
)
task.start()
Publishing to Google Earth (on the web)
To create a set of map tiles for publishing publicly via Google Earth, you will need to set the Access Level to 'Publicly Accessible', and set the JS Access Level to allow 'https://earth.google.com' (or 'Publicly Accessible'). After export, you can preview them in Google Earth using the earth.html file in the export directory (see above).
Code Editor (JavaScript)
// --- Export Map Tiles for use with Google Earth web ---
// Use image setup code from example at top of the page.
// Set up Export task.
Export.map.toCloudStorage({
  image: landsatImage,
  description: 'mapTilesForEarthWeb',
  bucket: 'yourBucketName',  // replace with your GCS bucket name
  fileFormat: 'auto',
  maxZoom: 13,
  region: exportRegion,
  writePublicTiles: true,
  bucketCorsUris: ['https://earth.google.com']
  // ['*'] will also work, but risks misuse
});
import ee
import geemap.core as geemap
Colab (Python)
# --- Export Map Tiles for use with Google Earth web ---
# Use image setup code from example at top of the page.
# Set up Export task.
task = ee.batch.Export.map.toCloudStorage(
    image=landsat_image,
    description='mapTilesForEarthWeb',
    bucket='yourBucketName',  # replace with your GCS bucket name
    fileFormat='auto',
    maxZoom=13,
    region=export_region,
    writePublicTiles=True,
    bucketCorsUris=['https://earth.google.com'],
    # ['*'] will also work, but risks misuse
)
task.start()
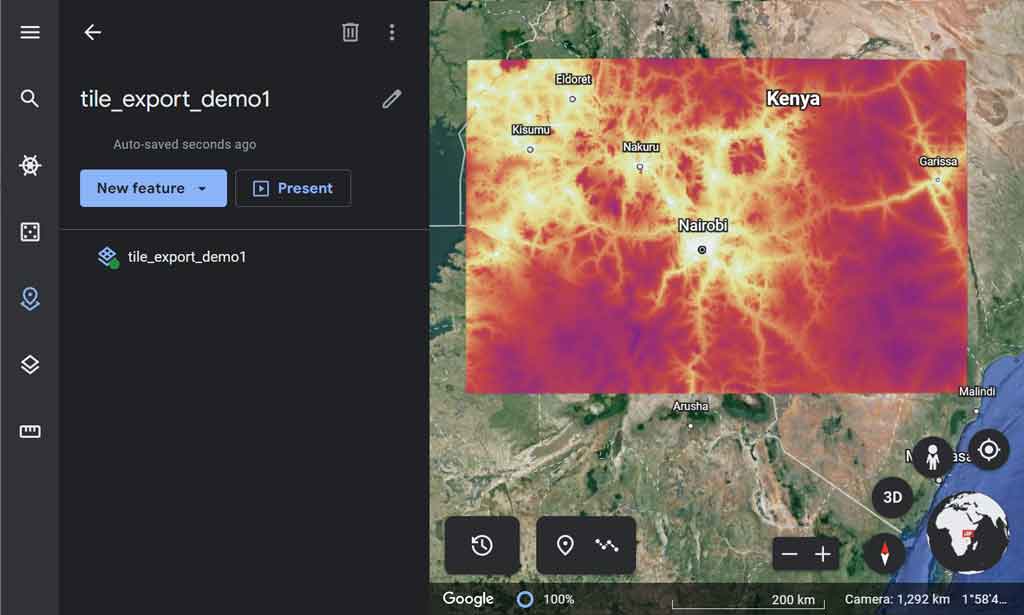
Once you export the tiles, you can add them to a project in
Google Earth web. The output in
the code editor Tasks tab (shown below) provides the URL for your tiles
with the appropriate variables for use in Google Earth, for example:
https://storage.googleapis.com/my_bucket/my_test_tiles/$[level]/$[x]/$[y]

To use this in Earth web, create a Tile Overlay feature and add this URL as the "Overlay URL". If your dataset is not global and you want to avoid tile request errors for non-existent tiles, then make sure to open up the "Overlay Options" section and adjust the four Tile Coverage parameters to match the extents of your exported tiles.
Publishing to other mapping platforms
When exporting tiles for use with other platforms or applications, the necessary settings will depend on how they access the tiles. To make the tiles as widely accessible as possible, set the Access Level to 'Publicly Accessible', and set the JS Access Level to 'Publicly Accessible'.
Generating a Google Maps Platform API Key
If you plan to use your map tiles with the Google Maps Platform, or want to preview them on Maps without the developer restricted basemap, then you will need to have or generate a Google Maps Platform API key and either include it in your export settings, or add it to the site(s) afterward. This is not necessary for use with Google Earth.
When you export map tiles from Earth Engine, we generate a sample HTML page stored in the output directory for you to preview the tiles using the Google Maps Platform JavaScript API. You can optionally provide a Google Maps Platform API Key at the time of export, which will be used for the sample viewer's API calls.
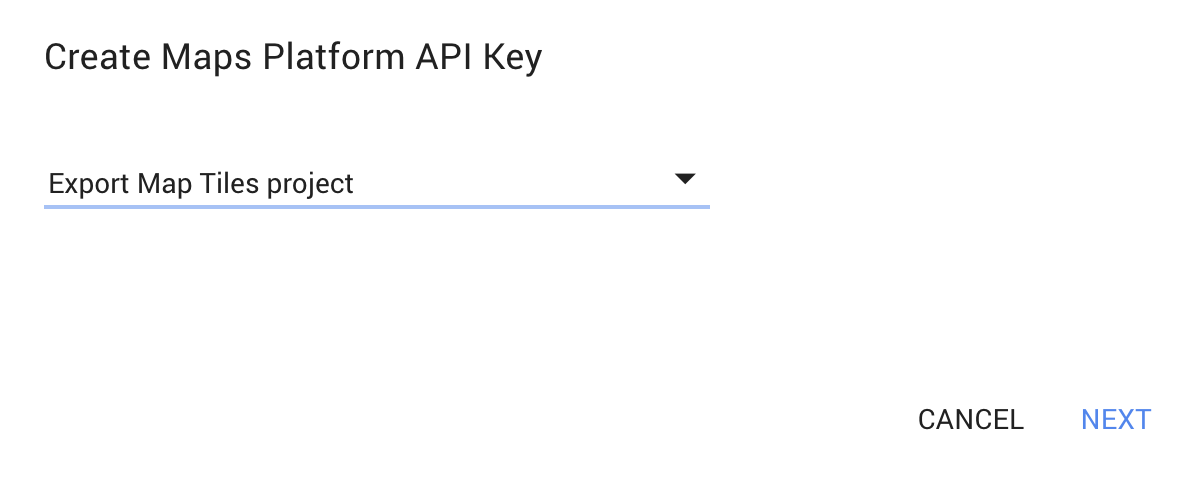
To generate a Google Maps Platform API key now, follow these four steps:
- Click the "Create Maps Platform API Key" button below.
- Select the Cloud project for your API key, and click NEXT.
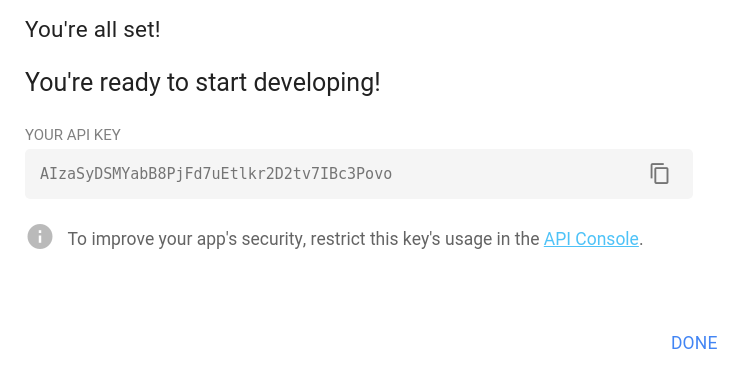
- Click to copy the new key, and paste it into the Export map dialog in the Code Editor.
- (Recommended) Click the API Console link under the new key to set referrer restrictions. See referrer and application restrictions for more details.
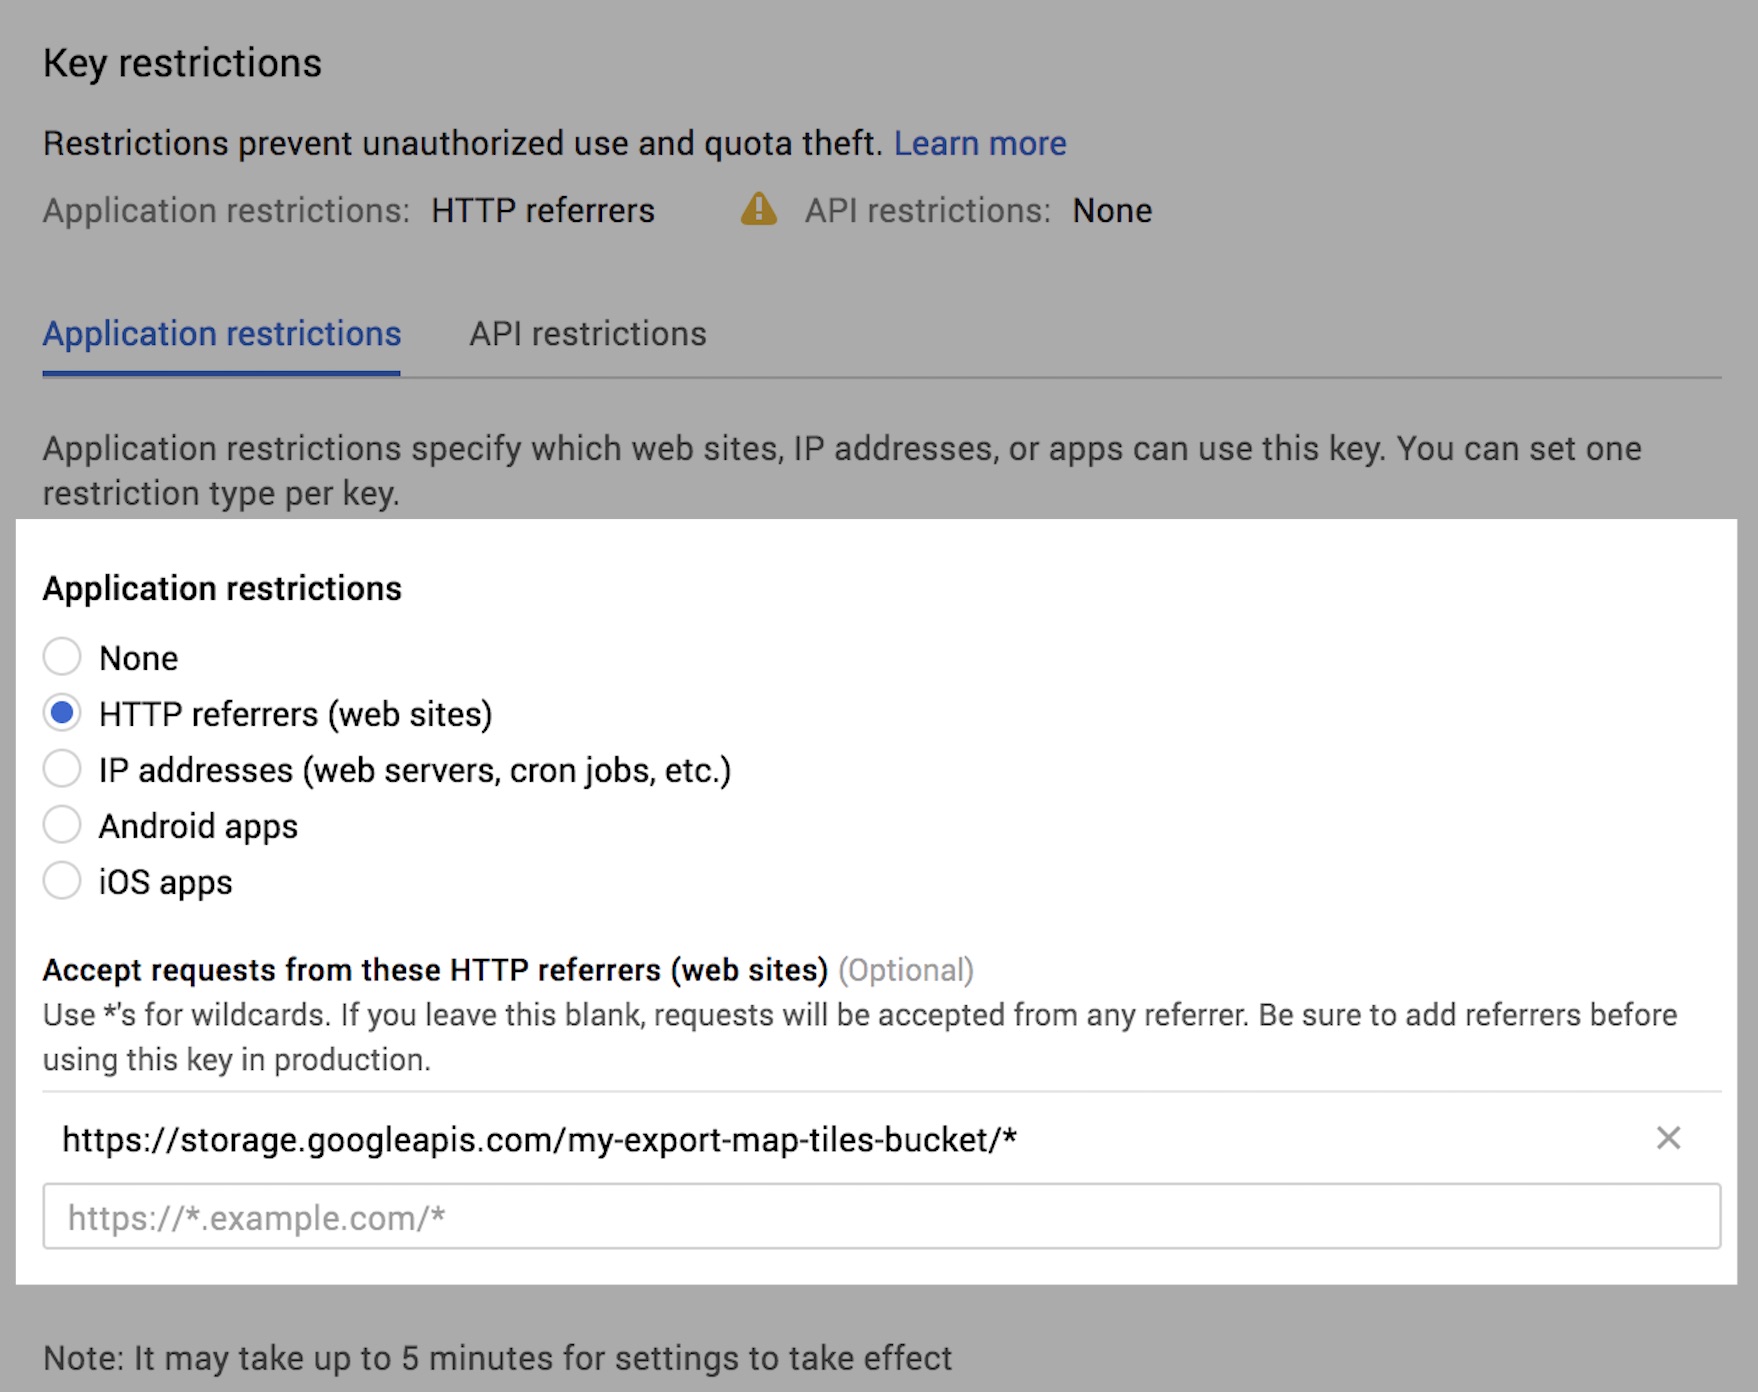
Adding Referrer Restrictions to an API key
When adding an API key, referrer restrictions ensure that only the designated app(s) can use your key. You can set or edit referrer restrictions at any time by visiting the Credentials page on the Cloud Console and following these steps:
- Make sure the correct project name is selected in the dropdown at the top of the screen.
- Click the Maps Platform API key generated above to view the details for the key.
-
Select HTTP referrers (websites), and specify the Cloud
Storage bucket specified in
Export.map.toCloudStorageusing the following template:https://storage.googleapis.com/{bucket}/* - Hit Save. The "Saving..." indicator should appear.