本頁說明您可以在 公用程式庫 Maps SDK for iOS。
只要將標記叢集化,您就可以在地圖上放置大量標記 而不會讓地圖難以閱讀標記叢集公用程式 管理多個縮放等級不同的標記。
當使用者以高縮放等級查看時,地圖上會顯示個別標記;使用者縮小時,標記會收集 組合成叢集,以更輕鬆的方式查看地圖
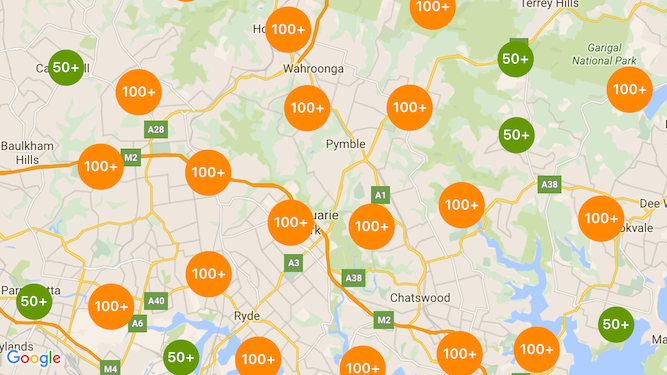
以下螢幕截圖顯示標記叢集的預設樣式:

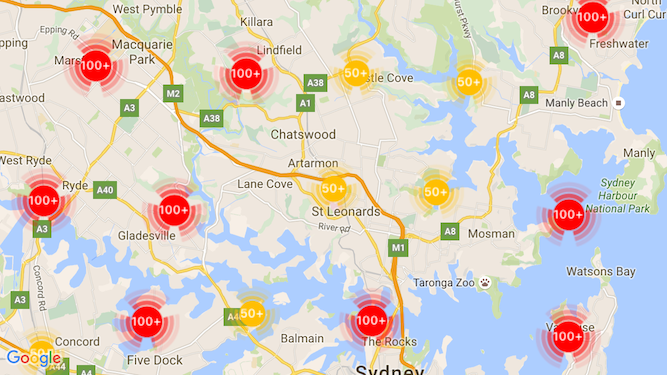
以下是自訂標記叢集的範例:

必要條件和注意事項
Maps SDK for iOS 公用程式庫
標記叢集公用程式是 Maps SDK for iOS 公用程式庫。如果您尚未設定程式庫,請先按照設定指南的步驟完成設定,再閱讀本頁面的其他內容。
為了獲得最佳效能,建議的最大標記數量為 10,000 個。
位置存取權
這個範例使用裝置的 GPS 找出使用者和地圖所在位置的座標。啟用方式
您可以加入 NSLocationWhenInUseUsageDescription 權限的說明
複製到專案的 Info.plist 檔案中
若要新增此功能,請執行下列步驟:
- 在 Xcode 的「Project Navigator」中點選
Info.plist檔案,即可開啟 屬性清單編輯器。 - 按一下「+」「資訊屬性清單」旁邊的圖示即可新增資源
- 在「索引鍵」輸入「NSLocationWhenInUseUsageDescription」。Xcode 會自動 請將這段文字翻譯成「隱私權 - 使用時的位置」說明換 可能的位置存取權屬性完整清單,請參閱 要求定位服務授權 。
- 保留「類型」欄位欄位已設為「String」。
- 在「值」中欄位,請在說明欄位中,描述應用程式需要使用 使用者的位置。例如「尋找使用者,提供附近的商家資訊」。
實作標記叢集
實作標記叢集需要三個步驟:
,瞭解如何調查及移除這項存取權。 如需標記叢集的完整實作範例,請參閱 GitHub 上的 Objective-C 和 Swift 範例應用程式。正在建立叢集管理員
如要使用叢集管理員,請執行下列操作:
- 設定算繪地圖的位置
ViewController,以符合GMSMapViewDelegate通訊協定。 - 建立
GMUClusterManager的執行個體。 - 傳遞要實作標記叢集的
GMSMapView例項 對GMUClusterManager執行個體的下列通訊協定執行 及 實作:GMUClusterIconGenerator:提供擷取 叢集圖示,供不同縮放等級使用。GMUClusterAlgorithm:指定用來決定行為的演算法 標記的叢集方式,例如標記之間的距離 (相同叢集)。GMUClusterRenderer:提供應用程式邏輯,處理實際的 在地圖上顯示叢集圖示
- 在
GMUClusterManager執行個體上設定地圖委派。
公用程式庫包含圖示產生器的預設實作方式 (GMUDefaultClusterIconGenerator),
演算法 (GMUNonHierarchicalDistanceBasedAlgorithm) 和轉譯器 (GMUDefaultClusterRenderer)。
您可以選擇建立自訂的聯盟圖示產生器、演算法及轉譯器。
下列程式碼會使用 viewDidLoad 中的這些預設值來建立叢集管理員
ViewController 的回呼:
Swift
import GoogleMaps
import GoogleMapsUtils

class MarkerClustering: UIViewController, GMSMapViewDelegate {
  private var mapView: GMSMapView!
  private var clusterManager: GMUClusterManager!

  override func viewDidLoad() {
    super.viewDidLoad()

    // Set up the cluster manager with the supplied icon generator and
    // renderer.
    let iconGenerator = GMUDefaultClusterIconGenerator()
    let algorithm = GMUNonHierarchicalDistanceBasedAlgorithm()
    let renderer = GMUDefaultClusterRenderer(mapView: mapView,
                                clusterIconGenerator: iconGenerator)
    clusterManager = GMUClusterManager(map: mapView, algorithm: algorithm,
                                                      renderer: renderer)

    // Register self to listen to GMSMapViewDelegate events.
    clusterManager.setMapDelegate(self)
    // ...
  }
  // ...
}
Objective-C
@import GoogleMaps;
@import GoogleMapsUtils;

@interface MarkerClustering () <GMSMapViewDelegate>

@end

@implementation MarkerClustering {
  GMSMapView *_mapView;
  GMUClusterManager *_clusterManager;
}

- (void)viewDidLoad {
  [super viewDidLoad];

  // Set up the cluster manager with a supplied icon generator and renderer.
  id<GMUClusterAlgorithm> algorithm =
      [[GMUNonHierarchicalDistanceBasedAlgorithm alloc] init];
  id<GMUClusterIconGenerator> iconGenerator =
      [[GMUDefaultClusterIconGenerator alloc] init];
  id<GMUClusterRenderer> renderer =
      [[GMUDefaultClusterRenderer alloc] initWithMapView:_mapView
                                    clusterIconGenerator:iconGenerator];
  _clusterManager =
      [[GMUClusterManager alloc] initWithMap:_mapView
                                   algorithm:algorithm
                                    renderer:renderer];

  // Register self to listen to GMSMapViewDelegate events.
  [_clusterManager setMapDelegate:self];
  // ...
}
// ...
@end
新增標記
將標記加入標記叢集的方法有兩種:個別或陣列。
個別標記
Swift
let position = CLLocationCoordinate2D(latitude: 47.60, longitude: -122.33)
let marker = GMSMarker(position: position)
clusterManager.add(marker)
Objective-C
CLLocationCoordinate2D position = CLLocationCoordinate2DMake(47.60, -122.33);
GMSMarker *marker = [GMSMarker markerWithPosition:position];
[_clusterManager addItem:marker];
標記陣列
Swift
let position1 = CLLocationCoordinate2D(latitude: 47.60, longitude: -122.33)
let marker1 = GMSMarker(position: position1)

let position2 = CLLocationCoordinate2D(latitude: 47.60, longitude: -122.46)
let marker2 = GMSMarker(position: position2)

let position3 = CLLocationCoordinate2D(latitude: 47.30, longitude: -122.46)
let marker3 = GMSMarker(position: position3)

let position4 = CLLocationCoordinate2D(latitude: 47.20, longitude: -122.23)
let marker4 = GMSMarker(position: position4)

let markerArray = [marker1, marker2, marker3, marker4]
clusterManager.add(markerArray)
Objective-C
CLLocationCoordinate2D position1 = CLLocationCoordinate2DMake(47.60, -122.33);
GMSMarker *marker1 = [GMSMarker markerWithPosition:position1];

CLLocationCoordinate2D position2 = CLLocationCoordinate2DMake(47.60, -122.46);
GMSMarker *marker2 = [GMSMarker markerWithPosition:position2];

CLLocationCoordinate2D position3 = CLLocationCoordinate2DMake(47.30, -122.46);
GMSMarker *marker3 = [GMSMarker markerWithPosition:position3];

CLLocationCoordinate2D position4 = CLLocationCoordinate2DMake(47.20, -122.23);
GMSMarker *marker4 = [GMSMarker markerWithPosition:position4];

NSArray<GMSMarker *> *markerArray = @[marker1, marker2, marker3, marker4];
[_clusterManager addItems:markerArray];
叫用標記叢集
建立標記叢集並傳遞您要叢集的標記後,
您必須在標記叢集執行個體中呼叫 cluster 方法。
Swift
clusterManager.cluster()
Objective-C
[_clusterManager cluster];
處理標記和叢集上的事件
在一般情況下,使用 Maps SDK for iOS 時,您必須實作
GMSMapViewDelegate
因此效能相當卓越你可以收聽
地圖事件,但無法
監聽類型安全叢集管理員事件使用者輕觸標記時,
API 會觸發個別叢集項目或叢集
mapView:didTapMarker:,並將額外的叢集資料附加至
marker.userData 屬性。接著,您可以檢查 userData 是否符合
使用 GMUCluster 通訊協定,判斷使用者是否輕觸了叢集圖示或標記。
Swift
func mapView(_ mapView: GMSMapView, didTap marker: GMSMarker) -> Bool {
  // center the map on tapped marker
  mapView.animate(toLocation: marker.position)
  // check if a cluster icon was tapped
  if marker.userData is GMUCluster {
    // zoom in on tapped cluster
    mapView.animate(toZoom: mapView.camera.zoom + 1)
    NSLog("Did tap cluster")
    return true
  }

  NSLog("Did tap a normal marker")
  return false
}
Objective-C
- (BOOL)mapView:(GMSMapView *)mapView didTapMarker:(GMSMarker *)marker {
  // center the map on tapped marker
    [_mapView animateToLocation:marker.position];
    // check if a cluster icon was tapped
    if ([marker.userData conformsToProtocol:@protocol(GMUCluster)]) {
      // zoom in on tapped cluster
      [_mapView animateToZoom:_mapView.camera.zoom + 1];
      NSLog(@"Did tap cluster");
      return YES;
    }

    NSLog(@"Did tap marker in cluster");
    return NO;
}
叢集管理員現在會攔截您已導入叢集的所有事件
clusterManager。會將所有其他事件轉送至地圖
或委派代表。請注意,標準標記的事件
(也就是說,叢集轉譯器產生的標記) 一律會轉送
地圖委派項目。
自訂標記叢集
您可以針對
GMUClusterRenderer、GMUClusterIconGenerator 或
GMUClusterAlgorithm。您可以根據自己的自訂實作項目
相關通訊協定實作項目範例
程式庫也可以編寫完全自訂的實作項目,方法是使用
通訊協定
