Page Summary
-
Info windows display information when a marker is tapped, showing a title and optional snippet text.
-
Customize info windows by creating a subclass of
UIViewand returning it in themapView:markerInfoWindow:delegate method. -
Control info window visibility programmatically using the
selectedMarkerproperty ofGMSMapView. -
Adjust the info window's position relative to the marker with the
infoWindowAnchorproperty. -
Listen to info window events like opening, closing, and long presses by implementing the
GMSMapViewDelegateprotocol.

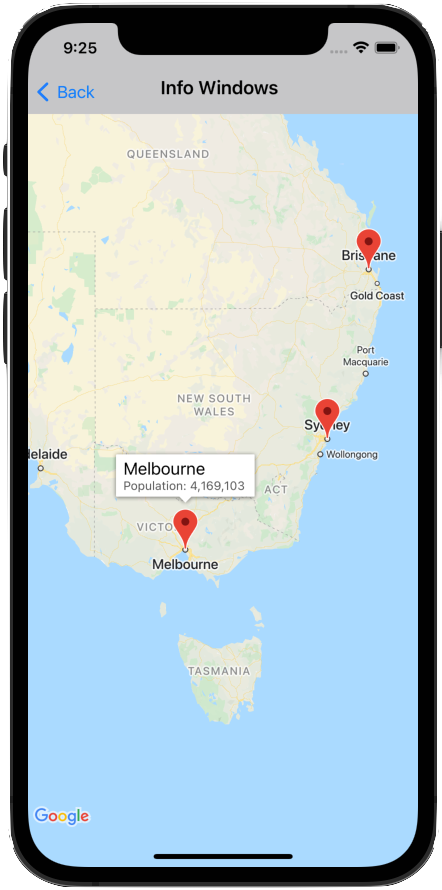
An info window allows you to display information to the user when they tap on a marker.
An info window is drawn oriented against the device's screen, centered above its associated marker. The default info window contains the title in bold, with the snippet text below the title.
The contents of the info window are defined by the title and
snippet properties of the marker. Clicking the marker does not display an
info window if both the title and snippet properties are blank or nil.
Only one info window is displayed at a time. If a user taps on another marker, the current window is hidden and the new info window opens. If the user clicks on a marker that is currently showing an info window, that info window closes and reopens.
Create a custom info window to add additional text or images. A custom info window gives you complete control of the appearance of the popup.
Add an info window
The following snippet creates a simple marker, with only a title for the text of the info window.
Swift
let position = CLLocationCoordinate2D(latitude: 51.5, longitude: -0.127)
let london = GMSMarker(position: position)
london.title = "London"
london.map = mapView
Objective-C
CLLocationCoordinate2D position = CLLocationCoordinate2DMake(51.5, -0.127);
GMSMarker *london = [GMSMarker markerWithPosition:position];
london.title = @"London";
london.map = mapView;
With the snippet property, you can add additional text that will appear
below the title in a smaller font. Strings that are longer than the width of
the info window are automatically wrapped over several lines. Very long
messages may be truncated.
Swift
london.title = "London"
london.snippet = "Population: 8,174,100"
london.map = mapView
Objective-C
london.title = @"London";
london.snippet = @"Population: 8,174,100";
london.map = mapView;
Show/hide an info window
Info windows are designed to respond to user touch events on the marker.
You can show or hide an info window programmatically by setting the selectedMarker
property of GMSMapView:
- Set
selectedMarkerto the name of the marker to show it. - Set
selectedMarkertonilto hide it.
Swift
london.title = "London"
london.snippet = "Population: 8,174,100"
london.map = mapView
// Show marker
mapView.selectedMarker = london
// Hide marker
mapView.selectedMarker = nil
Objective-C
london.title = @"London";
london.snippet = @"Population: 8,174,100";
london.map = mapView;
// Show marker
mapView.selectedMarker = london;
// Hide marker
mapView.selectedMarker = nil;
Setting an info window to refresh automatically
Set tracksInfoWindowChanges on the
marker to YES or true if you want new properties or the content of the info
window to be immediately displayed when changed, rather than having to wait for
the info window to hide and then show again. The default is NO or false.
Swift
london.tracksInfoWindowChanges = true
Objective-C
london.tracksInfoWindowChanges = YES;
To decide when to set the
tracksInfoWindowChanges property, you
should weigh up performance considerations against the advantages of having the
info window redrawn automatically. For example:
- If you have a series of changes to make, you can change the property to
YESthen back toNO. - When an animation is running or the contents are being loaded asynchronously,
you should keep the property set to
YESuntil the actions are complete.
Refer also to the notes for consideration when
using the iconView property of the marker.
Changing the position of an info window
An info window is drawn oriented against the device's screen, centered
above its associated marker. You can alter the position of the info window
relative to the marker by setting the infoWindowAnchor property. This
property accepts a CGPoint, defined as an (x,y) offset where both x and y
range between 0.0 and 1.0. The default offset is (0.5, 0.0), that is, the center
top. Setting the infoWindowAnchor offset is useful for aligning the info
window against a custom icon.
Swift
london.infoWindowAnchor = CGPoint(x: 0.5, y: 0.5)
london.icon = UIImage(named: "house")
london.map = mapView
Objective-C
london.infoWindowAnchor = CGPointMake(0.5, 0.5);
london.icon = [UIImage imageNamed:@"house"];
london.map = mapView;
Handling events on info windows
You can listen to the following info window events:
mapView:markerInfoWindow:— Called when a marker is about to become selected. Can optionally return a custom info window, as aUIView, to use for the marker. See Custom info windows below for more information.mapView:markerInfoContents:— Called whenmapView:markerInfoWindowreturns nil.mapView:didCloseInfoWindowOfMarker:— Called when the marker's info window is closed.mapView:didLongPressInfoWindowOfMarker:— Called after a marker's info window has been long pressed.
To listen to events, you must implement the
GMSMapViewDelegate protocol. See the
guide to events and the list of methods on the
GMSMapViewDelegate.
GitHub includes samples that demonstrates how to handle info window events:
Custom info windows
Customize the contents of info windows by creating a subclass of
UIView
that defines the layout of the custom info window. In that subclass,
define the view however you'd like. For example, you can use custom
UILabel
instances to display title and snippet text and other views, such as
UIImageView
instances, to add images displayed in the info window.
Ensure that your ViewController implements the
GMSIndoorDisplayDelegate
protocol and defines a listener for the
mapView:markerInfoWindow:
event. This event listener is called when a marker is about to become
selected, and lets you return an instance of your custom UIView class to
define the custom info window used by the marker.
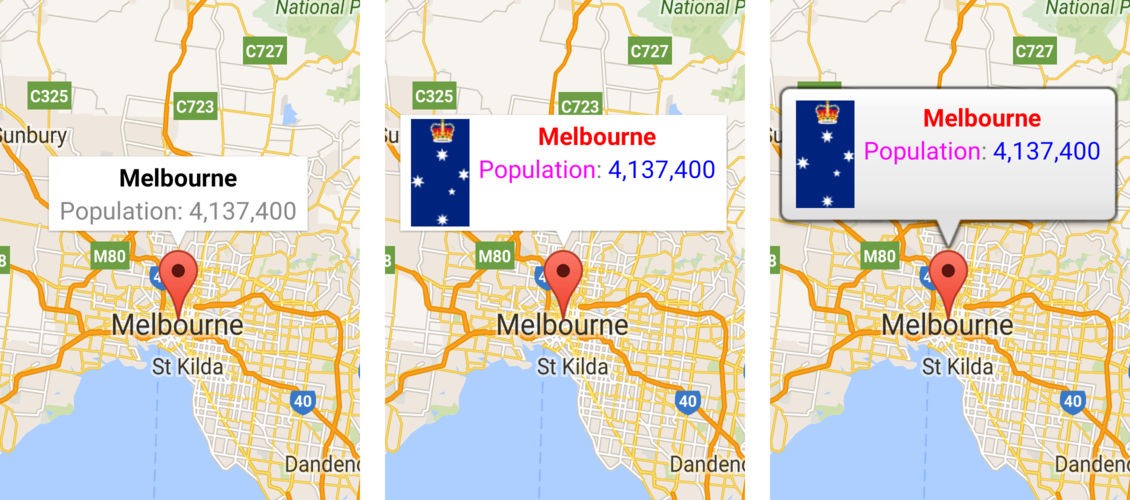
The images below show a default info window, an info window with customized contents, and an info window with customized frame and background.

The code samples on GitHub provided with the Maps SDK for iOS include samples of custom info windows. For example, see the definition of MarkerInfoWindowViewController.m (Objective-C) or MarkerInfoWindowViewController.swift (Swift).
See code samples for information on downloading and running these samples.
