
在地圖上選取目前位置並顯示相關詳細資料
本教學課程將示範如何建構 iOS 應用程式,以便擷取裝置目前位置、找出可能的地點、提示使用者選取最符合的地點,並為所選地點顯示地圖標記。
適合具備 Swift 或 Objective-C 初級或中級知識,且對 Xcode 有一般瞭解的使用者。如需建立地圖的進階指南,請參閱開發人員指南。
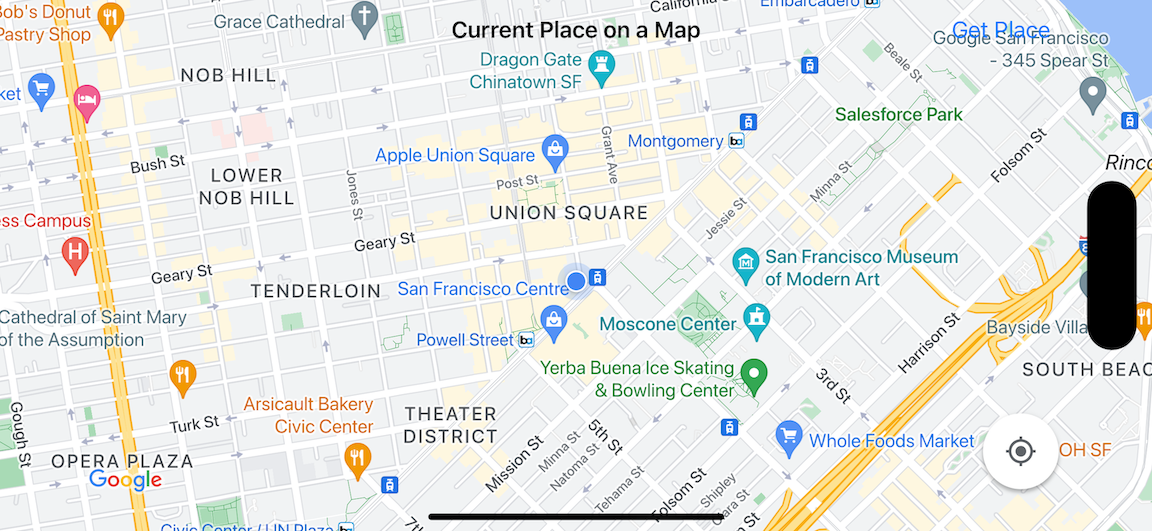
您將在本教學課程中建立下列地圖。地圖標記位於加州舊金山,但會移至裝置或模擬器所在位置。
本教學課程會使用 Places SDK for iOS、Maps SDK for iOS 和 Apple Core Location 架構。
取得程式碼
從 GitHub 複製或下載 Google 地圖 iOS 範例存放區。或者,您也可以點選下列按鈕下載原始碼:
MapViewController
Swift
import UIKit
import GoogleMaps
import GooglePlaces

class MapViewController: UIViewController {

  var locationManager: CLLocationManager!
  var currentLocation: CLLocation?
  var mapView: GMSMapView!
  var placesClient: GMSPlacesClient!
  var preciseLocationZoomLevel: Float = 15.0
  var approximateLocationZoomLevel: Float = 10.0

  // An array to hold the list of likely places.
  var likelyPlaces: [GMSPlace] = []

  // The currently selected place.
  var selectedPlace: GMSPlace?

  // Update the map once the user has made their selection.
  @IBAction func unwindToMain(segue: UIStoryboardSegue) {
    // Clear the map.
    mapView.clear()

    // Add a marker to the map.
    if let place = selectedPlace {
      let marker = GMSMarker(position: place.coordinate)
      marker.title = selectedPlace?.name
      marker.snippet = selectedPlace?.formattedAddress
      marker.map = mapView
    }

    listLikelyPlaces()
  }

  override func viewDidLoad() {
    super.viewDidLoad()

    // Initialize the location manager.
    locationManager = CLLocationManager()
    locationManager.desiredAccuracy = kCLLocationAccuracyBest
    locationManager.requestWhenInUseAuthorization()
    locationManager.distanceFilter = 50
    locationManager.startUpdatingLocation()
    locationManager.delegate = self

    placesClient = GMSPlacesClient.shared()

    // A default location to use when location permission is not granted.
    let defaultLocation = CLLocation(latitude: -33.869405, longitude: 151.199)

    // Create a map.
    let zoomLevel = locationManager.accuracyAuthorization == .fullAccuracy ? preciseLocationZoomLevel : approximateLocationZoomLevel
    let camera = GMSCameraPosition.camera(withLatitude: defaultLocation.coordinate.latitude,
                                          longitude: defaultLocation.coordinate.longitude,
                                          zoom: zoomLevel)
    mapView = GMSMapView.map(withFrame: view.bounds, camera: camera)
    mapView.settings.myLocationButton = true
    mapView.autoresizingMask = [.flexibleWidth, .flexibleHeight]
    mapView.isMyLocationEnabled = true

    // Add the map to the view, hide it until we've got a location update.
    view.addSubview(mapView)
    mapView.isHidden = true

    listLikelyPlaces()
  }

  // Populate the array with the list of likely places.
  func listLikelyPlaces() {
    // Clean up from previous sessions.
    likelyPlaces.removeAll()

    let placeFields: GMSPlaceField = [.name, .coordinate]
    placesClient.findPlaceLikelihoodsFromCurrentLocation(withPlaceFields: placeFields) { (placeLikelihoods, error) in
      guard error == nil else {
        // TODO: Handle the error.
        print("Current Place error: \(error!.localizedDescription)")
        return
      }

      guard let placeLikelihoods = placeLikelihoods else {
        print("No places found.")
        return
      }

      // Get likely places and add to the list.
      for likelihood in placeLikelihoods {
        let place = likelihood.place
        self.likelyPlaces.append(place)
      }
    }
  }

  // Prepare the segue.
  override func prepare(for segue: UIStoryboardSegue, sender: Any?) {
    if segue.identifier == "segueToSelect" {
      if let nextViewController = segue.destination as? PlacesViewController {
        nextViewController.likelyPlaces = likelyPlaces
      }
    }
  }
}

// Delegates to handle events for the location manager.
extension MapViewController: CLLocationManagerDelegate {

  // Handle incoming location events.
  func locationManager(_ manager: CLLocationManager, didUpdateLocations locations: [CLLocation]) {
    let location: CLLocation = locations.last!
    print("Location: \(location)")

    let zoomLevel = locationManager.accuracyAuthorization == .fullAccuracy ? preciseLocationZoomLevel : approximateLocationZoomLevel
    let camera = GMSCameraPosition.camera(withLatitude: location.coordinate.latitude,
                                          longitude: location.coordinate.longitude,
                                          zoom: zoomLevel)

    if mapView.isHidden {
      mapView.isHidden = false
      mapView.camera = camera
    } else {
      mapView.animate(to: camera)
    }

    listLikelyPlaces()
  }

  // Handle authorization for the location manager.
  func locationManager(_ manager: CLLocationManager, didChangeAuthorization status: CLAuthorizationStatus) {
    // Check accuracy authorization
    let accuracy = manager.accuracyAuthorization
    switch accuracy {
    case .fullAccuracy:
        print("Location accuracy is precise.")
    case .reducedAccuracy:
        print("Location accuracy is not precise.")
    @unknown default:
      fatalError()
    }

    // Handle authorization status
    switch status {
    case .restricted:
      print("Location access was restricted.")
    case .denied:
      print("User denied access to location.")
      // Display the map using the default location.
      mapView.isHidden = false
    case .notDetermined:
      print("Location status not determined.")
    case .authorizedAlways: fallthrough
    case .authorizedWhenInUse:
      print("Location status is OK.")
    @unknown default:
      fatalError()
    }
  }

  // Handle location manager errors.
  func locationManager(_ manager: CLLocationManager, didFailWithError error: Error) {
    locationManager.stopUpdatingLocation()
    print("Error: \(error)")
  }
}
Objective-C
#import "MapViewController.h"
#import "PlacesViewController.h"
@import CoreLocation;
@import GooglePlaces;
@import GoogleMaps;

@interface MapViewController () <CLLocationManagerDelegate>

@end

@implementation MapViewController {
  CLLocationManager *locationManager;
  CLLocation * _Nullable currentLocation;
  GMSMapView *mapView;
  GMSPlacesClient *placesClient;
  float preciseLocationZoomLevel;
  float approximateLocationZoomLevel;

  // An array to hold the list of likely places.
  NSMutableArray<GMSPlace *> *likelyPlaces;

  // The currently selected place.
  GMSPlace * _Nullable selectedPlace;
}

- (void)viewDidLoad {
  [super viewDidLoad];
  preciseLocationZoomLevel = 15.0;
  approximateLocationZoomLevel = 15.0;

  // Initialize the location manager.
  locationManager = [[CLLocationManager alloc] init];
  locationManager.desiredAccuracy = kCLLocationAccuracyBest;
  [locationManager requestWhenInUseAuthorization];
  locationManager.distanceFilter = 50;
  [locationManager startUpdatingLocation];
  locationManager.delegate = self;

  placesClient = [GMSPlacesClient sharedClient];

  // A default location to use when location permission is not granted.
  CLLocationCoordinate2D defaultLocation = CLLocationCoordinate2DMake(-33.869405, 151.199);

  // Create a map.
  float zoomLevel = locationManager.accuracyAuthorization == CLAccuracyAuthorizationFullAccuracy ? preciseLocationZoomLevel : approximateLocationZoomLevel;
  GMSCameraPosition *camera = [GMSCameraPosition cameraWithLatitude:defaultLocation.latitude
                                                          longitude:defaultLocation.longitude
                                                               zoom:zoomLevel];
  mapView = [GMSMapView mapWithFrame:self.view.bounds camera:camera];
  mapView.settings.myLocationButton = YES;
  mapView.autoresizingMask = UIViewAutoresizingFlexibleWidth | UIViewAutoresizingFlexibleHeight;
  mapView.myLocationEnabled = YES;

  // Add the map to the view, hide it until we've got a location update.
  [self.view addSubview:mapView];
  mapView.hidden = YES;

  [self listLikelyPlaces];
}

// Populate the array with the list of likely places.
- (void) listLikelyPlaces
{
  // Clean up from previous sessions.
  likelyPlaces = [NSMutableArray array];

  GMSPlaceField placeFields = GMSPlaceFieldName | GMSPlaceFieldCoordinate;
  [placesClient findPlaceLikelihoodsFromCurrentLocationWithPlaceFields:placeFields callback:^(NSArray<GMSPlaceLikelihood *> * _Nullable likelihoods, NSError * _Nullable error) {
    if (error != nil) {
      // TODO: Handle the error.
      NSLog(@"Current Place error: %@", error.localizedDescription);
      return;
    }

    if (likelihoods == nil) {
      NSLog(@"No places found.");
      return;
    }

    for (GMSPlaceLikelihood *likelihood in likelihoods) {
      GMSPlace *place = likelihood.place;
      [likelyPlaces addObject:place];
    }
  }];
}

// Update the map once the user has made their selection.
- (void) unwindToMain:(UIStoryboardSegue *)segue
{
  // Clear the map.
  [mapView clear];

  // Add a marker to the map.
  if (selectedPlace != nil) {
    GMSMarker *marker = [GMSMarker markerWithPosition:selectedPlace.coordinate];
    marker.title = selectedPlace.name;
    marker.snippet = selectedPlace.formattedAddress;
    marker.map = mapView;
  }

  [self listLikelyPlaces];
}

// Prepare the segue.
- (void)prepareForSegue:(UIStoryboardSegue *)segue sender:(id)sender
{
  if ([segue.identifier isEqualToString:@"segueToSelect"]) {
    if ([segue.destinationViewController isKindOfClass:[PlacesViewController class]]) {
      PlacesViewController *placesViewController = (PlacesViewController *)segue.destinationViewController;
      placesViewController.likelyPlaces = likelyPlaces;
    }
  }
}

// Delegates to handle events for the location manager.
#pragma mark - CLLocationManagerDelegate

// Handle incoming location events.
- (void)locationManager:(CLLocationManager *)manager didUpdateLocations:(NSArray<CLLocation *> *)locations
{
  CLLocation *location = locations.lastObject;
  NSLog(@"Location: %@", location);

  float zoomLevel = locationManager.accuracyAuthorization == CLAccuracyAuthorizationFullAccuracy ? preciseLocationZoomLevel : approximateLocationZoomLevel;
  GMSCameraPosition * camera = [GMSCameraPosition cameraWithLatitude:location.coordinate.latitude
                                                           longitude:location.coordinate.longitude
                                                                zoom:zoomLevel];

  if (mapView.isHidden) {
    mapView.hidden = NO;
    mapView.camera = camera;
  } else {
    [mapView animateToCameraPosition:camera];
  }

  [self listLikelyPlaces];
}

// Handle authorization for the location manager.
- (void)locationManager:(CLLocationManager *)manager didChangeAuthorizationStatus:(CLAuthorizationStatus)status
{
  // Check accuracy authorization
  CLAccuracyAuthorization accuracy = manager.accuracyAuthorization;
  switch (accuracy) {
    case CLAccuracyAuthorizationFullAccuracy:
      NSLog(@"Location accuracy is precise.");
      break;
    case CLAccuracyAuthorizationReducedAccuracy:
      NSLog(@"Location accuracy is not precise.");
      break;
  }

  // Handle authorization status
  switch (status) {
    case kCLAuthorizationStatusRestricted:
      NSLog(@"Location access was restricted.");
      break;
    case kCLAuthorizationStatusDenied:
      NSLog(@"User denied access to location.");
      // Display the map using the default location.
      mapView.hidden = NO;
    case kCLAuthorizationStatusNotDetermined:
      NSLog(@"Location status not determined.");
    case kCLAuthorizationStatusAuthorizedAlways:
    case kCLAuthorizationStatusAuthorizedWhenInUse:
      NSLog(@"Location status is OK.");
  }
}

// Handle location manager errors.
- (void)locationManager:(CLLocationManager *)manager didFailWithError:(NSError *)error
{
  [manager stopUpdatingLocation];
  NSLog(@"Error: %@", error.localizedDescription);
}

@end
PlacesViewController
Swift
import UIKit
import GooglePlaces

class PlacesViewController: UIViewController {

  // ...

  // Pass the selected place to the new view controller.
  override func prepare(for segue: UIStoryboardSegue, sender: Any?) {
    if segue.identifier == "unwindToMain" {
      if let nextViewController = segue.destination as? MapViewController {
        nextViewController.selectedPlace = selectedPlace
      }
    }
  }
}

// Respond when a user selects a place.
extension PlacesViewController: UITableViewDelegate {
  func tableView(_ tableView: UITableView, didSelectRowAt indexPath: IndexPath) {
    selectedPlace = likelyPlaces[indexPath.row]
    performSegue(withIdentifier: "unwindToMain", sender: self)
  }

  // Adjust cell height to only show the first five items in the table
  // (scrolling is disabled in IB).
  func tableView(_ tableView: UITableView, heightForRowAt indexPath: IndexPath) -> CGFloat {
    return self.tableView.frame.size.height/5
  }

  // Make table rows display at proper height if there are less than 5 items.
  func tableView(_ tableView: UITableView, heightForFooterInSection section: Int) -> CGFloat {
    if (section == tableView.numberOfSections - 1) {
      return 1
    }
    return 0
  }
}

// Populate the table with the list of most likely places.
extension PlacesViewController: UITableViewDataSource {
  func tableView(_ tableView: UITableView, numberOfRowsInSection section: Int) -> Int {
    return likelyPlaces.count
  }

  func tableView(_ tableView: UITableView, cellForRowAt indexPath: IndexPath) -> UITableViewCell {
    let cell = tableView.dequeueReusableCell(withIdentifier: cellReuseIdentifier, for: indexPath)
    let collectionItem = likelyPlaces[indexPath.row]

    cell.textLabel?.text = collectionItem.name

    return cell
  }
}
Objective-C
#import "PlacesViewController.h"

@interface PlacesViewController () <UITableViewDataSource, UITableViewDelegate>
// ...

-(void)prepareForSegue:(UIStoryboardSegue *)segue sender:(id)sender
{

}

#pragma mark - UITableViewDelegate

// Respond when a user selects a place.
-(void)tableView:(UITableView *)tableView didSelectRowAtIndexPath:(NSIndexPath *)indexPath
{
  self.selectedPlace = [self.likelyPlaces objectAtIndex:indexPath.row];
  [self performSegueWithIdentifier:@"unwindToMain" sender:self];
}

// Adjust cell height to only show the first five items in the table
// (scrolling is disabled in IB).
-(CGFloat)tableView:(UITableView *)tableView heightForRowAtIndexPath:(NSIndexPath *)indexPath
{
  return self.tableView.frame.size.height/5;
}

// Make table rows display at proper height if there are less than 5 items.
-(CGFloat)tableView:(UITableView *)tableView heightForFooterInSection:(NSInteger)section
{
  if (section == tableView.numberOfSections - 1) {
    return 1;
  }
  return 0;
}

#pragma mark - UITableViewDataSource

- (NSInteger)tableView:(UITableView *)tableView numberOfRowsInSection:(NSInteger)section
{
  return self.likelyPlaces.count;
}

- (UITableViewCell *)tableView:(UITableView *)tableView cellForRowAtIndexPath:(NSIndexPath *)indexPath
{
  return [tableView dequeueReusableCellWithIdentifier:cellReuseIdentifier forIndexPath:indexPath];
}
@end
開始使用
Swift Package Manager
您可以使用 Swift Package Manager 安裝 Maps SDK for iOS。
- 移除所有現有的 Maps SDK for iOS 依附元件。
- 開啟終端機視窗,然後前往
tutorials/current-place-on-map目錄。 -
關閉 Xcode 工作區,然後執行下列指令:
        sudo gem install cocoapods-deintegrate cocoapods-clean
        pod deintegrate
        pod cache clean --all
        rm Podfile
        rm current-place-on-map.xcworkspace
- 開啟 Xcode 專案並刪除 podfile。
- 新增 Places 和 Maps SDK:
- 依序前往「File」>「Add Package Dependencies」。
- 輸入 https://github.com/googlemaps/ios-places-sdk 做為網址,按 Enter 鍵拉取套件,然後按一下「Add Package」(新增套件)。
- 輸入 https://github.com/googlemaps/ios-maps-sdk 做為網址,按 Enter 鍵拉入套件,然後按一下「Add Package」(新增套件)。
- 您可能需要使用「File」>「Packages」>「Reset Package Cache」重設套件快取。
使用 CocoaPods
- 下載並安裝 Xcode 26.0 版以上版本。
- 如果您還沒有 CocoaPods,請在終端機上執行下列指令,即可在 macOS 中安裝這項工具:
sudo gem install cocoapods
- 前往
tutorials/current-place-on-map目錄。 - 執行
pod install指令。此動作會安裝Podfile中指定的 Maps 和 Places SDK,以及所有依附元件。 - 執行
pod outdated,比較已安裝的 Pod 版本與任何新更新。如果系統偵測到新版本,請執行pod update更新Podfile,並安裝最新版 SDK。詳情請參閱 CocoaPods 指南。 - 按兩下專案的 current-place-on-map.xcworkspace 檔案,在 Xcode 中開啟專案。您必須使用
.xcworkspace檔案開啟專案。
取得 API 金鑰並啟用必要的 API
如想完成本教學課程,您必須取得獲授權使用 Maps SDK for iOS 和 Places API 的 Google API 金鑰。
- 請按照「開始使用 Google 地圖平台」的說明,設定帳單帳戶和啟用這兩項產品的專案。
- 按照「取得 API 金鑰」一文中的操作說明,為先前設定的開發專案建立 API 金鑰。
Add the API key to your application
將 API 金鑰新增到您的 AppDelegate.swift 中,如下所示:
- 請注意,下列匯入陳述式已加進檔案:
import GooglePlaces
import GoogleMaps
- 編輯
application(_:didFinishLaunchingWithOptions:)方法中的下列程式碼行,並以您的 API 金鑰取代「YOUR_API_KEY」YOUR_API_KEY:GMSPlacesClient.provideAPIKey("YOUR_API_KEY") GMSServices.provideAPIKey("YOUR_API_KEY")
建構並執行應用程式
- 將 iOS 裝置連線至電腦,或從 Xcode 方案選單選取模擬器。
- 如果使用裝置,請確認已啟用定位服務。 如果使用模擬器,請從「功能」選單中選取位置。
- 在 Xcode 中,按一下「Product/Run」選單選項 (或播放按鈕圖示)。
- Xcode 會建構應用程式,然後在裝置或模擬器上執行應用程式。
- 您應該會看到一份地圖,上面有數個以您目前位置為中心的標記。
疑難排解:
- 如未看到地圖,請檢查您是否已按照上述步驟,取得 API 金鑰並加入應用程式。檢查 Xcode 的偵錯控制台,看看是否有關於 API 金鑰的錯誤訊息。
- 如果您使用 iOS 軟體包 ID 限制 API 金鑰,請編輯金鑰,加入應用程式的軟體包 ID:
com.google.examples.current-place-on-map。 - 如果拒絕定位服務的權限要求,地圖就不會正常顯示。
- 如果使用裝置,請依序前往「設定」/「一般」/「隱私權」/「定位服務」,然後重新啟用定位服務。
- 如果使用模擬器,請前往「Simulator/Reset Content and Settings...」
- 確認 Wi-Fi 或 GPS 連線品質良好。
- 如果應用程式已啟動,但未顯示地圖,請確認您已使用適當的位置權限更新專案的 Info.plist。如要進一步瞭解如何處理權限,請參閱下方「在應用程式中要求位置存取權」指南。
- 使用 Xcode 偵錯工具查看記錄檔並為應用程式偵錯。
瞭解程式碼
本教學課程這一段將說明 current-place-on-map 應用程式最重要的部分,協助您瞭解如何建構類似的應用程式。
current-place-on-map 應用程式包含兩個檢視畫面控制器:一個用於顯示地圖,當中會顯示使用者選取的地點;另一個則會向使用者顯示可能的地點清單,供使用者選擇。請注意,每個檢視區塊控制器都有相同的變數,用於追蹤可能地點的清單 (likelyPlaces),以及指出使用者的選取項目 (selectedPlace)。檢視區塊之間的導覽是透過轉場完成。
要求位置存取權
應用程式必須提示使用者同意使用定位服務。如要這麼做,請在應用程式的 Info.plist 檔案中加入 NSLocationAlwaysUsageDescription 鍵,並將每個鍵的值設為說明應用程式打算如何使用位置資料的字串。
設定位置管理工具
使用 CLLocationManager 找出裝置目前的位置,並在裝置移動到新位置時要求定期更新。本教學課程會提供取得裝置位置的程式碼。詳情請參閱 Apple 開發人員說明文件中的「取得使用者位置資訊」指南。
- 在類別層級宣告位置管理工具、目前位置、地圖檢視畫面、地點用戶端和預設縮放等級。
- 在
viewDidLoad()中初始化位置資訊管理工具和GMSPlacesClient。 - 宣告變數,以保留可能的地點清單和使用者選取的地點。
- 使用擴充子句,新增委派項目來處理位置管理工具的事件。
Swift
var locationManager: CLLocationManager!
var currentLocation: CLLocation?
var mapView: GMSMapView!
var placesClient: GMSPlacesClient!
var preciseLocationZoomLevel: Float = 15.0
var approximateLocationZoomLevel: Float = 10.0
Objective-C
CLLocationManager *locationManager;
CLLocation * _Nullable currentLocation;
GMSMapView *mapView;
GMSPlacesClient *placesClient;
float preciseLocationZoomLevel;
float approximateLocationZoomLevel;
Swift
// Initialize the location manager.
locationManager = CLLocationManager()
locationManager.desiredAccuracy = kCLLocationAccuracyBest
locationManager.requestWhenInUseAuthorization()
locationManager.distanceFilter = 50
locationManager.startUpdatingLocation()
locationManager.delegate = self

placesClient = GMSPlacesClient.shared()
Objective-C
// Initialize the location manager.
locationManager = [[CLLocationManager alloc] init];
locationManager.desiredAccuracy = kCLLocationAccuracyBest;
[locationManager requestWhenInUseAuthorization];
locationManager.distanceFilter = 50;
[locationManager startUpdatingLocation];
locationManager.delegate = self;

placesClient = [GMSPlacesClient sharedClient];
Swift
// An array to hold the list of likely places.
var likelyPlaces: [GMSPlace] = []

// The currently selected place.
var selectedPlace: GMSPlace?
Objective-C
// An array to hold the list of likely places.
NSMutableArray<GMSPlace *> *likelyPlaces;

// The currently selected place.
GMSPlace * _Nullable selectedPlace;
Swift
// Delegates to handle events for the location manager.
extension MapViewController: CLLocationManagerDelegate {

  // Handle incoming location events.
  func locationManager(_ manager: CLLocationManager, didUpdateLocations locations: [CLLocation]) {
    let location: CLLocation = locations.last!
    print("Location: \(location)")

    let zoomLevel = locationManager.accuracyAuthorization == .fullAccuracy ? preciseLocationZoomLevel : approximateLocationZoomLevel
    let camera = GMSCameraPosition.camera(withLatitude: location.coordinate.latitude,
                                          longitude: location.coordinate.longitude,
                                          zoom: zoomLevel)

    if mapView.isHidden {
      mapView.isHidden = false
      mapView.camera = camera
    } else {
      mapView.animate(to: camera)
    }

    listLikelyPlaces()
  }

  // Handle authorization for the location manager.
  func locationManager(_ manager: CLLocationManager, didChangeAuthorization status: CLAuthorizationStatus) {
    // Check accuracy authorization
    let accuracy = manager.accuracyAuthorization
    switch accuracy {
    case .fullAccuracy:
        print("Location accuracy is precise.")
    case .reducedAccuracy:
        print("Location accuracy is not precise.")
    @unknown default:
      fatalError()
    }

    // Handle authorization status
    switch status {
    case .restricted:
      print("Location access was restricted.")
    case .denied:
      print("User denied access to location.")
      // Display the map using the default location.
      mapView.isHidden = false
    case .notDetermined:
      print("Location status not determined.")
    case .authorizedAlways: fallthrough
    case .authorizedWhenInUse:
      print("Location status is OK.")
    @unknown default:
      fatalError()
    }
  }

  // Handle location manager errors.
  func locationManager(_ manager: CLLocationManager, didFailWithError error: Error) {
    locationManager.stopUpdatingLocation()
    print("Error: \(error)")
  }
}
Objective-C
// Delegates to handle events for the location manager.
#pragma mark - CLLocationManagerDelegate

// Handle incoming location events.
- (void)locationManager:(CLLocationManager *)manager didUpdateLocations:(NSArray<CLLocation *> *)locations
{
  CLLocation *location = locations.lastObject;
  NSLog(@"Location: %@", location);

  float zoomLevel = locationManager.accuracyAuthorization == CLAccuracyAuthorizationFullAccuracy ? preciseLocationZoomLevel : approximateLocationZoomLevel;
  GMSCameraPosition * camera = [GMSCameraPosition cameraWithLatitude:location.coordinate.latitude
                                                           longitude:location.coordinate.longitude
                                                                zoom:zoomLevel];

  if (mapView.isHidden) {
    mapView.hidden = NO;
    mapView.camera = camera;
  } else {
    [mapView animateToCameraPosition:camera];
  }

  [self listLikelyPlaces];
}

// Handle authorization for the location manager.
- (void)locationManager:(CLLocationManager *)manager didChangeAuthorizationStatus:(CLAuthorizationStatus)status
{
  // Check accuracy authorization
  CLAccuracyAuthorization accuracy = manager.accuracyAuthorization;
  switch (accuracy) {
    case CLAccuracyAuthorizationFullAccuracy:
      NSLog(@"Location accuracy is precise.");
      break;
    case CLAccuracyAuthorizationReducedAccuracy:
      NSLog(@"Location accuracy is not precise.");
      break;
  }

  // Handle authorization status
  switch (status) {
    case kCLAuthorizationStatusRestricted:
      NSLog(@"Location access was restricted.");
      break;
    case kCLAuthorizationStatusDenied:
      NSLog(@"User denied access to location.");
      // Display the map using the default location.
      mapView.hidden = NO;
    case kCLAuthorizationStatusNotDetermined:
      NSLog(@"Location status not determined.");
    case kCLAuthorizationStatusAuthorizedAlways:
    case kCLAuthorizationStatusAuthorizedWhenInUse:
      NSLog(@"Location status is OK.");
  }
}

// Handle location manager errors.
- (void)locationManager:(CLLocationManager *)manager didFailWithError:(NSError *)error
{
  [manager stopUpdatingLocation];
  NSLog(@"Error: %@", error.localizedDescription);
}
新增地圖
建立地圖,並在主要檢視畫面控制器中,將地圖新增至 viewDidLoad() 的檢視畫面。地圖會保持隱藏狀態,直到收到位置更新資訊為止
(位置更新資訊會在擴充功能中處理)。CLLocationManagerDelegate
Swift
// A default location to use when location permission is not granted.
let defaultLocation = CLLocation(latitude: -33.869405, longitude: 151.199)

// Create a map.
let zoomLevel = locationManager.accuracyAuthorization == .fullAccuracy ? preciseLocationZoomLevel : approximateLocationZoomLevel
let camera = GMSCameraPosition.camera(withLatitude: defaultLocation.coordinate.latitude,
                                      longitude: defaultLocation.coordinate.longitude,
                                      zoom: zoomLevel)
mapView = GMSMapView.map(withFrame: view.bounds, camera: camera)
mapView.settings.myLocationButton = true
mapView.autoresizingMask = [.flexibleWidth, .flexibleHeight]
mapView.isMyLocationEnabled = true

// Add the map to the view, hide it until we've got a location update.
view.addSubview(mapView)
mapView.isHidden = true
Objective-C
// A default location to use when location permission is not granted.
CLLocationCoordinate2D defaultLocation = CLLocationCoordinate2DMake(-33.869405, 151.199);

// Create a map.
float zoomLevel = locationManager.accuracyAuthorization == CLAccuracyAuthorizationFullAccuracy ? preciseLocationZoomLevel : approximateLocationZoomLevel;
GMSCameraPosition *camera = [GMSCameraPosition cameraWithLatitude:defaultLocation.latitude
                                                        longitude:defaultLocation.longitude
                                                             zoom:zoomLevel];
mapView = [GMSMapView mapWithFrame:self.view.bounds camera:camera];
mapView.settings.myLocationButton = YES;
mapView.autoresizingMask = UIViewAutoresizingFlexibleWidth | UIViewAutoresizingFlexibleHeight;
mapView.myLocationEnabled = YES;

// Add the map to the view, hide it until we've got a location update.
[self.view addSubview:mapView];
mapView.hidden = YES;
提示使用者選取目前所在位置
使用 Places SDK for iOS 取得根據使用者目前位置判斷的前五個可能地點,並在 UITableView 中顯示清單。使用者選取地點時,在地圖上新增標記。
- 取得可能的地點清單,以填入
UITableView,使用者可從中選取所在位置。 - 開啟新視窗,向使用者顯示可能的地點。使用者輕觸「取得地點」時,我們會切換到新檢視畫面,並向使用者顯示可供選擇的地點清單。
prepare函式會使用目前可能的地點清單更新PlacesViewController,並在執行 Segue 時自動呼叫。 - 在
PlacesViewController中,使用最有可能的地點清單填入表格,並使用UITableViewDataSource委派擴充功能。 - 使用
UITableViewDelegate委派擴充功能處理使用者的選項。
Swift
// Populate the array with the list of likely places.
func listLikelyPlaces() {
  // Clean up from previous sessions.
  likelyPlaces.removeAll()

  let placeFields: GMSPlaceField = [.name, .coordinate]
  placesClient.findPlaceLikelihoodsFromCurrentLocation(withPlaceFields: placeFields) { (placeLikelihoods, error) in
    guard error == nil else {
      // TODO: Handle the error.
      print("Current Place error: \(error!.localizedDescription)")
      return
    }

    guard let placeLikelihoods = placeLikelihoods else {
      print("No places found.")
      return
    }

    // Get likely places and add to the list.
    for likelihood in placeLikelihoods {
      let place = likelihood.place
      self.likelyPlaces.append(place)
    }
  }
}
Objective-C
// Populate the array with the list of likely places.
- (void) listLikelyPlaces
{
  // Clean up from previous sessions.
  likelyPlaces = [NSMutableArray array];

  GMSPlaceField placeFields = GMSPlaceFieldName | GMSPlaceFieldCoordinate;
  [placesClient findPlaceLikelihoodsFromCurrentLocationWithPlaceFields:placeFields callback:^(NSArray<GMSPlaceLikelihood *> * _Nullable likelihoods, NSError * _Nullable error) {
    if (error != nil) {
      // TODO: Handle the error.
      NSLog(@"Current Place error: %@", error.localizedDescription);
      return;
    }

    if (likelihoods == nil) {
      NSLog(@"No places found.");
      return;
    }

    for (GMSPlaceLikelihood *likelihood in likelihoods) {
      GMSPlace *place = likelihood.place;
      [likelyPlaces addObject:place];
    }
  }];
}
Swift
// Prepare the segue.
override func prepare(for segue: UIStoryboardSegue, sender: Any?) {
  if segue.identifier == "segueToSelect" {
    if let nextViewController = segue.destination as? PlacesViewController {
      nextViewController.likelyPlaces = likelyPlaces
    }
  }
}
Objective-C
// Prepare the segue.
- (void)prepareForSegue:(UIStoryboardSegue *)segue sender:(id)sender
{
  if ([segue.identifier isEqualToString:@"segueToSelect"]) {
    if ([segue.destinationViewController isKindOfClass:[PlacesViewController class]]) {
      PlacesViewController *placesViewController = (PlacesViewController *)segue.destinationViewController;
      placesViewController.likelyPlaces = likelyPlaces;
    }
  }
}
Swift
// Populate the table with the list of most likely places.
extension PlacesViewController: UITableViewDataSource {
  func tableView(_ tableView: UITableView, numberOfRowsInSection section: Int) -> Int {
    return likelyPlaces.count
  }

  func tableView(_ tableView: UITableView, cellForRowAt indexPath: IndexPath) -> UITableViewCell {
    let cell = tableView.dequeueReusableCell(withIdentifier: cellReuseIdentifier, for: indexPath)
    let collectionItem = likelyPlaces[indexPath.row]

    cell.textLabel?.text = collectionItem.name

    return cell
  }
}
Objective-C
#pragma mark - UITableViewDataSource

- (NSInteger)tableView:(UITableView *)tableView numberOfRowsInSection:(NSInteger)section
{
  return self.likelyPlaces.count;
}

- (UITableViewCell *)tableView:(UITableView *)tableView cellForRowAtIndexPath:(NSIndexPath *)indexPath
{
  return [tableView dequeueReusableCellWithIdentifier:cellReuseIdentifier forIndexPath:indexPath];
}
@end
Swift
class PlacesViewController: UIViewController {

  // ...

  // Pass the selected place to the new view controller.
  override func prepare(for segue: UIStoryboardSegue, sender: Any?) {
    if segue.identifier == "unwindToMain" {
      if let nextViewController = segue.destination as? MapViewController {
        nextViewController.selectedPlace = selectedPlace
      }
    }
  }
}

// Respond when a user selects a place.
extension PlacesViewController: UITableViewDelegate {
  func tableView(_ tableView: UITableView, didSelectRowAt indexPath: IndexPath) {
    selectedPlace = likelyPlaces[indexPath.row]
    performSegue(withIdentifier: "unwindToMain", sender: self)
  }

  // Adjust cell height to only show the first five items in the table
  // (scrolling is disabled in IB).
  func tableView(_ tableView: UITableView, heightForRowAt indexPath: IndexPath) -> CGFloat {
    return self.tableView.frame.size.height/5
  }

  // Make table rows display at proper height if there are less than 5 items.
  func tableView(_ tableView: UITableView, heightForFooterInSection section: Int) -> CGFloat {
    if (section == tableView.numberOfSections - 1) {
      return 1
    }
    return 0
  }
}
Objective-C
@interface PlacesViewController () <UITableViewDataSource, UITableViewDelegate>
// ...

-(void)prepareForSegue:(UIStoryboardSegue *)segue sender:(id)sender
{

}

#pragma mark - UITableViewDelegate

// Respond when a user selects a place.
-(void)tableView:(UITableView *)tableView didSelectRowAtIndexPath:(NSIndexPath *)indexPath
{
  self.selectedPlace = [self.likelyPlaces objectAtIndex:indexPath.row];
  [self performSegueWithIdentifier:@"unwindToMain" sender:self];
}

// Adjust cell height to only show the first five items in the table
// (scrolling is disabled in IB).
-(CGFloat)tableView:(UITableView *)tableView heightForRowAtIndexPath:(NSIndexPath *)indexPath
{
  return self.tableView.frame.size.height/5;
}

// Make table rows display at proper height if there are less than 5 items.
-(CGFloat)tableView:(UITableView *)tableView heightForFooterInSection:(NSInteger)section
{
  if (section == tableView.numberOfSections - 1) {
    return 1;
  }
  return 0;
}
在地圖上新增標記
使用者選取後,請使用 unwind segue 返回上一個檢視畫面,並在地圖上新增標記。返回主要檢視控制器時,系統會自動呼叫 unwindToMain
IBAction。
Swift
// Update the map once the user has made their selection.
@IBAction func unwindToMain(segue: UIStoryboardSegue) {
  // Clear the map.
  mapView.clear()

  // Add a marker to the map.
  if let place = selectedPlace {
    let marker = GMSMarker(position: place.coordinate)
    marker.title = selectedPlace?.name
    marker.snippet = selectedPlace?.formattedAddress
    marker.map = mapView
  }

  listLikelyPlaces()
}
Objective-C
// Update the map once the user has made their selection.
- (void) unwindToMain:(UIStoryboardSegue *)segue
{
  // Clear the map.
  [mapView clear];

  // Add a marker to the map.
  if (selectedPlace != nil) {
    GMSMarker *marker = [GMSMarker markerWithPosition:selectedPlace.coordinate];
    marker.title = selectedPlace.name;
    marker.snippet = selectedPlace.formattedAddress;
    marker.map = mapView;
  }

  [self listLikelyPlaces];
}
恭喜!您已建構 iOS 應用程式,可讓使用者選擇目前所在位置,並在 Google 地圖上顯示結果。在此過程中,您已學會如何使用 Places SDK for iOS、Maps SDK for iOS 和 Apple Core Location 架構。