
বর্তমান স্থান নির্বাচন করুন এবং মানচিত্রে বিস্তারিত বিবরণ দেখুন
এই টিউটোরিয়ালে এমন একটি iOS অ্যাপ তৈরি করা দেখানো হয়েছে, যা ডিভাইসের বর্তমান অবস্থান সংগ্রহ করে, সম্ভাব্য অবস্থানগুলো শনাক্ত করে, ব্যবহারকারীকে সেরা মিলটি বেছে নিতে বলে এবং নির্বাচিত অবস্থানের জন্য একটি ম্যাপ মার্কার প্রদর্শন করে।
যাদের সুইফট বা অবজেক্টিভ-সি-তে প্রাথমিক বা মধ্যম মানের জ্ঞান এবং এক্সকোড সম্পর্কে সাধারণ ধারণা আছে, তাদের জন্য এটি উপযুক্ত। ম্যাপ তৈরির একটি উন্নত নির্দেশিকার জন্য, ডেভেলপারদের নির্দেশিকাটি পড়ুন।
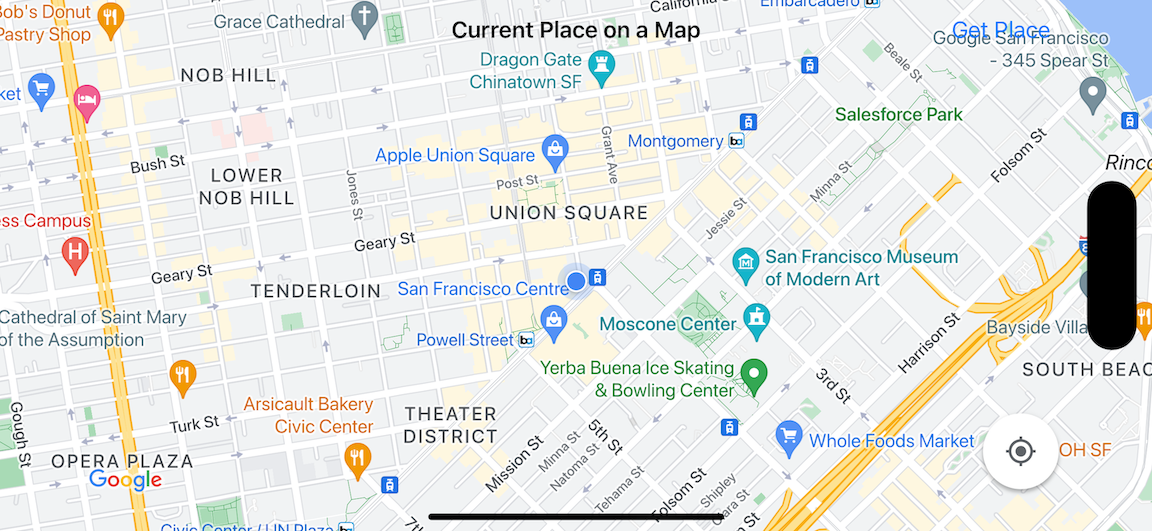
এই টিউটোরিয়ালটি ব্যবহার করে আপনি নিম্নলিখিত মানচিত্রটি তৈরি করবেন। মানচিত্রের মার্কারটি ক্যালিফোর্নিয়ার সান ফ্রান্সিসকোতে অবস্থিত, কিন্তু ডিভাইস বা সিমুলেটর যেখানেই থাকুক না কেন, এটি সেখানে চলে যাবে।
এই টিউটোরিয়ালটিতে iOS-এর জন্য Places SDK , iOS-এর জন্য Maps SDK এবং Apple Core Location ফ্রেমওয়ার্ক ব্যবহার করা হয়েছে।
কোডটি নিন
গিটহাব থেকে গুগল ম্যাপস আইওএস স্যাম্পল রিপোজিটরি ক্লোন বা ডাউনলোড করুন।বিকল্পভাবে, সোর্স কোড ডাউনলোড করতে নিচের বাটনটিতে ক্লিক করুন:
ম্যাপভিউকন্ট্রোলার
সুইফট
import UIKit
import GoogleMaps
import GooglePlaces

class MapViewController: UIViewController {

  var locationManager: CLLocationManager!
  var currentLocation: CLLocation?
  var mapView: GMSMapView!
  var placesClient: GMSPlacesClient!
  var preciseLocationZoomLevel: Float = 15.0
  var approximateLocationZoomLevel: Float = 10.0

  // An array to hold the list of likely places.
  var likelyPlaces: [GMSPlace] = []

  // The currently selected place.
  var selectedPlace: GMSPlace?

  // Update the map once the user has made their selection.
  @IBAction func unwindToMain(segue: UIStoryboardSegue) {
    // Clear the map.
    mapView.clear()

    // Add a marker to the map.
    if let place = selectedPlace {
      let marker = GMSMarker(position: place.coordinate)
      marker.title = selectedPlace?.name
      marker.snippet = selectedPlace?.formattedAddress
      marker.map = mapView
    }

    listLikelyPlaces()
  }

  override func viewDidLoad() {
    super.viewDidLoad()

    // Initialize the location manager.
    locationManager = CLLocationManager()
    locationManager.desiredAccuracy = kCLLocationAccuracyBest
    locationManager.requestWhenInUseAuthorization()
    locationManager.distanceFilter = 50
    locationManager.startUpdatingLocation()
    locationManager.delegate = self

    placesClient = GMSPlacesClient.shared()

    // A default location to use when location permission is not granted.
    let defaultLocation = CLLocation(latitude: -33.869405, longitude: 151.199)

    // Create a map.
    let zoomLevel = locationManager.accuracyAuthorization == .fullAccuracy ? preciseLocationZoomLevel : approximateLocationZoomLevel
    let camera = GMSCameraPosition.camera(withLatitude: defaultLocation.coordinate.latitude,
                                          longitude: defaultLocation.coordinate.longitude,
                                          zoom: zoomLevel)
    mapView = GMSMapView.map(withFrame: view.bounds, camera: camera)
    mapView.settings.myLocationButton = true
    mapView.autoresizingMask = [.flexibleWidth, .flexibleHeight]
    mapView.isMyLocationEnabled = true

    // Add the map to the view, hide it until we've got a location update.
    view.addSubview(mapView)
    mapView.isHidden = true

    listLikelyPlaces()
  }

  // Populate the array with the list of likely places.
  func listLikelyPlaces() {
    // Clean up from previous sessions.
    likelyPlaces.removeAll()

    let placeFields: GMSPlaceField = [.name, .coordinate]
    placesClient.findPlaceLikelihoodsFromCurrentLocation(withPlaceFields: placeFields) { (placeLikelihoods, error) in
      guard error == nil else {
        // TODO: Handle the error.
        print("Current Place error: \(error!.localizedDescription)")
        return
      }

      guard let placeLikelihoods = placeLikelihoods else {
        print("No places found.")
        return
      }

      // Get likely places and add to the list.
      for likelihood in placeLikelihoods {
        let place = likelihood.place
        self.likelyPlaces.append(place)
      }
    }
  }

  // Prepare the segue.
  override func prepare(for segue: UIStoryboardSegue, sender: Any?) {
    if segue.identifier == "segueToSelect" {
      if let nextViewController = segue.destination as? PlacesViewController {
        nextViewController.likelyPlaces = likelyPlaces
      }
    }
  }
}

// Delegates to handle events for the location manager.
extension MapViewController: CLLocationManagerDelegate {

  // Handle incoming location events.
  func locationManager(_ manager: CLLocationManager, didUpdateLocations locations: [CLLocation]) {
    let location: CLLocation = locations.last!
    print("Location: \(location)")

    let zoomLevel = locationManager.accuracyAuthorization == .fullAccuracy ? preciseLocationZoomLevel : approximateLocationZoomLevel
    let camera = GMSCameraPosition.camera(withLatitude: location.coordinate.latitude,
                                          longitude: location.coordinate.longitude,
                                          zoom: zoomLevel)

    if mapView.isHidden {
      mapView.isHidden = false
      mapView.camera = camera
    } else {
      mapView.animate(to: camera)
    }

    listLikelyPlaces()
  }

  // Handle authorization for the location manager.
  func locationManager(_ manager: CLLocationManager, didChangeAuthorization status: CLAuthorizationStatus) {
    // Check accuracy authorization
    let accuracy = manager.accuracyAuthorization
    switch accuracy {
    case .fullAccuracy:
        print("Location accuracy is precise.")
    case .reducedAccuracy:
        print("Location accuracy is not precise.")
    @unknown default:
      fatalError()
    }

    // Handle authorization status
    switch status {
    case .restricted:
      print("Location access was restricted.")
    case .denied:
      print("User denied access to location.")
      // Display the map using the default location.
      mapView.isHidden = false
    case .notDetermined:
      print("Location status not determined.")
    case .authorizedAlways: fallthrough
    case .authorizedWhenInUse:
      print("Location status is OK.")
    @unknown default:
      fatalError()
    }
  }

  // Handle location manager errors.
  func locationManager(_ manager: CLLocationManager, didFailWithError error: Error) {
    locationManager.stopUpdatingLocation()
    print("Error: \(error)")
  }
}
উদ্দেশ্য-সি
#import "MapViewController.h"
#import "PlacesViewController.h"
@import CoreLocation;
@import GooglePlaces;
@import GoogleMaps;

@interface MapViewController () <CLLocationManagerDelegate>

@end

@implementation MapViewController {
  CLLocationManager *locationManager;
  CLLocation * _Nullable currentLocation;
  GMSMapView *mapView;
  GMSPlacesClient *placesClient;
  float preciseLocationZoomLevel;
  float approximateLocationZoomLevel;

  // An array to hold the list of likely places.
  NSMutableArray<GMSPlace *> *likelyPlaces;

  // The currently selected place.
  GMSPlace * _Nullable selectedPlace;
}

- (void)viewDidLoad {
  [super viewDidLoad];
  preciseLocationZoomLevel = 15.0;
  approximateLocationZoomLevel = 15.0;

  // Initialize the location manager.
  locationManager = [[CLLocationManager alloc] init];
  locationManager.desiredAccuracy = kCLLocationAccuracyBest;
  [locationManager requestWhenInUseAuthorization];
  locationManager.distanceFilter = 50;
  [locationManager startUpdatingLocation];
  locationManager.delegate = self;

  placesClient = [GMSPlacesClient sharedClient];

  // A default location to use when location permission is not granted.
  CLLocationCoordinate2D defaultLocation = CLLocationCoordinate2DMake(-33.869405, 151.199);

  // Create a map.
  float zoomLevel = locationManager.accuracyAuthorization == CLAccuracyAuthorizationFullAccuracy ? preciseLocationZoomLevel : approximateLocationZoomLevel;
  GMSCameraPosition *camera = [GMSCameraPosition cameraWithLatitude:defaultLocation.latitude
                                                          longitude:defaultLocation.longitude
                                                               zoom:zoomLevel];
  mapView = [GMSMapView mapWithFrame:self.view.bounds camera:camera];
  mapView.settings.myLocationButton = YES;
  mapView.autoresizingMask = UIViewAutoresizingFlexibleWidth | UIViewAutoresizingFlexibleHeight;
  mapView.myLocationEnabled = YES;

  // Add the map to the view, hide it until we've got a location update.
  [self.view addSubview:mapView];
  mapView.hidden = YES;

  [self listLikelyPlaces];
}

// Populate the array with the list of likely places.
- (void) listLikelyPlaces
{
  // Clean up from previous sessions.
  likelyPlaces = [NSMutableArray array];

  GMSPlaceField placeFields = GMSPlaceFieldName | GMSPlaceFieldCoordinate;
  [placesClient findPlaceLikelihoodsFromCurrentLocationWithPlaceFields:placeFields callback:^(NSArray<GMSPlaceLikelihood *> * _Nullable likelihoods, NSError * _Nullable error) {
    if (error != nil) {
      // TODO: Handle the error.
      NSLog(@"Current Place error: %@", error.localizedDescription);
      return;
    }

    if (likelihoods == nil) {
      NSLog(@"No places found.");
      return;
    }

    for (GMSPlaceLikelihood *likelihood in likelihoods) {
      GMSPlace *place = likelihood.place;
      [likelyPlaces addObject:place];
    }
  }];
}

// Update the map once the user has made their selection.
- (void) unwindToMain:(UIStoryboardSegue *)segue
{
  // Clear the map.
  [mapView clear];

  // Add a marker to the map.
  if (selectedPlace != nil) {
    GMSMarker *marker = [GMSMarker markerWithPosition:selectedPlace.coordinate];
    marker.title = selectedPlace.name;
    marker.snippet = selectedPlace.formattedAddress;
    marker.map = mapView;
  }

  [self listLikelyPlaces];
}

// Prepare the segue.
- (void)prepareForSegue:(UIStoryboardSegue *)segue sender:(id)sender
{
  if ([segue.identifier isEqualToString:@"segueToSelect"]) {
    if ([segue.destinationViewController isKindOfClass:[PlacesViewController class]]) {
      PlacesViewController *placesViewController = (PlacesViewController *)segue.destinationViewController;
      placesViewController.likelyPlaces = likelyPlaces;
    }
  }
}

// Delegates to handle events for the location manager.
#pragma mark - CLLocationManagerDelegate

// Handle incoming location events.
- (void)locationManager:(CLLocationManager *)manager didUpdateLocations:(NSArray<CLLocation *> *)locations
{
  CLLocation *location = locations.lastObject;
  NSLog(@"Location: %@", location);

  float zoomLevel = locationManager.accuracyAuthorization == CLAccuracyAuthorizationFullAccuracy ? preciseLocationZoomLevel : approximateLocationZoomLevel;
  GMSCameraPosition * camera = [GMSCameraPosition cameraWithLatitude:location.coordinate.latitude
                                                           longitude:location.coordinate.longitude
                                                                zoom:zoomLevel];

  if (mapView.isHidden) {
    mapView.hidden = NO;
    mapView.camera = camera;
  } else {
    [mapView animateToCameraPosition:camera];
  }

  [self listLikelyPlaces];
}

// Handle authorization for the location manager.
- (void)locationManager:(CLLocationManager *)manager didChangeAuthorizationStatus:(CLAuthorizationStatus)status
{
  // Check accuracy authorization
  CLAccuracyAuthorization accuracy = manager.accuracyAuthorization;
  switch (accuracy) {
    case CLAccuracyAuthorizationFullAccuracy:
      NSLog(@"Location accuracy is precise.");
      break;
    case CLAccuracyAuthorizationReducedAccuracy:
      NSLog(@"Location accuracy is not precise.");
      break;
  }

  // Handle authorization status
  switch (status) {
    case kCLAuthorizationStatusRestricted:
      NSLog(@"Location access was restricted.");
      break;
    case kCLAuthorizationStatusDenied:
      NSLog(@"User denied access to location.");
      // Display the map using the default location.
      mapView.hidden = NO;
    case kCLAuthorizationStatusNotDetermined:
      NSLog(@"Location status not determined.");
    case kCLAuthorizationStatusAuthorizedAlways:
    case kCLAuthorizationStatusAuthorizedWhenInUse:
      NSLog(@"Location status is OK.");
  }
}

// Handle location manager errors.
- (void)locationManager:(CLLocationManager *)manager didFailWithError:(NSError *)error
{
  [manager stopUpdatingLocation];
  NSLog(@"Error: %@", error.localizedDescription);
}

@end
PlacesViewController
সুইফট
import UIKit
import GooglePlaces

class PlacesViewController: UIViewController {

  // ...

  // Pass the selected place to the new view controller.
  override func prepare(for segue: UIStoryboardSegue, sender: Any?) {
    if segue.identifier == "unwindToMain" {
      if let nextViewController = segue.destination as? MapViewController {
        nextViewController.selectedPlace = selectedPlace
      }
    }
  }
}

// Respond when a user selects a place.
extension PlacesViewController: UITableViewDelegate {
  func tableView(_ tableView: UITableView, didSelectRowAt indexPath: IndexPath) {
    selectedPlace = likelyPlaces[indexPath.row]
    performSegue(withIdentifier: "unwindToMain", sender: self)
  }

  // Adjust cell height to only show the first five items in the table
  // (scrolling is disabled in IB).
  func tableView(_ tableView: UITableView, heightForRowAt indexPath: IndexPath) -> CGFloat {
    return self.tableView.frame.size.height/5
  }

  // Make table rows display at proper height if there are less than 5 items.
  func tableView(_ tableView: UITableView, heightForFooterInSection section: Int) -> CGFloat {
    if (section == tableView.numberOfSections - 1) {
      return 1
    }
    return 0
  }
}

// Populate the table with the list of most likely places.
extension PlacesViewController: UITableViewDataSource {
  func tableView(_ tableView: UITableView, numberOfRowsInSection section: Int) -> Int {
    return likelyPlaces.count
  }

  func tableView(_ tableView: UITableView, cellForRowAt indexPath: IndexPath) -> UITableViewCell {
    let cell = tableView.dequeueReusableCell(withIdentifier: cellReuseIdentifier, for: indexPath)
    let collectionItem = likelyPlaces[indexPath.row]

    cell.textLabel?.text = collectionItem.name

    return cell
  }
}
উদ্দেশ্য-সি
#import "PlacesViewController.h"

@interface PlacesViewController () <UITableViewDataSource, UITableViewDelegate>
// ...

-(void)prepareForSegue:(UIStoryboardSegue *)segue sender:(id)sender
{

}

#pragma mark - UITableViewDelegate

// Respond when a user selects a place.
-(void)tableView:(UITableView *)tableView didSelectRowAtIndexPath:(NSIndexPath *)indexPath
{
  self.selectedPlace = [self.likelyPlaces objectAtIndex:indexPath.row];
  [self performSegueWithIdentifier:@"unwindToMain" sender:self];
}

// Adjust cell height to only show the first five items in the table
// (scrolling is disabled in IB).
-(CGFloat)tableView:(UITableView *)tableView heightForRowAtIndexPath:(NSIndexPath *)indexPath
{
  return self.tableView.frame.size.height/5;
}

// Make table rows display at proper height if there are less than 5 items.
-(CGFloat)tableView:(UITableView *)tableView heightForFooterInSection:(NSInteger)section
{
  if (section == tableView.numberOfSections - 1) {
    return 1;
  }
  return 0;
}

#pragma mark - UITableViewDataSource

- (NSInteger)tableView:(UITableView *)tableView numberOfRowsInSection:(NSInteger)section
{
  return self.likelyPlaces.count;
}

- (UITableViewCell *)tableView:(UITableView *)tableView cellForRowAtIndexPath:(NSIndexPath *)indexPath
{
  return [tableView dequeueReusableCellWithIdentifier:cellReuseIdentifier forIndexPath:indexPath];
}
@end
শুরু করুন
সুইফট প্যাকেজ ম্যানেজার
সুইফট প্যাকেজ ম্যানেজার ব্যবহার করে iOS-এর জন্য ম্যাপস এসডিকে ইনস্টল করা যায়।
- iOS-এর জন্য বিদ্যমান Maps SDK নির্ভরতাগুলো মুছে ফেলুন।
- একটি টার্মিনাল উইন্ডো খুলুন এবং
tutorials/current-place-on-mapডিরেক্টরিতে যান। - আপনার Xcode ওয়ার্কস্পেসটি বন্ধ করুন এবং নিম্নলিখিত কমান্ডগুলি চালান:
        sudo gem install cocoapods-deintegrate cocoapods-clean
        pod deintegrate
        pod cache clean --all
        rm Podfile
        rm current-place-on-map.xcworkspace
- আপনার Xcode প্রজেক্টটি খুলুন এবং podfile-টি মুছে ফেলুন।
- Places এবং Maps SDK-গুলো যোগ করুন:
- ফাইল > প্যাকেজ নির্ভরতা যোগ করুন -এ যান।
- URL হিসেবে https://github.com/googlemaps/ios-places-sdk লিখুন, প্যাকেজটি যুক্ত করতে এন্টার চাপুন এবং 'Add Package'-এ ক্লিক করুন।
- URL হিসেবে https://github.com/googlemaps/ios-maps-sdk লিখুন, প্যাকেজটি যুক্ত করতে এন্টার চাপুন এবং 'Add Package'-এ ক্লিক করুন।
- ফাইল > প্যাকেজ > প্যাকেজ ক্যাশে রিসেট করুন ব্যবহার করে আপনাকে আপনার প্যাকেজ ক্যাশে রিসেট করতে হতে পারে।
কোকোপড ব্যবহার করুন
- Xcode সংস্করণ 26.0 বা তার পরবর্তী সংস্করণ ডাউনলোড ও ইনস্টল করুন।
- আপনার কাছে যদি আগে থেকে CocoaPods না থাকে, তাহলে টার্মিনাল থেকে নিম্নলিখিত কমান্ডটি চালিয়ে macOS-এ এটি ইনস্টল করুন:
sudo gem install cocoapods
tutorials/current-place-on-mapডিরেক্টরিতে যান।-
pod installকমান্ডটি চালান। এটিPodfileএ উল্লেখিত Maps এবং Places SDK-গুলো , তাদের প্রয়োজনীয় ডিপেন্ডেন্সি সহ, ইনস্টল করবে। - ইনস্টল করা পড ভার্সনের সাথে নতুন কোনো আপডেট তুলনা করতে
pod outdatedচালান। যদি কোনো নতুন ভার্সন পাওয়া যায়, তাহলেPodfileআপডেট করতে এবং সর্বশেষ SDK ইনস্টল করতেpod updateচালান। আরও বিস্তারিত জানতে, CocoaPods Guide দেখুন। - এক্সকোডে প্রজেক্টটি খোলার জন্য, সেটির উপর ডাবল-ক্লিক করুন। প্রজেক্টটি খোলার জন্য আপনাকে অবশ্যই
.xcworkspaceফাইলটি ব্যবহার করতে হবে।
একটি এপিআই কী নিন এবং প্রয়োজনীয় এপিআইগুলো সক্রিয় করুন।
এই টিউটোরিয়ালটি সম্পন্ন করতে আপনার এমন একটি গুগল এপিআই কী প্রয়োজন, যা আইওএস-এর জন্য ম্যাপস এসডিকে (Maps SDK for iOS) এবং প্লেসেস এপিআই (Places API) ব্যবহারের জন্য অনুমোদিত।
- এই দুটি প্রোডাক্ট দ্বারা সক্রিয় একটি বিলিং অ্যাকাউন্ট ও একটি প্রজেক্ট সেট আপ করতে , 'গুগল ম্যাপস প্ল্যাটফর্ম দিয়ে শুরু করুন' (Get Started with Google Maps Platform) -এর নির্দেশাবলী অনুসরণ করুন।
- আপনার পূর্বে সেট আপ করা ডেভেলপমেন্ট প্রজেক্টের জন্য একটি এপিআই কী তৈরি করতে, "Get an API Key" -এর নির্দেশাবলী অনুসরণ করুন।
আপনার অ্যাপ্লিকেশনে এপিআই কী যোগ করুন
আপনার AppDelegate.swift ফাইলে নিম্নলিখিতভাবে আপনার API কী যোগ করুন:
- লক্ষ্য করুন যে ফাইলটিতে নিম্নলিখিত ইম্পোর্ট স্টেটমেন্টটি যোগ করা হয়েছে:
import GooglePlaces
import GoogleMaps
- আপনার
application(_:didFinishLaunchingWithOptions:)মেথডের নিম্নলিখিত লাইনটি সম্পাদনা করুন, এবং YOUR_API_KEY- এর জায়গায় আপনার API কী বসান:GMSPlacesClient.provideAPIKey("YOUR_API_KEY") GMSServices.provideAPIKey("YOUR_API_KEY")
আপনার অ্যাপ তৈরি করুন এবং চালান
- আপনার কম্পিউটারের সাথে একটি iOS ডিভাইস সংযুক্ত করুন, অথবা Xcode স্কিম মেনু থেকে একটি সিমুলেটর নির্বাচন করুন।
- আপনি যদি কোনো ডিভাইস ব্যবহার করেন, তাহলে নিশ্চিত করুন যে লোকেশন সার্ভিস চালু আছে। আপনি যদি সিমুলেটর ব্যবহার করেন, তাহলে ফিচারস মেনু থেকে একটি লোকেশন বেছে নিন।
- Xcode-এ, Product/Run মেনু অপশনটিতে (অথবা প্লে বাটন আইকনে) ক্লিক করুন।
- Xcode অ্যাপটি বিল্ড করে এবং তারপর ডিভাইস বা সিমুলেটরে অ্যাপটি রান করে।
- আপনি এমন একটি মানচিত্র দেখতে পাবেন, যেখানে আপনার বর্তমান অবস্থানকে কেন্দ্র করে বেশ কিছু চিহ্নিত স্থান থাকবে।
সমস্যা সমাধান:
- যদি আপনি কোনো ম্যাপ দেখতে না পান, তাহলে উপরে বর্ণিত পদ্ধতি অনুযায়ী একটি API কী সংগ্রহ করে অ্যাপে যোগ করেছেন কিনা তা যাচাই করুন। API কী সম্পর্কিত ত্রুটির বার্তার জন্য Xcode-এর ডিবাগিং কনসোল দেখুন।
- আপনি যদি iOS বান্ডেল আইডেন্টিফায়ার দ্বারা API কী-টি সীমাবদ্ধ করে থাকেন, তাহলে অ্যাপটির বান্ডেল আইডেন্টিফায়ার যোগ করতে কী-টি সম্পাদনা করুন:
com.google.examples.current-place-on-map। - অবস্থান পরিষেবার অনুমতির অনুরোধ প্রত্যাখ্যান করা হলে মানচিত্রটি সঠিকভাবে প্রদর্শিত হবে না।
- আপনি যদি কোনো ডিভাইস ব্যবহার করেন, তাহলে সেটিংস/সাধারণ/গোপনীয়তা/অবস্থান পরিষেবা- তে যান এবং অবস্থান পরিষেবা পুনরায় চালু করুন।
- আপনি যদি সিমুলেটর ব্যবহার করেন, তাহলে Simulator/Reset Content and Settings... এ যান।
- আপনার একটি ভালো ওয়াই-ফাই বা জিপিএস সংযোগ আছে কিনা তা নিশ্চিত করুন।
- যদি অ্যাপটি চালু হয় কিন্তু কোনো ম্যাপ প্রদর্শিত না হয়, তাহলে নিশ্চিত করুন যে আপনি আপনার প্রোজেক্টের Info.plist ফাইলটি যথাযথ লোকেশন পারমিশন দিয়ে আপডেট করেছেন। পারমিশন পরিচালনা সম্পর্কে আরও তথ্যের জন্য, নিচে আপনার অ্যাপে লোকেশন পারমিশন অনুরোধ করার নির্দেশিকাটি দেখুন।
- লগ দেখতে ও অ্যাপটি ডিবাগ করতে এক্সকোড ডিবাগিং টুল ব্যবহার করুন।
কোডটি বুঝুন
টিউটোরিয়ালের এই অংশে 'মানচিত্রে বর্তমান স্থান' অ্যাপটির সবচেয়ে গুরুত্বপূর্ণ অংশগুলো ব্যাখ্যা করা হয়েছে, যাতে আপনি একই ধরনের একটি অ্যাপ তৈরি করার পদ্ধতি বুঝতে পারেন।
বর্তমান-স্থান-অন-ম্যাপ অ্যাপটিতে দুটি ভিউ কন্ট্রোলার রয়েছে: একটি ব্যবহারকারীর নির্বাচিত স্থান দেখানো একটি মানচিত্র প্রদর্শন করার জন্য, এবং অন্যটি ব্যবহারকারীকে বেছে নেওয়ার জন্য সম্ভাব্য স্থানগুলির একটি তালিকা উপস্থাপন করার জন্য। উল্লেখ্য যে, প্রতিটি ভিউ কন্ট্রোলারে সম্ভাব্য স্থানগুলির তালিকা ট্র্যাক করার জন্য ( likelyPlaces ) এবং ব্যবহারকারীর নির্বাচন নির্দেশ করার জন্য ( selectedPlace ) একই ভ্যারিয়েবল রয়েছে। সেগ্যু (segue) ব্যবহারের মাধ্যমে ভিউগুলির মধ্যে নেভিগেশন সম্পন্ন করা হয়।
অবস্থানের অনুমতির জন্য অনুরোধ।
আপনার অ্যাপকে অবশ্যই লোকেশন সার্ভিস ব্যবহারের জন্য ব্যবহারকারীর কাছে অনুমতি চাইতে হবে। এটি করার জন্য, অ্যাপটির Info.plist ফাইলে NSLocationAlwaysUsageDescription কী-টি অন্তর্ভুক্ত করুন এবং প্রতিটি কী-এর ভ্যালু এমন একটি স্ট্রিং-এ সেট করুন যা বর্ণনা করে যে অ্যাপটি কীভাবে লোকেশন ডেটা ব্যবহার করতে চায়।
অবস্থান ব্যবস্থাপক সেট আপ করুন
ডিভাইসের বর্তমান অবস্থান খুঁজে বের করতে এবং ডিভাইসটি নতুন কোনো স্থানে গেলে নিয়মিত আপডেটের অনুরোধ জানাতে CLLocationManager ব্যবহার করুন। এই টিউটোরিয়ালটিতে ডিভাইসের অবস্থান পাওয়ার জন্য প্রয়োজনীয় কোড দেওয়া আছে। আরও বিস্তারিত জানতে, অ্যাপল ডেভেলপার ডকুমেন্টেশনে থাকা 'ব্যবহারকারীর অবস্থান জানা' (Getting the User's Location) নির্দেশিকাটি দেখুন।
- ক্লাস লেভেলে লোকেশন ম্যানেজার, বর্তমান অবস্থান, ম্যাপ ভিউ, প্লেসেস ক্লায়েন্ট এবং ডিফল্ট জুম লেভেল ঘোষণা করুন।
-
viewDidLoad()ফাংশনে লোকেশন ম্যানেজার এবংGMSPlacesClientইনিশিয়ালাইজ করুন। - সম্ভাব্য স্থানগুলোর তালিকা এবং ব্যবহারকারীর নির্বাচিত স্থান ধারণ করার জন্য ভেরিয়েবল ঘোষণা করুন।
- একটি এক্সটেনশন ক্লজ ব্যবহার করে লোকেশন ম্যানেজারের জন্য ইভেন্টগুলো পরিচালনা করতে ডেলিগেট যোগ করুন।
সুইফট
var locationManager: CLLocationManager!
var currentLocation: CLLocation?
var mapView: GMSMapView!
var placesClient: GMSPlacesClient!
var preciseLocationZoomLevel: Float = 15.0
var approximateLocationZoomLevel: Float = 10.0
উদ্দেশ্য-সি
CLLocationManager *locationManager;
CLLocation * _Nullable currentLocation;
GMSMapView *mapView;
GMSPlacesClient *placesClient;
float preciseLocationZoomLevel;
float approximateLocationZoomLevel;
সুইফট
// Initialize the location manager.
locationManager = CLLocationManager()
locationManager.desiredAccuracy = kCLLocationAccuracyBest
locationManager.requestWhenInUseAuthorization()
locationManager.distanceFilter = 50
locationManager.startUpdatingLocation()
locationManager.delegate = self

placesClient = GMSPlacesClient.shared()
উদ্দেশ্য-সি
// Initialize the location manager.
locationManager = [[CLLocationManager alloc] init];
locationManager.desiredAccuracy = kCLLocationAccuracyBest;
[locationManager requestWhenInUseAuthorization];
locationManager.distanceFilter = 50;
[locationManager startUpdatingLocation];
locationManager.delegate = self;

placesClient = [GMSPlacesClient sharedClient];
সুইফট
// An array to hold the list of likely places.
var likelyPlaces: [GMSPlace] = []

// The currently selected place.
var selectedPlace: GMSPlace?
উদ্দেশ্য-সি
// An array to hold the list of likely places.
NSMutableArray<GMSPlace *> *likelyPlaces;

// The currently selected place.
GMSPlace * _Nullable selectedPlace;
সুইফট
// Delegates to handle events for the location manager.
extension MapViewController: CLLocationManagerDelegate {

  // Handle incoming location events.
  func locationManager(_ manager: CLLocationManager, didUpdateLocations locations: [CLLocation]) {
    let location: CLLocation = locations.last!
    print("Location: \(location)")

    let zoomLevel = locationManager.accuracyAuthorization == .fullAccuracy ? preciseLocationZoomLevel : approximateLocationZoomLevel
    let camera = GMSCameraPosition.camera(withLatitude: location.coordinate.latitude,
                                          longitude: location.coordinate.longitude,
                                          zoom: zoomLevel)

    if mapView.isHidden {
      mapView.isHidden = false
      mapView.camera = camera
    } else {
      mapView.animate(to: camera)
    }

    listLikelyPlaces()
  }

  // Handle authorization for the location manager.
  func locationManager(_ manager: CLLocationManager, didChangeAuthorization status: CLAuthorizationStatus) {
    // Check accuracy authorization
    let accuracy = manager.accuracyAuthorization
    switch accuracy {
    case .fullAccuracy:
        print("Location accuracy is precise.")
    case .reducedAccuracy:
        print("Location accuracy is not precise.")
    @unknown default:
      fatalError()
    }

    // Handle authorization status
    switch status {
    case .restricted:
      print("Location access was restricted.")
    case .denied:
      print("User denied access to location.")
      // Display the map using the default location.
      mapView.isHidden = false
    case .notDetermined:
      print("Location status not determined.")
    case .authorizedAlways: fallthrough
    case .authorizedWhenInUse:
      print("Location status is OK.")
    @unknown default:
      fatalError()
    }
  }

  // Handle location manager errors.
  func locationManager(_ manager: CLLocationManager, didFailWithError error: Error) {
    locationManager.stopUpdatingLocation()
    print("Error: \(error)")
  }
}
উদ্দেশ্য-সি
// Delegates to handle events for the location manager.
#pragma mark - CLLocationManagerDelegate

// Handle incoming location events.
- (void)locationManager:(CLLocationManager *)manager didUpdateLocations:(NSArray<CLLocation *> *)locations
{
  CLLocation *location = locations.lastObject;
  NSLog(@"Location: %@", location);

  float zoomLevel = locationManager.accuracyAuthorization == CLAccuracyAuthorizationFullAccuracy ? preciseLocationZoomLevel : approximateLocationZoomLevel;
  GMSCameraPosition * camera = [GMSCameraPosition cameraWithLatitude:location.coordinate.latitude
                                                           longitude:location.coordinate.longitude
                                                                zoom:zoomLevel];

  if (mapView.isHidden) {
    mapView.hidden = NO;
    mapView.camera = camera;
  } else {
    [mapView animateToCameraPosition:camera];
  }

  [self listLikelyPlaces];
}

// Handle authorization for the location manager.
- (void)locationManager:(CLLocationManager *)manager didChangeAuthorizationStatus:(CLAuthorizationStatus)status
{
  // Check accuracy authorization
  CLAccuracyAuthorization accuracy = manager.accuracyAuthorization;
  switch (accuracy) {
    case CLAccuracyAuthorizationFullAccuracy:
      NSLog(@"Location accuracy is precise.");
      break;
    case CLAccuracyAuthorizationReducedAccuracy:
      NSLog(@"Location accuracy is not precise.");
      break;
  }

  // Handle authorization status
  switch (status) {
    case kCLAuthorizationStatusRestricted:
      NSLog(@"Location access was restricted.");
      break;
    case kCLAuthorizationStatusDenied:
      NSLog(@"User denied access to location.");
      // Display the map using the default location.
      mapView.hidden = NO;
    case kCLAuthorizationStatusNotDetermined:
      NSLog(@"Location status not determined.");
    case kCLAuthorizationStatusAuthorizedAlways:
    case kCLAuthorizationStatusAuthorizedWhenInUse:
      NSLog(@"Location status is OK.");
  }
}

// Handle location manager errors.
- (void)locationManager:(CLLocationManager *)manager didFailWithError:(NSError *)error
{
  [manager stopUpdatingLocation];
  NSLog(@"Error: %@", error.localizedDescription);
}
একটি মানচিত্র যোগ করা
একটি মানচিত্র তৈরি করুন এবং প্রধান ভিউ কন্ট্রোলারের viewDidLoad() ফাংশনে এটিকে যুক্ত করুন। অবস্থানের কোনো আপডেট না পাওয়া পর্যন্ত মানচিত্রটি লুকানো থাকে (অবস্থানের আপডেটগুলো CLLocationManagerDelegate এক্সটেনশনের মাধ্যমে পরিচালনা করা হয়)।
সুইফট
// A default location to use when location permission is not granted.
let defaultLocation = CLLocation(latitude: -33.869405, longitude: 151.199)

// Create a map.
let zoomLevel = locationManager.accuracyAuthorization == .fullAccuracy ? preciseLocationZoomLevel : approximateLocationZoomLevel
let camera = GMSCameraPosition.camera(withLatitude: defaultLocation.coordinate.latitude,
                                      longitude: defaultLocation.coordinate.longitude,
                                      zoom: zoomLevel)
mapView = GMSMapView.map(withFrame: view.bounds, camera: camera)
mapView.settings.myLocationButton = true
mapView.autoresizingMask = [.flexibleWidth, .flexibleHeight]
mapView.isMyLocationEnabled = true

// Add the map to the view, hide it until we've got a location update.
view.addSubview(mapView)
mapView.isHidden = true
উদ্দেশ্য-সি
// A default location to use when location permission is not granted.
CLLocationCoordinate2D defaultLocation = CLLocationCoordinate2DMake(-33.869405, 151.199);

// Create a map.
float zoomLevel = locationManager.accuracyAuthorization == CLAccuracyAuthorizationFullAccuracy ? preciseLocationZoomLevel : approximateLocationZoomLevel;
GMSCameraPosition *camera = [GMSCameraPosition cameraWithLatitude:defaultLocation.latitude
                                                        longitude:defaultLocation.longitude
                                                             zoom:zoomLevel];
mapView = [GMSMapView mapWithFrame:self.view.bounds camera:camera];
mapView.settings.myLocationButton = YES;
mapView.autoresizingMask = UIViewAutoresizingFlexibleWidth | UIViewAutoresizingFlexibleHeight;
mapView.myLocationEnabled = YES;

// Add the map to the view, hide it until we've got a location update.
[self.view addSubview:mapView];
mapView.hidden = YES;
ব্যবহারকারীকে তার বর্তমান স্থান নির্বাচন করতে বলা হচ্ছে
ব্যবহারকারীর বর্তমান অবস্থানের উপর ভিত্তি করে সম্ভাব্য শীর্ষ পাঁচটি স্থানের তালিকা পেতে iOS-এর জন্য Places SDK ব্যবহার করুন এবং তালিকাটি একটি UITableView তে উপস্থাপন করুন। ব্যবহারকারী যখন কোনো স্থান নির্বাচন করবেন, তখন মানচিত্রে একটি মার্কার যুক্ত করুন।
- একটি
UITableViewতথ্য যোগ করার জন্য সম্ভাব্য স্থানগুলির একটি তালিকা পান, যেখান থেকে ব্যবহারকারী তার নিজের অবস্থান নির্বাচন করতে পারবেন। - ব্যবহারকারীকে সম্ভাব্য স্থানগুলো দেখানোর জন্য একটি নতুন ভিউ খুলুন। যখন ব্যবহারকারী "Get Place"-এ ট্যাপ করেন, আমরা একটি নতুন ভিউতে চলে যাই এবং ব্যবহারকারীকে বেছে নেওয়ার জন্য সম্ভাব্য স্থানগুলোর একটি তালিকা দেখাই।
prepareফাংশনটিPlacesViewControllerবর্তমান সম্ভাব্য স্থানগুলোর তালিকা দিয়ে আপডেট করে এবং যখন কোনো segue সম্পন্ন হয়, তখন এটি স্বয়ংক্রিয়ভাবে কল করা হয়। -
PlacesViewControllerএ,UITableViewDataSourceডেলিগেট এক্সটেনশন ব্যবহার করে সবচেয়ে সম্ভাব্য স্থানগুলির তালিকা দিয়ে টেবিলটি পূরণ করুন। -
UITableViewDelegateডেলিগেট এক্সটেনশন ব্যবহার করে ব্যবহারকারীর নির্বাচন পরিচালনা করুন।
সুইফট
// Populate the array with the list of likely places.
func listLikelyPlaces() {
  // Clean up from previous sessions.
  likelyPlaces.removeAll()

  let placeFields: GMSPlaceField = [.name, .coordinate]
  placesClient.findPlaceLikelihoodsFromCurrentLocation(withPlaceFields: placeFields) { (placeLikelihoods, error) in
    guard error == nil else {
      // TODO: Handle the error.
      print("Current Place error: \(error!.localizedDescription)")
      return
    }

    guard let placeLikelihoods = placeLikelihoods else {
      print("No places found.")
      return
    }

    // Get likely places and add to the list.
    for likelihood in placeLikelihoods {
      let place = likelihood.place
      self.likelyPlaces.append(place)
    }
  }
}
উদ্দেশ্য-সি
// Populate the array with the list of likely places.
- (void) listLikelyPlaces
{
  // Clean up from previous sessions.
  likelyPlaces = [NSMutableArray array];

  GMSPlaceField placeFields = GMSPlaceFieldName | GMSPlaceFieldCoordinate;
  [placesClient findPlaceLikelihoodsFromCurrentLocationWithPlaceFields:placeFields callback:^(NSArray<GMSPlaceLikelihood *> * _Nullable likelihoods, NSError * _Nullable error) {
    if (error != nil) {
      // TODO: Handle the error.
      NSLog(@"Current Place error: %@", error.localizedDescription);
      return;
    }

    if (likelihoods == nil) {
      NSLog(@"No places found.");
      return;
    }

    for (GMSPlaceLikelihood *likelihood in likelihoods) {
      GMSPlace *place = likelihood.place;
      [likelyPlaces addObject:place];
    }
  }];
}
সুইফট
// Prepare the segue.
override func prepare(for segue: UIStoryboardSegue, sender: Any?) {
  if segue.identifier == "segueToSelect" {
    if let nextViewController = segue.destination as? PlacesViewController {
      nextViewController.likelyPlaces = likelyPlaces
    }
  }
}
উদ্দেশ্য-সি
// Prepare the segue.
- (void)prepareForSegue:(UIStoryboardSegue *)segue sender:(id)sender
{
  if ([segue.identifier isEqualToString:@"segueToSelect"]) {
    if ([segue.destinationViewController isKindOfClass:[PlacesViewController class]]) {
      PlacesViewController *placesViewController = (PlacesViewController *)segue.destinationViewController;
      placesViewController.likelyPlaces = likelyPlaces;
    }
  }
}
সুইফট
// Populate the table with the list of most likely places.
extension PlacesViewController: UITableViewDataSource {
  func tableView(_ tableView: UITableView, numberOfRowsInSection section: Int) -> Int {
    return likelyPlaces.count
  }

  func tableView(_ tableView: UITableView, cellForRowAt indexPath: IndexPath) -> UITableViewCell {
    let cell = tableView.dequeueReusableCell(withIdentifier: cellReuseIdentifier, for: indexPath)
    let collectionItem = likelyPlaces[indexPath.row]

    cell.textLabel?.text = collectionItem.name

    return cell
  }
}
উদ্দেশ্য-সি
#pragma mark - UITableViewDataSource

- (NSInteger)tableView:(UITableView *)tableView numberOfRowsInSection:(NSInteger)section
{
  return self.likelyPlaces.count;
}

- (UITableViewCell *)tableView:(UITableView *)tableView cellForRowAtIndexPath:(NSIndexPath *)indexPath
{
  return [tableView dequeueReusableCellWithIdentifier:cellReuseIdentifier forIndexPath:indexPath];
}
@end
সুইফট
class PlacesViewController: UIViewController {

  // ...

  // Pass the selected place to the new view controller.
  override func prepare(for segue: UIStoryboardSegue, sender: Any?) {
    if segue.identifier == "unwindToMain" {
      if let nextViewController = segue.destination as? MapViewController {
        nextViewController.selectedPlace = selectedPlace
      }
    }
  }
}

// Respond when a user selects a place.
extension PlacesViewController: UITableViewDelegate {
  func tableView(_ tableView: UITableView, didSelectRowAt indexPath: IndexPath) {
    selectedPlace = likelyPlaces[indexPath.row]
    performSegue(withIdentifier: "unwindToMain", sender: self)
  }

  // Adjust cell height to only show the first five items in the table
  // (scrolling is disabled in IB).
  func tableView(_ tableView: UITableView, heightForRowAt indexPath: IndexPath) -> CGFloat {
    return self.tableView.frame.size.height/5
  }

  // Make table rows display at proper height if there are less than 5 items.
  func tableView(_ tableView: UITableView, heightForFooterInSection section: Int) -> CGFloat {
    if (section == tableView.numberOfSections - 1) {
      return 1
    }
    return 0
  }
}
উদ্দেশ্য-সি
@interface PlacesViewController () <UITableViewDataSource, UITableViewDelegate>
// ...

-(void)prepareForSegue:(UIStoryboardSegue *)segue sender:(id)sender
{

}

#pragma mark - UITableViewDelegate

// Respond when a user selects a place.
-(void)tableView:(UITableView *)tableView didSelectRowAtIndexPath:(NSIndexPath *)indexPath
{
  self.selectedPlace = [self.likelyPlaces objectAtIndex:indexPath.row];
  [self performSegueWithIdentifier:@"unwindToMain" sender:self];
}

// Adjust cell height to only show the first five items in the table
// (scrolling is disabled in IB).
-(CGFloat)tableView:(UITableView *)tableView heightForRowAtIndexPath:(NSIndexPath *)indexPath
{
  return self.tableView.frame.size.height/5;
}

// Make table rows display at proper height if there are less than 5 items.
-(CGFloat)tableView:(UITableView *)tableView heightForFooterInSection:(NSInteger)section
{
  if (section == tableView.numberOfSections - 1) {
    return 1;
  }
  return 0;
}
মানচিত্রে একটি মার্কার যোগ করুন
যখন ব্যবহারকারী কোনো কিছু নির্বাচন করেন, তখন পূর্ববর্তী ভিউতে ফিরে যেতে একটি আনওয়াইন্ড সেগ ব্যবহার করুন এবং ম্যাপে মার্কারটি যুক্ত করুন। মূল ভিউ কন্ট্রোলারে ফিরে আসার সাথে সাথে unwindToMain আইবিঅ্যাকশনটি (IBAction) স্বয়ংক্রিয়ভাবে কল করা হয়।
সুইফট
// Update the map once the user has made their selection.
@IBAction func unwindToMain(segue: UIStoryboardSegue) {
  // Clear the map.
  mapView.clear()

  // Add a marker to the map.
  if let place = selectedPlace {
    let marker = GMSMarker(position: place.coordinate)
    marker.title = selectedPlace?.name
    marker.snippet = selectedPlace?.formattedAddress
    marker.map = mapView
  }

  listLikelyPlaces()
}
উদ্দেশ্য-সি
// Update the map once the user has made their selection.
- (void) unwindToMain:(UIStoryboardSegue *)segue
{
  // Clear the map.
  [mapView clear];

  // Add a marker to the map.
  if (selectedPlace != nil) {
    GMSMarker *marker = [GMSMarker markerWithPosition:selectedPlace.coordinate];
    marker.title = selectedPlace.name;
    marker.snippet = selectedPlace.formattedAddress;
    marker.map = mapView;
  }

  [self listLikelyPlaces];
}
অভিনন্দন! আপনি এমন একটি iOS অ্যাপ তৈরি করেছেন যা ব্যবহারকারীকে তার বর্তমান স্থান বেছে নিতে দেয় এবং ফলাফলটি একটি গুগল ম্যাপে দেখায়। এই কাজটি করতে গিয়ে আপনি iOS-এর জন্য Places SDK , iOS-এর জন্য Maps SDK এবং Apple Core Location ফ্রেমওয়ার্ক ব্যবহার করতে শিখেছেন।