Page Summary
-
Geospatial API and Cloud Anchors use the ARCore API hosted on Google Cloud, which requires credentials to access the service.
-
To set up your application to communicate with the ARCore API, you need to either use an existing Google Cloud project or create a new one, and enable the ARCore API.
-
iOS applications can authorize access to the ARCore API using either the recommended Keyless authorization with signed tokens or API Key authorization.
-
Keyless authorization involves creating a Google service account and signing key, then generating and signing JSON Web Tokens (JWTs) on your server or development machine.
-
API Key authorization involves creating an API key in Google Cloud, though this method is generally less secure than token authorization.
ARCore features such as the Geospatial API and Cloud Anchors use the ARCore API hosted on Google Cloud. When using these features, your application uses credentials to access the ARCore API service.
This quickstart describes how to set up your application so that it can communicate with the ARCore API service hosted on Google Cloud.
Create a new Google Cloud project or use an existing project
If you have an existing project, select it.
If you don't have an existing Google Cloud project, create one.
Enable the ARCore API
To use the ARCore API, you must enable it in your project.
Set up an authorization method
An Android application can communicate with the ARCore API using two different authorization methods: Keyless authorization (OAuth 2.0), which is the recommended method, and API Key authorization:
- Keyless authorization uses a combination of the application's package name and the fingerprint of the signing key to authorize your application.
- An API key is a string that identifies a Google Cloud project. API keys are generally not considered secure as they are typically accessible to clients. Consider using Keyless authorization to communicate with the ARCore API.
Keyless
To authorize your app using Keyless authentication, create OAuth 2.0 client IDs.
Determine signing key fingerprints
A OAuth 2.0 client ID uses your app's signing key fingerprint to identify your app.
How to obtain your debug signing fingerprint
When running or debugging your project, the Android SDK tools automatically sign your app with a generated debug certificate.
- In Android Studio, open the Gradle toolpane.
- Navigate to project-name > Tasks > android.
- Run the signingReport task.
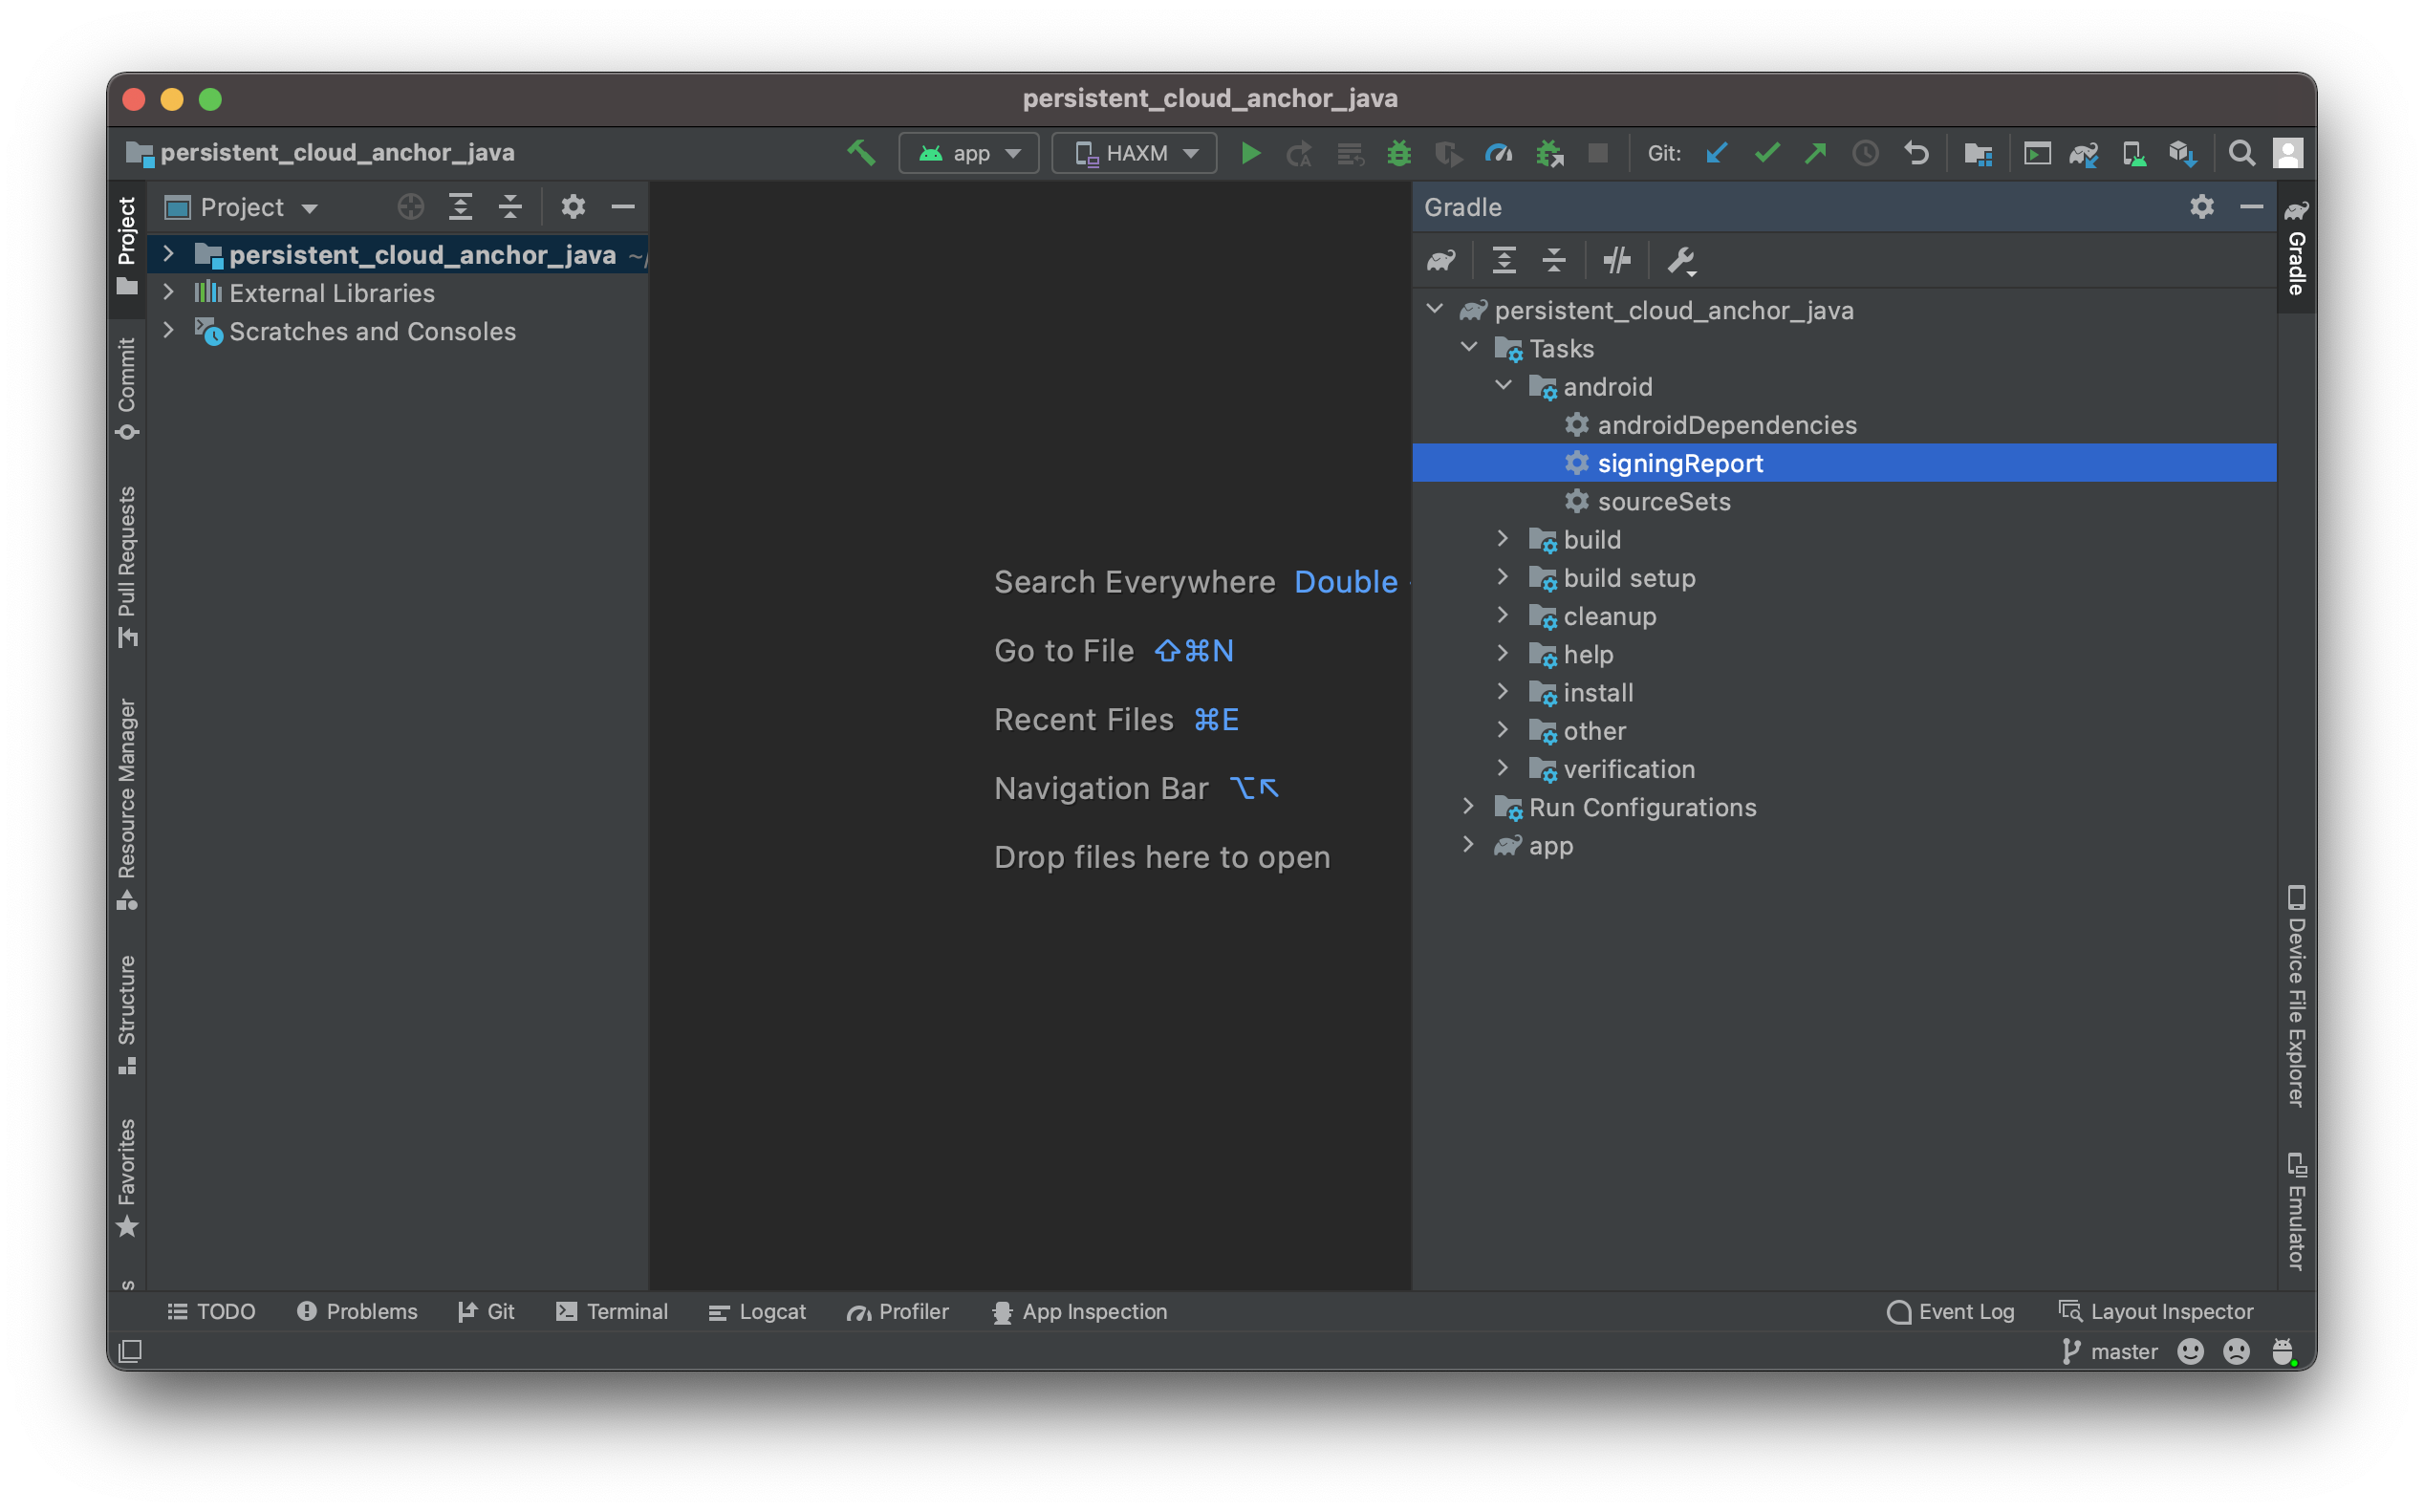
- Copy the SHA-1 fingerprint for the debug variant.
How to obtain a signing fingerprint from a keystore
If you have a keystore file, use the keytool utility to determine the fingerprint.
keytool -list -v -alias your-key-name -keystore path-to-production-keystoreThe keytool utility then prints the fingerprint to the terminal. For example:
Certificate fingerprint: SHA1: DA:39:A3:EE:5E:6B:4B:0D:32:55:BF:EF:95:60:18:90:AF:D8:07:09
How to obtain your app's signing key from Play App Signing
When using Play App Signing, Google manages your app's signing key and uses it to sign your APKs. This key should be used for the signing fingerprint.
- In the App Signing page in Google Play Console, scroll to App signing key certificate.
- Use the SHA-1 certificate fingerprint.
Create OAuth 2.0 client IDs
For each applicable signing key from the previous steps, create an OAuth 2.0 client ID in your Google Cloud project's credentials.
In Google Cloud, open the Credentials page.
Click Create credentials, then select OAuth client ID from the menu.
Fill in the required fields as follows:
- Application type: choose Android.
- Package name: use the package name as declared in your AndroidManifest.xml.
- SHA-1 certificate fingerprint: use a fingerprint obtained in previous steps.
Press Create.
Include required libraries
- Include
com.google.android.gms:play-services-auth:16+in your app's dependencies. If you are using code minification, add it to your app's
build.gradlefile:buildTypes { release { ... proguardFiles getDefaultProguardFile('proguard-android-optimize.txt'), 'proguard-rules.pro' } }Add the following to your app's
proguard-rules.profile:-keep class com.google.android.gms.common.** { *; } -keep class com.google.android.gms.location.** { *; } -keep class com.google.android.gms.auth.** { *; } -keep class com.google.android.gms.tasks.** { *; }
Your app is now configured to use Keyless authentication.
API Key
- In Google Cloud, open the Credentials page.
Credentials - Click Create credentials, then select API key from the menu.
The API key created dialog displays the string for your newly created key. In Android Studio, add the new API key to your project. Include the API key in a
<meta-data>element in the<application>element in your app'sAndroidManifest.xml:<meta-data android:name="com.google.android.ar.API_KEY" android:value="API_KEY"/>- Review documentation on API key restrictions to secure your API key.
Your app is now configured to use API keys.
What's next
With authorization configured, check out the following ARCore features that use it: