Page Summary
-
ARCore detects planes by finding points on flat surfaces like walls, ceilings, or floors.
-
Guiding users with visuals and feedback helps them successfully find and confirm surfaces.
-
Vertical surfaces can be harder to detect but ARCore is capable of locating them.
-
Effective object placement involves considering optimal ranges and providing visual cues like highlights and shadows.
-
Objects can be placed automatically or manually using tap or drag gestures, and can also be anchored in place.
Plane discovery
Finding a surface
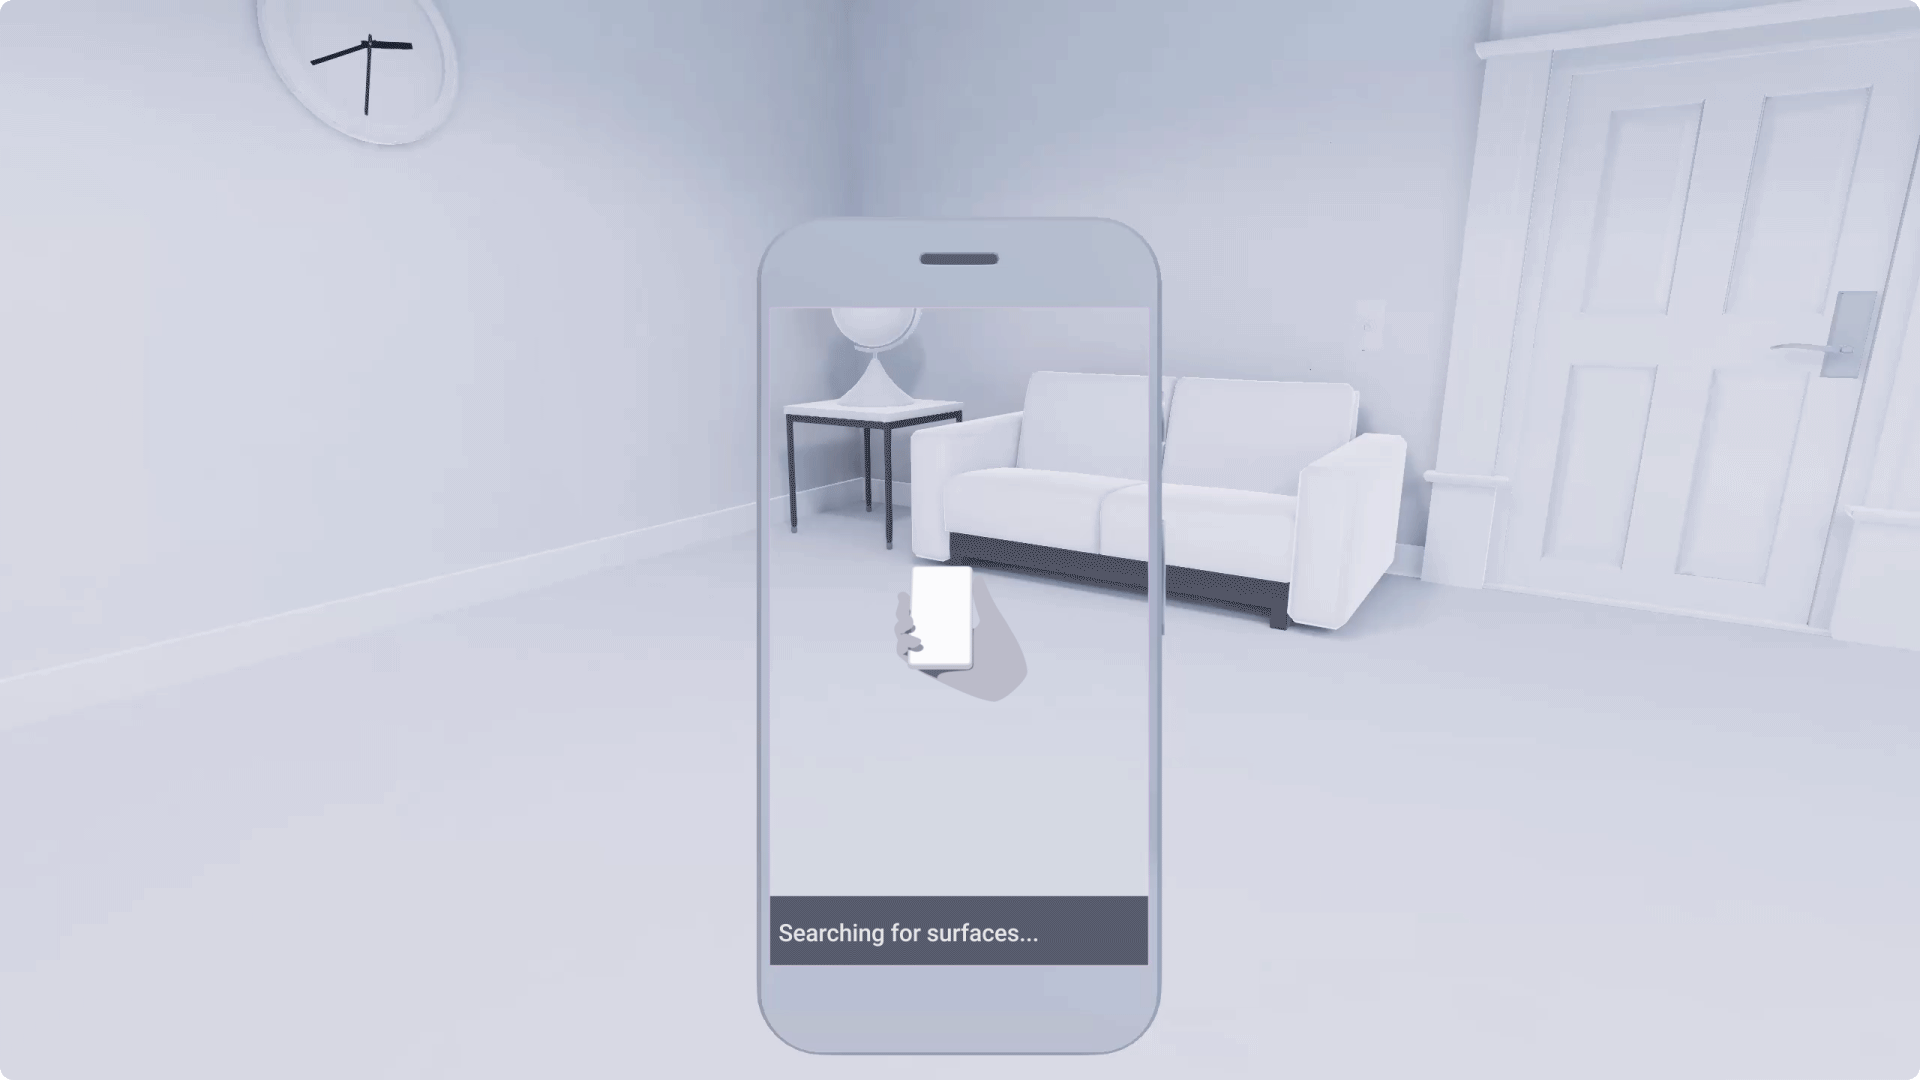
In order to find a plane, ARCore searches for a wall, ceiling, or floor by finding several points that are part of the same flat surface.
Show users how to find a surface using their phone. Use illustrations or animations to show users how to scan properly. This can help users understand to hold their phone toward the surface that they’re trying to detect, to move the phone in a clockwise or circular motion, and to search for surfaces that aren’t too dim or too bright.
As users move their phones, give instant feedback to show they’ve successfully detected a surface.
Vertical surfaces
Vertical surfaces can be harder to detect than horizontal surfaces.
Vertical surfaces reflect light, and they’re often painted a single color, both of which can cause detection failures.
ARCore is able to detect vertical surfaces. In certain cases, though, they might take a little longer to locate.
Confirm surface detection
When a user successfully finds a surface, tell them what to do next.
You can give them an object to place, encourage them to explore the space, or something else.
To encourage the user, build their confidence, and reduce frustration:
Design seamless transitions. When the user moves quickly, ARCore might lose its tracking. Design smooth, subtle transitions between surface finding and detection.
Aim for visual consistency. The visuals used for instructions, surface detection, and within the experience itself should share a single consistent look. Aim for visual harmony in all parts of your experience.
Use progressive disclosure. Let users know about changes in system status in a timely and relevant way. Using visual highlighting or displaying text to help communicate that a surface has been successfully detected.
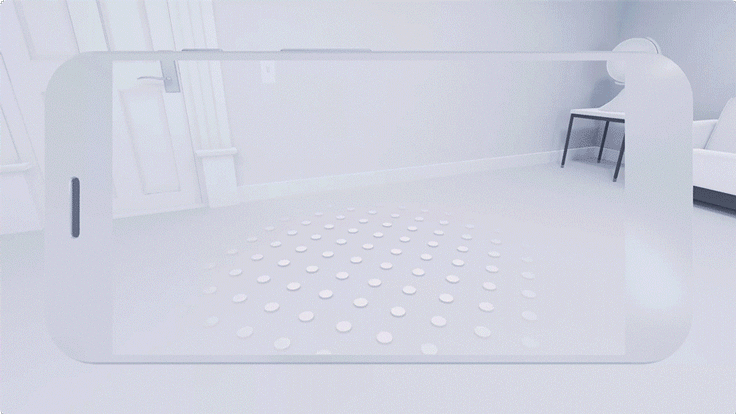
Use surface visualization to help users with object placement
Highlight surfaces that have been detected and are ready for object placement.
Visually highlight only the surface that the user is viewing or pointing at. Avoid highlighting multiple surfaces at once, and create visual distinctions between different planes.
Communicate error states clearly and help users recover quickly
Provide feedback when something has gone wrong, and give the user an actionable path to resolution. Give simple, short tasks. Walk the user through correcting the error state, one step at a time.
Error states can include:
- Trouble detecting a surface
- Trouble scanning a surface
- If the phone isn’t moving to enable detection
- If the user isn’t moving the phone properly to detect surfaces
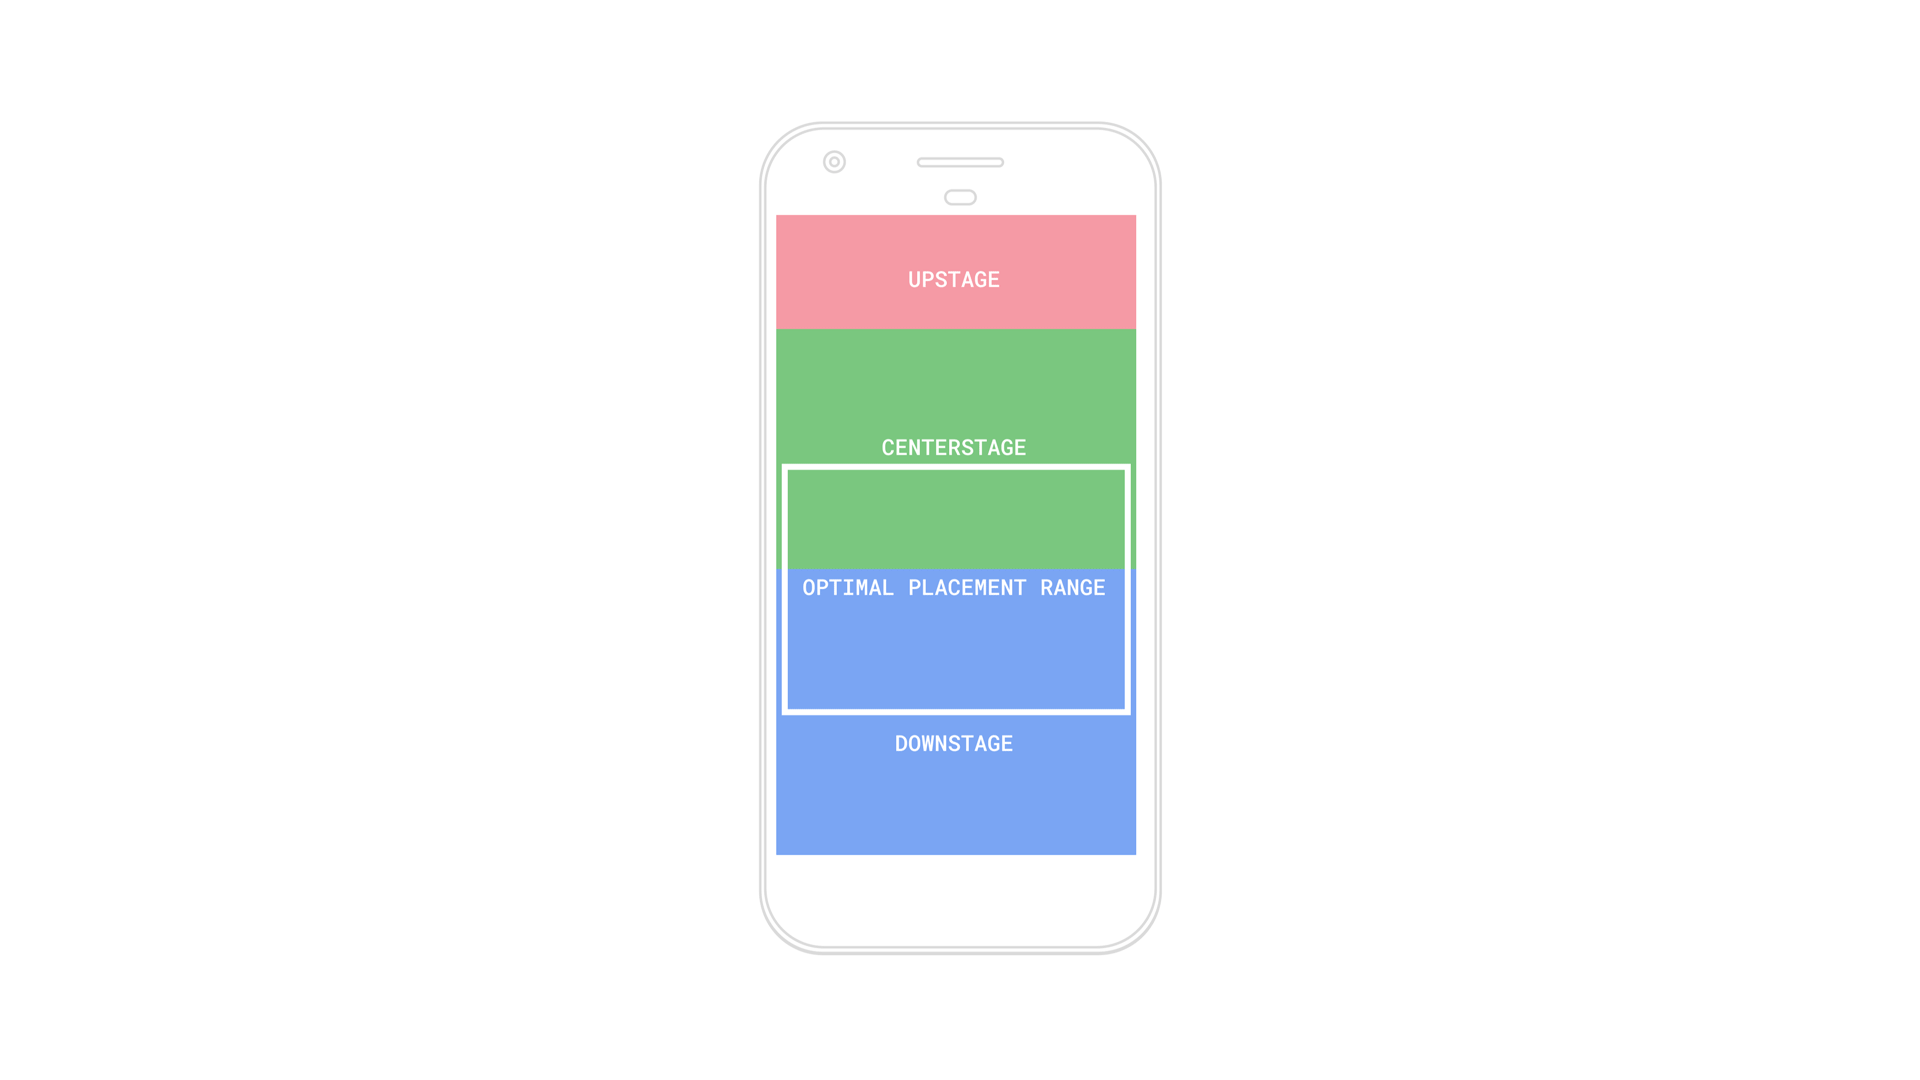
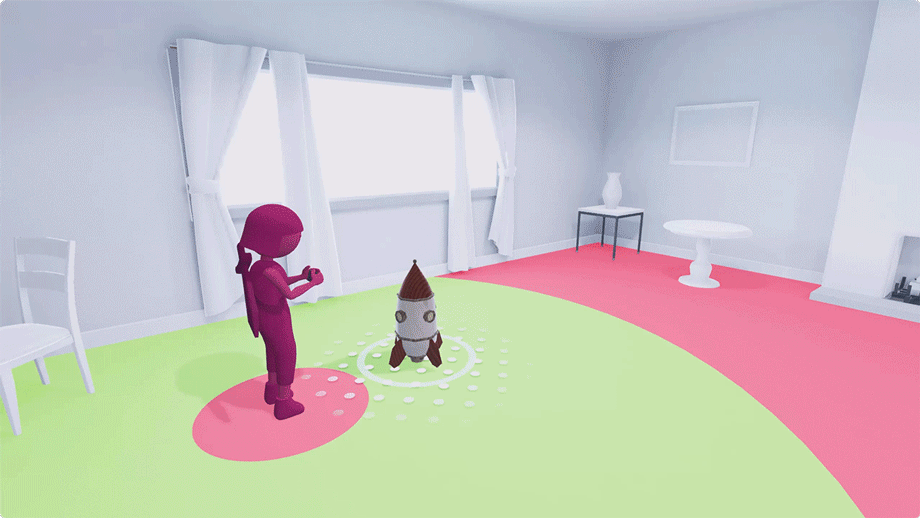
Optimal placement range
The optimal placement range is where you can place a virtual object at the most comfortable viewing distance.
Placement Range
Design your scene so it’s easy for users to perceive the depth and distance of objects.
The limited field of view on a phone screen can make it challenging for a user to perceive depth, scale, and distance. This may impact users’ experience, as well as their ability to interact with objects.
A user’s depth perception often depends on how objects are placed in the scene. For example, placing an object too close to the user can be startling or alarming. Placing large objects close to the user may cause them to step backward, bumping into or tripping over real-world objects behind them.
When you create your experience, consider the importance of depth. Think about how users will see your content, and whether or not they’ll be able to access it. Think of the scene in 3 distinct regions: downstage, upstage, and center stage.
Downstage, closest to the user: If an object is placed unexpectedly close to the user, it forces the user to move back, since it’s harder to see the full object. This is useful when you want the user to look down or examine something closely. However, be careful never to encourage the user to move backward! They could trip on real objects behind them.
Upstage, farthest from the user: If the object is placed upstage, it’s difficult for users to see the difference between a very small object and an object that’s sitting far away. It’s useful to encourage exploration and movement, but can create a visually confusing experience.
Center stage: This is the most comfortable viewing range for users. Objects here are optimal for users to interact with.
Note that the positioning of the three stages is relative to the viewing angle of the phone.
Maximum Placement Distance
Guide users as they place objects in the scene.
Help them to avoid placing objects at an uncomfortable distance.
You can set a maximum placement distance for objects. This helps to make sure that users will place objects at a comfortable viewing distance. It also guarantees that the object will stay at a realistic scale as the user continues to move it.
Set a default maximum distance, and don’t let users place an object beyond it.
Destination Point
The destination point is where an object will eventually be placed.
Use visual indicators to guide users as they place objects. Shadows can help indicate the destination point and make it easier for users to understand where an object will be placed on a detected surface.
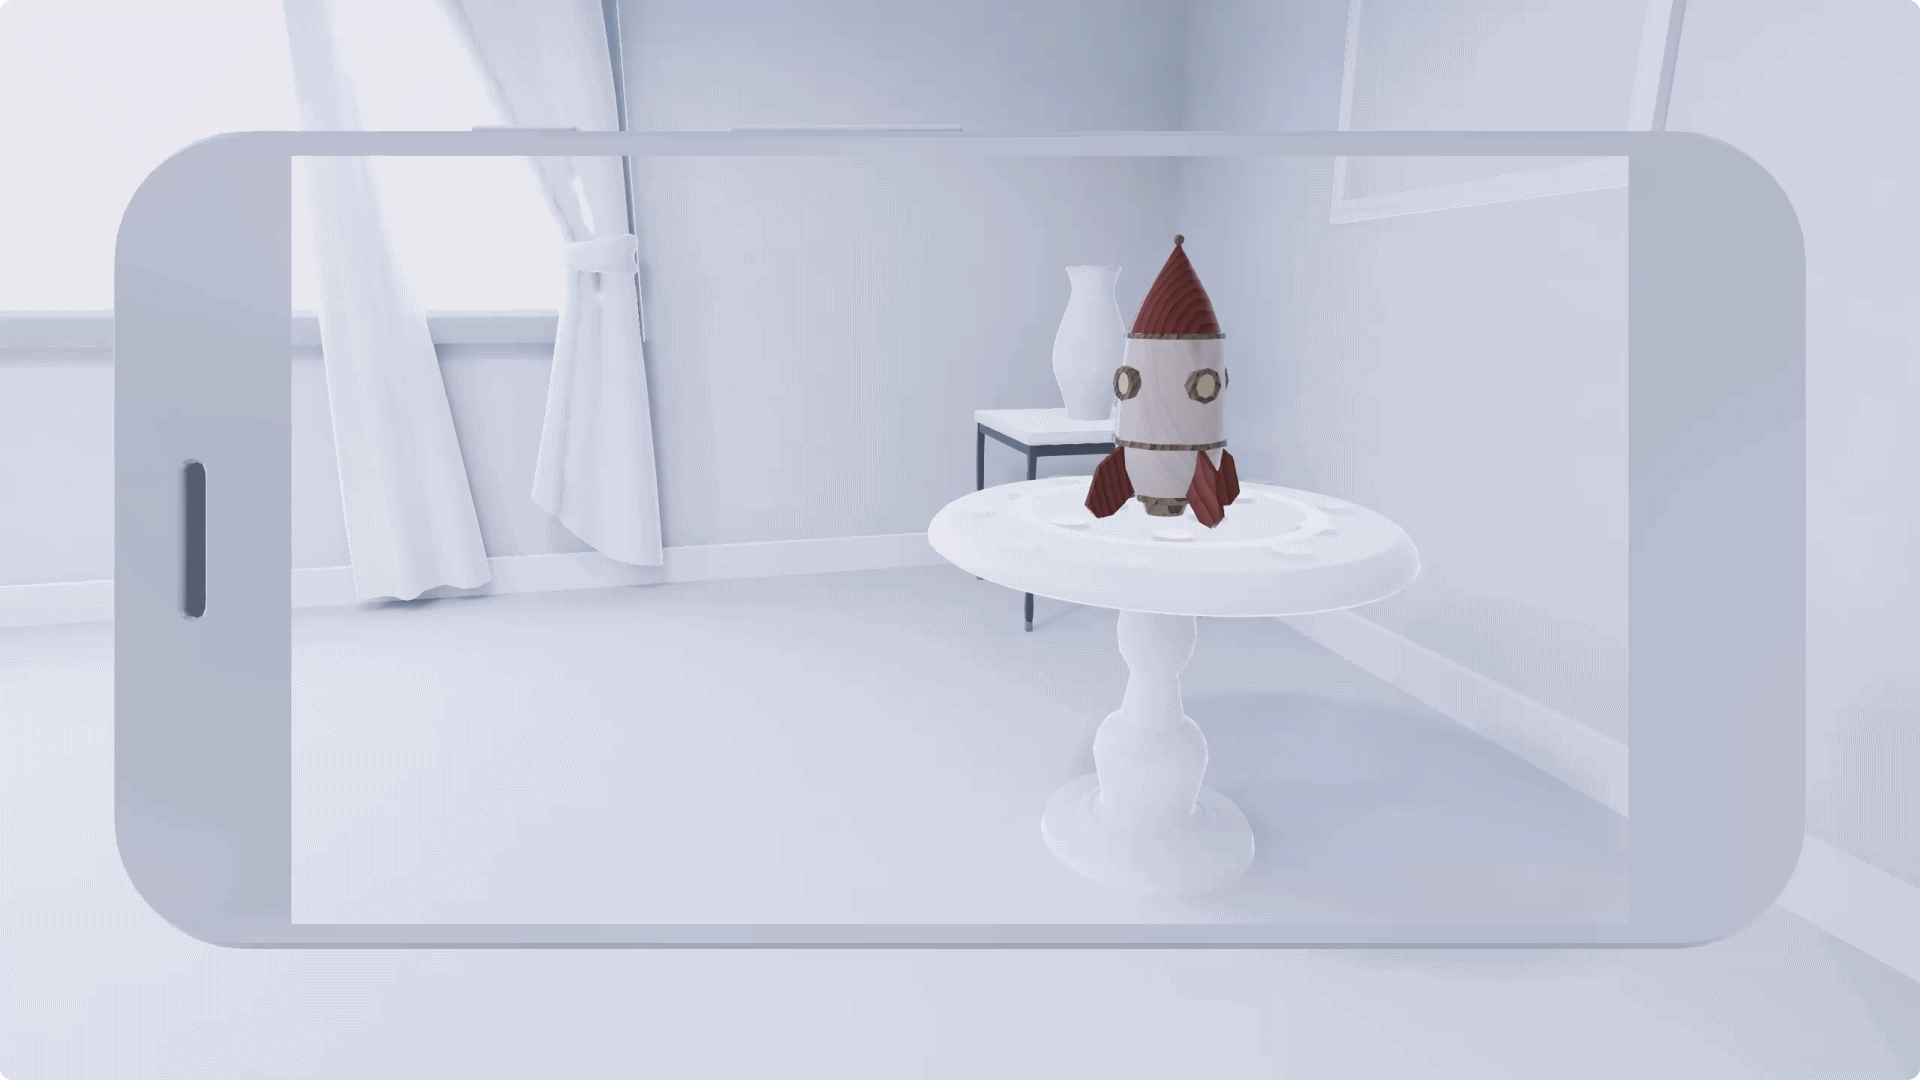
You can use the surface visualization, or the shadow of the object to indicate the destination point
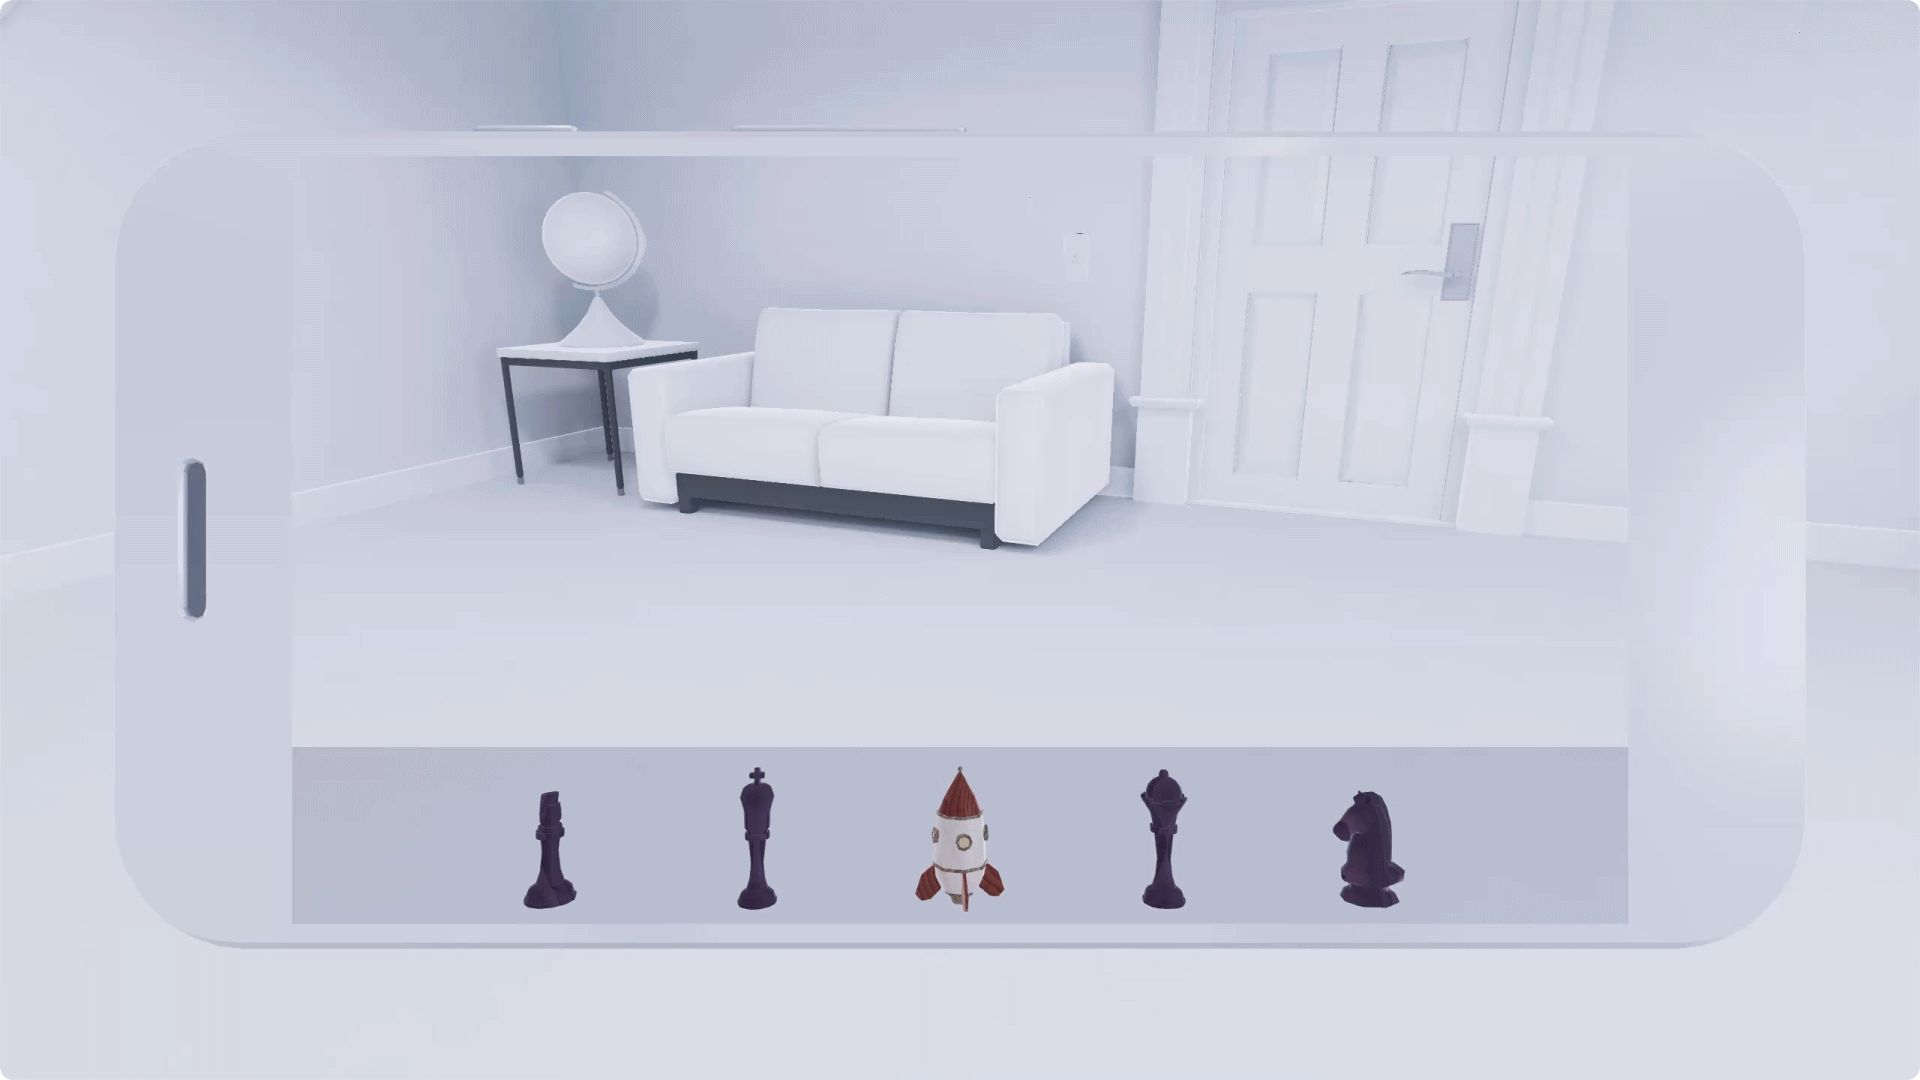
Placement
ARCore lets you drop any virtual object into a real-world space. Objects can be placed either automatically or manually.
Automatic Placement
It’s possible for the app itself to populate a scene. Once a surface is detected, the app can start placing objects immediately.
Automatic placement works best when:
- A virtual environment is added, without any user input, into the real-world space
- There’s no interaction, or minimal interaction
- It doesn’t matter if objects appear in exactly the right spot
- AR mode is crucial to your experience
- AR mode starts when the experience is launched
Virtual objects populating a scene
Manual Placement
Users can manually add virtual objects to a scene and move them around.
Manual placement works best when:
- The experience is fully interactive, such as a jigsaw puzzle
- Object placement needs to be precise, such as a furniture selection app
Tap to place an object
A user can drop a virtual object by tapping a spot anywhere in the scene. Tapping generally feels natural to the user, and works best when:
- The virtual object doesn’t need to be adjusted or resized before it’s placed
- It should be placed quickly
Tapping doesn’t work when multiple objects appear in the scene. When tapped, multiple objects can pile on top of each other.
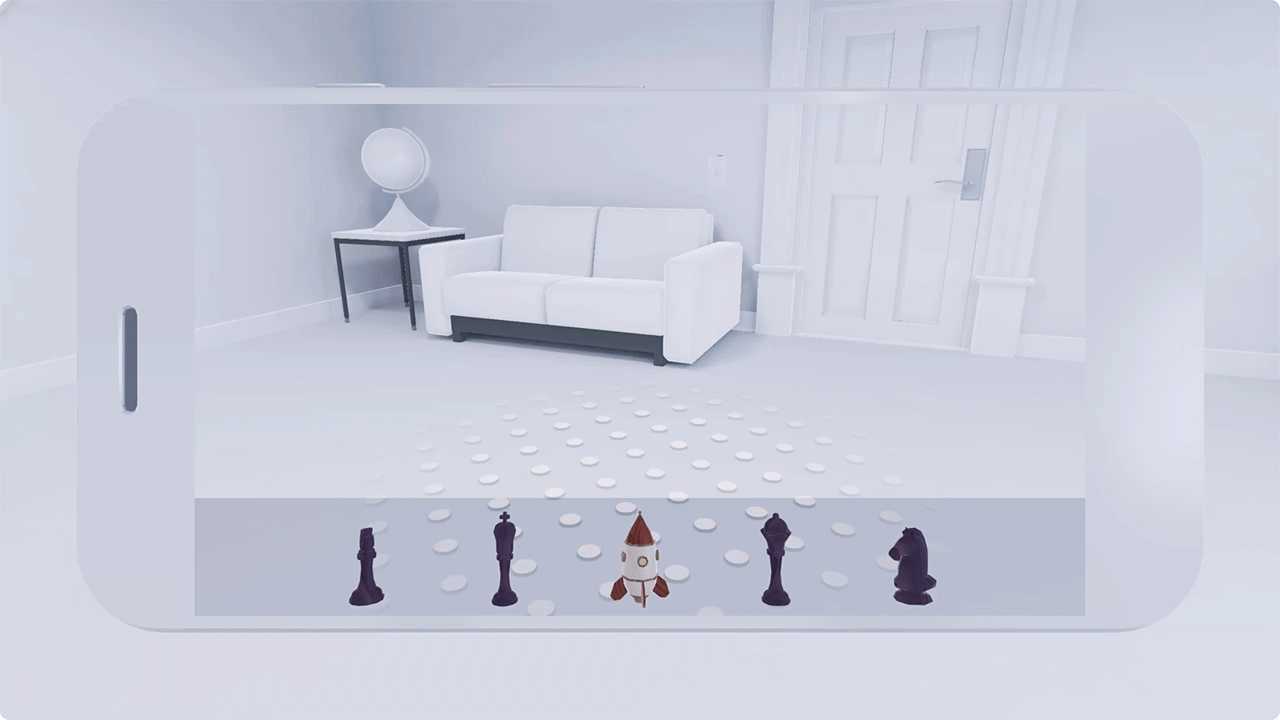
Drag to place an object
After selecting a virtual object by touching it, users can drag the object into their scene. Many users might not know how to drag. Give clear instructions, and walk them through the process of dragging step by step.
Be sure to tell users how to place an object before they pick it up! Dragging doesn’t work as well when the user is not informed about the placement gesture in advance.
Dragging works best when:
- The object needs to be adjusted or transformed
- The object needs to be dropped precisely in a certain place
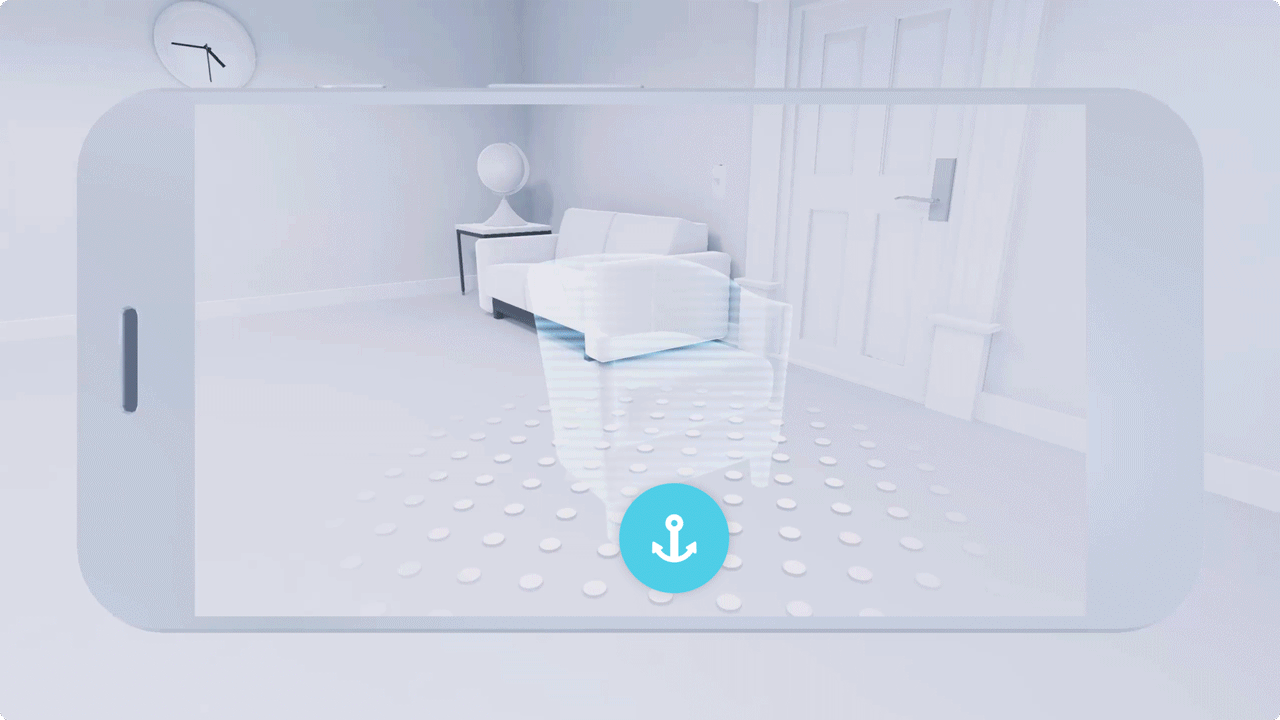
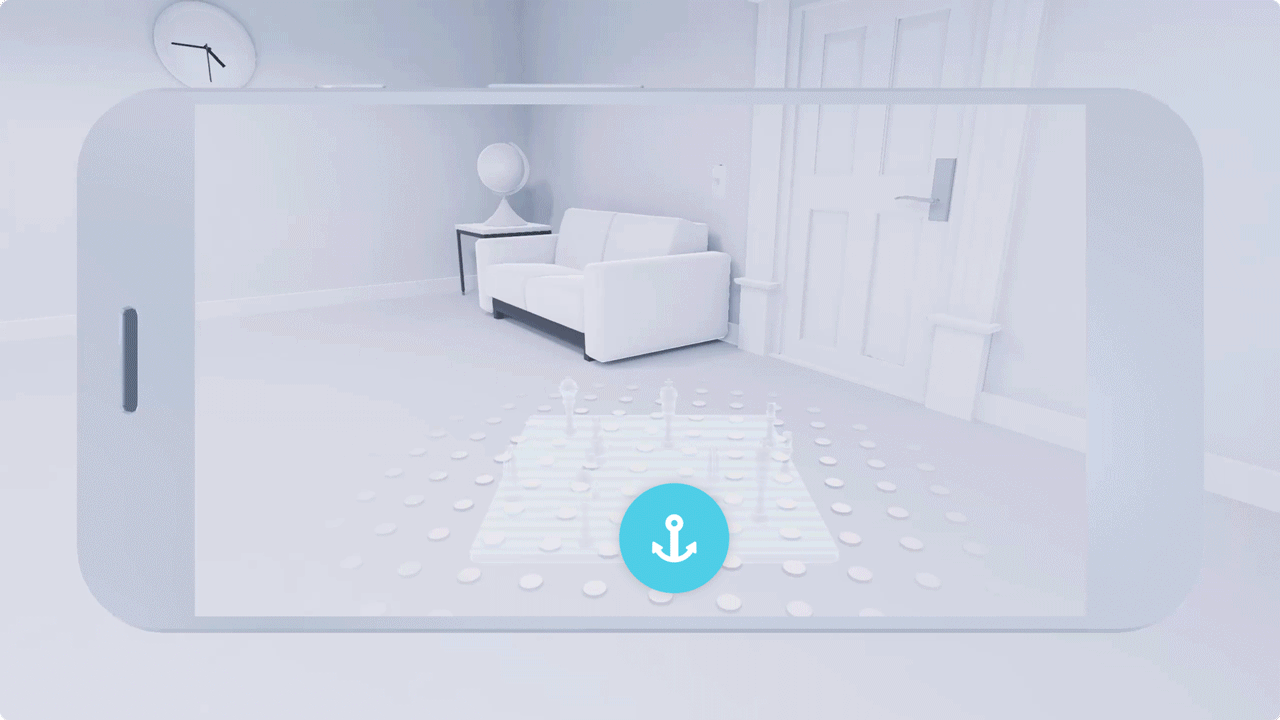
Anchoring
When you anchor an object in AR, you lock it firmly in a specific spot. Even when the user moves around, the object remains anchored.
Anchoring is different than simply placing an object in the scene. Ordinary objects can be placed, moved around, and played with. On the other hand, an anchored object will stay locked in place until the user moves it.
Anchors are most useful for pinning objects that the user will keep returning to, such as a menu or a home base. It’s also useful to anchor objects that contain other assets, like game boards.
Anchoring an object doesn’t mean it’s stuck in place forever! You can let the user move the object and re-anchor it if they need to.
Recommended — It’s helpful to anchor objects that contain other assets, like a chess board
Not recommended — There's no need to anchor static objects that stay in the same spot through the whole experience