
1. Overview
ARCore is Google's framework for building Augmented Reality experiences on smartphones. The new ARCore Geospatial API grants a new aspect to Augmented Reality, allowing you to place location-specific Augmented Reality waypoints around real-world landmarks.
What you'll build
In this codelab, you get started with the ARCore Geospatial API. You'll discover what information the Geospatial API can offer to your overall AR experience, and how this data can be used to power a simple AR wayfinding experience.
What you'll learn
- How to set up an ARCore project that uses the Geospatial API.
- How to request geographical data from the Geospatial API and display it using Google Maps.
- How to place an Anchor that's attached to a real-world location.
What you'll need
- A supported ARCore Android device, connected using a USB cable to your development machine, configured with USB debugging.
- Android Studio installed and configured to build Android apps.
- Google Play Services for AR 1.31 or later, installed on the Android development device.
2. Set up your development environment
Set up Android Studio
To get started with the Geospatial API, we provided a starter project that includes the basics of an ARCore project integrated with the Google Maps SDK. This gives you a quick start with the Geospatial API.
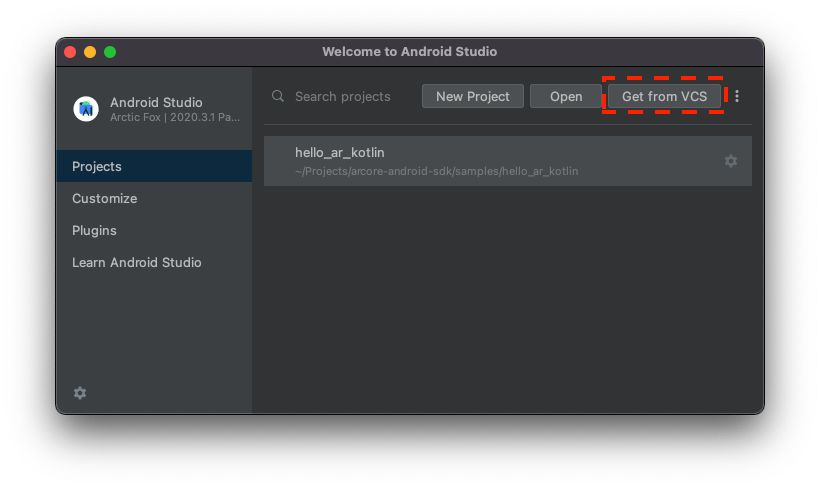
- Start Android Studio and import a project from VCS.
- If you have a project open already, use File > New > Project from Version Control....
- If you see the Welcome to Android Studio window, use Get from VCS.
- Select Git, and use URL
https://github.com/google-ar/codelab-geospatial.gitto import the project.
Set up a Google Cloud Project
The Geospatial API uses StreetView imagery combined with the device's magnetometer and camera sensor information to improve orientation values. To make use of this service, you need set up a Google Cloud Project.
- Create a project in the Google Cloud Console:
- Visit Create a project in Google Cloud Platform.
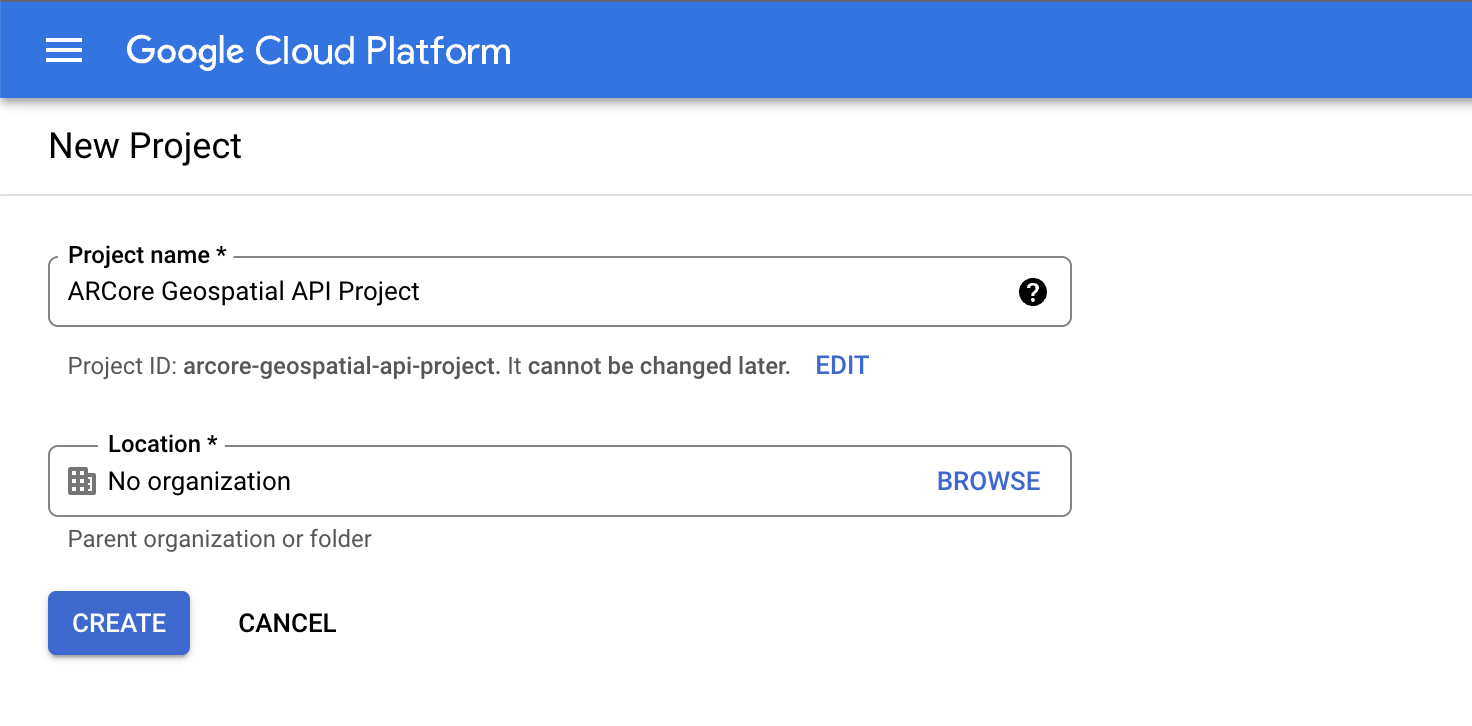
- Enter an appropriate Project name (for example, "ARCore Geospatial API project"), and choose any location.
- Click Create.
- Visit Create a project in Google Cloud Platform.
- Enable the necessary APIs:
- Create API Key credentials:
- Under APIs & Services, select Credentials.
- In the top bar, click Create Credentials, then select API Key.
- Take note of the key that was created as you need it for the next step. Return to the Credentials page if you need to retrieve it.
With these steps, you have created a Google Cloud Project with API key authorization, and you are ready to use the Geospatial API.
Integrate the API key with the Android Studio project
To associate the API key from Google Cloud with your project, open the project you created in Android Studio and modify the API keys:
- Open app > src > AndroidManifest.xml.
- Find the following
meta-dataentries:<meta-data android:name="com.google.android.ar.API_KEY" android:value="PLACEHOLDER_API_KEY" /> <meta-data android:name="com.google.android.geo.API_KEY" android:value="PLACEHOLDER_API_KEY" /> - Replace
PLACEHOLDER_API_KEYwith the API key that you created in your Google Cloud project.
The value stored in com.google.android.ar.API_KEY authorizes this app to use the Geospatial API, and the value stored in com.google.android.geo.API_KEY authorizes this app to use the Google Maps SDK.
Verify your project
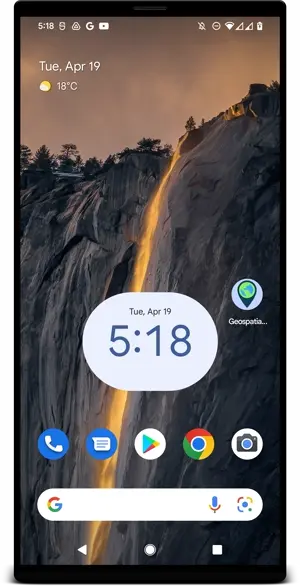
Make sure your project is all ready to go. In Android Studio, run your app. You should be able to see a camera view, along with a working map on the bottom of the screen.
3. Determine the user's position
In this step, you add code to the sample project to get started with the Geospatial API.
Configure the ARCore session to use the Geospatial API
To obtain Geospatial data, you need to enable the Geospatial API. Change the GeospatialMode in your session configuration to ENABLED by modifying the configureSession function in HelloGeoActivity.kt:
fun configureSession(session: Session) {
  session.configure(
    session.config.apply {
      // Enable Geospatial Mode.
      geospatialMode = Config.GeospatialMode.ENABLED
    }
  )
}
While the Geospatial mode is ENABLED, the application can obtain Geospatial information.
Request data from the Geospatial API
In HelloGeoRenderer.kt, find the following line:
// TODO: Obtain Geospatial information and display it on the map.
Below it, check that the Earth object is available for usage. That's when it has trackingState TrackingState.ENABLED.
val earth = session.earth
if (earth?.trackingState == TrackingState.TRACKING) {
  // TODO: the Earth object may be used here.
}
Below the TODO, request Geospatial information from ARCore. Add this line:
val cameraGeospatialPose = earth.cameraGeospatialPose
This gives you a GeospatialPose that contains this information:
- Location, expressed in latitude and longitude. An estimate of the location accuracy is also supplied.
- Elevation, and an estimate of elevation accuracy.
- Heading, an approximation of the direction the device is facing, and an estimate of the accuracy of the heading.
Display positioning information on the map
You can use the GeospatialPose stored in cameraGeospatialPose to move a marker on the map that shows where the user is. Continue where you left off and add the following:
activity.view.mapView?.updateMapPosition(
  latitude = cameraGeospatialPose.latitude,
  longitude = cameraGeospatialPose.longitude,
  heading = cameraGeospatialPose.heading
)
This continually updates the map's position using the values obtained from the Geospatial API.
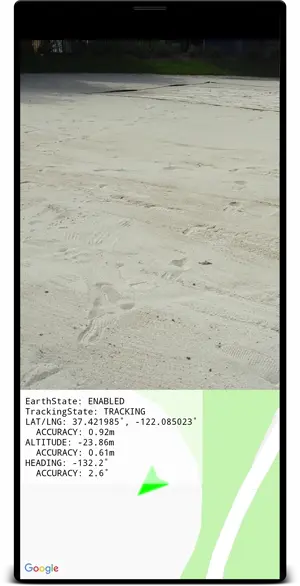
Try it out
In Android Studio, click Play. Hold your device up and move it around to help ARCore establish tracking. After a short while, you should see a green marker appear on the map. This marker rotates as you view your surroundings. It should also point in the correct direction: when you're physically facing North, the arrow also points North.
4. Place an anchor using Earth coordinates
The Geospatial API can place Anchors at any coordinate pair and rotation in the real world. This lets your users see anchored content when specific locations are visited.
In this step, you add a way to place an Anchor by tapping on the map.
Set an action when the map is tapped
The project comes with an onMapClick function, which is called with a latitude and longitude when the map fragment is clicked. Find the onMapClick function in HelloGeoRenderer.kt.
Make sure the Earth object can be used
Before creating anchors on Earth, make sure that the Earth object's TrackingState is TRACKING, meaning that the position of Earth is known. Also make sure its EarthState is ENABLED, meaning no problems were encountered with the Geospatial API. Add these lines inside onMapClick:
val earth = session?.earth ?: return
if (earth.trackingState != TrackingState.TRACKING) {
  return
}
Determine the positioning of the new Anchor
After confirming that the Earth object is tracking, detach the previous earthAnchor, if one exists. You replace the earthAnchor with a new anchor in the next steps:
earthAnchor?.detach()
Then, use the cameraGeospatialPose to determine the altitude for the new anchor. Use the coordinate pair from tapping the map as the anchor's positioning.
// Place the earth anchor at the same altitude as that of the camera to make it easier to view.
val altitude = earth.cameraGeospatialPose.altitude - 1
// The rotation quaternion of the anchor in the East-Up-South (EUS) coordinate system.
val qx = 0f
val qy = 0f
val qz = 0f
val qw = 1f
earthAnchor =
  earth.createAnchor(latLng.latitude, latLng.longitude, altitude, qx, qy, qz, qw)
createAnchor creates an Anchor fixed to geodetic coordinates with a given rotation. This anchor attempts to remain stable and fixed to the specified coordinates and altitude.
Show the placed marker on the map
Finally, move a new marker that indicates where the marker was placed:
activity.view.mapView?.earthMarker?.apply {
  position = latLng
  isVisible = true
}
Try it out
In Android Studio, click Play. Hold your device up, and move it around to help ARCore establish tracking. After a short while, you should see a green marker appear on the map that indicates your current position.
Tapping the map uses the Geospatial API to place an anchor, which is fixed to a real-world location. Try placing the anchor close to your current location so that you can see it in the AR view. It should remain stable as you navigate your environment.
5. Conclusion
In this codelab, you learned how to use the Geospatial API to create a simple AR experience that's tied to the real world.
What we've covered
- How to set up a Google Cloud project with the Geospatial API enabled.
- How to obtain Geospatial information in an ARCore project and display it on a map.
- How to place an anchor that's positioned in the real world using geographic positioning.
Additional resources
For more details on the geographical concepts and SDKs used in this codelab, see these additional resources: