本頁面將引導您使用 WebXR 建立簡單的沉浸式 AR 應用程式。
您需要支援 WebXR 的開發環境才能開始使用。
建立 HTML 網頁
WebXR 需要使用者互動才能啟動工作階段。建立呼叫 activateXR() 的按鈕。載入頁面後,使用者可以使用這個按鈕開始 AR 體驗。
建立名為 index.html 的新檔案,並在檔案中加入下列 HTML 程式碼:
<!doctype html>
<html>
<head>
  <meta charset="UTF-8">
  <meta name="viewport"
        content="width=device-width, user-scalable=no, initial-scale=1.0, maximum-scale=1.0, minimum-scale=1.0">
  <title>Hello WebXR!</title>

  <!-- three.js -->
  <script src="https://unpkg.com/three@0.126.0/build/three.js"></script>
</head>
<body>

<!-- Starting an immersive WebXR session requires user interaction.
    We start this one with a simple button. -->
<button onclick="activateXR()">Start Hello WebXR</button>
<script>
async function activateXR() {
  // Add a canvas element and initialize a WebGL context that is compatible with WebXR.
  const canvas = document.createElement("canvas");
  document.body.appendChild(canvas);
  const gl = canvas.getContext("webgl", {xrCompatible: true});

  // To be continued in upcoming steps.
}
</script>
</body>
</html>
初始化 three.js
按下「Start」按鈕後,系統不會執行太多操作。如要設定 3D 環境,您可以使用轉譯程式庫來顯示場景。
在這個範例中,您將使用提供 WebGL 轉譯器的 JavaScript 3D 算繪程式庫 three.js。Three.js 可處理算繪、相機和場景圖表,讓您更輕鬆地在網路上顯示 3D 內容。
建立場景
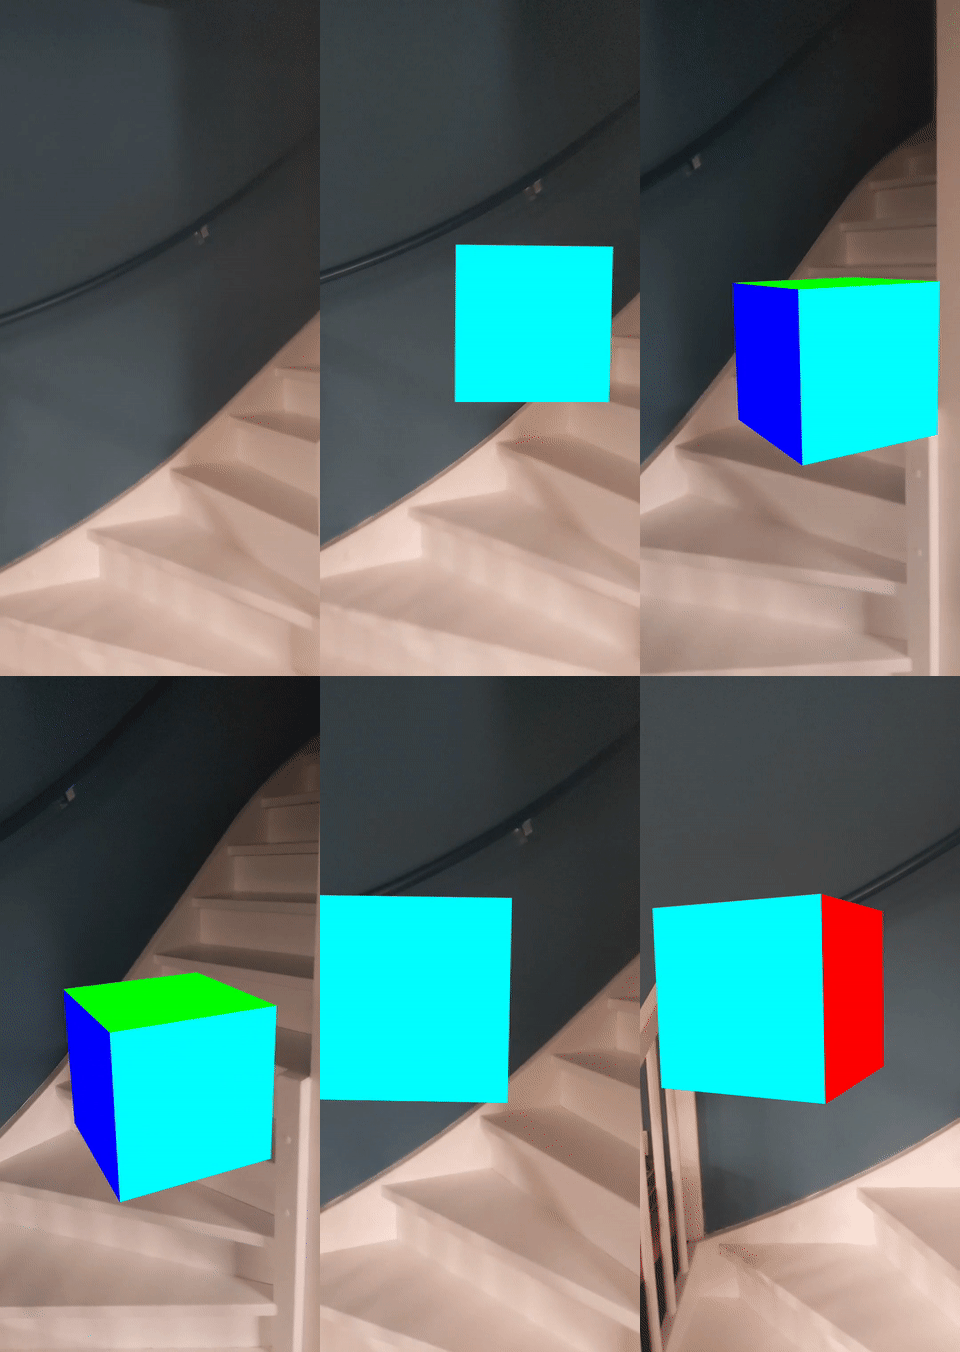
3D 環境通常會模擬為場景。建立包含 AR 元素的 THREE.Scene。以下程式碼可讓您在 AR 中查看未點亮的彩色方塊。
將下列程式碼新增至 activateXR() 函式的底部:
const scene = new THREE.Scene();

// The cube will have a different color on each side.
const materials = [
  new THREE.MeshBasicMaterial({color: 0xff0000}),
  new THREE.MeshBasicMaterial({color: 0x0000ff}),
  new THREE.MeshBasicMaterial({color: 0x00ff00}),
  new THREE.MeshBasicMaterial({color: 0xff00ff}),
  new THREE.MeshBasicMaterial({color: 0x00ffff}),
  new THREE.MeshBasicMaterial({color: 0xffff00})
];

// Create the cube and add it to the demo scene.
const cube = new THREE.Mesh(new THREE.BoxBufferGeometry(0.2, 0.2, 0.2), materials);
cube.position.set(1, 1, 1);
scene.add(cube);
使用 Three.js 設定轉譯
您需要使用轉譯器和攝影機,才能在 AR 模式中查看這個場景。 轉譯器會使用 WebGL 將場景繪製至螢幕。攝影機會說明可用來查看場景的可視區域。
將下列程式碼新增至 activateXR() 函式的底部:
// Set up the WebGLRenderer, which handles rendering to the session's base layer.
const renderer = new THREE.WebGLRenderer({
  alpha: true,
  preserveDrawingBuffer: true,
  canvas: canvas,
  context: gl
});
renderer.autoClear = false;

// The API directly updates the camera matrices.
// Disable matrix auto updates so three.js doesn't attempt
// to handle the matrices independently.
const camera = new THREE.PerspectiveCamera();
camera.matrixAutoUpdate = false;
建立 XRSession
WebXR 的進入點是透過 XRSystem.requestSession()。使用 immersive-ar 模式,即可在實際環境中查看算繪內容。
XRReferenceSpace 是指虛擬世界中物件使用的座標系統。'local' 模式最適合 AR 體驗,因為其參考空間的起點位於觀看者附近,且追蹤穩定。
如要建立 XRSession 和 XRReferenceSpace,請將以下程式碼新增至 activateXR() 函式的底部:
// Initialize a WebXR session using "immersive-ar".
const session = await navigator.xr.requestSession("immersive-ar");
session.updateRenderState({
  baseLayer: new XRWebGLLayer(session, gl)
});

// A 'local' reference space has a native origin that is located
// near the viewer's position at the time the session was created.
const referenceSpace = await session.requestReferenceSpace('local');
算繪場景
您現在可以轉譯場景了。XRSession.requestAnimationFrame() 會排定回呼,在瀏覽器準備好繪製影格時執行。
在動畫影格回呼期間,請呼叫 XRFrame.getViewerPose(),以取得相對於本機座標空間的檢視器姿勢。這項屬性用於更新場景中的攝影機,在轉譯器使用更新後的攝影機繪製場景之前,變更使用者查看虛擬世界的方式。
將下列程式碼新增至 activateXR() 函式的底部:
// Create a render loop that allows us to draw on the AR view.
const onXRFrame = (time, frame) => {
  // Queue up the next draw request.
  session.requestAnimationFrame(onXRFrame);

  // Bind the graphics framebuffer to the baseLayer's framebuffer
  gl.bindFramebuffer(gl.FRAMEBUFFER, session.renderState.baseLayer.framebuffer)

  // Retrieve the pose of the device.
  // XRFrame.getViewerPose can return null while the session attempts to establish tracking.
  const pose = frame.getViewerPose(referenceSpace);
  if (pose) {
    // In mobile AR, we only have one view.
    const view = pose.views[0];

    const viewport = session.renderState.baseLayer.getViewport(view);
    renderer.setSize(viewport.width, viewport.height)

    // Use the view's transform matrix and projection matrix to configure the THREE.camera.
    camera.matrix.fromArray(view.transform.matrix)
    camera.projectionMatrix.fromArray(view.projectionMatrix);
    camera.updateMatrixWorld(true);

    // Render the scene with THREE.WebGLRenderer.
    renderer.render(scene, camera)
  }
}
session.requestAnimationFrame(onXRFrame);
執行 Hello WebXR
前往裝置上的 WebXR 檔案。您應該可以從各個角度看到彩色立方體。
新增命中測試
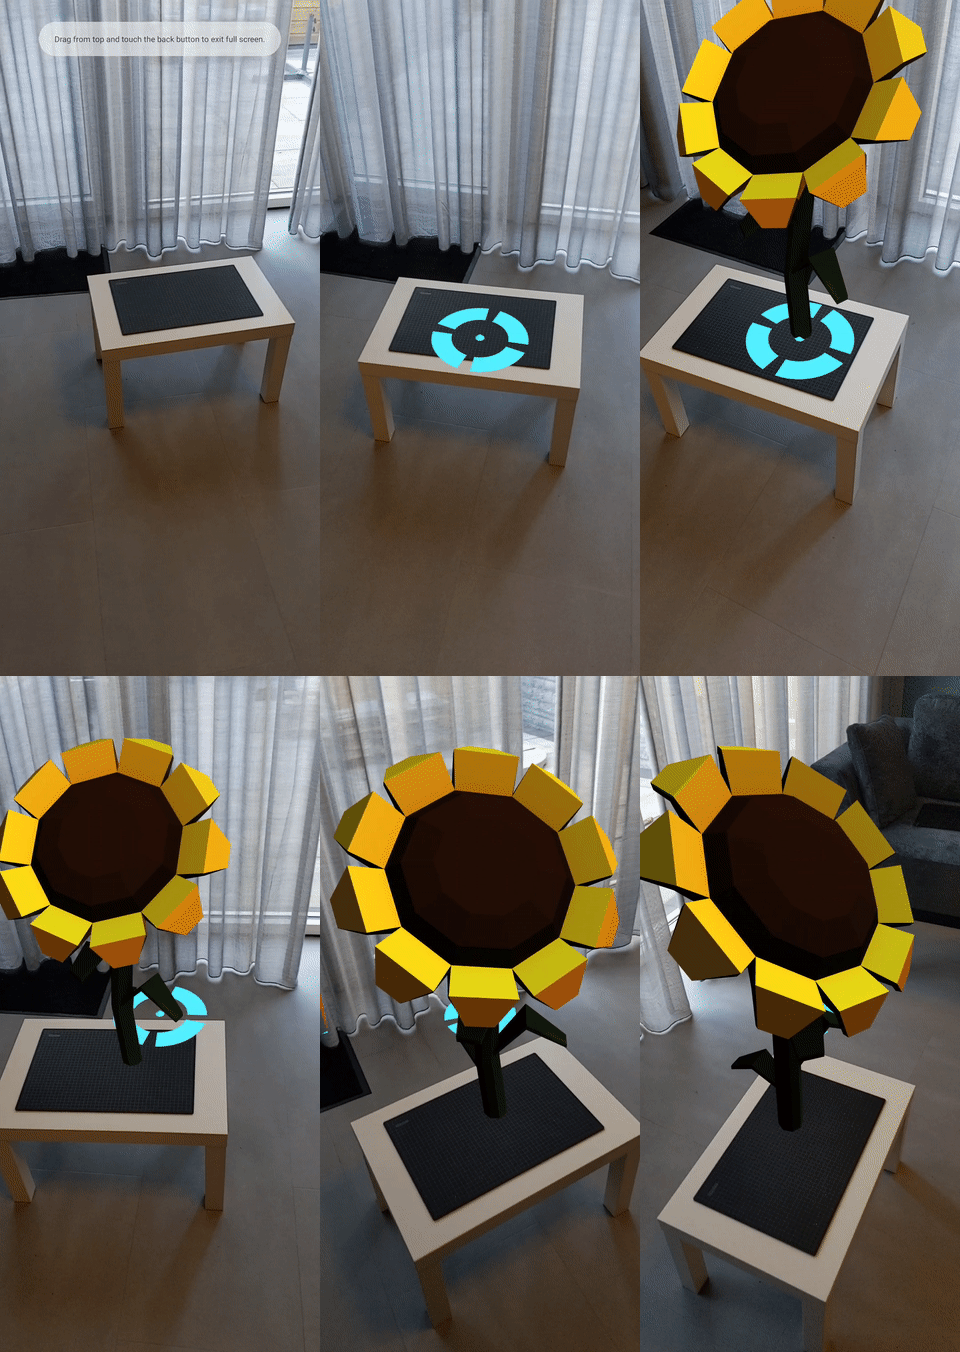
與 AR 世界互動的常見方式是透過命中測試,找出光線與實際幾何圖形的交集。在 Hello WebXR 中,您將使用命中測試,在虛擬世界中放置向日葵。
移除示範立方體
移除未點亮的立方體,並以含有照明的場景取代:
const scene = new THREE.Scene();

const directionalLight = new THREE.DirectionalLight(0xffffff, 0.3);
directionalLight.position.set(10, 15, 10);
scene.add(directionalLight);
使用 hit-test 功能
如要初始化命中測試功能,請使用 hit-test 功能要求工作階段。找出先前的 requestSession() 片段,然後加入 hit-test:
const session = await navigator.xr.requestSession("immersive-ar", {requiredFeatures: ['hit-test']});
新增模型載入器
目前場景只包含一個彩色立方體。為了讓體驗更有趣,請新增模型載入器,以允許載入 glTF 模型。
在文件的 <head> 標記中,新增 three.js 的 GLTFLoader。
<!-- three.js -->
<script src="https://unpkg.com/three@0.126.0/build/three.js"></script>

<script src="https://unpkg.com/three@0.126.0/examples/js/loaders/GLTFLoader.js"></script>
載入 GLTF 模型
使用上一個步驟中的模型載入器,從網路載入指定目標十字準線和向日葵。
請在 onXRFrame 上方加入以下程式碼:
const loader = new THREE.GLTFLoader();
let reticle;
loader.load("https://immersive-web.github.io/webxr-samples/media/gltf/reticle/reticle.gltf", function(gltf) {
  reticle = gltf.scene;
  reticle.visible = false;
  scene.add(reticle);
})

let flower;
loader.load("https://immersive-web.github.io/webxr-samples/media/gltf/sunflower/sunflower.gltf", function(gltf) {
  flower = gltf.scene;
});

// Create a render loop that allows us to draw on the AR view.
const onXRFrame = (time, frame) => {
建立命中測試來源
如要計算與實際物件的交集,請使用 XRSession.requestHitTestSource() 建立 XRHitTestSource。用於命中測試的光線會將 viewer 參考空間設為原點,也就是從檢視區中心執行命中測試。
如要建立命中測試來源,請在建立 local 參照空間後加入以下程式碼:
// A 'local' reference space has a native origin that is located
// near the viewer's position at the time the session was created.
const referenceSpace = await session.requestReferenceSpace('local');

// Create another XRReferenceSpace that has the viewer as the origin.
const viewerSpace = await session.requestReferenceSpace('viewer');
// Perform hit testing using the viewer as origin.
const hitTestSource = await session.requestHitTestSource({ space: viewerSpace });
畫出指定目標做法
如要清楚指明向日葵的刊登位置,請在場景中加入目標鎖定提示。 這個十字準線會顯示在實際表面上,表示向日葵將會固定在哪裡。
XRFrame.getHitTestResults 會傳回 XRHitTestResult 陣列,並公開與實際幾何圖形的交集。使用這些交集點,在每個影格上放置瞄準十字線。
camera.projectionMatrix.fromArray(view.projectionMatrix);
camera.updateMatrixWorld(true);

const hitTestResults = frame.getHitTestResults(hitTestSource);
if (hitTestResults.length > 0 && reticle) {
  const hitPose = hitTestResults[0].getPose(referenceSpace);
  reticle.visible = true;
  reticle.position.set(hitPose.transform.position.x, hitPose.transform.position.y, hitPose.transform.position.z)
  reticle.updateMatrixWorld(true);
}
新增輕觸互動
當使用者完成主要動作時,XRSession 會收到 select 事件。在 AR 工作階段中,這會對應到輕觸螢幕。
在初始化期間新增以下程式碼,讓輕觸螢幕上的使用者能夠顯示新的向日葵:
let flower;
loader.load("https://immersive-web.github.io/webxr-samples/media/gltf/sunflower/sunflower.gltf", function(gltf) {
  flower = gltf.scene;
});

session.addEventListener("select", (event) => {
  if (flower) {
    const clone = flower.clone();
    clone.position.copy(reticle.position);
    scene.add(clone);
  }
});
測試點擊測試
使用行動裝置前往該頁面。WebXR 瞭解環境後,十字準線就會顯示在實際表面上。輕觸螢幕放置向日葵,可從各個方向觀看。
後續步驟
- 閱讀 WebXR Device API 規格。
- 請參閱 MDN 網路文件中的 WebXR 參考說明文件。
- 試用 WebXR 範例。
- 使用 WebXR Device API 建構擴增實境 (AR) 應用程式 (程式碼研究室)。


