
本頁面說明 Maps SDK for iOS 公用程式庫提供的熱視圖公用程式。熱視圖可用來在地圖上呈現資料點的分布情形和密度。
這部影片說明當資料需要用到地圖上的大量資料點時,如何以熱視圖替代標記叢集。
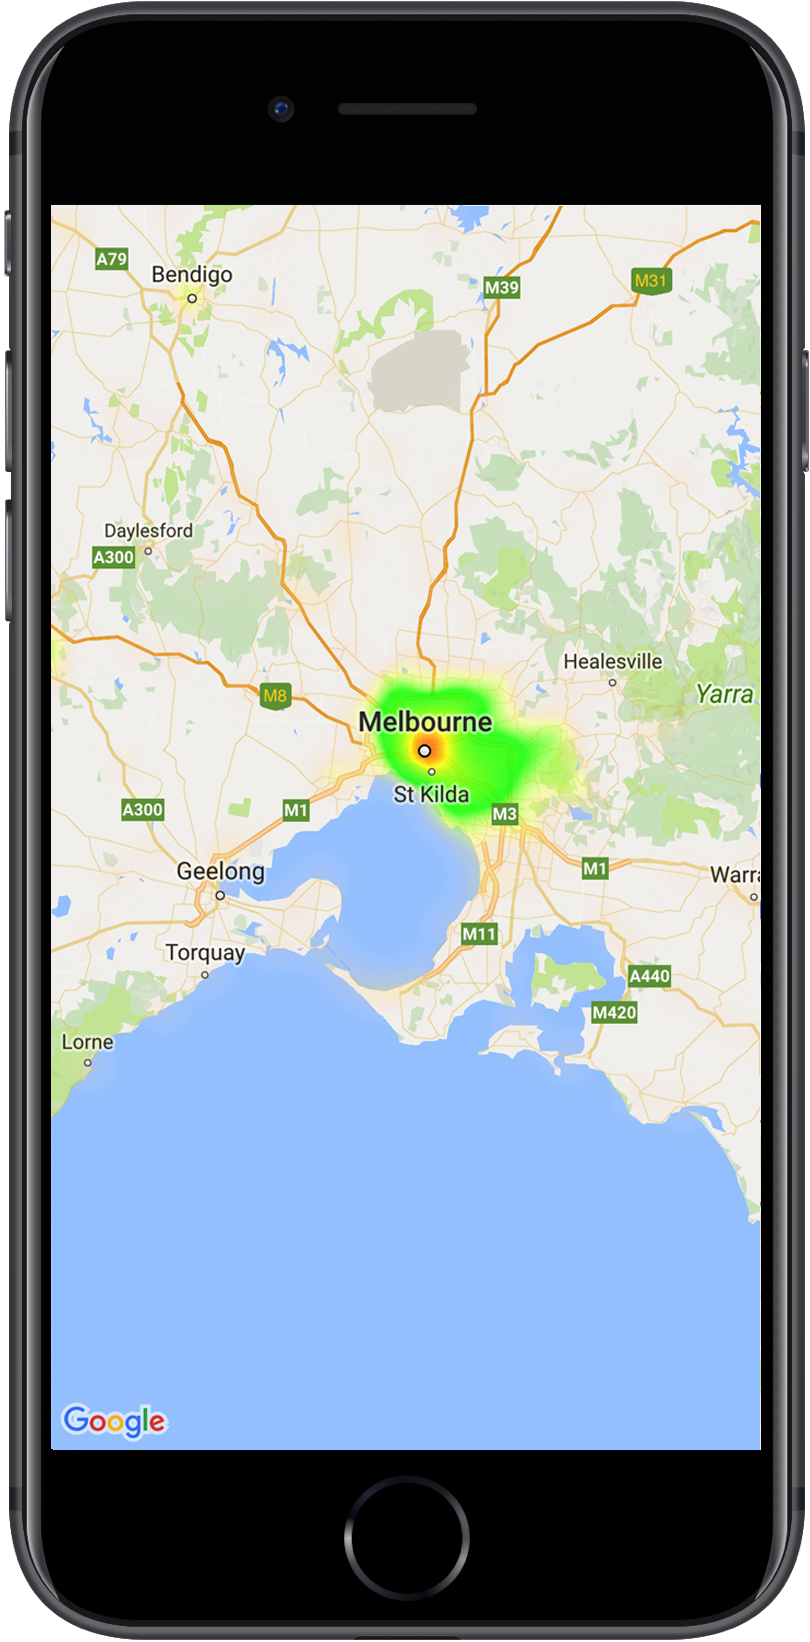
熱視圖能在地圖上顯示資料點的分布位置及相對強度,讓檢視者一目瞭然。這類地圖並不會在各個地點放置標記,而是使用顏色來表示資料的分布情形。
在下方範例中,紅色代表澳洲維多利亞省警察局數量最密集的區域。
如果您尚未設定程式庫,請先按照設定指南的步驟完成設定,再閱讀本頁面的其他內容。
新增簡單的熱視圖
如要在地圖中加入熱視圖,您需要一個由各個興趣點位置座標構成的資料集。首先,請建立 GMUHeatmapTileLayer 例項,並將 map 屬性設為 GMSMapView。請在應用程式的 viewDidLoad() 函式中執行這項操作,確保在處理熱視圖之前已載入基本地圖。然後將 GMUWeightedLatLng 物件集合傳遞至 GMUHeatmapTileLayer 例項。
公用程式會提供 GMUHeatmapTileLayer 類別,這個類別會接受 GMUWeightedLatLng 物件集合。該類別會根據提供的半徑、漸層和不透明度選項,為不同縮放等級建立圖塊圖片。
詳細步驟如下:
- 建立
GMUHeatmapTileLayer例項,並將map屬性設為GMSMapView(在應用程式的viewDidLoad()函式中執行此操作)。 - 將
GMUWeightedLatLng物件的集合傳遞至GMUHeatmapTileLayer例項。 - 呼叫
GMUHeatmapTileLayer.map,傳遞地圖檢視區塊。Swift
class Heatmap: UIViewController {

  private var mapView: GMSMapView!
  private var heatmapLayer: GMUHeatmapTileLayer!

  override func viewDidLoad() {
    super.viewDidLoad()
    heatmapLayer = GMUHeatmapTileLayer()
    heatmapLayer.map = mapView
  }

  // ...

  func addHeatmap() {

    // Get the data: latitude/longitude positions of police stations.
    guard let path = Bundle.main.url(forResource: "police_stations", withExtension: "json") else {
      return
    }
    guard let data = try? Data(contentsOf: path) else {
      return
    }
    guard let json = try? JSONSerialization.jsonObject(with: data, options: []) else {
      return
    }
    guard let object = json as? [[String: Any]] else {
      print("Could not read the JSON.")
      return
    }

    var list = [GMUWeightedLatLng]()
    for item in object {
      let lat = item["lat"] as! CLLocationDegrees
      let lng = item["lng"] as! CLLocationDegrees
      let coords = GMUWeightedLatLng(
        coordinate: CLLocationCoordinate2DMake(lat, lng),
        intensity: 1.0
      )
      list.append(coords)
    }

    // Add the latlngs to the heatmap layer.
    heatmapLayer.weightedData = list
  }
}
Objective-C
@implementation Heatmap {
  GMSMapView *_mapView;
  GMUHeatmapTileLayer *_heatmapLayer;
}

- (void)viewDidLoad {
  [super viewDidLoad];
  _heatmapLayer = [[GMUHeatmapTileLayer alloc] init];
  _heatmapLayer.map = _mapView;
}

// ...

- (void) addHeatmap {

  // Get the data: latitude/longitude positions of police stations.
  NSURL *path = [NSBundle.mainBundle URLForResource:@"police_stations" withExtension:@"json"];
  NSData *data = [NSData dataWithContentsOfURL:path];
  NSArray *json = [NSJSONSerialization JSONObjectWithData:data options:0 error:nil];

  NSMutableArray<GMUWeightedLatLng *> *list = [[NSMutableArray alloc] init];
  [json enumerateObjectsUsingBlock:^(id  _Nonnull obj, NSUInteger idx, BOOL * _Nonnull stop) {
    NSDictionary *item = (NSDictionary *)obj;
    CLLocationDegrees lat = [(NSNumber *) [item valueForKey:@"lat"] doubleValue];
    CLLocationDegrees lng = [(NSNumber *) [item valueForKey:@"lng"] doubleValue];
    GMUWeightedLatLng *coords = [[GMUWeightedLatLng alloc] initWithCoordinate:CLLocationCoordinate2DMake(lat, lng)
                                                                    intensity:1.0];
    [list addObject:coords];
  }];


  // Add the latlngs to the heatmap layer.
  _heatmapLayer.weightedData = list;
}
@end
在本範例中,資料會儲存在 JSON 檔案 police_stations.json 中。以下是從檔案擷取的內容:
[
{"lat" : -37.1886, "lng" : 145.708 } ,
{"lat" : -37.8361, "lng" : 144.845 } ,
{"lat" : -38.4034, "lng" : 144.192 } ,
{"lat" : -38.7597, "lng" : 143.67 } ,
{"lat" : -36.9672, "lng" : 141.083 }
]
自訂熱視圖
熱視圖有多種屬性可供自訂。您可以在一開始建立 GMUHeatmapTileLayer 執行個體時設定選項,也可以隨時為選項設定新值。
可用選項如下所示:
半徑:套用至熱視圖的高斯模糊效果範圍 (以像素表示,預設值為 20)。此值必須介於 10 至 50 之間。使用
GMUHeatmapTileLayer.radius設定半徑。漸層:熱視圖用來產生彩色地圖的色彩範圍,範圍從最低強度到最高強度。建立
GMUGradient時會使用包含色彩的整數陣列,以及指出各顏色起點的浮點陣列,代表占最高強度的百分比,並以 0 到 1 之間的小數值表示。您必須為單一顏色漸層指定一個顏色,或為多色漸層指定至少兩種顏色。顏色對照表會使用這些顏色的內插類型來產生。預設漸層有兩種顏色。colorMapSize參數會定義漸層中的步驟數。數字越大,漸層越平滑;數字越小,轉換越銳利,類似於輪廓圖。使用GMUHeatmapTileLayer.gradient設定漸層。不透明度:這是整個熱視圖圖層的不透明度,範圍從 0 到 1,預設值為 0.7。使用
GMUHeatmapTileLayer.opacity設定不透明度值。
舉例來說,建立 Gradient:
Swift
let gradientColors: [UIColor] = [.green, .red]
let gradientStartPoints: [NSNumber] = [0.2, 1.0]
heatmapLayer.gradient = GMUGradient(
  colors: gradientColors,
  startPoints: gradientStartPoints,
  colorMapSize: 256
)
Objective-C
NSArray<UIColor *> *gradientColors = @[UIColor.greenColor, UIColor.redColor];
NSArray<NSNumber *> *gradientStartPoints = @[@0.2, @1.0];
_heatmapLayer.gradient = [[GMUGradient alloc] initWithColors:gradientColors
                                                 startPoints:gradientStartPoints
                                                colorMapSize:256];
如要變更現有熱視圖的不透明度:
Swift
heatmapLayer.opacity = 0.7
Objective-C
_heatmapLayer.opacity = 0.7;
更新現有選項
如要更新已設定的選項,請按照下列步驟操作:
- 將選項更新為所需值。
- 歡迎致電
GMUHeatmapTileLayer.clearTileCache()。
變更資料集
如要變更建立熱視圖時做為依據的資料集,請按照下列步驟操作:
- 更新資料收集器。使用
GMUHeatmapTileLayer.weightedData,並傳遞GMUWeightedLatLng陣列。 - 歡迎致電
GMUHeatmapTileLayer.clearTileCache()。
移除熱視圖
如要移除熱視圖,請呼叫 GMUHeatmapTileLayer.map,並傳遞 nil。
Swift
heatmapLayer.map = nil
Objective-C
_heatmapLayer.map = nil;
查看試用版應用程式
如需其他熱視圖導入範例,請前往公用程式庫隨附的試用版應用程式中查看 HeatmapViewController。設定指南會示範如何執行試用版應用程式。