
Maps SDK for iOS には、地図にシェイプを追加するさまざまな方法が用意されています。サポートされている図形は、以下のとおりです。
- ポリラインは、連結された一連の線分です。任意のシェイプを形成でき、地図上にパスやルートを示すために使用できます。
- ポリゴンは閉じたシェイプです。地図上の領域をマーキングするために使用できます。
- 円は、地表面上の円を地理的に正確に投影したものです。
各図形の外観は、さまざまな方法で変更できます。
ポリライン
ポリラインを使用すると、地図上に線を描画できます。GMSPolyline オブジェクトは、一連の線分として表示される、順序付けられた一連の位置を表します。ポリラインの色は GMSStrokeStyle で設定できます。
ポリラインを作成するには、2 つ以上のポイントを含む対応する GMSMutablePath オブジェクトを作成して、そのパスを指定する必要があります。各 CLLocationCoordinate2D は、地表上の 1 点を表します。線分は、パスにポイントを追加した順序に従って、ポイント間に描画されます。addCoordinate: メソッドまたは addLatitude:longitude: メソッドを使用して、パスにポイントを追加できます。
Swift
let path = GMSMutablePath()
path.add(CLLocationCoordinate2D(latitude: -33.85, longitude: 151.20))
path.add(CLLocationCoordinate2D(latitude: -33.70, longitude: 151.40))
path.add(CLLocationCoordinate2D(latitude: -33.73, longitude: 151.41))
let polyline = GMSPolyline(path: path)
Objective-C
GMSMutablePath *path = [GMSMutablePath path];
[path addCoordinate:CLLocationCoordinate2DMake(-33.85, 151.20)];
[path addCoordinate:CLLocationCoordinate2DMake(-33.70, 151.40)];
[path addCoordinate:CLLocationCoordinate2DMake(-33.73, 151.41)];
GMSPolyline *polyline = [GMSPolyline polylineWithPath:path];
ポリラインを追加する
GMSMutablePathオブジェクトを作成します。addCoordinate:メソッドまたはaddLatitude:longitude:メソッドを使用して、パス内のポイントを設定します。- パスを引数として使用して、新しい
GMSPolylineオブジェクトをインスタンス化します。 - 必要に応じて、
strokeWidthやstrokeColorなどの他のプロパティを設定します。 GMSPolylineのmapプロパティを設定します。- ポリラインが地図上に表示されます。
次のコード スニペットでは、マップに長方形を追加しています。
Swift
let rectanglePath = GMSMutablePath()
rectanglePath.add(CLLocationCoordinate2D(latitude: 37.36, longitude: -122.0))
rectanglePath.add(CLLocationCoordinate2D(latitude: 37.45, longitude: -122.0))
rectanglePath.add(CLLocationCoordinate2D(latitude: 37.45, longitude: -122.2))
rectanglePath.add(CLLocationCoordinate2D(latitude: 37.36, longitude: -122.2))
rectanglePath.add(CLLocationCoordinate2D(latitude: 37.36, longitude: -122.0))

let rectangle = GMSPolyline(path: path)
rectangle.map = mapView
Objective-C
GMSMutablePath *rectanglePath = [GMSMutablePath path];
[rectanglePath addCoordinate:CLLocationCoordinate2DMake(37.36, -122.0)];
[rectanglePath addCoordinate:CLLocationCoordinate2DMake(37.45, -122.0)];
[rectanglePath addCoordinate:CLLocationCoordinate2DMake(37.45, -122.2)];
[rectanglePath addCoordinate:CLLocationCoordinate2DMake(37.36, -122.2)];
[rectanglePath addCoordinate:CLLocationCoordinate2DMake(37.36, -122.0)];

GMSPolyline *rectangle = [GMSPolyline polylineWithPath:path];
rectangle.map = mapView;
ポリラインを削除する
GMSPolyline の map プロパティを nil に設定すると、地図からポリラインを削除できます。また、GMSMapView
clear メソッドを呼び出して、地図上のすべてのオーバーレイ(ポリラインやその他のシェイプなど)を削除することもできます。
Swift
mapView.clear()
Objective-C
[mapView clear];
ポリラインをカスタマイズする
GMSPolyline オブジェクトには、線の外観を制御するためのプロパティがいくつか用意されています。次のオプションを使用できます。
strokeWidth- 行全体の幅(画面ポイント単位)。デフォルトは 1 です。この幅は、地図がズームされても拡大縮小されません。
geodesic-
YESの場合、このポリラインの端を測地線としてレンダリングします。測地線セグメントは、地表面に沿った最短のパスに従うため、メルカトル図法を使用している地図では曲線として表示されることがあります。非測地線セグメントは、地図上に直線として描画されます。デフォルトはNOです。 spans- ポリラインの 1 つ以上のセグメントの色を指定するために使用されます。spans プロパティは
GMSStyleSpanオブジェクトの配列です。ポリラインの色を変更するには、spansプロパティを設定することをおすすめします。 strokeColor- ポリラインの色を指定する
UIColorオブジェクト。デフォルトはblueColorです。spansが設定されている場合、strokeColorプロパティは無視されます。
次のスニペットでは、メルボルンからパースへの測地線補間を含む太いポリラインが追加されます。
Swift
let path = GMSMutablePath()
path.addLatitude(-37.81319, longitude: 144.96298)
path.addLatitude(-31.95285, longitude: 115.85734)
let polyline = GMSPolyline(path: path)
polyline.strokeWidth = 10.0
polyline.geodesic = true
polyline.map = mapView
Objective-C
GMSMutablePath *path = [GMSMutablePath path];
[path addLatitude:-37.81319 longitude:144.96298];
[path addLatitude:-31.95285 longitude:115.85734];
GMSPolyline *polyline = [GMSPolyline polylineWithPath:path];
polyline.strokeWidth = 10.f;
polyline.geodesic = YES;
polyline.map = mapView;
地図に追加した後でポリラインを変更するには、必ず GMSPolyline オブジェクトを保持してください。
Swift
polyline.strokeColor = .blue
Objective-C
polyline.strokeColor = [UIColor blueColor];
ポリラインの色を変更する
ポリラインは、一連のセグメントとして地図上に描画されます。spans プロパティを使用すると、個々のセグメントまたは線全体のカラーを変更できます。このプロパティを使用すると、ポリラインの色を詳細に制御できますが、線全体に単一のスタイルを適用できる便利な機能もいくつかあります。
次のスニペットでは、spanWithColor: メソッドを使用して、行全体の色を赤に変更しています。
Swift
polyline.spans = [GMSStyleSpan(color: .red)]
Objective-C
polyline.spans = @[[GMSStyleSpan spanWithColor:[UIColor redColor]]];
または、GMSStrokeStyle オブジェクトへのアクセス権がすでにある場合は、spanWithStyle: メソッドを使用できます。
Swift
let solidRed = GMSStrokeStyle.solidColor(.red)
polyline.spans = [GMSStyleSpan(style: solidRed)]
Objective-C
GMSStrokeStyle *solidRed = [GMSStrokeStyle solidColor:[UIColor redColor]];
polyline.spans = @[[GMSStyleSpan spanWithStyle:solidRed]];
Maps SDK for iOS のバージョン 1.7 より前は、単一のプロパティ strokeColor を使用して GMSPolyline の色全体を設定できました。spans プロパティは strokeColor よりも優先されます。
Swift
polyline.strokeColor = .red
Objective-C
polyline.strokeColor = [UIColor redColor];
スタイル
アプリで同じストロークの色を複数回適用する場合は、再利用可能なスタイルを定義すると便利です。ポリラインのスタイルは、GMSStrokeStyle オブジェクトを使用して指定します。ストローク スタイルは、単色またはある色から別の色へのグラデーションにできます。スタイルを作成したら、spanWithStyle: メソッドを使用して GMSStyleSpan に適用できます。
Swift
// Create two styles: one that is solid blue, and one that is a gradient from red to yellow
let solidBlue = GMSStrokeStyle.solidColor(.blue)
let solidBlueSpan = GMSStyleSpan(style: solidBlue)
let redYellow = GMSStrokeStyle.gradient(from: .red, to: .yellow)
let redYellowSpan = GMSStyleSpan(style: redYellow)
Objective-C
// Create two styles: one that is solid blue, and one that is a gradient from red to yellow
GMSStrokeStyle *solidBlue = [GMSStrokeStyle solidColor:[UIColor blueColor]];
GMSStyleSpan *solidBlueSpan = [GMSStyleSpan spanWithStyle:solidBlue];
GMSStrokeStyle *redYellow =
    [GMSStrokeStyle gradientFromColor:[UIColor redColor] toColor:[UIColor yellowColor]];
GMSStyleSpan *redYellowSpan = [GMSStyleSpan spanWithStyle:redYellow];
span のスタイルは、ポリラインの終了まで、または新しいスタイルが設定されるまで継続します。ポリラインの spans プロパティを単一の GMSStyleSpan に設定すると、線全体の色を変更できます。この例では、ポリラインの全長にグラデーションを適用する方法を示します。
Swift
polyline.spans = [GMSStyleSpan(style: redYellow)]
Objective-C
polyline.spans = @[[GMSStyleSpan spanWithStyle:redYellow]];
個々の線分の色を変更する
ポリラインの各セグメントのスタイルを個別に設定するには、GMSStyleSpan オブジェクトの配列を作成し、これを spans プロパティに渡します。デフォルトでは、配列の各アイテムが対応する線分の色に設定されます。配列内の要素が線のセグメントよりも多い場合、余分な要素は無視されます。配列内の要素が少ない場合、最後の GMSStyleSpan は行の残りの部分の色を表します。
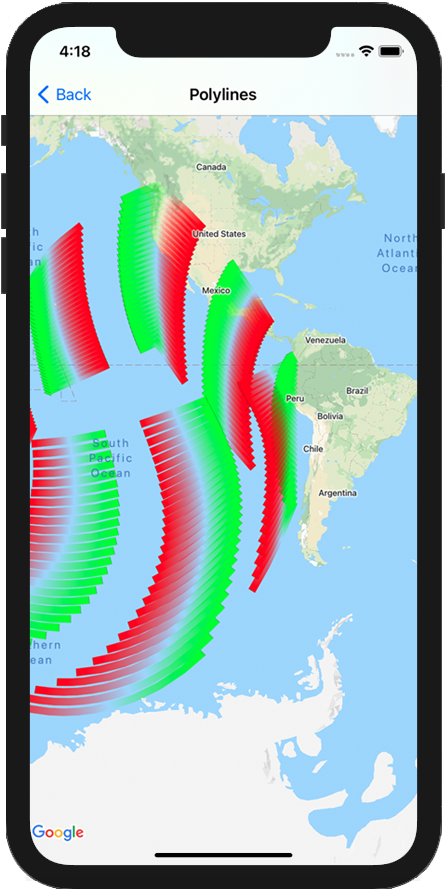
色のブロックやグラデーションのポリラインを使用して、標高や速度など、ポリラインに沿った変化を示すことができます。次のスニペットでは、ポリラインの最初の 2 つのセグメントの色を赤に設定し、残りの線は赤から黄色へのグラデーションに設定しています。
Swift
polyline.spans = [
  GMSStyleSpan(style: solidRed),
  GMSStyleSpan(style: solidRed),
  GMSStyleSpan(style: redYellow)
]
Objective-C
polyline.spans = @[[GMSStyleSpan spanWithStyle:solidRed],
                   [GMSStyleSpan spanWithStyle:solidRed],
                   [GMSStyleSpan spanWithStyle:redYellow]];
spanWithStyle:segments: メソッドを使用すると、複数のセグメントのスタイルを一度に設定できます。たとえば、次のコードは上記のコードと同等です。最後の GMSStyleSpan のセグメント長は、スタイルの残りの部分を記述するために使用されるため、常に無視されます。
Swift
polyline.spans = [
  GMSStyleSpan(style: solidRed, segments:2),
  GMSStyleSpan(style: redYellow, segments:10)
]
Objective-C
polyline.spans = @[[GMSStyleSpan spanWithStyle:solidRed segments:2],
                   [GMSStyleSpan spanWithStyle:redYellow segments:10]];
部分的なセグメント
セグメントは小数値として指定することもできます。これにより、セグメントの小数部分にスタイルが適用され、1 つのセグメントが分割される可能性があります。各 GMSStyleSpan は直前の GMSStyleSpan の直後に開始します。下の例では、グレーの色は 2 番目のセグメントの 1/2 から始まり、3 番目のセグメントの 1/2 まで続きます。
Swift
polyline.spans = [
  GMSStyleSpan(style: solidRed, segments: 2.5),
  GMSStyleSpan(color: .gray),
  GMSStyleSpan(color: .purple, segments: 0.75),
  GMSStyleSpan(style: redYellow)
]
Objective-C
polyline.spans = @[[GMSStyleSpan spanWithStyle:solidRed segments:2.5],
                   [GMSStyleSpan spanWithColor:[UIColor grayColor]],
                   [GMSStyleSpan spanWithColor:[UIColor purpleColor] segments:0.75],
                   [GMSStyleSpan spanWithStyle:redYellow]];
ポリラインに繰り返し色パターンを追加する
ポリラインにパターンを追加する場合は、GMSGeometryUtils の GMSStyleSpans ユーティリティ メソッドを使用します。GMSStyleSpans メソッドは、繰り返しパターンを定義する 2 つの配列を受け取ります。一方の配列は繰り返すスタイルを設定し、もう一方の配列は繰り返しの間隔を定義します。これらを組み合わせて使用すると、長さやセグメントの数に関係なく、任意のポリラインに適用できるパターンを作成できます。
たとえば、次のコード スニペットは、黒と白の交互のパターンを持つポリラインを定義します。タイプが kGMSLengthRhumb として指定されているため、長さは等角航路(メルカトル図法では直線)に沿ったメートル単位として扱われます。
Swift
let styles = [
  GMSStrokeStyle.solidColor(.white),
  GMSStrokeStyle.solidColor(.black)
]
let lengths: [NSNumber] = [100000, 50000]
polyline.spans = GMSStyleSpans(
  polyline.path!,
  styles,
  lengths,
  GMSLengthKind.rhumb
)
Objective-C
NSArray *styles = @[[GMSStrokeStyle solidColor:[UIColor whiteColor]],
                    [GMSStrokeStyle solidColor:[UIColor blackColor]]];
NSArray *lengths = @[@100000, @50000];
polyline.spans = GMSStyleSpans(polyline.path, styles, lengths, kGMSLengthRhumb);
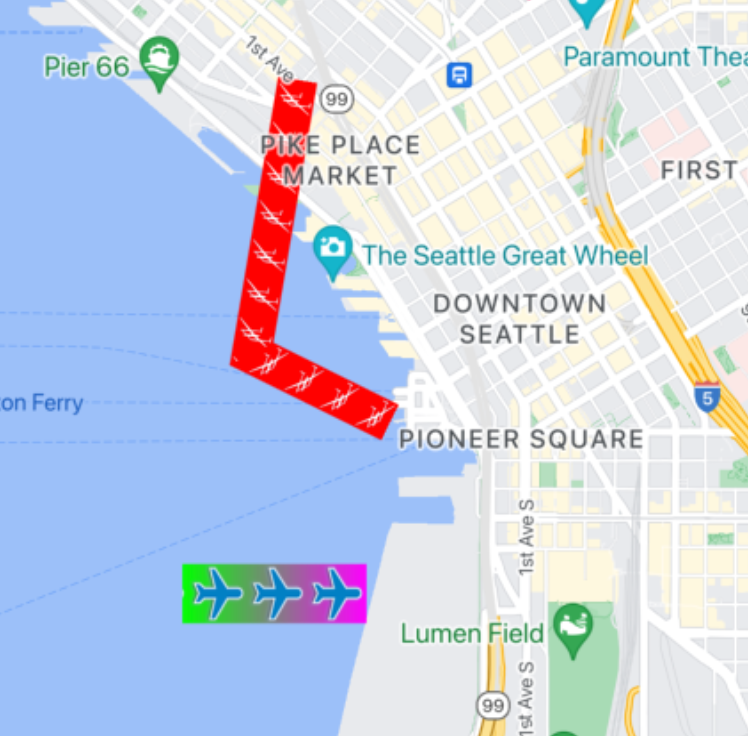
スプライト スタンプ型ポリライン
スプライト スタンプ型ポリラインを使うと、選択したビットマップ画像を繰り返し使ってポリラインを作成できます。図形は背景が透明なストロークで表示されますが、スタンプは線の角で切り捨てられません。そのため、徒歩経路を示すドットなど、さまざまな状況で役立ちます。
この機能を使用するには、GMSSpriteStyle を使用し、GMSStrokeStyle の stampStyle プロパティを使用してスタンプとして設定します。
Swift
let path = GMSMutablePath()
path.addLatitude(-37.81319, longitude: 144.96298)
path.addLatitude(-31.95285, longitude: 115.85734)
let polyline = GMSPolyline(path: path)
polyline.strokeWidth = 20
let image = UIImage(named: "imageFromBundleOrAsset")! // Image could be from anywhere
let stampStyle = GMSSpriteStyle(image: image)
let transparentStampStroke = GMSStrokeStyle.transparentStroke(withStamp: stampStyle)
let span = GMSStyleSpan(style: transparentStampStroke)
polyline.spans = [span]
polyline.map = mapView
Objective-C
GMSMutablePath *path = [GMSMutablePath path];
[path addLatitude:-37.81319 longitude:144.96298];
[path addLatitude:-31.95285 longitude:115.85734];
polyline.strokeWidth = 20;
GMSPolyline *polyline = [GMSPolyline polylineWithPath:path];

UIImage *image = [UIImage imageNamed:@"imageFromBundleOrAsset"];
GMSStrokeStyle *transparentStampStroke = [GMSStrokeStyle transparentStrokeWithStampStyle:[GMSSpriteStyle spriteStyleWithImage:image]];

GMSStyleSpan *span = [GMSStyleSpan spanWithStyle:transparentStampStroke];
polyline.spans = @[span];
polyline.map = _mapView;
テクスチャ スタンプ型ポリライン
テクスチャ スタンプ型ポリラインを使うと、選択したテクスチャを繰り返し使ってポリラインを作成できます。図形は、透明、単色、グラデーションの背景ストロークで表示できます。テクスチャはズームレベルに応じてサイズが変更されます。パスまたはパスポイントの終端または始端にある画像が、特定のズームレベルで切り捨てられる。
この機能を使用するには、GMSTextureStyle を使用し、GMSStrokeStyle の stampStyle プロパティを使用してスタンプとして設定します。
Swift
let path = GMSMutablePath()
path.addLatitude(-37.81319, longitude: 144.96298)
path.addLatitude(-31.95285, longitude: 115.85734)
let polyline = GMSPolyline(path: path)
polyline.strokeWidth = 20
let redWithStamp = GMSStrokeStyle.solidColor(.red)
let image = UIImage(named: "imageFromBundleOrAsset")! // Image could be from anywhere
redWithStamp.stampStyle = GMSTextureStyle(image: image)
let span = GMSStyleSpan(style: redWithStamp)
polyline.spans = [span]
polyline.map = mapView
Objective-C
GMSMutablePath *path = [GMSMutablePath path];
[path addLatitude:-37.81319 longitude:144.96298];
[path addLatitude:-31.95285 longitude:115.85734];
GMSPolyline *polyline = [GMSPolyline polylineWithPath:path];
polyline.strokeWidth = 20;
GMSStrokeStyle *redWithStamp = [GMSStrokeStyle solidColor:[UIColor redColor]];

UIImage *image = [UIImage imageNamed:@"imageFromBundleOrAsset"]; // Image could be from anywhere
redWithStamp.stampStyle = [GMSTextureStyle textureStyleWithImage:image];

GMSStyleSpan *span = [GMSStyleSpan spanWithStyle:redWithStamp];
polyline.spans = @[span];
polyline.map = _mapView;
地図の機能
GMSMapView の mapCapabilities プロパティは、地図固有の機能のプログラムによるチェックを追加します。これは、特定の API を呼び出す前に、特定の地図 capabilities が利用可能かどうかを確認する場合に便利です。このクエリは、地図ビューがスプライト スタンプ付きポリラインをサポートしているかどうかを判断します。
Swift
let path = GMSMutablePath()
path.addLatitude(-37.81319, longitude: 144.96298)
path.addLatitude(-31.95285, longitude: 115.85734)
let polyline = GMSPolyline(path: path)
polyline.strokeWidth = 20
let image = UIImage(named: "imageFromBundleOrAsset")! // Image could be from anywhere
let spans: [GMSStyleSpan]
if (mapView.mapCapabilities.contains(.spritePolylines)) {
  let spriteStyle = GMSSpriteStyle(image: image)
  let stroke = GMSStrokeStyle.transparentStroke(withStamp: spriteStyle)
  spans = [ GMSStyleSpan(style: stroke) ]
} else {
  let stroke = GMSStrokeStyle.solidColor(.clear)
  stroke.stampStyle = GMSTextureStyle(image: image)
  spans = [ GMSStyleSpan(style: stroke) ]
}
polyline.spans = spans
polyline.map = mapView
Objective-C
GMSMutablePath *path = [GMSMutablePath path];
[path addLatitude:-37.81319 longitude:144.96298];
[path addLatitude:-31.95285 longitude:115.85734];

UIImage *_Nonnull image = [UIImage imageNamed:@"imageFromBundleOrAsset"]; // Image could be from anywhere

NSArray<GMSStyleSpan *> * spans;
if (_mapView.mapCapabilities & GMSMapCapabilityFlagsSpritePolylines) {
  GMSSpriteStyle *spriteStyle = [GMSSpriteStyle spriteStyleWithImage:image];
  GMSStrokeStyle *stroke = [GMSStrokeStyle transparentStrokeWithStampStyle:spriteStyle];
  spans = @[ [GMSStyleSpan spanWithStyle:stroke] ];
} else {
  GMSStrokeStyle *stroke = [GMSStrokeStyle solidColor:UIColor.clearColor];
  stroke.stampStyle = [GMSTextureStyle textureStyleWithImage:image];
  spans = @[ [GMSStyleSpan spanWithStyle:stroke] ];
}

GMSPolyline *polyline = [GMSPolyline polylineWithPath:path];
polyline.strokeWidth = 20;
polyline.spans = spans;
polyline.map = _mapView;
このパターンを使用すると、変更をサブスクライブして、地図ビューの状態で更新に対応できます。GMSMapViewDelegate で didChangeMapCapabilities を実装して、機能の利用可能性に関する最新情報を取得することもできます。
ポリゴン
ポリゴンは、指定された順序の一連の座標で構成されている点でポリラインと似ています。ただし、ポリゴンは終端部が開いておらず、閉じたループ内の塗りつぶされた領域として定義されます。ポリゴンは、Maps SDK for iOS で GMSPolygon クラスによって定義されます。
GMSPolygon は、GMSPolyline を追加するのと同じ方法で地図に追加できます。まず、対応する GMSMutablePath オブジェクトを作成し、これにポイントを追加して、パスを指定します。これらのポイントにより、ポリゴンのアウトラインが形成されます。各 CLLocationCoordinate2D は、地表上の 1 点を表します。線分は、パスにポイントを追加した順序に従って、ポイント間に描画されます。
ポリゴンを追加する
GMSMutablePathオブジェクトを作成します。addCoordinate:メソッドまたはaddLatitude:longitude:メソッドを使用して、パス内のポイントを設定します。これらのポイントにより、ポリゴンのアウトラインが形成されます。- パスを引数として使用して、新しい
GMSPolygonオブジェクトをインスタンス化します。 - 必要に応じて、
strokeWidth、strokeColor、fillColorなどの他のプロパティを設定します。 GMSPolygon.mapプロパティを設定して、ポリゴンをGMSMapViewオブジェクトに割り当てます。- 地図上にポリゴンが表示されます。
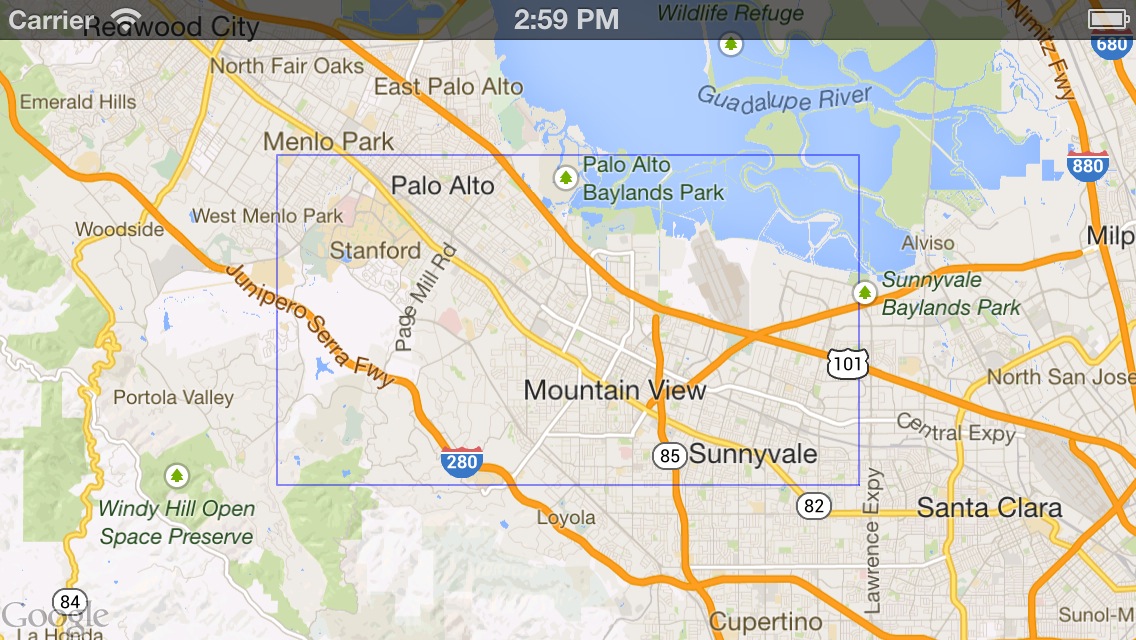
次のコード スニペットでは、地図に長方形を追加しています。
Swift
// Create a rectangular path
let rect = GMSMutablePath()
rect.add(CLLocationCoordinate2D(latitude: 37.36, longitude: -122.0))
rect.add(CLLocationCoordinate2D(latitude: 37.45, longitude: -122.0))
rect.add(CLLocationCoordinate2D(latitude: 37.45, longitude: -122.2))
rect.add(CLLocationCoordinate2D(latitude: 37.36, longitude: -122.2))

// Create the polygon, and assign it to the map.
let polygon = GMSPolygon(path: rect)
polygon.fillColor = UIColor(red: 0.25, green: 0, blue: 0, alpha: 0.05);
polygon.strokeColor = .black
polygon.strokeWidth = 2
polygon.map = mapView
Objective-C
// Create a rectangular path
GMSMutablePath *rect = [GMSMutablePath path];
[rect addCoordinate:CLLocationCoordinate2DMake(37.36, -122.0)];
[rect addCoordinate:CLLocationCoordinate2DMake(37.45, -122.0)];
[rect addCoordinate:CLLocationCoordinate2DMake(37.45, -122.2)];
[rect addCoordinate:CLLocationCoordinate2DMake(37.36, -122.2)];

// Create the polygon, and assign it to the map.
GMSPolygon *polygon = [GMSPolygon polygonWithPath:rect];
polygon.fillColor = [UIColor colorWithRed:0.25 green:0 blue:0 alpha:0.05];
polygon.strokeColor = [UIColor blackColor];
polygon.strokeWidth = 2;
polygon.map = mapView;
ポリゴンの外観は、地図に追加する前でも、地図に追加した後でもカスタマイズできます。
ポリゴンの削除
ポリゴンを削除するには、GMSPolygon.map プロパティを nil に設定し、layer を親から切り離します。
Swift
 polygon.map = nil
 polygon.layer.removeFromSuperLayer()
Objective-C
 polygon.map = nil;
 [polygon.layer removeFromSuperlayer];
円
Maps SDK for iOS には、汎用の GMSPolygon クラスに加えて、GMSCircle も用意されており、地球の表面に円を描画できます。
円を作成するには、次の 2 つのプロパティを指定する必要があります。
CLLocationCoordinate2Dによるpositionradius(メートル単位)
これにより、指定された center から radius メートルの地点にある、地表面上のすべてのポイントのセットとして円が定義されます。地球という球体の表面を平面に投影するため Maps API ではメルカトル図法が採用されており、この図法の性質上、円は地図の赤道付近ではほぼ完全な円として表示されますが、円が赤道から遠ざかるにつれて、(画面上の表示では)歪んだ円となっていきます。
円を追加する
次のコード スニペットでは、マップに円を追加しています。
Swift
let circleCenter = CLLocationCoordinate2D(latitude: 37.35, longitude: -122.0)
let circle = GMSCircle(position: circleCenter, radius: 1000)
circle.map = mapView
Objective-C
CLLocationCoordinate2D circleCenter = CLLocationCoordinate2DMake(37.35, -122.0);
GMSCircle *circle = [GMSCircle circleWithPosition:circleCenter
                                         radius:1000];
circle.map = mapView;
円の外観は、地図に追加する前でも、地図に追加した後でもカスタマイズできます。
円をカスタマイズする
GMSCircle のプロパティを変更することで、カスタムカラーとストロークの幅を指定できます。次のオプションを使用できます。
fillColor- : 円の内側の色を指定する
UIColorオブジェクト。デフォルトは透明です。 strokeColor- 円の輪郭の色を指定する
UIColorオブジェクト。デフォルト値はblackColorです。 strokeWidth- 円の輪郭の太さ(画面ポイント単位)。デフォルトは 1 です。地図がズームされても、太さは拡大縮小されません。
次のスニペットは、半透明の赤い内側を持つ太い赤い円を追加します。
Swift
circle.fillColor = UIColor(red: 0.35, green: 0, blue: 0, alpha: 0.05)
circle.strokeColor = .red
circle.strokeWidth = 5
Objective-C
circle.fillColor = [UIColor colorWithRed:0.25 green:0 blue:0 alpha:0.05];
circle.strokeColor = [UIColor redColor];
circle.strokeWidth = 5;
中が空洞のポリゴンを作成する
複数のパスを 1 つの GMSPolygon オブジェクトにまとめて、塗りつぶされた輪、つまりドーナツ(ポリゴンの内部にポリゴン領域が個別のシェイプとして表示されているもの)などの複雑なシェイプを作成できます。複雑なシェイプは複数のパスで構成されています。
ポリゴンでカバーされる最大のエリアを指定するパスを使用してポリゴンを作成します。次に、ポリゴンの holes プロパティを 1 つ以上の GMSPath オブジェクトの配列として指定します。このオブジェクトは、ポリゴン内の穴を定義します。
小さい方のパスが、大きい方のパスで完全に囲まれている場合、ポリゴンの一部が削除されているかのように見えます。
次のコードサンプルは、2 つの穴を持つポリゴンを作成します。
Swift
let hydeParkLocation = CLLocationCoordinate2D(latitude: -33.87344, longitude: 151.21135)
let camera = GMSCameraPosition.camera(withTarget: hydeParkLocation, zoom: 16)
let mapView = GMSMapView.map(withFrame: .zero, camera: camera)
mapView.animate(to: camera)

let hydePark = "tpwmEkd|y[QVe@Pk@BsHe@mGc@iNaAKMaBIYIq@qAMo@Eo@@[Fe@DoALu@HUb@c@XUZS^ELGxOhAd@@ZB`@J^BhFRlBN\\BZ@`AFrATAJAR?rAE\\C~BIpD"
let archibaldFountain = "tlvmEqq|y[NNCXSJQOB[TI"
let reflectionPool = "bewmEwk|y[Dm@zAPEj@{AO"

let hollowPolygon = GMSPolygon()
hollowPolygon.path = GMSPath(fromEncodedPath: hydePark)
hollowPolygon.holes = [GMSPath(fromEncodedPath: archibaldFountain)!, GMSPath(fromEncodedPath: reflectionPool)!]
hollowPolygon.fillColor = UIColor(red: 1.0, green: 0.0, blue: 0.0, alpha: 0.2)
hollowPolygon.strokeColor = UIColor(red: 1.0, green: 0.0, blue: 0.0, alpha: 1.0)
hollowPolygon.strokeWidth = 2
hollowPolygon.map = mapView
Objective-C
CLLocationCoordinate2D hydeParkLocation = CLLocationCoordinate2DMake(-33.87344, 151.21135);
GMSCameraPosition *camera = [GMSCameraPosition cameraWithTarget:hydeParkLocation
                                                           zoom:16];
mapView = [GMSMapView mapWithFrame:CGRectZero camera:camera];

NSString *hydePark = @"tpwmEkd|y[QVe@Pk@BsHe@mGc@iNaAKMaBIYIq@qAMo@Eo@@[Fe@DoALu@HUb@c@XUZS^ELGxOhAd@@ZB`@J^BhFRlBN\\BZ@`AFrATAJAR?rAE\\C~BIpD";
NSString *archibaldFountain = @"tlvmEqq|y[NNCXSJQOB[TI";
NSString *reflectionPool = @"bewmEwk|y[Dm@zAPEj@{AO";

GMSPolygon *hollowPolygon = [[GMSPolygon alloc] init];
hollowPolygon.path = [GMSPath pathFromEncodedPath:hydePark];
hollowPolygon.holes = @[[GMSPath pathFromEncodedPath:archibaldFountain],
                  [GMSPath pathFromEncodedPath:reflectionPool]];
hollowPolygon.fillColor = [UIColor colorWithRed:1.0 green:0.0 blue:0.0 alpha:0.2];
hollowPolygon.strokeColor = [UIColor colorWithRed:1.0 green:0.0 blue:0.0 alpha:1.0];
hollowPolygon.strokeWidth = 2;
hollowPolygon.map = mapView;