
Page Summary
-
Dialogflow developers can migrate existing Actions to Actions Builder using a migration tool which converts specific Dialogflow elements like intents and entities.
-
The migration tool automatically handles several Dialogflow elements, including the Default Welcome Intent, training phrases, entities, and various types of intents and events.
-
Elements that are not handled by the migration tool include intents with multiple input contexts, custom events, most system entities, and fulfillment source code, requiring manual setup after migration.
-
The migration dashboard provides options to migrate as a new project (recommended) or migrate the existing project, along with a report detailing what will and won't be migrated.
-
Post-migration setup involves updating conversational flow, reviewing global intents, consolidating similar intents, updating event handling, adding system intents for fallback, and updating your fulfillment strategy.
As a Dialogflow developer, you may want to migrate your existing Actions to Actions Builder. There are a number of benefits to using the new in-console method for developing Actions, and migrating your existing Dialogflow project is easy. This page describes how to use the Dialogflow/Actions Builder migration tool.
Prior to working through this guide, you should review Dialogflow to Actions Builder migration overview, which covers important concepts and differences between Dialogflow and Actions Builder.
What the migration tool does
The Dialogflow to Actions Builder migration tool converts specific Dialogflow elements, like intents and entities, to work with Action Builder.
The migration tool automatically migrates the following Dialogflow elements to Actions Builder:
- Dialogflow’s Default Welcome Intent, which is migrated as the main invocation.
- All training phrases and entities for each language your Action supports.
- Intents with no input context, which are migrated over as global intents.
- Intents with one input context, which are migrated over as scenes and intents.
- Intents with one input context and slot filling result in two scenes and one intent to handle the transition to the scene with slot filling.
- Intents that use Dialogflow fallback, media, and welcome events result in the related Actions Builder handler and an intent with training phrases.
- Intents that use Dialogflow date and number system entities result in the related Actions Builder system types.
The migration tool does not handle the following Dialogflow elements:
- Intents with multiple input contexts. Scenes need to be created manually.
- Intents that use custom events in Dialogflow.
- Dialogflow system entities that are not date or number. These entities are created as new types, but you need to add synonyms manually.
- Dialogflow fulfillment source code. This code is not migrated to Builder, due to differences in API versions.
Access the migration tool
To access the migration tool, open a Dialogflow project in the Actions console and navigate to Develop > Actions.
If you're unsure of the project used in the Actions console, go to the Dialogflow console and follow these steps:
- Open the project you want to migrate and click the Settings icon.
- Under General > Project ID, click the Action on Google link. This step takes you to the Actions console for the specific project.
Navigate to Develop > Actions and click Preview migration.

Navigate through the informational slides and click Start migration to see the migration dashboard.
Migration dashboard
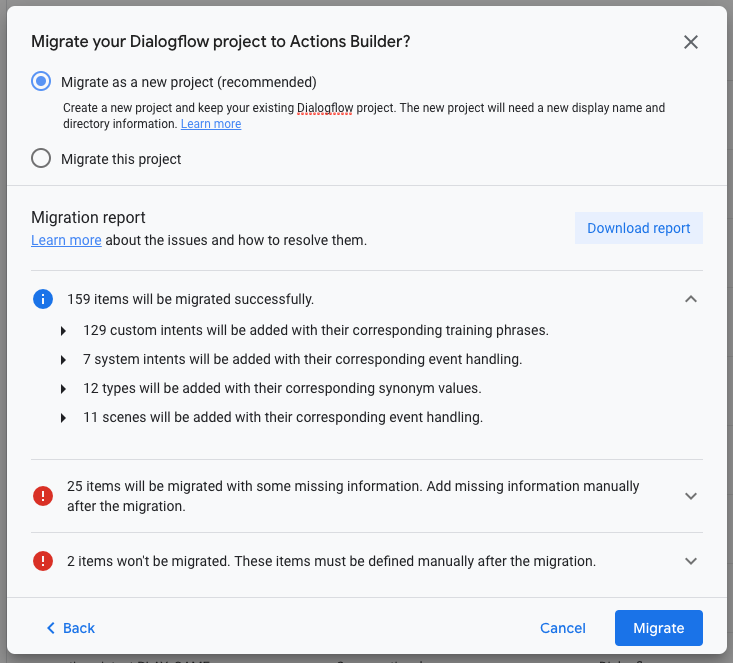
The migration dashboard shows migration options, as well as information related to what items will be migrated.
Migration options
The migration tool has two options for migrating your Dialogflow project to Actions Builder:
- Migrate as a new project (recommended)
- Keeps your existing Dialogflow project intact and migrates a copy to a new project.
- Display name and directory information remain associated with the existing production project. See the recommended process on how to overwrite your live project with your migrated project.
- Migrate this project
- Replaces the existing Dialogflow project, and keeps the existing display name and Assistant directory information you've defined for your project.
Migration report
You can expand each section of the migration report to show project specific details pertaining to the following information:
- What will be fully migrated.
- What will be migrated but will need additional post-migration setup.
- What won't be migrated and will need to be added manually (if needed).
- What features your Dialogflow project uses that won't be available in Actions Builder.
You can also download the migration report, which you can reference when making post-migration changes to your project.
Post migration set up
While the migration tool aids in moving important pieces of your Dialogflow project to Actions Builder, additional development is needed to set up transitions, prompts, and webhooks that were not migrated.
Update your conversational flow to use scenes
While the migration tool generates scenes based on Dialogflow intents that have one input context, this isn't a one-to-one relationship. Some of the migrated scenes may not make sense in Actions Builder with the new conversation model.
You may need to rethink the conversational flow by evaluating what scenes are needed. Depending on the complexity of your Action, it may be easier to delete some of the generated scenes if they no longer fit your conversational flow.
Review and update global intents
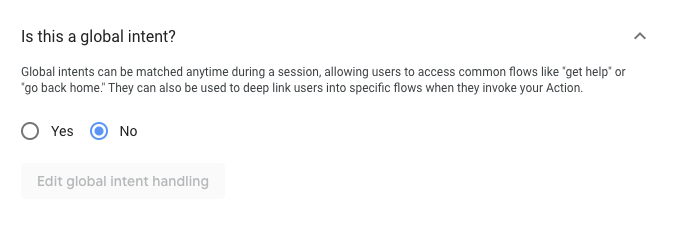
Dialogflow intents with no input context are migrated to Actions Builder as global intents. Global intents are active throughout a conversation, which means they can be matched at any point.
Global intents can also be used to deep link users into specific flows when they invoke your Action. It is important to validate if the generated global intents should be active and accessible to users in the global scope. To change global intents to normal intents, click on the intent and change the global intent handling option to NO.
Consolidate intents with similar training phrases
If some of your intents share very similar training phrases, you should consolidate the intents into a single generic intent. Doing so increases the accuracy of intent matching.
For example, Intent A has the following training phrases:
- "ok, I want to make sure it's ready"
- "Alright, this is ready"
- "Let's do it"
Intent B has the following training phrases:
- "ok, I want to make sure it's ready"
- "Alright, I think I'm ready"
Since the training phrases between the two intents are similar, consolidate Intent A and Intent B into a more generic intent (Intent C) and delete the originals. Use Intent C in scenes that referred to either Intent A or Intent B.
Intent C has the following training phrases:
- "ok, I want to make sure it's ready"
- "Alright, this is ready"
- "Let's do it"
- "Alright, I think I'm ready"
Update event handling
For intents that use certain events (fallback, media, and welcome) in Dialogflow, the migration tool creates a related system intent for that event. If the same Dialogflow intent has training phrases, an additional intent is created with the same training phrases.
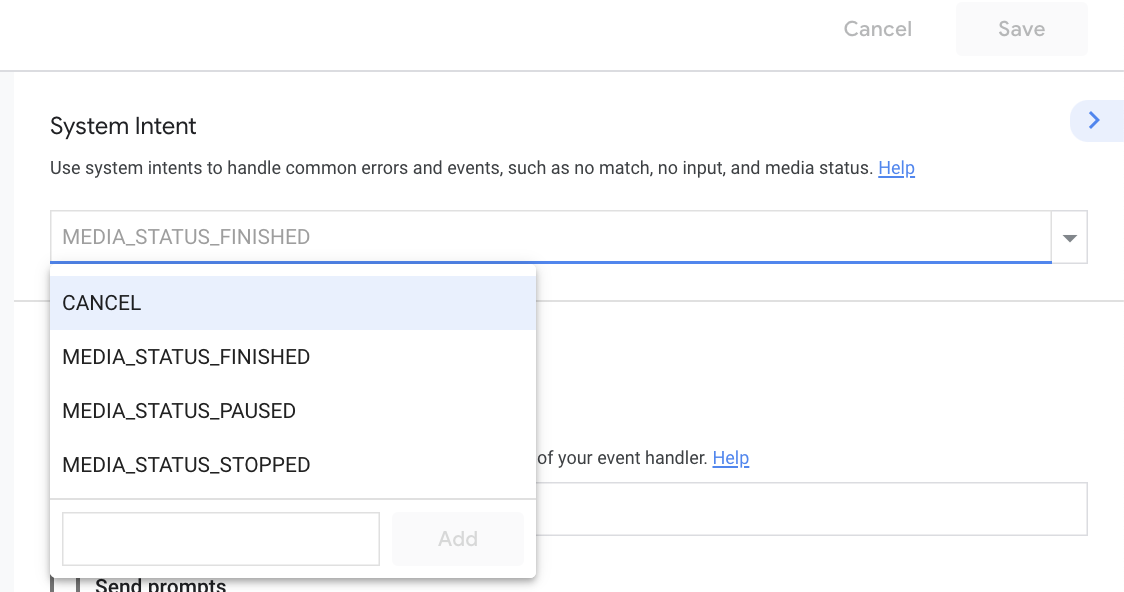
To complete the set up of events in Actions Builder, you need to add webhook handlers as well as transitions, as needed.
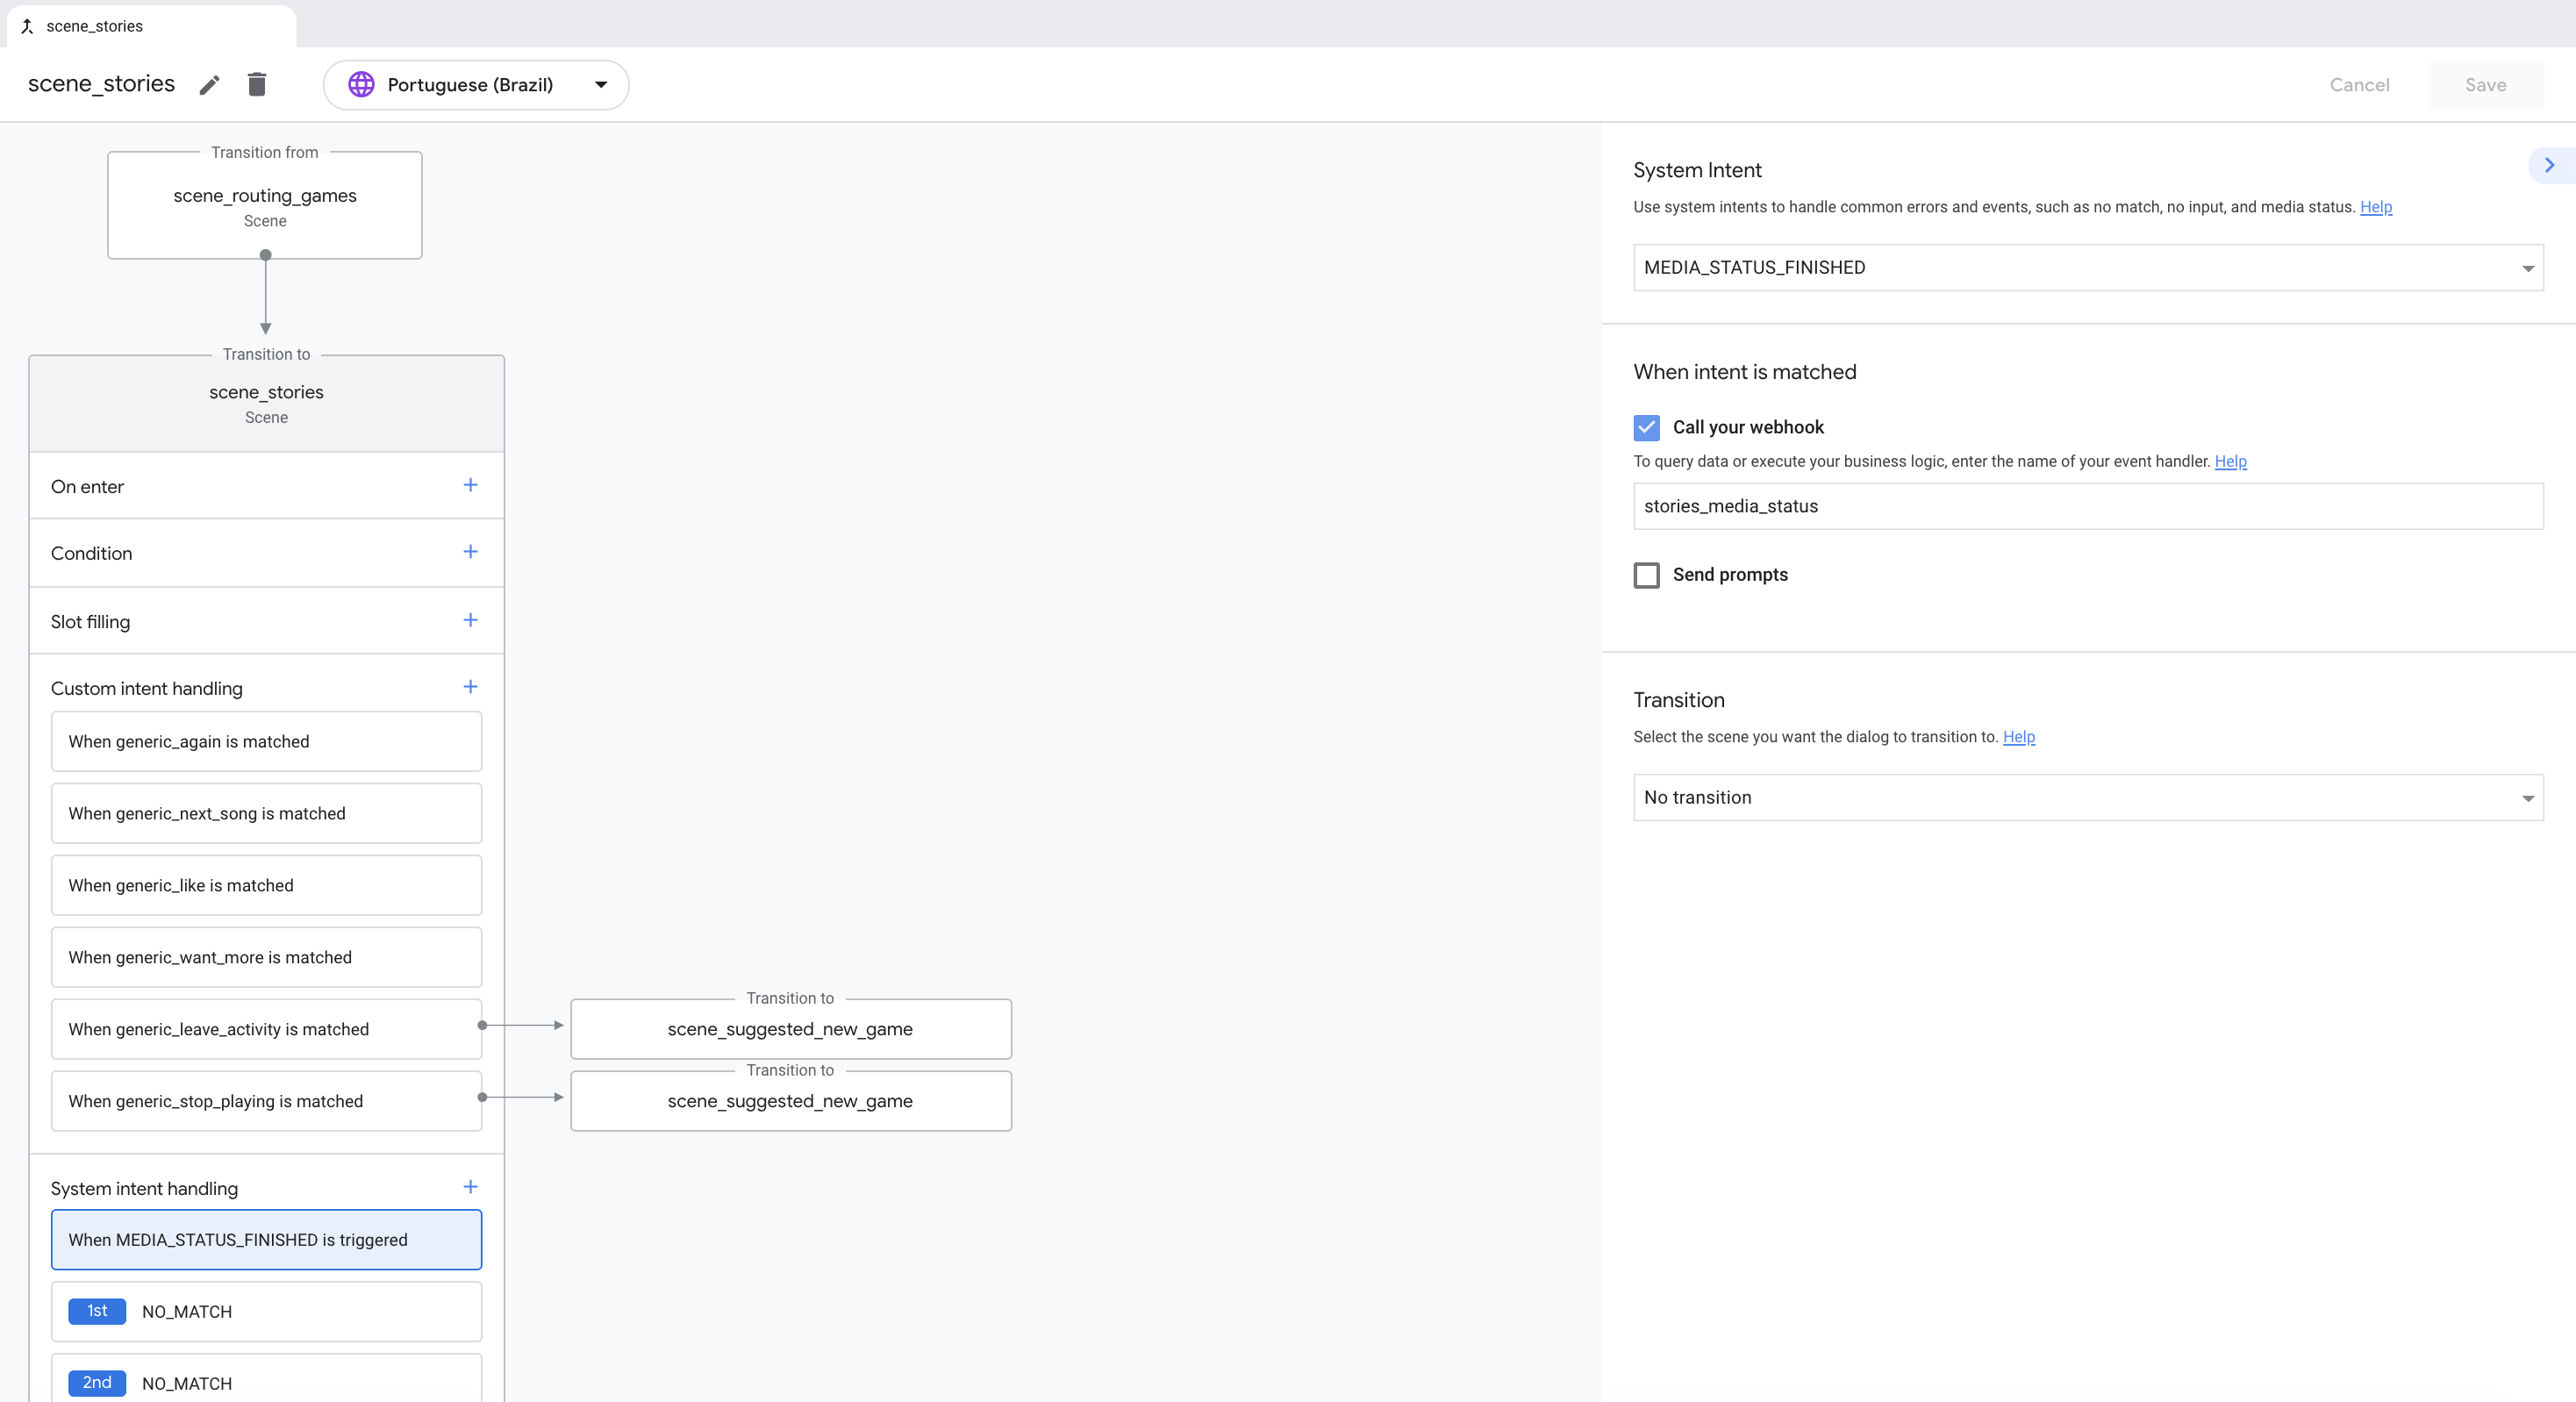
Add system intents to handle fallback intents
In Dialogflow, fallback intents handle cases where an intent doesn't recognize a user's input. Actions Builder utilizes NO_MATCH and NO_INPOUT system intents to account for these cases.
Both NO_MATCH and NO_INPUT system intents can be added to a scene up to three times. For example, adding three NO_MATCH intents to a scene means you can progressively respond with more details about what your Action is looking for in the user's response.
It is important to add system intents where your Dialogflow project utilized fallback intents. Some examples of commonly used Actions Builder system intents are NO_MATCH and NO_INPUT. To learn more about these system intents, you can check out system intents.
Update your fulfillment strategy
Moving your Dialogflow fulfillment code to Actions Builder is one of the larger pieces of the migration process. While the concepts of webhook calls and general fulfillment remain the same, Actions Builder provides options for reusing functions and adds more webhook triggering opportunities.
With this in mind, you may want to consider revisiting your project's fulfillment to take advantage of Actions Builder's features:
- Custom webhook handler names mean you can call the same webhook function from multiple parts of different scenes.
- Webhook calls can be made based on entering a scene, conditional validation, slot filling, and intent matching. More granular control of when and where webhook calls are made, allow for more creative fulfillment solutions.
As you update your fulfillment code, consider when and where you should trigger webhook calls. You can enable webhooks in more than one parts of a scene using the Call your webhook option. For more information about enabling webhooks, see the webhooks section of the Fulfillment migration guide.
Migration examples
Migrated projects from Dialogflow to Actions Builder have significantly different structures due to the differences in the conversational model that each tool uses. The use of scenes, prompts, and transitions in Actions Builder, as well as features like reusable webhook handlers, make the code of a migrated project significantly different from the original.
Comparing migrated projects can help you understand the type and scope of changes required when migrating from Dialogflow to Actions Builder. You can review the following migrated sample projects to compare the implementations:
| Sample Project | Dialogflow Code | Actions Builder Code |
|---|---|---|
| Facts about Google | project code | project code |
| Transactions | project code | project code |
| Account linking | project code | project code |
Recommended migration process
This section describes the recommended migration process and allows you to keep your current display (invocation) name, directory information, and historical analytics.
This process involves working with two different Actions Builder projects, both of which are migrated from the same Dialogflow project. For clarity, these projects are referred to as the following:
- experimental: This project is used to set up and test your migration.
- original: This project is currently live and serving users.
To migrate your project, do the following:
- Create a backup of your Dialogflow project by using Dialogflow's export feature.
- Go to the Actions console and open the project you want to migrate.
- Navigate to Develop > Actions and click Preview migration.
- Click through the informational slides and then click Start migration.
- Choose Migrate as a new project.
- Review the migration report and optionally download it for future reference.
- Click Migrate.
- Enter a name for your "experimental" project and click Create Project. Make a note of the Project ID.
- Complete any post-migration set up needed and verify your Action is functioning as intended.
Use the gactions CLI to pull the draft of your "experimental" project.
gactions pull --project-id experimental-project-idReopen your "original" Dialogflow project in the Actions console.
Navigate to Develop > Actions and click Preview migration.
Choose Migrate this project.
Click Migrate.
Click the More icon > Project settings and make note of the Project ID.
On your local system, open the settings.yaml file of the "experimental" project you pulled, and replace the projectId with the project ID of the "original" project.
Use the gactions CLI to push the draft of your locally saved project.
gactions pushFollow the steps for publishing through the alpha or beta channels, or publish your Action to production.