Page Summary
-
This guide provides steps for creating a simple immersive AR application using WebXR.
-
A WebXR-compatible development environment is required to begin creating the application.
-
The guide explains how to set up the basic HTML structure with a button to start the AR experience and initialize a 3D environment using the three.js library.
-
Steps are provided for creating an
XRSession, setting up a coordinate system withXRReferenceSpace, and rendering the scene within a continuous animation loop. -
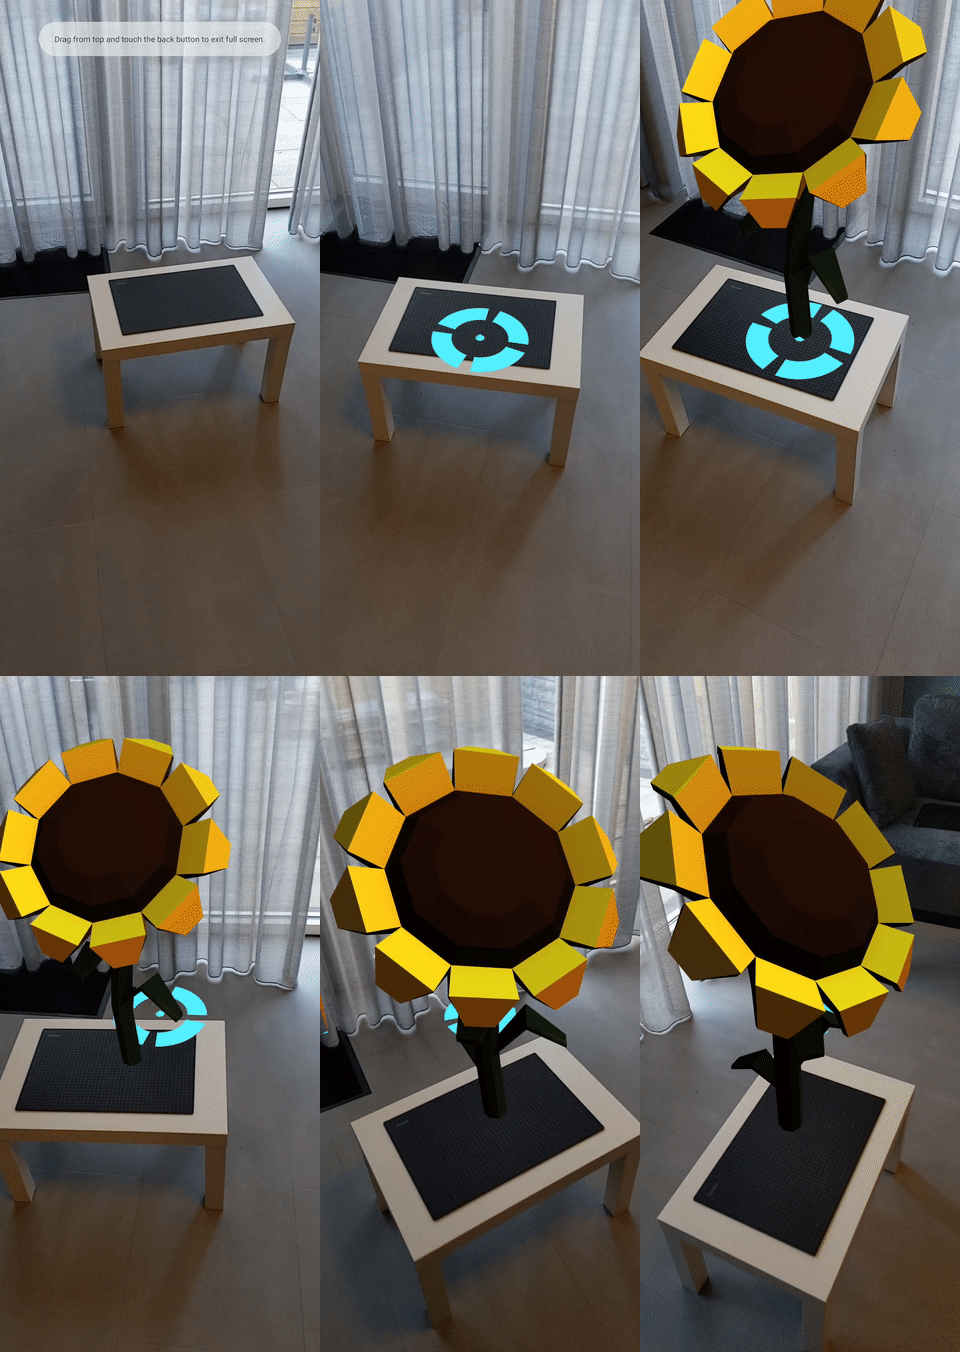
The tutorial details how to implement hit testing to place virtual objects, like a sunflower, onto real-world surfaces using GLTF models and handling user taps for interaction.
This page will guide you through creating a simple immersive AR application using WebXR.
You'll need a WebXR-compatible development environment to get started.
Create an HTML page
WebXR requires user interaction to be able to start a session.
Create a button that calls activateXR(). Upon loading the page, the user can use this button to start the AR experience.
Make a new file called index.html and add the following HTML code to it:
<!doctype html>
<html>
<head>
  <meta charset="UTF-8">
  <meta name="viewport"
        content="width=device-width, user-scalable=no, initial-scale=1.0, maximum-scale=1.0, minimum-scale=1.0">
  <title>Hello WebXR!</title>

  <!-- three.js -->
  <script src="https://unpkg.com/three@0.126.0/build/three.js"></script>
</head>
<body>

<!-- Starting an immersive WebXR session requires user interaction.
    We start this one with a simple button. -->
<button onclick="activateXR()">Start Hello WebXR</button>
<script>
async function activateXR() {
  // Add a canvas element and initialize a WebGL context that is compatible with WebXR.
  const canvas = document.createElement("canvas");
  document.body.appendChild(canvas);
  const gl = canvas.getContext("webgl", {xrCompatible: true});

  // To be continued in upcoming steps.
}
</script>
</body>
</html>
Initialize three.js
Not much will happen when pressing the Start button. To set up a 3D environment, you can use a rendering library to display a scene.
In this example, you will use three.js, a JavaScript 3D rendering library that provides a WebGL renderer. Three.js handles rendering, cameras, and scene graphs, making it easier to display 3D content on the web.
Create a scene
A 3D environment is generally modelled as a scene. Create a THREE.Scene that contains AR elements.
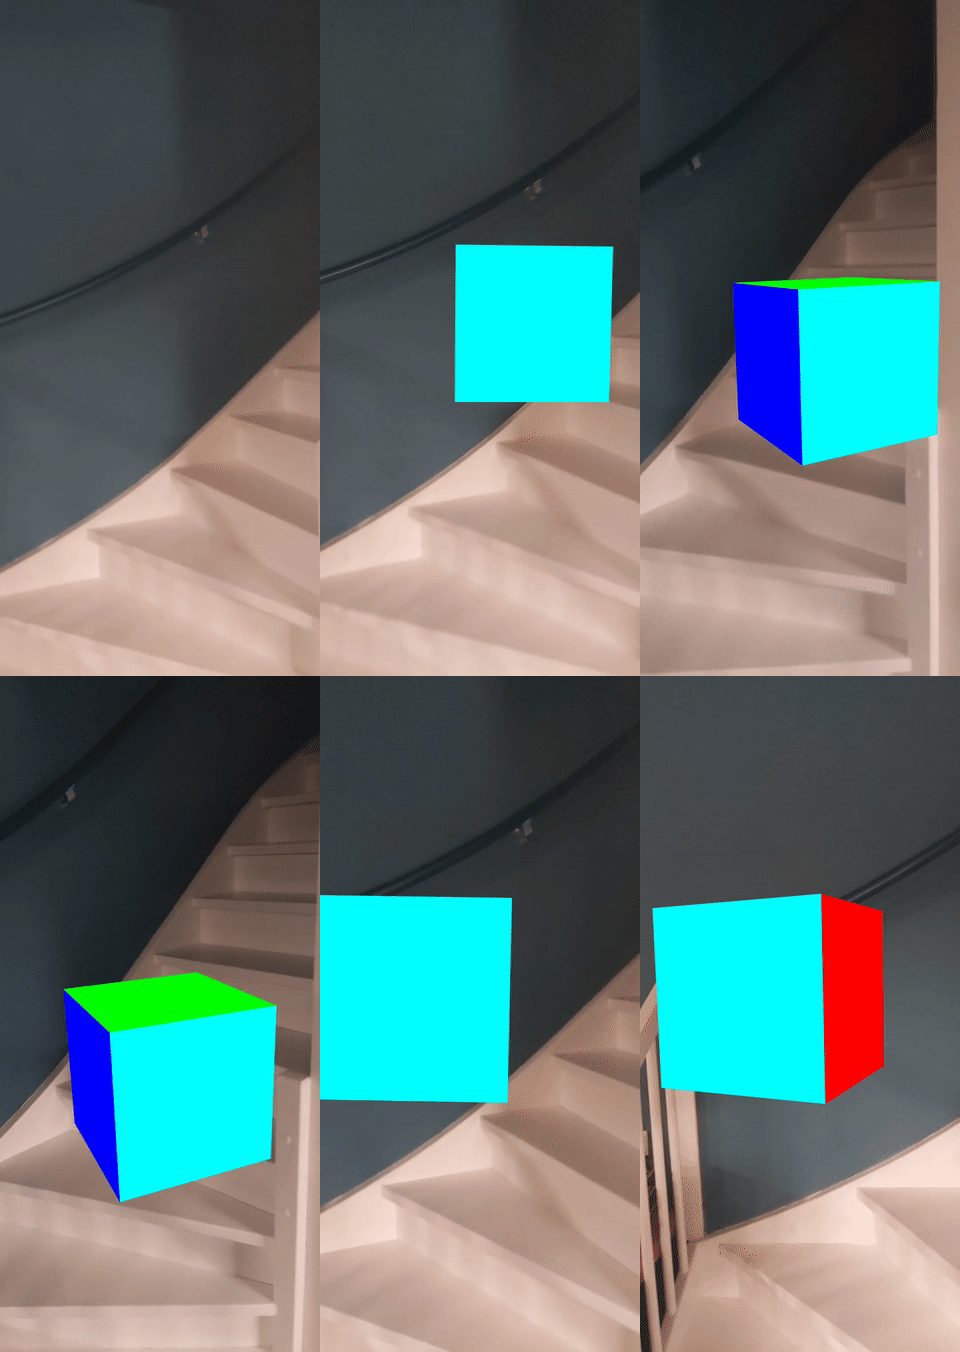
The following code allows you to look at an unlit colored box in AR.
Add this code to the bottom of the activateXR() function:
const scene = new THREE.Scene();

// The cube will have a different color on each side.
const materials = [
  new THREE.MeshBasicMaterial({color: 0xff0000}),
  new THREE.MeshBasicMaterial({color: 0x0000ff}),
  new THREE.MeshBasicMaterial({color: 0x00ff00}),
  new THREE.MeshBasicMaterial({color: 0xff00ff}),
  new THREE.MeshBasicMaterial({color: 0x00ffff}),
  new THREE.MeshBasicMaterial({color: 0xffff00})
];

// Create the cube and add it to the demo scene.
const cube = new THREE.Mesh(new THREE.BoxBufferGeometry(0.2, 0.2, 0.2), materials);
cube.position.set(1, 1, 1);
scene.add(cube);
Set up rendering using three.js
To be able to view this scene in AR, you'll need a renderer and a camera. The renderer uses WebGL to draw your scene to the screen. The camera describes the viewport from which the scene is viewed.
Add this code to the bottom of the activateXR() function:
// Set up the WebGLRenderer, which handles rendering to the session's base layer.
const renderer = new THREE.WebGLRenderer({
  alpha: true,
  preserveDrawingBuffer: true,
  canvas: canvas,
  context: gl
});
renderer.autoClear = false;

// The API directly updates the camera matrices.
// Disable matrix auto updates so three.js doesn't attempt
// to handle the matrices independently.
const camera = new THREE.PerspectiveCamera();
camera.matrixAutoUpdate = false;
Create an XRSession
The entrypoint to WebXR is through XRSystem.requestSession(). Use the immersive-ar mode to allow rendered content to be viewed in a real-world environment.
An XRReferenceSpace
describes the coordinate system used for objects within the virtual world.
The 'local' mode is best suited for an AR experience, with a reference space that has an origin near the viewer and stable tracking.
To create an XRSession and XRReferenceSpace, add this code to the bottom of the activateXR() function:
// Initialize a WebXR session using "immersive-ar".
const session = await navigator.xr.requestSession("immersive-ar");
session.updateRenderState({
  baseLayer: new XRWebGLLayer(session, gl)
});

// A 'local' reference space has a native origin that is located
// near the viewer's position at the time the session was created.
const referenceSpace = await session.requestReferenceSpace('local');
Render the scene
Now you can render the scene. XRSession.requestAnimationFrame()
schedules a callback which is executed when the browser is ready to draw a frame.
During the animation frame callback, call XRFrame.getViewerPose()
to obtain the viewer's pose relative to the local coordinate space.
This is used to update the in-scene camera, changing how the user views the virtual world before the renderer draws the scene using the updated camera.
Add this code to the bottom of the activateXR() function:
// Create a render loop that allows us to draw on the AR view.
const onXRFrame = (time, frame) => {
  // Queue up the next draw request.
  session.requestAnimationFrame(onXRFrame);

  // Bind the graphics framebuffer to the baseLayer's framebuffer
  gl.bindFramebuffer(gl.FRAMEBUFFER, session.renderState.baseLayer.framebuffer)

  // Retrieve the pose of the device.
  // XRFrame.getViewerPose can return null while the session attempts to establish tracking.
  const pose = frame.getViewerPose(referenceSpace);
  if (pose) {
    // In mobile AR, we only have one view.
    const view = pose.views[0];

    const viewport = session.renderState.baseLayer.getViewport(view);
    renderer.setSize(viewport.width, viewport.height)

    // Use the view's transform matrix and projection matrix to configure the THREE.camera.
    camera.matrix.fromArray(view.transform.matrix)
    camera.projectionMatrix.fromArray(view.projectionMatrix);
    camera.updateMatrixWorld(true);

    // Render the scene with THREE.WebGLRenderer.
    renderer.render(scene, camera)
  }
}
session.requestAnimationFrame(onXRFrame);
Run Hello WebXR
Navigate to the WebXR file on your device. You should be able to view a colored cube from all sides.
Add a hit test
A common way of interacting with the AR world is through a hit test, which finds an intersection between a ray and real-world geometry. In Hello WebXR, you'll use a hit test to place a sunflower in the virtual world.
Remove the demo cube
Remove the unlit cube and replace it with a scene that includes lighting:
const scene = new THREE.Scene();

const directionalLight = new THREE.DirectionalLight(0xffffff, 0.3);
directionalLight.position.set(10, 15, 10);
scene.add(directionalLight);
Use the hit-test feature
To initialize hit test functionality, request session with the hit-test feature. Find the previous requestSession() fragment, and add hit-test to it:
const session = await navigator.xr.requestSession("immersive-ar", {requiredFeatures: ['hit-test']});
Add a model loader
Currently, the scene only contains a colored cube. To make the experience more interesting, add a model loader, which allows GLTF models to be loaded.
In your document's <head> tag, add three.js' GLTFLoader.
<!-- three.js -->
<script src="https://unpkg.com/three@0.126.0/build/three.js"></script>

<script src="https://unpkg.com/three@0.126.0/examples/js/loaders/GLTFLoader.js"></script>
Load GLTF models
Use the model loader from the previous step to load a targeting reticle and a sunflower from the web.
Add this code above onXRFrame:
const loader = new THREE.GLTFLoader();
let reticle;
loader.load("https://immersive-web.github.io/webxr-samples/media/gltf/reticle/reticle.gltf", function(gltf) {
  reticle = gltf.scene;
  reticle.visible = false;
  scene.add(reticle);
})

let flower;
loader.load("https://immersive-web.github.io/webxr-samples/media/gltf/sunflower/sunflower.gltf", function(gltf) {
  flower = gltf.scene;
});

// Create a render loop that allows us to draw on the AR view.
const onXRFrame = (time, frame) => {
Create a hit test source
To calculate intersections with real-world objects, create a XRHitTestSource using
XRSession.requestHitTestSource().
The ray used for hit testing has the viewer reference space as origin, meaning that the hit test is done from the center of the viewport.
To create a hit test source, add this code after creating the local reference space:
// A 'local' reference space has a native origin that is located
// near the viewer's position at the time the session was created.
const referenceSpace = await session.requestReferenceSpace('local');

// Create another XRReferenceSpace that has the viewer as the origin.
const viewerSpace = await session.requestReferenceSpace('viewer');
// Perform hit testing using the viewer as origin.
const hitTestSource = await session.requestHitTestSource({ space: viewerSpace });
Drawing a targeting reticle
To make it clear where the sunflower will be placed, add a targeting reticle to the scene. This reticle will appear to stick to real-world surfaces, signifying where the sunflower will be anchored.
XRFrame.getHitTestResults returns an array of XRHitTestResult and exposes intersections with real-world geometry.
Use these intersections to position the targeting reticle on every frame.
camera.projectionMatrix.fromArray(view.projectionMatrix);
camera.updateMatrixWorld(true);

const hitTestResults = frame.getHitTestResults(hitTestSource);
if (hitTestResults.length > 0 && reticle) {
  const hitPose = hitTestResults[0].getPose(referenceSpace);
  reticle.visible = true;
  reticle.position.set(hitPose.transform.position.x, hitPose.transform.position.y, hitPose.transform.position.z)
  reticle.updateMatrixWorld(true);
}
Adding interactions on tap
XRSession receives select events when the user completes a primary action.
In an AR session, this corresponds to a tap on the screen.
Make a new sunflower appear when the user taps on the screen by adding this code during initialization:
let flower;
loader.load("https://immersive-web.github.io/webxr-samples/media/gltf/sunflower/sunflower.gltf", function(gltf) {
  flower = gltf.scene;
});

session.addEventListener("select", (event) => {
  if (flower) {
    const clone = flower.clone();
    clone.position.copy(reticle.position);
    scene.add(clone);
  }
});
Test the hit test
Use your mobile device to navigate to the page. After WebXR builds an understanding of the environment, the reticle should appear on real-world surfaces. Tap the screen to place a sunflower, which can be viewed from all sides.
Next steps
- Read the WebXR Device API Specification.
- Check out WebXR Reference documentation on MDN web docs.
- Try out WebXR Samples.
- Build an augmented reality (AR) app using the WebXR Device API (codelab).


