Maps SDK for iOS 提供多种方法,让您可以在地图中添加形状。可支持以下形状:
- 多段线是一系列相连的线段,可组成您想要的任何形状,并可用于在地图上标记路径和路线。
- 多边形:可用于在地图上标记区域的封闭形状。
- 圆形是在地球表面上绘制的圆圈在地理位置上的准确投影。
您可以通过多种方式修改每个形状的外观。
多段线
您可以利用折线在地图上绘制线条。GMSPolyline 对象表示一系列有序的位置,以一系列线段的形式显示。您可以使用 GMSStrokeStyle 设置多段线的颜色。
如需创建多段线,您需要通过创建包含两个或更多点的相应 GMSMutablePath 对象来指定其路径。每个 CLLocationCoordinate2D 都表示地球表面上的一个点。系统会按照您向路径添加点的顺序在各点之间绘制线段。您可以使用 addCoordinate: 或 addLatitude:longitude: 方法向路径添加点。
Swift
let path = GMSMutablePath()
path.add(CLLocationCoordinate2D(latitude: -33.85, longitude: 151.20))
path.add(CLLocationCoordinate2D(latitude: -33.70, longitude: 151.40))
path.add(CLLocationCoordinate2D(latitude: -33.73, longitude: 151.41))
let polyline = GMSPolyline(path: path)
Objective-C
GMSMutablePath *path = [GMSMutablePath path];
[path addCoordinate:CLLocationCoordinate2DMake(-33.85, 151.20)];
[path addCoordinate:CLLocationCoordinate2DMake(-33.70, 151.40)];
[path addCoordinate:CLLocationCoordinate2DMake(-33.73, 151.41)];
GMSPolyline *polyline = [GMSPolyline polylineWithPath:path];
添加多段线
- 创建一个
GMSMutablePath对象。 - 使用
addCoordinate:或addLatitude:longitude:方法设置路径中的点。 - 使用路径作为实参,实例化一个新的
GMSPolyline对象。 - 根据需要设置其他属性,例如
strokeWidth和strokeColor。 - 设置
GMSPolyline的map属性。 - 多边形现在将显示在地图上。
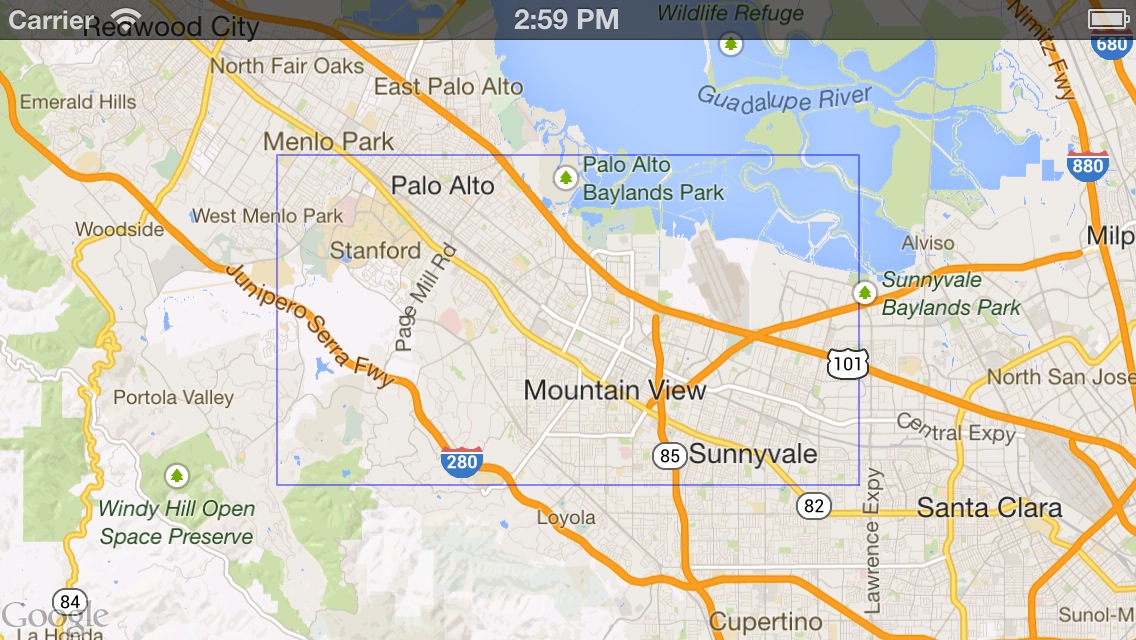
下面这段代码用于向地图添加矩形:
Swift
let rectanglePath = GMSMutablePath()
rectanglePath.add(CLLocationCoordinate2D(latitude: 37.36, longitude: -122.0))
rectanglePath.add(CLLocationCoordinate2D(latitude: 37.45, longitude: -122.0))
rectanglePath.add(CLLocationCoordinate2D(latitude: 37.45, longitude: -122.2))
rectanglePath.add(CLLocationCoordinate2D(latitude: 37.36, longitude: -122.2))
rectanglePath.add(CLLocationCoordinate2D(latitude: 37.36, longitude: -122.0))

let rectangle = GMSPolyline(path: path)
rectangle.map = mapView
Objective-C
GMSMutablePath *rectanglePath = [GMSMutablePath path];
[rectanglePath addCoordinate:CLLocationCoordinate2DMake(37.36, -122.0)];
[rectanglePath addCoordinate:CLLocationCoordinate2DMake(37.45, -122.0)];
[rectanglePath addCoordinate:CLLocationCoordinate2DMake(37.45, -122.2)];
[rectanglePath addCoordinate:CLLocationCoordinate2DMake(37.36, -122.2)];
[rectanglePath addCoordinate:CLLocationCoordinate2DMake(37.36, -122.0)];

GMSPolyline *rectangle = [GMSPolyline polylineWithPath:path];
rectangle.map = mapView;
移除多段线
您可以通过将 GMSPolyline 的 map 属性设置为 nil,从地图中移除多段线。或者,您也可以通过调用 GMSMapView
clear 方法来移除地图上的所有叠加层(包括多段线和其他形状)。
Swift
mapView.clear()
Objective-C
[mapView clear];
自定义多段线
GMSPolyline 对象提供了多个属性来控制线条的外观。它支持下列选项:
strokeWidth- 整条线的宽度,以屏幕点为单位。默认为1。该宽度不会随地图的缩放而缩放。
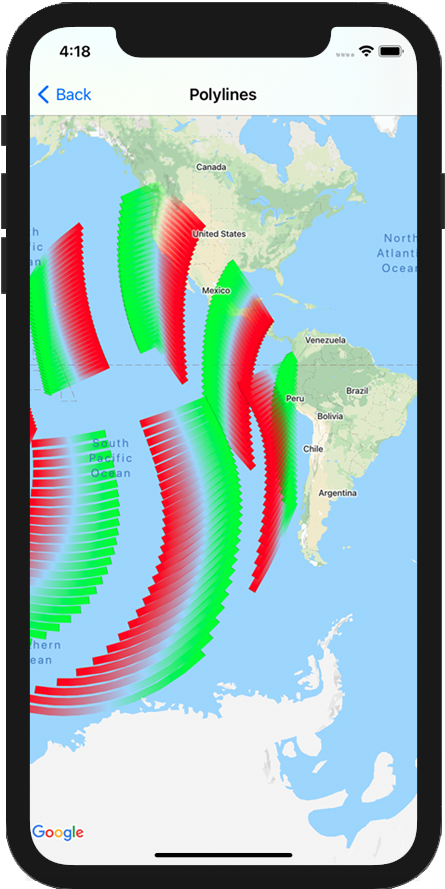
geodesic-
如果为
YES,则将此多段线边渲染为测地线。测地线段沿地球表面依循最短路径,在采用墨卡托投影法的地图上可能以曲线形式出现。非测地线段在地图上绘制为直线。默认值为NO。 spans- 用于指定多段线的一个或多个线段的颜色。spans 属性是一个
GMSStyleSpan对象数组。设置spans属性是更改多段线颜色的首选方式。 strokeColor- 一个
UIColor对象,用于指定多段线的颜色。 默认值为blueColor。 如果设置了spans,系统会忽略strokeColor属性。
以下代码段添加了一条从墨尔本到珀斯的粗多段线,并采用测地线插值。
Swift
let path = GMSMutablePath()
path.addLatitude(-37.81319, longitude: 144.96298)
path.addLatitude(-31.95285, longitude: 115.85734)
let polyline = GMSPolyline(path: path)
polyline.strokeWidth = 10.0
polyline.geodesic = true
polyline.map = mapView
Objective-C
GMSMutablePath *path = [GMSMutablePath path];
[path addLatitude:-37.81319 longitude:144.96298];
[path addLatitude:-31.95285 longitude:115.85734];
GMSPolyline *polyline = [GMSPolyline polylineWithPath:path];
polyline.strokeWidth = 10.f;
polyline.geodesic = YES;
polyline.map = mapView;
如需在将多段线添加到地图后对其进行修改,请务必保留 GMSPolyline 对象。
Swift
polyline.strokeColor = .blue
Objective-C
polyline.strokeColor = [UIColor blueColor];
更改多段线的颜色
多段线在地图上绘制为一系列线段。您可以使用 spans 属性更改各个细分或整条线的颜色。虽然此属性可让您详细控制多段线的着色,但您也可以使用一些便利功能,将单一样式应用于整条线。
以下代码段使用 spanWithColor: 方法将整条线的颜色更改为红色。
Swift
polyline.spans = [GMSStyleSpan(color: .red)]
Objective-C
polyline.spans = @[[GMSStyleSpan spanWithColor:[UIColor redColor]]];
或者,如果您已拥有 GMSStrokeStyle 对象,则可以使用 spanWithStyle: 方法。
Swift
let solidRed = GMSStrokeStyle.solidColor(.red)
polyline.spans = [GMSStyleSpan(style: solidRed)]
Objective-C
GMSStrokeStyle *solidRed = [GMSStrokeStyle solidColor:[UIColor redColor]];
polyline.spans = @[[GMSStyleSpan spanWithStyle:solidRed]];
在 Maps SDK for iOS 1.7 版之前,可以使用单个属性 strokeColor 设置 GMSPolyline 的整个颜色。spans 属性的优先级高于 strokeColor。
Swift
polyline.strokeColor = .red
Objective-C
polyline.strokeColor = [UIColor redColor];
样式
如果您的应用多次应用相同的描边颜色,您可能会发现定义可重用的样式非常有用。多段线样式使用 GMSStrokeStyle 对象指定。描边样式可以是纯色,也可以是从一种颜色到另一种颜色的渐变。创建样式后,您可以使用 spanWithStyle: 方法将其应用于 GMSStyleSpan。
Swift
// Create two styles: one that is solid blue, and one that is a gradient from red to yellow
let solidBlue = GMSStrokeStyle.solidColor(.blue)
let solidBlueSpan = GMSStyleSpan(style: solidBlue)
let redYellow = GMSStrokeStyle.gradient(from: .red, to: .yellow)
let redYellowSpan = GMSStyleSpan(style: redYellow)
Objective-C
// Create two styles: one that is solid blue, and one that is a gradient from red to yellow
GMSStrokeStyle *solidBlue = [GMSStrokeStyle solidColor:[UIColor blueColor]];
GMSStyleSpan *solidBlueSpan = [GMSStyleSpan spanWithStyle:solidBlue];
GMSStrokeStyle *redYellow =
    [GMSStrokeStyle gradientFromColor:[UIColor redColor] toColor:[UIColor yellowColor]];
GMSStyleSpan *redYellowSpan = [GMSStyleSpan spanWithStyle:redYellow];
span 的样式将持续到折线末尾,或直到设置了新样式为止。您可以通过将多段线的 spans 属性设置为单个 GMSStyleSpan 来更改整条线的颜色。此示例演示了如何将渐变效果应用于多段线的整个长度。
Swift
polyline.spans = [GMSStyleSpan(style: redYellow)]
Objective-C
polyline.spans = @[[GMSStyleSpan spanWithStyle:redYellow]];
更改各个线段的颜色
如果您想单独设置多段线每个线段的样式,可以创建一个 GMSStyleSpan 对象数组,然后将其传递给 spans 属性。默认情况下,数组中的每一项都会设置相应线段的颜色。如果数组中的元素数量多于线条中的线段数量,则会忽略多余的元素。如果数组中的元素较少,则最后的 GMSStyleSpan 描述了该行剩余部分的颜色。
您可以使用色块和/或渐变折线来指示折线沿线的变化,例如海拔高度或速度。以下代码段将多段线的前两个线段的颜色设置为红色,其余线段的颜色为从红色到黄色的渐变。
Swift
polyline.spans = [
  GMSStyleSpan(style: solidRed),
  GMSStyleSpan(style: solidRed),
  GMSStyleSpan(style: redYellow)
]
Objective-C
polyline.spans = @[[GMSStyleSpan spanWithStyle:solidRed],
                   [GMSStyleSpan spanWithStyle:solidRed],
                   [GMSStyleSpan spanWithStyle:redYellow]];
您可以使用 spanWithStyle:segments: 方法一次性为多个段设置样式。例如,以下代码与上述代码等效。
系统始终会忽略最终 GMSStyleSpan 的分段长度,因为该样式用于描述行的其余部分。
Swift
polyline.spans = [
  GMSStyleSpan(style: solidRed, segments:2),
  GMSStyleSpan(style: redYellow, segments:10)
]
Objective-C
polyline.spans = @[[GMSStyleSpan spanWithStyle:solidRed segments:2],
                   [GMSStyleSpan spanWithStyle:redYellow segments:10]];
部分细分
细分也可以指定为小数值。这会将样式应用于小数部分的段数,可能会导致单个段发生拆分。每个 GMSStyleSpan 都会在前一个 GMSStyleSpan 结束后立即开始:在下面的示例中,灰色从第二个片段的中间开始,一直持续到第三个片段的中间。
Swift
polyline.spans = [
  GMSStyleSpan(style: solidRed, segments: 2.5),
  GMSStyleSpan(color: .gray),
  GMSStyleSpan(color: .purple, segments: 0.75),
  GMSStyleSpan(style: redYellow)
]
Objective-C
polyline.spans = @[[GMSStyleSpan spanWithStyle:solidRed segments:2.5],
                   [GMSStyleSpan spanWithColor:[UIColor grayColor]],
                   [GMSStyleSpan spanWithColor:[UIColor purpleColor] segments:0.75],
                   [GMSStyleSpan spanWithStyle:redYellow]];
向多段线添加重复的颜色图案
如果您想向折线添加图案,可以使用 GMSGeometryUtils 中的 GMSStyleSpans 实用方法。GMSStyleSpans 方法接受两个用于定义重复模式的数组。一个数组用于设置应重复的样式,另一个数组用于定义重复间隔。结合使用时,您可以创建一种可应用于任何折线的模式,无论折线的长度或可用线段数量如何。
例如,以下代码段定义了一条黑白交替的多段线。由于类型指定为 kGMSLengthRhumb,因此其长度被视为沿等角航线(在墨卡托投影中,这是一条直线)的米数。
Swift
let styles = [
  GMSStrokeStyle.solidColor(.white),
  GMSStrokeStyle.solidColor(.black)
]
let lengths: [NSNumber] = [100000, 50000]
polyline.spans = GMSStyleSpans(
  polyline.path!,
  styles,
  lengths,
  GMSLengthKind.rhumb
)
Objective-C
NSArray *styles = @[[GMSStrokeStyle solidColor:[UIColor whiteColor]],
                    [GMSStrokeStyle solidColor:[UIColor blackColor]]];
NSArray *lengths = @[@100000, @50000];
polyline.spans = GMSStyleSpans(polyline.path, styles, lengths, kGMSLengthRhumb);
精灵印花多段线
借助精灵印花多段线,您可以使用重复显示的位图图像来创建多段线。形状以清晰的背景描边显示,但邮票不会在线条拐角处被截断,因此非常适合用于说明步行路线(例如,使用圆点)。
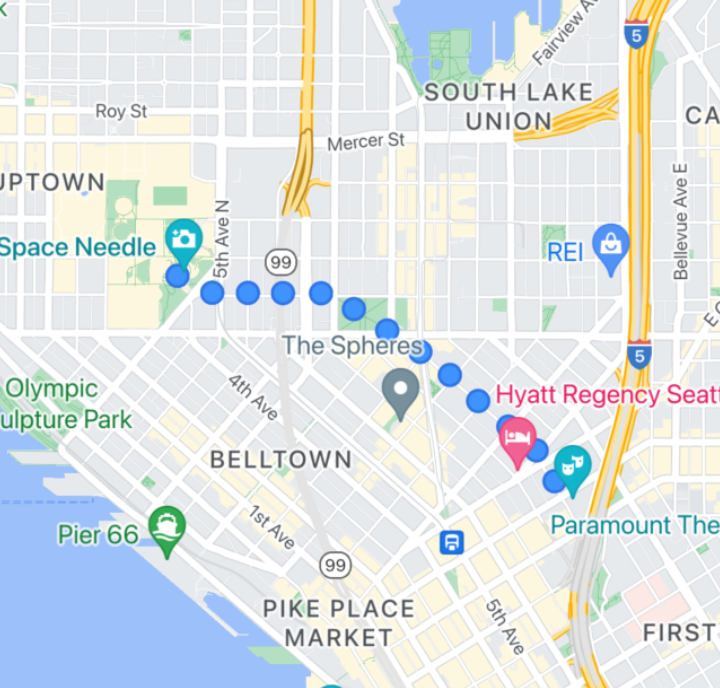
您可以使用 GMSSpriteStyle 来使用此功能,并通过 GMSStrokeStyle 的 stampStyle 属性将其设置为邮票。
Swift
let path = GMSMutablePath()
path.addLatitude(-37.81319, longitude: 144.96298)
path.addLatitude(-31.95285, longitude: 115.85734)
let polyline = GMSPolyline(path: path)
polyline.strokeWidth = 20
let image = UIImage(named: "imageFromBundleOrAsset")! // Image could be from anywhere
let stampStyle = GMSSpriteStyle(image: image)
let transparentStampStroke = GMSStrokeStyle.transparentStroke(withStamp: stampStyle)
let span = GMSStyleSpan(style: transparentStampStroke)
polyline.spans = [span]
polyline.map = mapView
Objective-C
GMSMutablePath *path = [GMSMutablePath path];
[path addLatitude:-37.81319 longitude:144.96298];
[path addLatitude:-31.95285 longitude:115.85734];
polyline.strokeWidth = 20;
GMSPolyline *polyline = [GMSPolyline polylineWithPath:path];

UIImage *image = [UIImage imageNamed:@"imageFromBundleOrAsset"];
GMSStrokeStyle *transparentStampStroke = [GMSStrokeStyle transparentStrokeWithStampStyle:[GMSSpriteStyle spriteStyleWithImage:image]];

GMSStyleSpan *span = [GMSStyleSpan spanWithStyle:transparentStampStroke];
polyline.spans = @[span];
polyline.map = _mapView;
纹理印花多段线
借助纹理印花多段线,您可以使用所选的重复纹理创建多段线。形状可以显示为透明、单色或渐变背景描边。纹理会随着缩放级别的变化而调整大小。在某些缩放级别下,路径或路径点末尾或开头的图片会被截断。
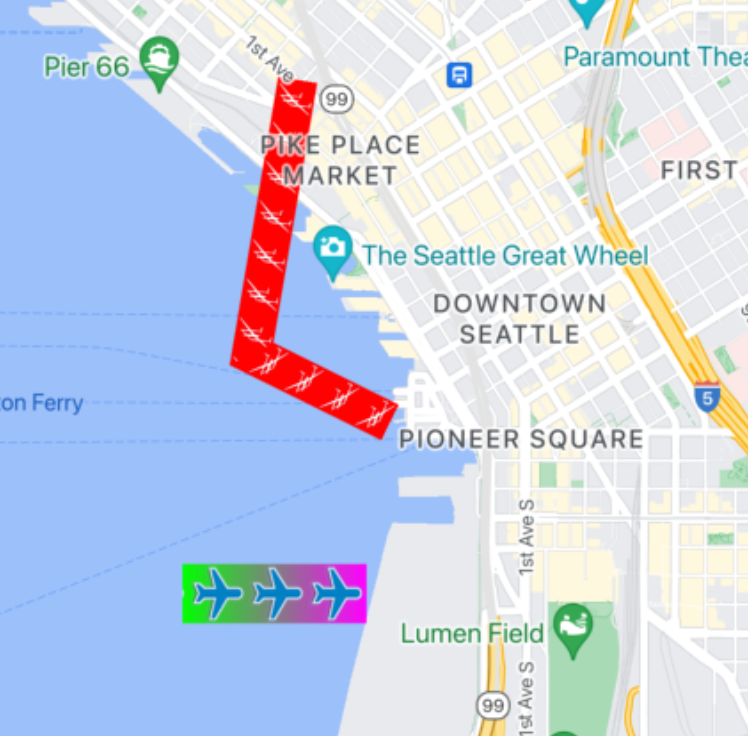
您可以使用 GMSTextureStyle 并通过 GMSStrokeStyle 的 stampStyle 属性将其设置为邮票来使用此功能。
Swift
let path = GMSMutablePath()
path.addLatitude(-37.81319, longitude: 144.96298)
path.addLatitude(-31.95285, longitude: 115.85734)
let polyline = GMSPolyline(path: path)
polyline.strokeWidth = 20
let redWithStamp = GMSStrokeStyle.solidColor(.red)
let image = UIImage(named: "imageFromBundleOrAsset")! // Image could be from anywhere
redWithStamp.stampStyle = GMSTextureStyle(image: image)
let span = GMSStyleSpan(style: redWithStamp)
polyline.spans = [span]
polyline.map = mapView
Objective-C
GMSMutablePath *path = [GMSMutablePath path];
[path addLatitude:-37.81319 longitude:144.96298];
[path addLatitude:-31.95285 longitude:115.85734];
GMSPolyline *polyline = [GMSPolyline polylineWithPath:path];
polyline.strokeWidth = 20;
GMSStrokeStyle *redWithStamp = [GMSStrokeStyle solidColor:[UIColor redColor]];

UIImage *image = [UIImage imageNamed:@"imageFromBundleOrAsset"]; // Image could be from anywhere
redWithStamp.stampStyle = [GMSTextureStyle textureStyleWithImage:image];

GMSStyleSpan *span = [GMSStyleSpan spanWithStyle:redWithStamp];
polyline.spans = @[span];
polyline.map = _mapView;
地图功能
GMSMapView 上的 mapCapabilities 属性可针对地图专用功能添加程序化检查。如果您想在调用特定 API 之前了解某些地图 capabilities 是否可用,此方法会非常有用。此查询用于确定地图视图是否支持 Sprite Stamped Polylines。
Swift
let path = GMSMutablePath()
path.addLatitude(-37.81319, longitude: 144.96298)
path.addLatitude(-31.95285, longitude: 115.85734)
let polyline = GMSPolyline(path: path)
polyline.strokeWidth = 20
let image = UIImage(named: "imageFromBundleOrAsset")! // Image could be from anywhere
let spans: [GMSStyleSpan]
if (mapView.mapCapabilities.contains(.spritePolylines)) {
  let spriteStyle = GMSSpriteStyle(image: image)
  let stroke = GMSStrokeStyle.transparentStroke(withStamp: spriteStyle)
  spans = [ GMSStyleSpan(style: stroke) ]
} else {
  let stroke = GMSStrokeStyle.solidColor(.clear)
  stroke.stampStyle = GMSTextureStyle(image: image)
  spans = [ GMSStyleSpan(style: stroke) ]
}
polyline.spans = spans
polyline.map = mapView
Objective-C
GMSMutablePath *path = [GMSMutablePath path];
[path addLatitude:-37.81319 longitude:144.96298];
[path addLatitude:-31.95285 longitude:115.85734];

UIImage *_Nonnull image = [UIImage imageNamed:@"imageFromBundleOrAsset"]; // Image could be from anywhere

NSArray<GMSStyleSpan *> * spans;
if (_mapView.mapCapabilities & GMSMapCapabilityFlagsSpritePolylines) {
  GMSSpriteStyle *spriteStyle = [GMSSpriteStyle spriteStyleWithImage:image];
  GMSStrokeStyle *stroke = [GMSStrokeStyle transparentStrokeWithStampStyle:spriteStyle];
  spans = @[ [GMSStyleSpan spanWithStyle:stroke] ];
} else {
  GMSStrokeStyle *stroke = [GMSStrokeStyle solidColor:UIColor.clearColor];
  stroke.stampStyle = [GMSTextureStyle textureStyleWithImage:image];
  spans = @[ [GMSStyleSpan spanWithStyle:stroke] ];
}

GMSPolyline *polyline = [GMSPolyline polylineWithPath:path];
polyline.strokeWidth = 20;
polyline.spans = spans;
polyline.map = _mapView;
借助此模式,您可以订阅更改并使用地图视图状态对更新做出反应。您还可以在 GMSMapViewDelegate 上实现 didChangeMapCapabilities,以获取有关功能可用性的更新。
多边形
多边形与多段线类似,都包含一系列有序的坐标。不过,多边形并不是开放式的,它们用于定义闭合环路内的实心区域。在 Maps SDK for iOS 中,多边形由 GMSPolygon 类定义。
您可以按照添加 GMSPolyline 的方法向地图添加 GMSPolygon。首先,通过创建相应的 GMSMutablePath 对象并为其添加点来指定其路径。这些点将组成多边形的轮廓。每个 CLLocationCoordinate2D 都表示地球表面上的一个点。系统会按照您向路径添加点的顺序在各点之间绘制线段。
添加多边形
- 创建一个
GMSMutablePath对象。 - 使用
addCoordinate:或addLatitude:longitude:方法设置路径中的点。这些点将组成多边形的轮廓。 - 使用路径作为实参,实例化一个新的
GMSPolygon对象。 - 根据需要设置其他属性,例如
strokeWidth、strokeColor和fillColor。 - 通过设置
GMSPolygon.map属性,将多边形分配给GMSMapView对象。 - 多边形随即会显示在地图上。
以下代码段的作用是向地图添加一个矩形。
Swift
// Create a rectangular path
let rect = GMSMutablePath()
rect.add(CLLocationCoordinate2D(latitude: 37.36, longitude: -122.0))
rect.add(CLLocationCoordinate2D(latitude: 37.45, longitude: -122.0))
rect.add(CLLocationCoordinate2D(latitude: 37.45, longitude: -122.2))
rect.add(CLLocationCoordinate2D(latitude: 37.36, longitude: -122.2))

// Create the polygon, and assign it to the map.
let polygon = GMSPolygon(path: rect)
polygon.fillColor = UIColor(red: 0.25, green: 0, blue: 0, alpha: 0.05);
polygon.strokeColor = .black
polygon.strokeWidth = 2
polygon.map = mapView
Objective-C
// Create a rectangular path
GMSMutablePath *rect = [GMSMutablePath path];
[rect addCoordinate:CLLocationCoordinate2DMake(37.36, -122.0)];
[rect addCoordinate:CLLocationCoordinate2DMake(37.45, -122.0)];
[rect addCoordinate:CLLocationCoordinate2DMake(37.45, -122.2)];
[rect addCoordinate:CLLocationCoordinate2DMake(37.36, -122.2)];

// Create the polygon, and assign it to the map.
GMSPolygon *polygon = [GMSPolygon polygonWithPath:rect];
polygon.fillColor = [UIColor colorWithRed:0.25 green:0 blue:0 alpha:0.05];
polygon.strokeColor = [UIColor blackColor];
polygon.strokeWidth = 2;
polygon.map = mapView;
在将多边形添加到地图之前和之后,您都可以自定义其外观。
移除多边形
通过将多边形的 GMSPolygon.map 属性设置为 nil 并将 layer 从其父级分离,来移除多边形。
Swift
 polygon.map = nil
 polygon.layer.removeFromSuperLayer()
Objective-C
 polygon.map = nil;
 [polygon.layer removeFromSuperlayer];
圆形
除了通用的 GMSPolygon 类之外,Maps SDK for iOS 还包含 GMSCircle,可让您在地球表面上绘制圆形。
如需构建圆形,您必须指定以下两个属性:
position,以CLLocationCoordinate2D形式表示。radius(以米为单位)。
然后便可将圆形定义为地球表面上所有与给定 center 的距离为 radius 米的点的集合。Maps API 使用墨卡托投影法在平面上呈现球形,由于所用方式的缘故,当圆形位于地图上靠近赤道的位置时,呈现的将是近乎完美的圆,而随着圆形距离赤道越来越远,则愈发(在屏幕上)呈现为非圆形状。
添加圈子
下面这段代码用于向地图添加圆:
Swift
let circleCenter = CLLocationCoordinate2D(latitude: 37.35, longitude: -122.0)
let circle = GMSCircle(position: circleCenter, radius: 1000)
circle.map = mapView
Objective-C
CLLocationCoordinate2D circleCenter = CLLocationCoordinate2DMake(37.35, -122.0);
GMSCircle *circle = [GMSCircle circleWithPosition:circleCenter
                                         radius:1000];
circle.map = mapView;
在将圆形添加到地图之前和之后,您都可以自定义其外观。
自定义圈子
您可以通过修改 GMSCircle 的属性来指定自定义颜色和描边宽度。它支持下列选项:
fillColor- 一个
UIColor对象,用于指定圆的内部颜色。默认为透明。 strokeColor- 一个
UIColor对象,用于指定圆圈轮廓的颜色。默认值为blackColor。 strokeWidth- 圆轮廓的粗细(以屏幕点为单位)。默认值为 1。 该粗细不会随地图的缩放而缩放。
以下代码段添加了一个粗红色圆圈,其内部为半透明红色。
Swift
circle.fillColor = UIColor(red: 0.35, green: 0, blue: 0, alpha: 0.05)
circle.strokeColor = .red
circle.strokeWidth = 5
Objective-C
circle.fillColor = [UIColor colorWithRed:0.25 green:0 blue:0 alpha:0.05];
circle.strokeColor = [UIColor redColor];
circle.strokeWidth = 5;
创建空心多边形
您可以在一个 GMSPolygon 对象中组合多个路径来创建复杂形状,如填充环,或圆环(其中的多边形区域在多边形内呈单独的形状)。复杂形状由多条路径组成。
创建一条路径指定多边形覆盖的最大面积的多边形。然后,将多边形的 holes 属性指定为一个或多个 GMSPath 对象的数组,这些对象用于定义多边形内的孔洞。
如果较小的路径被较大的路径完全包围,就会产生好像多边形的一部分被挖掉的效果。
下面的代码示例将创建一个带两个洞的多边形:
Swift
let hydeParkLocation = CLLocationCoordinate2D(latitude: -33.87344, longitude: 151.21135)
let camera = GMSCameraPosition.camera(withTarget: hydeParkLocation, zoom: 16)
let mapView = GMSMapView.map(withFrame: .zero, camera: camera)
mapView.animate(to: camera)

let hydePark = "tpwmEkd|y[QVe@Pk@BsHe@mGc@iNaAKMaBIYIq@qAMo@Eo@@[Fe@DoALu@HUb@c@XUZS^ELGxOhAd@@ZB`@J^BhFRlBN\\BZ@`AFrATAJAR?rAE\\C~BIpD"
let archibaldFountain = "tlvmEqq|y[NNCXSJQOB[TI"
let reflectionPool = "bewmEwk|y[Dm@zAPEj@{AO"

let hollowPolygon = GMSPolygon()
hollowPolygon.path = GMSPath(fromEncodedPath: hydePark)
hollowPolygon.holes = [GMSPath(fromEncodedPath: archibaldFountain)!, GMSPath(fromEncodedPath: reflectionPool)!]
hollowPolygon.fillColor = UIColor(red: 1.0, green: 0.0, blue: 0.0, alpha: 0.2)
hollowPolygon.strokeColor = UIColor(red: 1.0, green: 0.0, blue: 0.0, alpha: 1.0)
hollowPolygon.strokeWidth = 2
hollowPolygon.map = mapView
Objective-C
CLLocationCoordinate2D hydeParkLocation = CLLocationCoordinate2DMake(-33.87344, 151.21135);
GMSCameraPosition *camera = [GMSCameraPosition cameraWithTarget:hydeParkLocation
                                                           zoom:16];
mapView = [GMSMapView mapWithFrame:CGRectZero camera:camera];

NSString *hydePark = @"tpwmEkd|y[QVe@Pk@BsHe@mGc@iNaAKMaBIYIq@qAMo@Eo@@[Fe@DoALu@HUb@c@XUZS^ELGxOhAd@@ZB`@J^BhFRlBN\\BZ@`AFrATAJAR?rAE\\C~BIpD";
NSString *archibaldFountain = @"tlvmEqq|y[NNCXSJQOB[TI";
NSString *reflectionPool = @"bewmEwk|y[Dm@zAPEj@{AO";

GMSPolygon *hollowPolygon = [[GMSPolygon alloc] init];
hollowPolygon.path = [GMSPath pathFromEncodedPath:hydePark];
hollowPolygon.holes = @[[GMSPath pathFromEncodedPath:archibaldFountain],
                  [GMSPath pathFromEncodedPath:reflectionPool]];
hollowPolygon.fillColor = [UIColor colorWithRed:1.0 green:0.0 blue:0.0 alpha:0.2];
hollowPolygon.strokeColor = [UIColor colorWithRed:1.0 green:0.0 blue:0.0 alpha:1.0];
hollowPolygon.strokeWidth = 2;
hollowPolygon.map = mapView;