마커가 포함된 지도 추가
이 튜토리얼에서는 마커가 포함된 Google 지도를 iOS 앱에 추가하는 방법을 보여줍니다. 이 튜토리얼은 Swift 또는 Objective-C에 관한 초급 또는 중급 수준의 지식과 Xcode에 관한 일반적인 지식이 있는 사용자에게 적합합니다. 지도 만들기에 관한 고급 가이드는 개발자 가이드를 참고하세요.
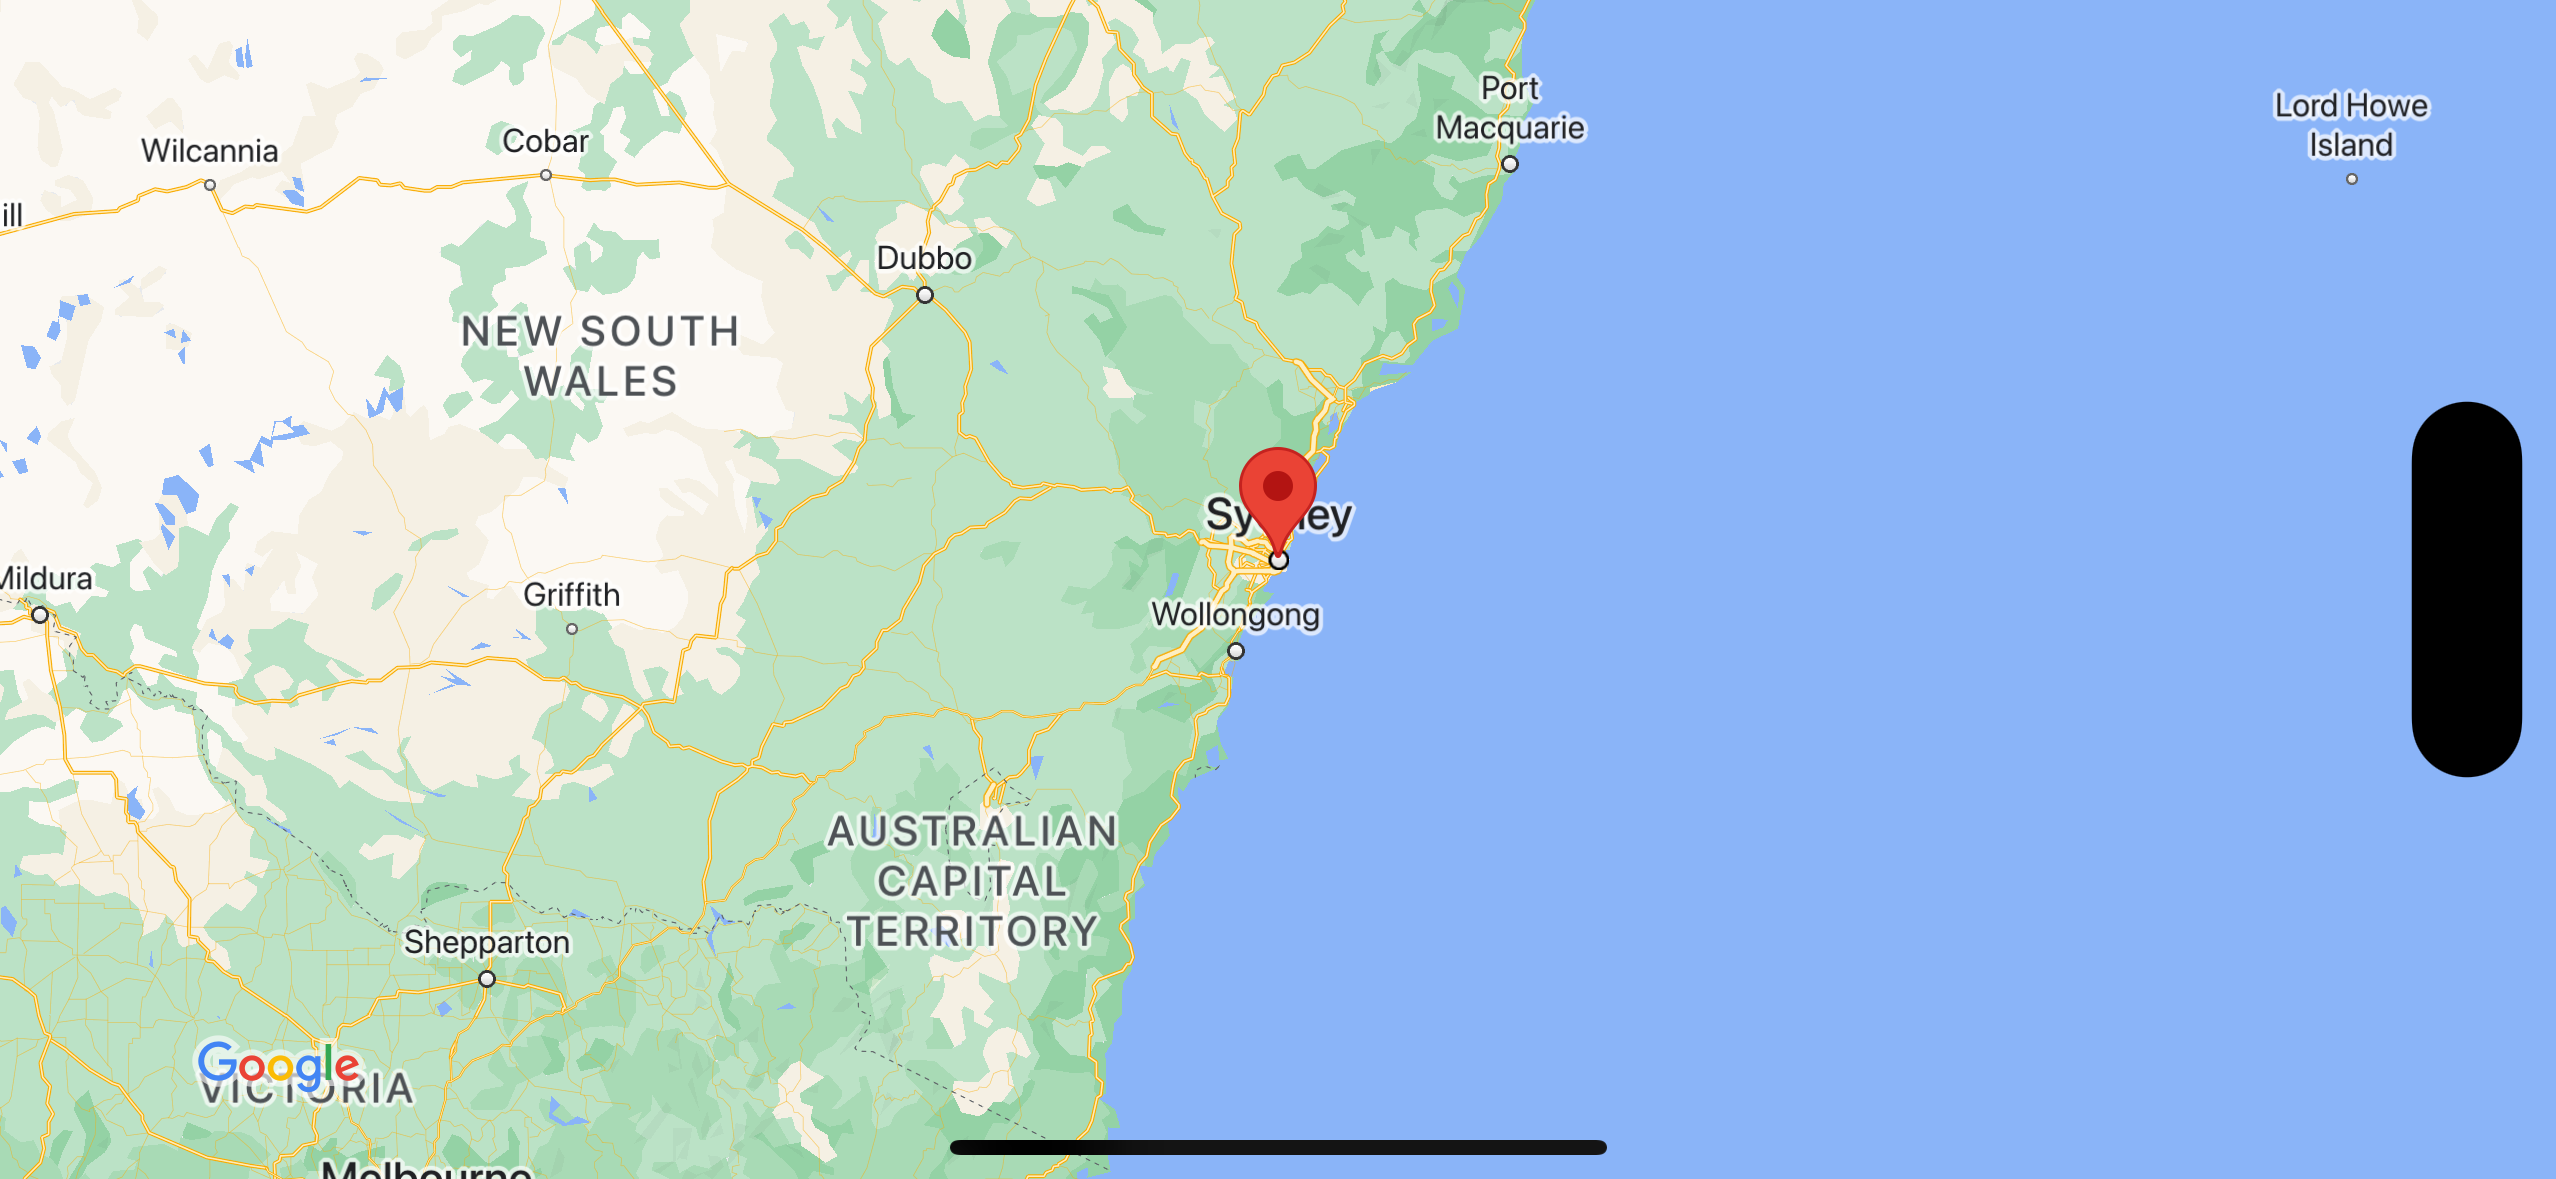
이 튜토리얼을 사용하여 다음과 같은 지도를 만듭니다. 마커는 오스트레일리아 시드니에 배치됩니다.

코드 가져오기
GitHub에서 Google Maps iOS 샘플 저장소를 클론하거나 다운로드합니다.
또는 다음 버튼을 클릭하여 소스 코드를 다운로드합니다.
Swift
import UIKit
import GoogleMaps

class ViewController: UIViewController {

    override func viewDidLoad() {
        super.viewDidLoad()
        // Do any additional setup after loading the view.
        // Create a GMSCameraPosition that tells the map to display the
        // coordinate -33.86,151.20 at zoom level 6.
        let camera = GMSCameraPosition.camera(withLatitude: -33.86, longitude: 151.20, zoom: 6.0)
        let mapView = GMSMapView.map(withFrame: self.view.frame, camera: camera)
        self.view.addSubview(mapView)

        // Creates a marker in the center of the map.
        let marker = GMSMarker()
        marker.position = CLLocationCoordinate2D(latitude: -33.86, longitude: 151.20)
        marker.title = "Sydney"
        marker.snippet = "Australia"
        marker.map = mapView
  }
}
Objective-C
#import "ViewController.h"
#import <GoogleMaps/GoogleMaps.h>

@interface ViewController ()

@end

@implementation ViewController

- (void)viewDidLoad {
    [super viewDidLoad];
  // Do any additional setup after loading the view.
  // Create a GMSCameraPosition that tells the map to display the
  // coordinate -33.86,151.20 at zoom level 6.
  GMSCameraPosition *camera = [GMSCameraPosition cameraWithLatitude:-33.86
                                                          longitude:151.20
                                                               zoom:6];
  GMSMapView *mapView = [GMSMapView mapWithFrame:self.view.frame camera:camera];
  mapView.myLocationEnabled = YES;
  [self.view addSubview:mapView];

  // Creates a marker in the center of the map.
  GMSMarker *marker = [[GMSMarker alloc] init];
  marker.position = CLLocationCoordinate2DMake(-33.86, 151.20);
  marker.title = @"Sydney";
  marker.snippet = @"Australia";
  marker.map = mapView;
}

@end
시작하기
Swift Package Manager
iOS용 Maps SDK는 Swift Package Manager를 사용하여 설치할 수 있습니다.
- 기존 iOS용 Maps SDK 종속 항목을 삭제합니다.
- 터미널 창을 열고
tutorials/map-with-marker디렉터리로 이동합니다. - Xcode 작업공간을 닫고 다음 명령어를 실행합니다.
sudo gem install cocoapods-deintegrate cocoapods-clean
pod deintegrate
pod cache clean --all
rm Podfile
rm map-with-marker.xcworkspace
- Xcode 프로젝트를 열고 podfile을 삭제합니다.
- File(파일) > Add Package Dependencies(패키지 종속 항목 추가)로 이동합니다.
- https://github.com/googlemaps/ios-maps-sdk를 URL로 입력하고 Enter 키를 눌러 패키지를 가져온 다음 패키지 추가를 클릭합니다.
- 파일 > 패키지 > 패키지 캐시 재설정을 사용하여 패키지 캐시를 재설정해야 할 수도 있습니다.
CocoaPods 사용
- Xcode 버전 26.0 이상을 다운로드하여 설치합니다.
- 아직 CocoaPods가 없으면 터미널에서 다음 명령어를 실행하여 macOS에 설치합니다.
sudo gem install cocoapods
tutorials/map-with-marker디렉터리로 이동합니다.pod install명령어를 실행합니다.Podfile에 지정된 Maps SDK가 종속 항목과 함께 설치됩니다.pod outdated를 실행하여 설치된 포드 버전과 새 업데이트를 비교합니다. 새 버전이 감지되면pod update를 실행하여Podfile를 업데이트하고 최신 SDK를 설치합니다. 자세한 내용은 CocoaPods 가이드를 참고하세요.- 프로젝트의 map-with-marker.xcworkspace 파일을 (더블클릭하여) 열어 Xcode에서 엽니다.
.xcworkspace파일을 사용하여 프로젝트를 열어야 합니다.
API 키 가져오기 및 필요한 API 사용 설정하기
이 튜토리얼을 완료하려면 iOS용 Maps SDK를 사용할 수 있도록 승인된 Google API 키가 필요합니다. 다음 버튼을 클릭하여 키를 가져오고 API를 활성화합니다.
시작하기자세한 내용은 API 키 가져오기를 참고하세요.
애플리케이션에 API 키 추가
다음과 같이 API 키를 AppDelegate.swift에 추가합니다.
- 다음 가져오기 문이 파일에 추가되었는지 확인합니다.
import GoogleMaps
application(_:didFinishLaunchingWithOptions:)메서드에서 다음 줄을 편집하여 YOUR_API_KEY를 본인의 API 키로 대체합니다.GMSServices.provideAPIKey("YOUR_API_KEY")
앱 빌드 및 실행
- iOS 기기를 컴퓨터에 연결하거나 Xcode 스키마 메뉴에서 시뮬레이터를 선택합니다.
- 기기를 사용하는 경우 위치 서비스가 사용 설정되어 있는지 확인합니다. 시뮬레이터를 사용하는 경우 기능 메뉴에서 위치를 선택합니다.
- Xcode에서 Product/Run 메뉴 옵션 (또는 재생 버튼 아이콘)을 클릭합니다.
- Xcode에서 앱을 빌드한 다음 기기 또는 시뮬레이터에서 앱을 실행합니다.
- 오스트레일리아 동쪽 해안의 시드니를 가리키는 마커가 포함된 지도가 표시됩니다. 이 페이지의 이미지와 비슷합니다.
문제 해결:
- 지도가 표시되지 않으면 이전에 설명한 대로 API 키를 가져와 앱에 추가했는지 확인하세요. Xcode의 디버깅 콘솔에서 API 키에 관한 오류 메시지를 확인합니다.
- iOS 번들 식별자로 API 키를 제한한 경우 키를 수정하여 앱에 대한 번들 식별자를 추가하세요(
com.google.examples.map-with-marker). - Wi-Fi 또는 GPS 연결 상태가 양호해야 합니다.
- Xcode 디버깅 도구를 사용하여 로그를 확인하고 앱을 디버그합니다.
코드 이해하기
- 지도를 만들고
viewDidLoad()의 뷰로 설정합니다.Swift
// Create a GMSCameraPosition that tells the map to display the
// coordinate -33.86,151.20 at zoom level 6.
let camera = GMSCameraPosition.camera(withLatitude: -33.86, longitude: 151.20, zoom: 6.0)
let mapView = GMSMapView.map(withFrame: CGRect.zero, camera: camera)
view = mapView
Objective-C
// Create a GMSCameraPosition that tells the map to display the
// coordinate -33.86,151.20 at zoom level 6.
GMSCameraPosition *camera = [GMSCameraPosition cameraWithLatitude:-33.86
                                                        longitude:151.20
                                                             zoom:6.0];
GMSMapView *mapView = [[GMSMapView alloc] initWithFrame: CGRectZero camera:camera];
self.view = mapView;
viewDidLoad()에서 지도에 마커를 추가합니다.Swift
// Creates a marker in the center of the map.
let marker = GMSMarker()
marker.position = CLLocationCoordinate2D(latitude: -33.86, longitude: 151.20)
marker.title = "Sydney"
marker.snippet = "Australia"
marker.map = mapView
Objective-C
// Creates a marker in the center of the map.
GMSMarker *marker = [[GMSMarker alloc] init];
marker.position = CLLocationCoordinate2DMake(-33.86, 151.20);
marker.title = @"Sydney";
marker.snippet = @"Australia";
marker.map = mapView;
기본적으로 iOS용 Maps SDK는 사용자가 마커를 탭할 때 정보 창의 콘텐츠를 표시합니다. 기본 동작으로 충분하면 마커에 클릭 리스너를 추가하지 않아도 됩니다.
수고하셨습니다. 특정 위치를 나타내는 마커가 포함된 Google 지도를 표시하는 iOS 앱을 빌드했습니다. iOS용 Maps SDK를 사용하는 방법도 알아보았습니다.
다음 단계
지도 객체 및 마커로 할 수 있는 작업에 대해 자세히 알아보세요.
