التوفّر: تظهر هذه الميزة على Android وiOS وJavaScript و خرائط Google الثابتة.
يمكنك تخصيص خريطتك بشكل أفضل لتلبية احتياجات المستخدمين من خلال إبراز الميزات على مستوى التكبير أو التصغير الذي يتم عرض الخريطة به. على سبيل المثال، يمكنك إبراز الأماكن المهمة أو الطرق بعد أن يكبّر المشاهدون موقعًا جغرافيًا معيّنًا يهمّهم.
يمكنك تنسيق عناصر ميزات الخريطة لتظهر بالطريقة نفسها على جميع مستويات التكبير أو التصغير على الخريطة، أو يمكنك إنشاء أنماط مختلفة لبعض العناصر على مستويات تكبير أو تصغير مختلفة.
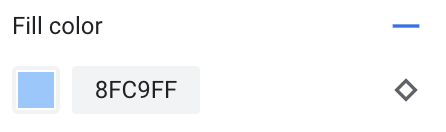
لا تسمح لك بعض الميزات بتخصيص مستويات التكبير أو التصغير. تحتوي عناصر على الخريطة التي يمكنك ضبط تصميم مستويات التكبير عليها على رمز ماسة على اليسار.
![]()
فهم تنسيق مستوى التكبير أو التصغير
تتراوح مستويات التكبير أو التصغير من 0، وهو مستوى التصغير الأقصى الذي يعرض العالم، إلى 22، وهو مستوى التكبير الأقصى الذي يعرض جزءًا صغيرًا ومفصّلاً من الخريطة. مستوى التكبير الرئيسي هو مستوى التكبير الذي تريد بدء نمط جديد عنده.
عند تنسيق ميزات الخريطة على مستويات تكبير أو تصغير مختلفة، يتم تطبيق هذا النمط على جميع مستويات التكبير أو التصغير الأعلى (المكبّرة أكثر) إلى أن يتم الوصول إلى نمط مستوى تكبير أو تصغير آخر. تتم دائمًا إضافة مستوى التكبير أو التصغير 0 مع النمط الحالي.
على سبيل المثال، إذا ضبطت الأنماط على مستويَي التكبير أو التصغير 5 و10:
- ينطبق نمط مستوى التكبير أو التصغير 5 على مستويات التكبير أو التصغير من 5 إلى 9.
- ينطبق نمط مستوى التكبير أو التصغير 10 على مستويات التكبير أو التصغير من 10 إلى 22.
- تحتفظ مستويات التكبير أو التصغير من 0 إلى 4 بالنمط الحالي.
عند تخصيص نمط مستوى التكبير أو التصغير لعنصر على الخريطة، يتم إلغاء أي أنماط مخصّصة على عنصر الخريطة الإجمالي.
فهم عمليات الانتقال بين مستويات التكبير أو التصغير للخرائط الثلاثية الأبعاد
عند إمالة خريطة ثلاثية الأبعاد والانتقال بين مستويات التكبير أو التصغير، قد تظهر ألوان انتقالية خارج أنماط مستوى التكبير أو التصغير التي تم ضبطها.
على سبيل المثال، إذا ضبطت أنماط مستوى التكبير أو التصغير على النحو التالي:
- بالنسبة إلى مستوى التكبير أو التصغير 10، يكون لون تعبئة المياه أسود.
- بالنسبة إلى مستوى التكبير أو التصغير 11، يكون لون تعبئة المياه أبيض.
قد يظهر لون تعبئة المياه باللون الرمادي عند الانتقال بين مستويَي التكبير أو التصغير، كما هو موضّح في الشكل التالي:

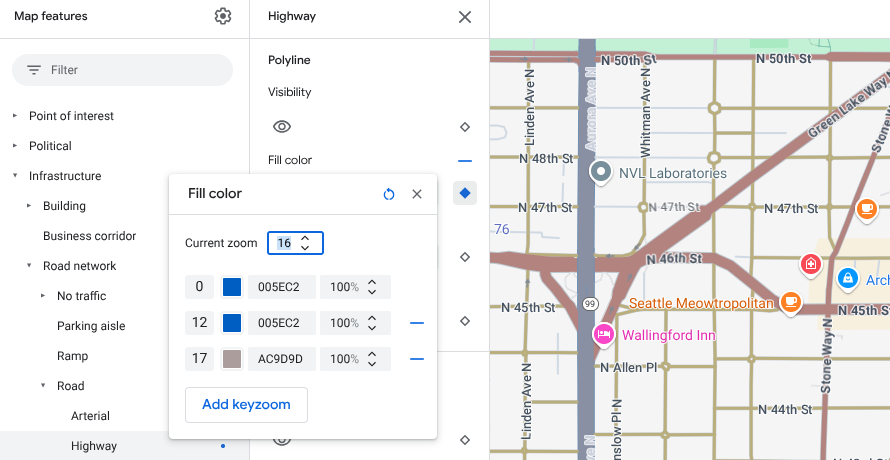
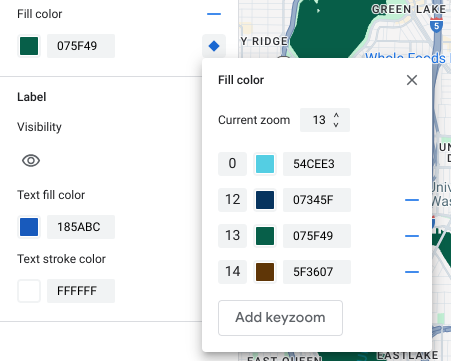
تخصيص مستويات التكبير أو التصغير المختلفة
في Cloud Console، انتقِل إلى أنماط الخرائط، واختَر مشروعًا إذا لزم الأمر.
أنشئ نمط خريطة أو افتحه، وانقر على تخصيص. لمعرفة التفاصيل، يُرجى الاطّلاع على إنشاء نمط خريطة.
من لوحة ميزات الخريطة ، اختَر عنصرًا على الخريطة لتخصيصه. تُفتح لوحة الأنماط التي تعرض العناصر التي يمكنك تخصيصها.
بجانب العنصر الذي تريد إضافة تصميم مستويات التكبير إليه، انقر على رمز الماسة الخاص بالتكبير أو التصغير على اليمين لفتح لوحة مستوى التكبير الرئيسي.
بجانب مستوى التكبير أو التصغير الحالي، اختَر مستوى التكبير أو التصغير الذي تريد تخصيصه. تتكيّف خريطة المعاينة مع مستوى التكبير أو التصغير هذا.
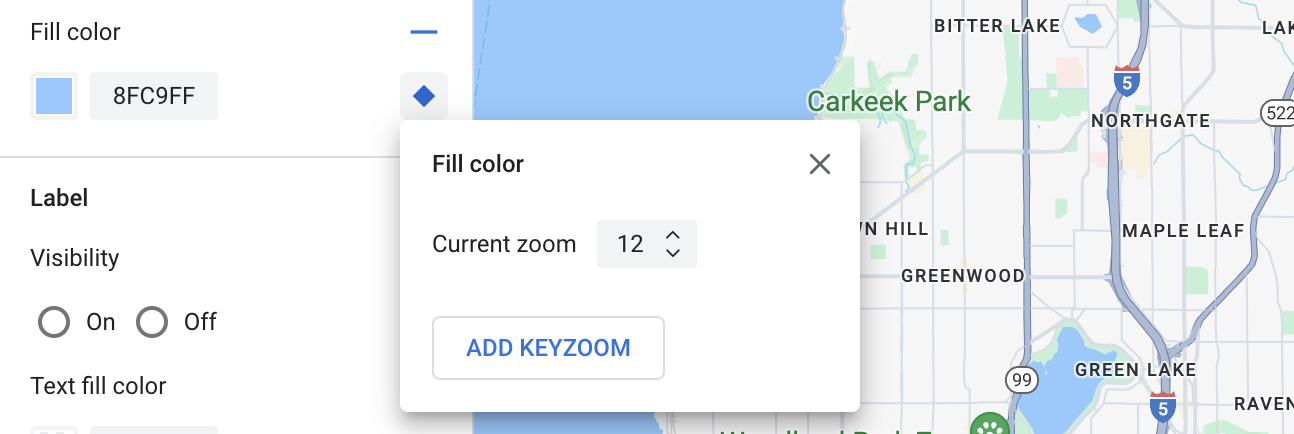
انقر على إضافة مستوى التكبير الرئيسي لإضافة مستوى تكبير رئيسي جديد على مستوى التكبير المحدّد وعرض قيمة الخريطة الأساسية التلقائية المقابلة.
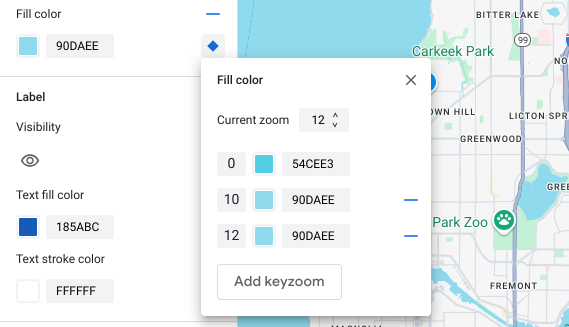
نسِّق مستوى التكبير أو التصغير هذا وأي مستويات تكبير أو تصغير أخرى حسب الحاجة.

لضبط مستوى تكبير آخر، غيِّر مستوى التكبير الحالي وانقر على إضافة مستوى التكبير الرئيسي مرة أخرى لإضافة مستوى تكبير آخر إلى القائمة. واصِل إضافة أنماط مستويات التكبير أو التصغير وضبطها إلى أن تنتهي.
عند الانتهاء، أغلق لوحة مستوى التكبير الرئيسي.
الكتابة فوق قيم ألوان الخريطة الأساسية التلقائية لعنصر
للكتابة فوق جميع قيم ألوان الخريطة الأساسية التلقائية لعنصر على جميع مستويات التكبير أو التصغير، نسِّق العنصر أولاً. عند إضافة تكبيرات رئيسية، يستخدم التكبير الرئيسي اللون الذي ضبطته للعنصر بدلاً من لون الخريطة الأساسية التلقائي.
حفظ تنسيق مستوى التكبير أو التصغير ونشره
لحفظ التغييرات التي أجريتها على تنسيق الخريطة، انقر على حفظ.
لإتاحة التغييرات لمعرّفات الخرائط المرتبطة بنمط الخريطة، انقر على نشر.
إزالة نمط مستوى التكبير أو التصغير
من لوحة ميزات الخريطة ، اختَر ميزة خريطة مخصّصة.
بجانب خيار تصميم، انقر على رمز الماسة على اليسار. تعرض العناصر التي تم ضبط تنسيق مستوى التكبير أو التصغير المخصّص لها رمز ماسة زرقاء صلبة.

في لوحة التكبير الرئيسي، انقر على رمز علامة الطرح لحذف مستوى تكبير أو تصغير.
إزالة جميع أنماط مستويات التكبير أو التصغير
إذا أردت إزالة جميع الأنماط المخصّصة من عنصر على الخريطة، يمكنك إجراء أحد الإجراءَين التاليَين:
- في لوحة الأنماط ، انقر على رمز علامة الطرح للإزالة بجانب اسم العنصر.
- في لوحة مستوى التكبير الرئيسي، انقر على رمز إعادة الضبط بجانب اسم العنصر.
معاينة تفاصيل مستوى الطريق
يمكنك معاينة تفاصيل مستوى الطريق المحسّنة على مستويات التكبير أو التصغير 17 أو أعلى في أنماطك الحالية، مثل عروض الطرق الواقعية والأرصفة وعلامات المسارات والميزات الأخرى في مدن معيّنة. يجب تفعيل المعاينة لكل جلسة في أداة تعديل الأنماط. لا تظهر ميزات الخريطة لتفاصيل الطريق هذه إلا في حزم تطوير البرامج (SDK) أو واجهات برمجة التطبيقات (API) التي تتيح تفاصيل مستوى الطريق. لتطبيقها في تطبيقك، يجب تحديث حزمة تطوير البرامج (SDK) أو واجهة برمجة التطبيقات (API) المرتبطة إلى الإصدار الذي يتيح تفاصيل مستوى الطريق. لمزيد من المعلومات عن إصدارات واجهات برمجة التطبيقات وحزم تطوير البرامج (SDK)، يُرجى الاطّلاع على تفاصيل مستوى الطريق في "منصة خرائط Google".
لتفعيل معاينة تفاصيل الطريق، اتّبِع الخطوات التالية:
في Google Cloud Console، انتقِل إلى أنماط الخرائط.
اختَر نمطًا حاليًا أو أنشئ نمطًا.
انقر على تخصيص.
في أداة تعديل الأنماط، انقر على معاينة تفاصيل الطريق.
في مربّع حوار المعاينة، فعِّل تفاصيل الطريق.
لمعرفة تفاصيل مستوى الطريق التي يمكنك تنسيقها، يُرجى الاطّلاع على العناصر التي يمكنك تنسيقها على الخريطة.
إضافة أنماط مستوى التكبير أو التصغير لتخفيف الانتقال بين الأنماط لمستويات التكبير أو التصغير 17 أو أعلى
على مستويات التكبير أو التصغير 17 أو أعلى مع تفعيل تفاصيل مستوى الطريق، تختفي ميزات "خريطة الطريق" وتصبح ميزة "خريطة السطح" بدلاً منها. عند التكبير، تظهر أي عناصر منسّقة تنطبق على عنصر على الخريطة في "خريطة السطح" وتحل محل عناصر على الخريطة في "خريطة الطريق" وأنماطها.
لجعل الانتقال بين أنماط ميزات الخريطة أكثر سلاسة، يمكنك إضافة أنماط مستوى التكبير أو التصغير لتثبيت ألوان النمط بين مستويات تكبير أو تصغير معيّنة. يمكنك أيضًا استخدام أنماط مستوى التكبير أو التصغير للتحكّم في وقت الانتقال بسلاسة إلى لون نمط جديد.
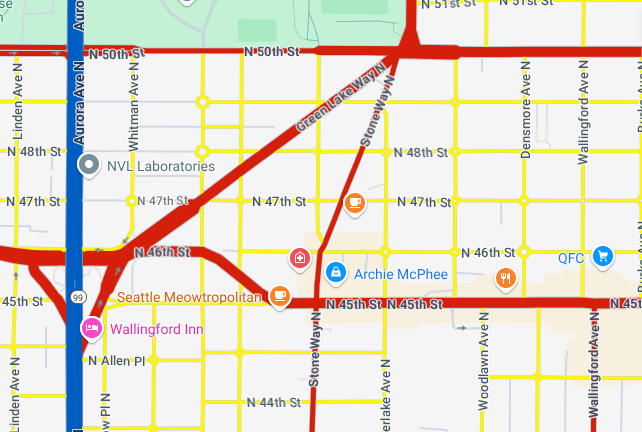
على سبيل المثال، على مستوى التكبير أو التصغير 16، يتم تنسيق ميزات الخريطة المدرَجة على النحو التالي:
- الطريق الرئيسي باللون الأحمر
- الطريق السريع باللون الأزرق
- الطريق المحلي باللون الأصفر
- السطح باللون البيج
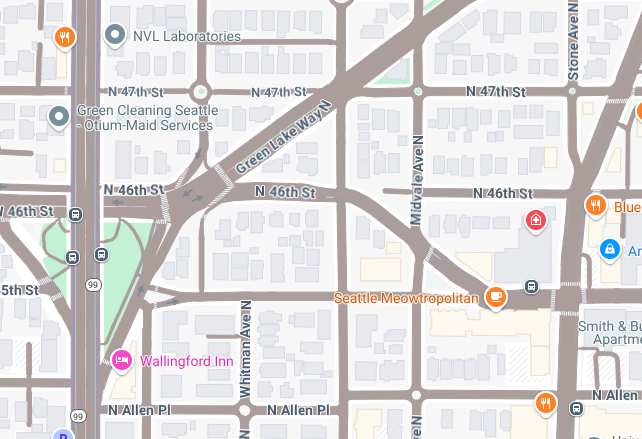
عند التكبير إلى مستوى التكبير أو التصغير 17، تتغيّر الطرق الرئيسية والطرق السريعة والطرق المحلية إلى عنصر على الخريطة "خريطة السطح"، الذي تم تنسيقه باللون البيج.
لإنشاء انتقال أكثر سلاسة بين ميزات "خريطة الطريق" وميزة "خريطة السطح"، أضِف التكبيرات الرئيسية التالية وتنسيق مستوى التكبير أو التصغير:
| عنصر على الخريطة | مستوى التكبير أو التصغير 0 | مستوى التكبير أو التصغير 12 | مستوى التكبير أو التصغير 17 |
|---|---|---|---|
| الطريق الرئيسي | أحمر | أحمر | بيج |
| الطريق السريع | أزرق | أزرق | بيج |
| الطريق المحلي | أصفر | أصفر | بيج |
بعد إضافة تنسيق مستوى التكبير أو التصغير، يحدث ما يلي عند التكبير:
- تعرض الطرق الرئيسية والطرق السريعة والطرق المحلية اللون المنسّق المخصّص من مستويات التكبير أو التصغير من 0 إلى 12.
- بعد مستوى التكبير 12، يبدأ اللون المنسّق في التلاشي إلى اللون البيج إلى أن ينتقل بالكامل إلى اللون البيج من نمط عنصر على الخريطة لـ "خريطة السطح" على مستوى التكبير 17.