

अपने मार्कर को क्लस्टर में रखकर, आप मैप पर बड़ी संख्या में मार्कर लगा सकते हैं ताकि मैप को पढ़ना मुश्किल न हो.
परिचय
इस वीडियो में मार्कर क्लस्टरिंग के इस्तेमाल के बारे में बताया गया है, जब आपके डेटा को मैप पर बड़ी संख्या में डेटा पॉइंट की ज़रूरत होती है.
मार्कर क्लस्टरिंग उपयोगिता आपको अलग-अलग स्थानों पर एक से ज़्यादा मार्कर प्रबंधित करने में सहायता करती है ज़ूम लेवल. सटीक रूप से, 'मार्कर' असल में 'आइटम' हैं इस समय, और सिर्फ़ 'मार्कर' बन जाते हैं प्राथमिकता दी जाती है. हालांकि, अगर साफ़ तौर पर कहा जाए, तो इस दस्तावेज़ में उनका नाम 'मार्कर' होगा .
जब कोई उपयोगकर्ता मैप को उच्च ज़ूम स्तर पर देखता है, तो व्यक्ति मार्कर मैप पर दिखाई देते हैं. जब उपयोगकर्ता ज़ूम आउट करता है, तो मार्कर इकट्ठा हो जाते हैं क्लस्टर में एक साथ जोड़ा जा सकता है, ताकि मैप को देखना आसान हो सके. मार्कर क्लस्टरिंग यूटिलिटी, Android यूटिलिटी लाइब्रेरी के लिए Maps SDK टूल का हिस्सा है. अगर आपने अब तक लाइब्रेरी सेट अप नहीं की है, तो सेटअप गाइड का पालन करें कृपया ध्यान दें.
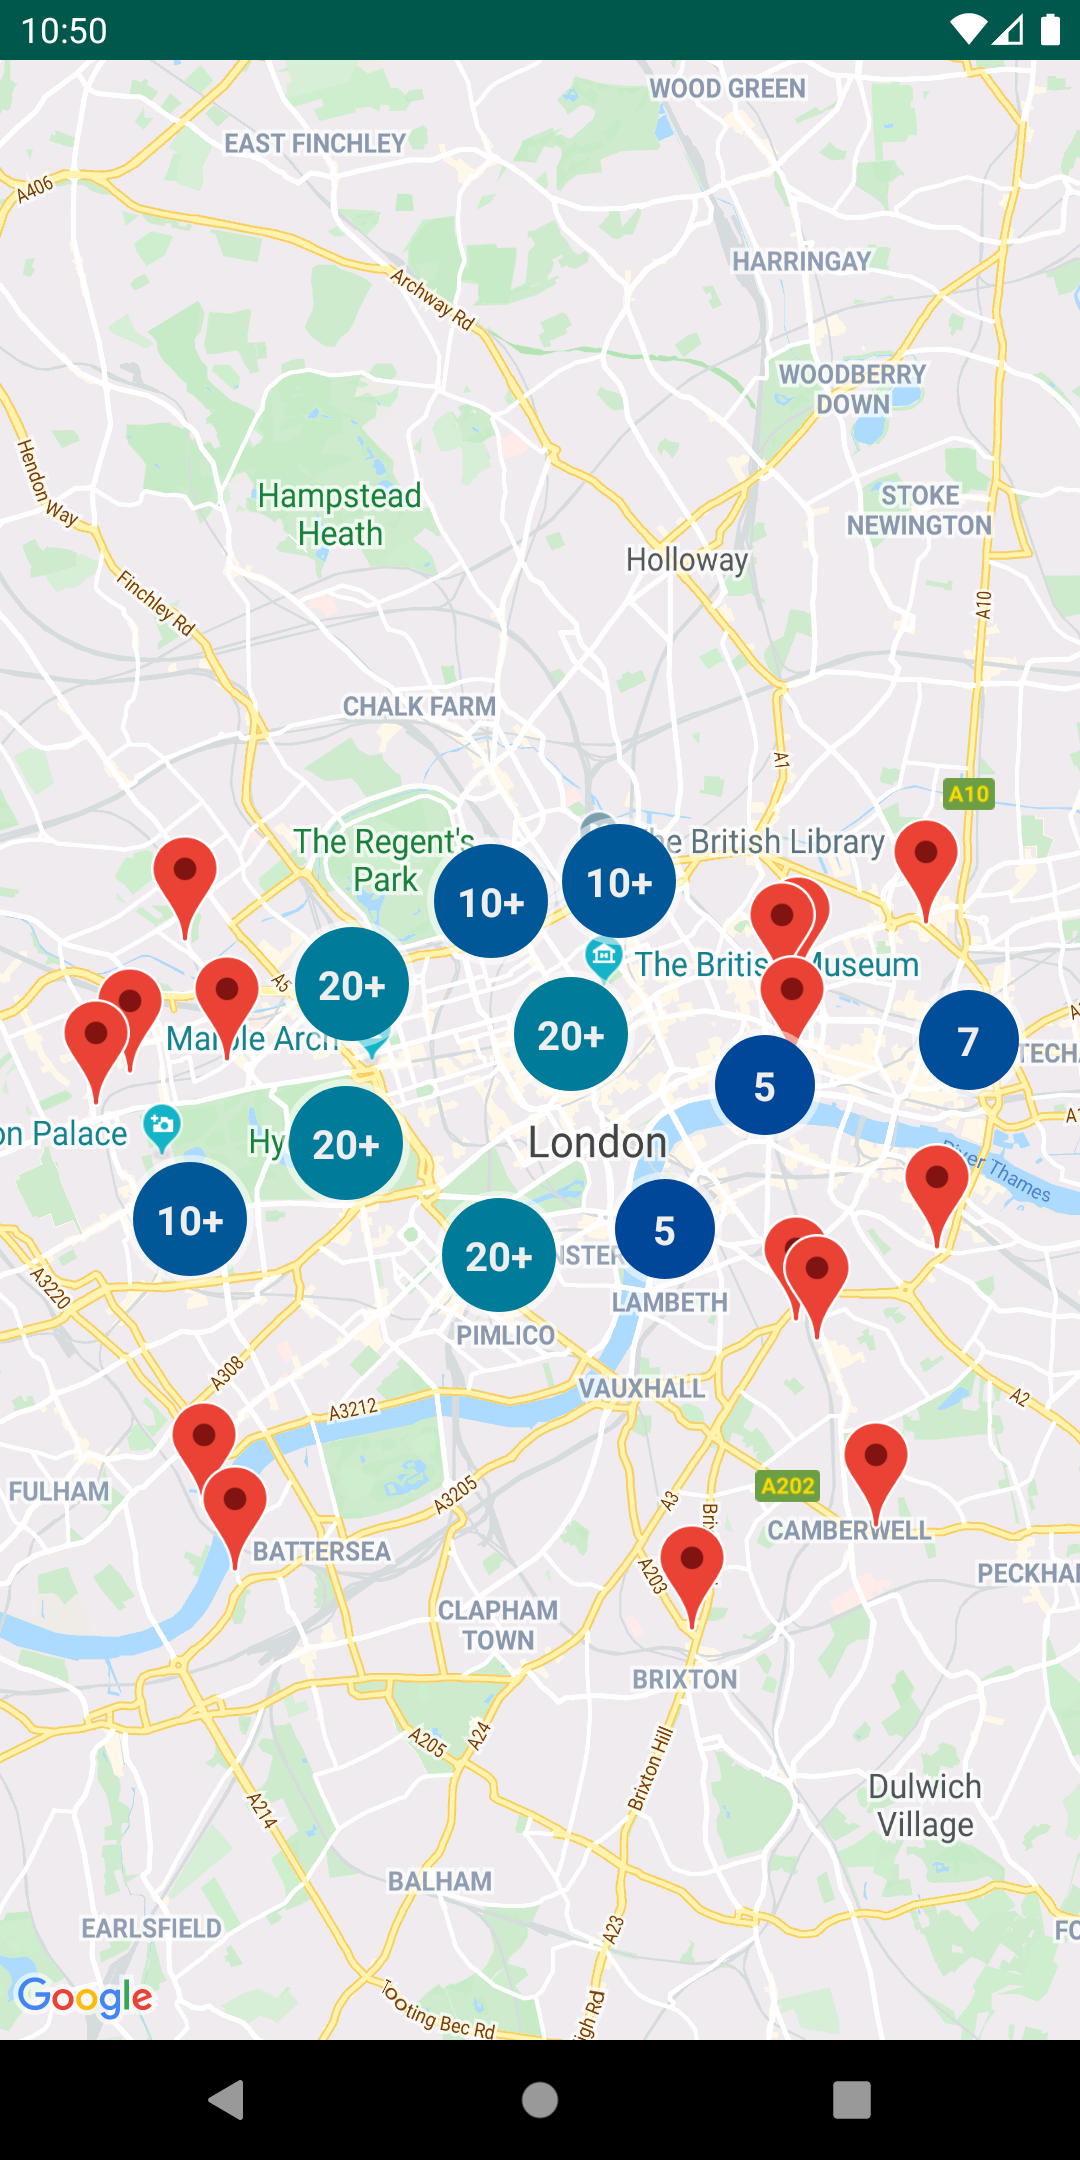
मार्कर क्लस्टरिंग उपयोगिता का उपयोग करने के लिए, आपको मार्कर इस रूप में जोड़ने की आवश्यकता होगी
ClusterManager के लिए ClusterItem ऑब्जेक्ट. कॉन्टेंट बनाने
ClusterManager ने मार्कर को Algorithm पर पास किया,
जो उन्हें क्लस्टर में बदल देता है. ClusterRenderer
क्लस्टर और व्यक्तिगत फ़ाइलों को जोड़कर और उन्हें हटाकर रेंडरिंग का ध्यान रखता है
मार्कर. ClusterRenderer और Algorithm
प्लग-इन किया जा सकता है और इसे अपनी पसंद के मुताबिक बनाया जा सकता है.
यूटिलिटी लाइब्रेरी में एक डेमो ऐप्लिकेशन होता है, जिसमें सैंपल लागू करने की सुविधा होती है इस्तेमाल कर सकते हैं. डेमो ऐप्लिकेशन चलाने में सहायता के लिए, देखें सेटअप गाइड पढ़ें. डेमो ऐप्लिकेशन में ये मार्कर क्लस्टरिंग सैंपल शामिल हैं:
ClusteringDemoActivity: एक आसान गतिविधि, जो इसे दिखाती है मार्कर क्लस्टरिंग.BigClusteringDemoActivity: 2,000 के साथ क्लस्टरिंग मार्कर.CustomMarkerClusteringDemoActivity: पसंद के मुताबिक डिज़ाइन बनाना इस्तेमाल किए जा सकते हैं.
एक सामान्य मार्कर क्लस्टर जोड़ें
दस मार्करों का एक सरल क्लस्टर बनाने के लिए नीचे दिए गए चरणों का पालन करें. नतीजा इस तरह दिखेगी. हालांकि, दिखाए गए/क्लस्टर किए गए मार्कर की संख्या ज़ूम स्तर के आधार पर बदल सकते है:
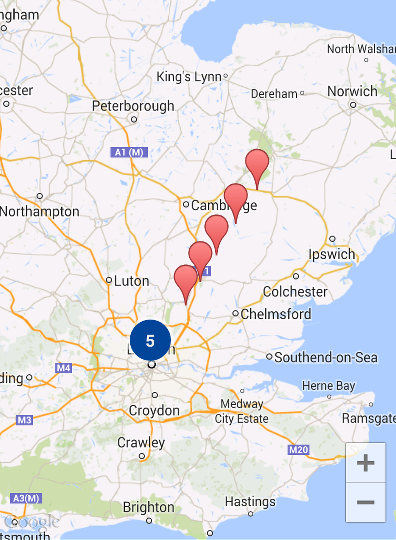
यहां ज़रूरी चरणों की खास जानकारी दी गई है:
- लागू करना
ClusterItemपर क्लिक करें. क्लस्टर आइटम मार्कर की स्थिति दिखाता है एक LatLng ऑब्जेक्ट के तौर पर और एक वैकल्पिक टाइटल या स्निपेट के तौर पर. - नई प्रोफ़ाइल बनाएं
ClusterManagerका इस्तेमाल करके, ज़ूम लेवल के आधार पर क्लस्टर आइटम (मार्कर) का ग्रुप बनाएं. - मैप के
OnCameraIdleListener()कोClusterManager, क्योंकिClusterManagerलागू होता है लिसनर. - अगर आपको किसी मार्कर क्लिक के जवाब में कोई खास फ़ंक्शन जोड़ना हो
इवेंट के लिए, मैप के
OnMarkerClickListener()कोClusterManager, क्योंकिClusterManagerलागू होता है लिसनर. - मार्कर को
ClusterManagerमें फ़ीड करें.
चरणों के बारे में ज़्यादा जानकारी: दस का हमारा सरल क्लस्टर बनाने के लिए
मार्कर की मदद से, पहले एक ऐसी MyItem क्लास बनाएं जो लागू करती हो
ClusterItem.
Kotlin
class MyItem(
    lat: Double,
    lng: Double,
    override val title: String,
    override val snippet: String
) : ClusterItem {

    override val position: LatLng = LatLng(lat, lng)

    override val zIndex: Float = 0f

    override fun equals(other: Any?): Boolean {
        if (this === other) return true
        if (other !is MyItem) return false
        return position == other.position && title == other.title
    }

    override fun hashCode(): Int {
        var result = position.hashCode()
        result = 31 * result + title.hashCode()
        return result
    }
}
Java
public static class MyItem implements ClusterItem {
    private final LatLng position;
    private final String title;
    private final String snippet;

    public MyItem(double lat, double lng, String title, String snippet) {
        position = new LatLng(lat, lng);
        this.title = title;
        this.snippet = snippet;
    }

    @Override
    public LatLng getPosition() {
        return position;
    }

    @Override
    public String getTitle() {
        return title;
    }

    @Override
    public String getSnippet() {
        return snippet;
    }

    @Nullable
    @Override
    public Float getZIndex() {
        return 0f;
    }
}
अपनी मैप गतिविधि में, ClusterManager जोड़ें और इसे
क्लस्टर आइटम. ध्यान दें:
टाइप
आर्ग्युमेंट <MyItem> में बताया गया है, जो
MyItem टाइप के लिए ClusterManager.
Kotlin
// Position the map.
map.moveCamera(CameraUpdateFactory.newLatLngZoom(LatLng(51.503186, -0.126446), 10f))

// Initialize the manager with the context and the map.
// (Activity extends context, so we can pass 'this' in the constructor.)
val manager = ClusterManager<MyItem>(context, map)
clusterManager = manager

// Point the map's listeners at the listeners implemented by the cluster
// manager.
map.setOnCameraIdleListener(manager)
map.setOnMarkerClickListener(manager)

// Add cluster items (markers) to the cluster manager.
addItems()
manager.cluster()
Java
// Position the map.
map.moveCamera(CameraUpdateFactory.newLatLngZoom(new LatLng(51.503186, -0.126446), 10));

// Initialize the manager with the context and the map.
// (Activity extends context, so we can pass 'this' in the constructor.)
clusterManager = new ClusterManager<MyItem>(context, map);

// Point the map's listeners at the listeners implemented by the cluster
// manager.
map.setOnCameraIdleListener(clusterManager);
map.setOnMarkerClickListener(clusterManager);

// Add cluster items (markers) to the cluster manager.
addItems();
clusterManager.cluster();
ज़ूम इन और आउट करते समय आप क्लस्टरिंग ऐनिमेशन को अक्षम भी कर सकते हैं.
यदि एनिमेशन बंद है, तो मार्कर
क्लस्टर में और उससे बाहर माइग्रेट करने को कहते हैं.
ऐनिमेशन बंद करने के लिए, ClusterManager में setAnimation() का इस्तेमाल करें
जैसा कि नीचे दिखाया गया है:
Kotlin
it.setAnimation(false)
Java
clusterManager.setAnimation(false);
क्लस्टर किए गए किसी मार्कर के लिए जानकारी विंडो जोड़ें
क्लस्टर वाले मार्कर की जानकारी विंडो जोड़ने के लिए, इनमें टाइटल और स्निपेट स्ट्रिंग जोड़ें
ClusterItem को लागू करने का कंस्ट्रक्टर.
नीचे दिए गए उदाहरण में, जानकारी विंडो के साथ मार्कर जोड़ा गया है
addItems() तरीके में, टाइटल और स्निपेट सेट करके:
Kotlin
// Set the lat/long coordinates for the marker.
val lat = 51.5009
val lng = -0.122

// Set the title and snippet strings.
val title = "This is the title"
val snippet = "and this is the snippet."

// Create a cluster item for the marker and set the title and snippet using the constructor.
val infoWindowItem = MyItem(lat, lng, title, snippet)

// Add the cluster item (marker) to the cluster manager.
it.addItem(infoWindowItem)
it.cluster()
Java
// Set the lat/long coordinates for the marker.
double lat = 51.5009;
double lng = -0.122;

// Set the title and snippet strings.
String title = "This is the title";
String snippet = "and this is the snippet.";

// Create a cluster item for the marker and set the title and snippet using the constructor.
MyItem infoWindowItem = new MyItem(lat, lng, title, snippet);

// Add the cluster item (marker) to the cluster manager.
clusterManager.addItem(infoWindowItem);
मार्कर क्लस्टर को पसंद के मुताबिक बनाएं
ClusterManager कंस्ट्रक्टर,
DefaultClusterRenderer और
NonHierarchicalDistanceBasedAlgorithm. आप
ClusterRenderer और Algorithm
setAlgorithm(Algorithm<T> algorithm) और
setRenderer(ClusterRenderer<T> view) तरीके
ClusterManager.
ClusterRenderer को लागू करके, इसकी रेंडरिंग को पसंद के मुताबिक बनाया जा सकता है
क्लस्टर. DefaultClusterRenderer से, आपको इनके लिए अच्छी परफ़ॉर्मेंस मिलती है
से शुरू होता है. DefaultClusterRenderer को सब-क्लास में शामिल करके, ये काम किए जा सकते हैं
डिफ़ॉल्ट को ओवरराइड कर देता है.
कस्टमाइज़ेशन के विस्तृत उदाहरण के लिए, यहां देखें
डेमो ऐप्लिकेशन में मौजूद CustomMarkerClusteringDemoActivity, जो शिपिंग की सुविधा देता है
उपयोगिता लाइब्रेरी के साथ.
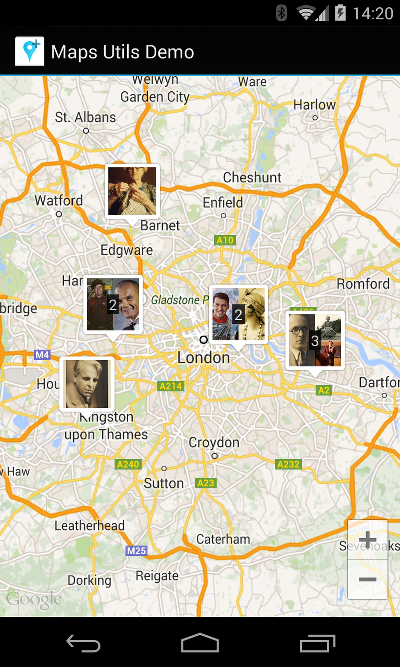
CustomMarkerClusteringDemoActivity अपना क्लस्टर तय करता है
आइटम, Person और
PersonRenderer के तौर पर DefaultClusterRenderer.
डेमो में यह भी बताया गया है कि
ClusterManager.OnClusterClickListener<Person> इंटरफ़ेस
क्लस्टर को क्लिक करने पर व्यक्ति के बारे में ज़्यादा जानकारी दिखाता है. आप
इसे भी लागू करें
ClusterManager.OnClusterItemClickListener<Person>
काम आ रहा है.
डेमो ऐप्लिकेशन चलाने में सहायता के लिए, देखें सेटअप गाइड पढ़ें.