
En esta guía, se explica cómo usar el método create() en el recurso Message de la API de Google Chat para realizar cualquiera de las siguientes acciones:
- Envía mensajes que contengan texto, tarjetas y widgets interactivos.
- Enviar mensajes de forma privada a un usuario específico de Chat
- Iniciar o responder un hilo de mensajes
- Asigna un nombre a un mensaje para que puedas especificarlo en otras solicitudes de la API de Chat.
El tamaño máximo del mensaje (incluido cualquier texto o tarjeta) es de 32,000 bytes. Para enviar un mensaje que supere este tamaño, tu app de Chat debe enviar varios mensajes.
Además de llamar a la API de Chat para crear mensajes, las apps de Chat pueden crear y enviar mensajes para responder a las interacciones del usuario, como publicar un mensaje de bienvenida después de que un usuario agrega la app de Chat a un espacio. Cuando responden a las interacciones, las apps de Chat pueden usar otros tipos de funciones de mensajería, como diálogos interactivos y interfaces de vista previa de vínculos. Para responder a un usuario, la app de Chat devuelve el mensaje de forma síncrona, sin llamar a la API de Chat. Para obtener información sobre cómo enviar mensajes para responder a las interacciones, consulta Cómo recibir y responder interacciones con tu app de Google Chat.
Cómo Chat muestra y atribuye los mensajes creados con la API de Chat
Puedes llamar al método create() con la autenticación de la app y la autenticación del usuario.
Chat atribuye el remitente del mensaje de manera diferente según el tipo de autenticación que uses.
Cuando te autenticas como la app de Chat, esta envía el mensaje.

App junto a su nombre.Cuando te autenticas como usuario, la app de Chat envía el mensaje en nombre del usuario. Chat también atribuye la app de Chat al mensaje mostrando su nombre.

El tipo de autenticación también determina qué funciones e interfaces de mensajería puedes incluir en el mensaje. Con la autenticación de la app, las apps de Chat pueden enviar mensajes que contienen texto enriquecido, interfaces basadas en tarjetas y widgets interactivos. Dado que los usuarios de Chat solo pueden enviar texto en sus mensajes, solo puedes incluir texto cuando crees mensajes con autenticación del usuario. Para obtener más información sobre las funciones de mensajería disponibles para la API de Chat, consulta la descripción general de los mensajes de Google Chat.
En esta guía, se explica cómo usar cualquiera de los tipos de autenticación para enviar un mensaje con la API de Chat.
Requisitos previos
Node.js
- Una cuenta de Google Workspace para empresas o Enterprise con acceso a Google Chat
- Configura tu entorno:
- Crea un proyecto de Google Cloud
- Configura la pantalla de consentimiento de OAuth.
- Habilita y configura la API de Google Chat con un nombre, un ícono y una descripción para tu app de Chat.
- Instala la biblioteca cliente de Cloud de Node.js.
- Crea credenciales de acceso según cómo quieras autenticar tu solicitud a la API de Google Chat:
- Para autenticarte como usuario de Chat, crea credenciales de ID de cliente de OAuth y guárdalas como un archivo JSON llamado
credentials.jsonen tu directorio local. - Para autenticarte como la app de Chat, crea credenciales de cuenta de servicio y guárdalas como un archivo JSON llamado
credentials.json.
- Para autenticarte como usuario de Chat, crea credenciales de ID de cliente de OAuth y guárdalas como un archivo JSON llamado
- Elige un alcance de autorización según si deseas autenticarte como usuario o como la app de Chat.
- Un espacio de Google Chat en el que el usuario autenticado o la app de Chat que realiza la llamada es miembro. Para autenticarte como la app de Chat, agrega la app de Chat al espacio.
Python
- Una cuenta de Google Workspace para empresas o Enterprise con acceso a Google Chat
- Configura tu entorno:
- Crea un proyecto de Google Cloud
- Configura la pantalla de consentimiento de OAuth.
- Habilita y configura la API de Google Chat con un nombre, un ícono y una descripción para tu app de Chat.
- Instala la biblioteca cliente de Cloud de Python.
- Crea credenciales de acceso según cómo quieras autenticar tu solicitud a la API de Google Chat:
- Para autenticarte como usuario de Chat, crea credenciales de ID de cliente de OAuth y guárdalas como un archivo JSON llamado
credentials.jsonen tu directorio local. - Para autenticarte como la app de Chat, crea credenciales de cuenta de servicio y guárdalas como un archivo JSON llamado
credentials.json.
- Para autenticarte como usuario de Chat, crea credenciales de ID de cliente de OAuth y guárdalas como un archivo JSON llamado
- Elige un alcance de autorización según si deseas autenticarte como usuario o como la app de Chat.
- Un espacio de Google Chat en el que el usuario autenticado o la app de Chat que realiza la llamada es miembro. Para autenticarte como la app de Chat, agrega la app de Chat al espacio.
Java
- Una cuenta de Google Workspace para empresas o Enterprise con acceso a Google Chat
- Configura tu entorno:
- Crea un proyecto de Google Cloud
- Configura la pantalla de consentimiento de OAuth.
- Habilita y configura la API de Google Chat con un nombre, un ícono y una descripción para tu app de Chat.
- Instala la biblioteca cliente de Cloud de Java.
- Crea credenciales de acceso según cómo quieras autenticar tu solicitud a la API de Google Chat:
- Para autenticarte como usuario de Chat, crea credenciales de ID de cliente de OAuth y guárdalas como un archivo JSON llamado
credentials.jsonen tu directorio local. - Para autenticarte como la app de Chat, crea credenciales de cuenta de servicio y guárdalas como un archivo JSON llamado
credentials.json.
- Para autenticarte como usuario de Chat, crea credenciales de ID de cliente de OAuth y guárdalas como un archivo JSON llamado
- Elige un alcance de autorización según si deseas autenticarte como usuario o como la app de Chat.
- Un espacio de Google Chat en el que el usuario autenticado o la app de Chat que realiza la llamada es miembro. Para autenticarte como la app de Chat, agrega la app de Chat al espacio.
Apps Script
- Una cuenta de Google Workspace para empresas o Enterprise con acceso a Google Chat
- Configura tu entorno:
- Crea un proyecto de Google Cloud
- Configura la pantalla de consentimiento de OAuth.
- Habilita y configura la API de Google Chat con un nombre, un ícono y una descripción para tu app de Chat.
- Crea un proyecto independiente de Apps Script y activa el servicio de Chat avanzado.
- En esta guía, debes usar la autenticación de usuario o de app. Para autenticarte como la app de Chat, crea credenciales de cuenta de servicio. Para conocer los pasos, consulta Cómo autenticar y autorizar como una app de Google Chat.
- Elige un alcance de autorización según si deseas autenticarte como usuario o como la app de Chat.
- Un espacio de Google Chat en el que el usuario autenticado o la app de Chat que realiza la llamada es miembro. Para autenticarte como la app de Chat, agrega la app de Chat al espacio.
Envía un mensaje como la app de Chat
En esta sección, se explica cómo enviar mensajes que contienen texto, tarjetas y widgets de accesorios interactivos con la autenticación de la app.

Para llamar al método CreateMessage() con la autenticación de la app, debes especificar los siguientes campos en la solicitud:
- Es el permiso de autorización de
chat.bot. - Recurso
Spaceen el que deseas publicar el mensaje. La app de Chat debe ser miembro del espacio. - Es el recurso
Messageque se creará. Para definir el contenido del mensaje, puedes incluir texto enriquecido (text), una o más interfaces de tarjetas (cardsV2) o ambos.
De manera opcional, puedes incluir lo siguiente:
- El campo
accessoryWidgetspara incluir botones interactivos en la parte inferior del mensaje. - El campo
privateMessageViewerpara enviar el mensaje de forma privada a un usuario especificado. - El campo
messageId, que te permite nombrar el mensaje para usarlo en otras solicitudes a la API - Los campos
thread.threadKeyymessageReplyOptionpara iniciar o responder una conversación. Si el espacio no usa subprocesos, este campo se ignora.
En el siguiente código, se muestra un ejemplo de cómo una app de Chat puede enviar un mensaje publicado como la app de Chat que contiene texto, una tarjeta y un botón en el que se puede hacer clic en la parte inferior del mensaje:
Node.js
Python
Java
Apps Script
Para ejecutar este ejemplo, reemplaza SPACE_NAME por el ID del campo name del espacio. Puedes obtener el ID llamando al método ListSpaces() o desde la URL del espacio.
Agrega widgets interactivos en la parte inferior de un mensaje
En el primer ejemplo de código de esta guía, el mensaje de la app de chat muestra un botón en el que se puede hacer clic en la parte inferior del mensaje, conocido como widget de accesorio. Los widgets de accesorios aparecen después de cualquier texto o tarjeta en un mensaje. Puedes usar estos widgets para solicitar a los usuarios que interactúen con tu mensaje de muchas maneras, incluidas las siguientes:
- Calificar la precisión o la satisfacción de un mensaje
- Denuncia un problema con la app de Mensajes o Chat.
- Abrir un vínculo a contenido relacionado, como documentación
- Descartar o posponer mensajes similares de la app de Chat durante un período específico
Para agregar widgets de accesorios, incluye el campo accessoryWidgets[] en el cuerpo de la solicitud y especifica uno o más widgets que desees incluir.
En la siguiente imagen, se muestra una app de Chat que agrega un mensaje de texto con widgets de accesorios para que los usuarios puedan calificar su experiencia con la app de Chat.
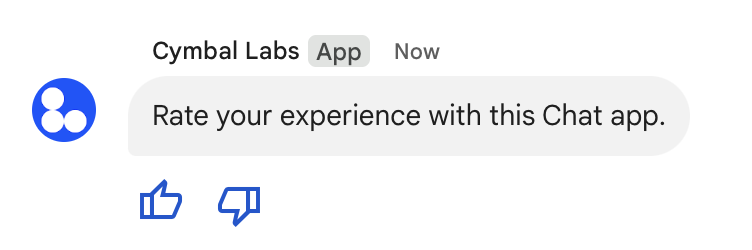
A continuación, se muestra el cuerpo de la solicitud que crea un mensaje de texto con dos botones de accesorio. Cuando un usuario hace clic en un botón, la función correspondiente (como doUpvote) procesa la interacción:
{
  text: "Rate your experience with this Chat app.",
  accessoryWidgets: [{ buttonList: { buttons: [{
    icon: { material_icon: {
      name: "thumb_up"
    }},
    color: { red: 0, blue: 255, green: 0 },
    onClick: { action: {
      function: "doUpvote"
    }}
  }, {
    icon: { material_icon: {
      name: "thumb_down"
    }},
    color: { red: 0, blue: 255, green: 0 },
    onClick: { action: {
      function: "doDownvote"
    }}
  }]}}]
}
Cómo enviar un mensaje de forma privada
Las apps de Chat pueden enviar mensajes de forma privada para que solo un usuario específico del espacio pueda verlos. Cuando una app de Chat envía un mensaje privado, este muestra una etiqueta que notifica al usuario que el mensaje es solo visible para él.
Para enviar un mensaje de forma privada con la API de Chat, especifica el campo privateMessageViewer en el cuerpo de la solicitud. Para especificar el usuario, debes establecer el valor en el recurso User que representa al usuario de Chat. También puedes usar el campo name del recurso User, como se muestra en el siguiente ejemplo:
{
  text: "Hello private world!",
  privateMessageViewer: {
    name: "users/USER_ID"
  }
}
Para usar esta muestra, reemplaza USER_ID por un ID único para el usuario, como 12345678987654321 o hao@cymbalgroup.com. Para obtener más información sobre cómo especificar usuarios, consulta Cómo identificar y especificar usuarios de Google Chat.
Para enviar un mensaje de forma privada, debes omitir lo siguiente en tu solicitud:
Envía un mensaje de texto en nombre de un usuario
En esta sección, se explica cómo enviar mensajes en nombre de un usuario con la autenticación de usuario. Con la autenticación del usuario, el contenido del mensaje solo puede incluir texto y debe omitir las funciones de mensajería que solo están disponibles para las apps de Chat, incluidas las interfaces de tarjetas y los widgets interactivos.

Para llamar al método CreateMessage() con la autenticación del usuario, debes especificar los siguientes campos en la solicitud:
- Es un alcance de autorización que admite la autenticación de usuarios para este método. En el siguiente ejemplo, se usa el alcance
chat.messages.create. - Recurso
Spaceen el que deseas publicar el mensaje. El usuario autenticado debe ser miembro del espacio. - Es el recurso
Messageque se creará. Para definir el contenido del mensaje, debes incluir el campotext.
De manera opcional, puedes incluir lo siguiente:
- El campo
messageId, que te permite nombrar el mensaje para usarlo en otras solicitudes a la API - Los campos
thread.threadKeyymessageReplyOptionpara iniciar o responder una conversación. Si el espacio no usa subprocesos, este campo se ignora.
En el siguiente código, se muestra un ejemplo de cómo una app de Chat puede enviar un mensaje de texto en un espacio determinado en nombre de un usuario autenticado:
Node.js
Python
Java
Apps Script
Para ejecutar este ejemplo, reemplaza SPACE_NAME por el ID del campo name del espacio. Puedes obtener el ID llamando al método ListSpaces() o desde la URL del espacio.
Cómo iniciar o responder en un hilo
En el caso de los espacios que usan conversaciones, puedes especificar si un mensaje nuevo inicia una conversación o responde a una existente.
De forma predeterminada, los mensajes que creas con la API de Chat inician un nuevo subproceso. Para ayudarte a identificar el subproceso y responderlo más tarde, puedes especificar una clave de subproceso en tu solicitud:
- En el cuerpo de la solicitud, especifica el campo
thread.threadKey. - Especifica el parámetro de consulta
messageReplyOptionpara determinar qué sucede si la clave ya existe.
Para crear un mensaje que responda a un hilo existente, haz lo siguiente:
- En el cuerpo de la solicitud, incluye el campo
thread. Si se configura, puedes especificar elthreadKeyque creaste. De lo contrario, debes usar elnamedel subproceso. - Especifica el parámetro de consulta
messageReplyOption.
En el siguiente código, se muestra un ejemplo de cómo una app de Chat puede enviar un mensaje de texto que inicia o responde un subproceso determinado identificado por la clave de un espacio determinado en nombre de un usuario autenticado:
Node.js
Python
Java
Apps Script
Para ejecutar esta muestra, reemplaza lo siguiente:
THREAD_KEY: Es una clave de subproceso existente en el espacio o, para crear un subproceso nuevo, un nombre único para el subproceso.SPACE_NAME: Es el ID del camponamedel espacio. Puedes obtener el ID llamando al métodoListSpaces()o desde la URL del espacio.
Cómo nombrar un mensaje
Para recuperar o especificar un mensaje en futuras llamadas a la API, puedes asignarle un nombre configurando el campo messageId en tu solicitud.
Asignarle un nombre a tu mensaje te permite especificarlo sin necesidad de almacenar el ID asignado por el sistema del nombre del recurso del mensaje (representado en el campo name).
Por ejemplo, para recuperar un mensaje con el método get(), usas el nombre del recurso para especificar qué mensaje recuperar. El nombre del recurso tiene el formato spaces/{space}/messages/{message}, en el que {message} representa el ID asignado por el sistema o el nombre personalizado que estableciste cuando creaste el mensaje.
Para asignar un nombre a un mensaje, especifica un ID personalizado en el campo messageId cuando crees el mensaje. El campo messageId establece el valor del campo clientAssignedMessageId del recurso Message.
Solo puedes darle un nombre a un mensaje cuando lo creas. No puedes nombrar ni modificar un ID personalizado para los mensajes existentes. El ID personalizado debe cumplir con los siguientes requisitos:
- Comienza con
client-. Por ejemplo,client-custom-namees un ID personalizado válido, perocustom-nameno lo es. - Contiene hasta 63 caracteres y solo letras en minúscula, números y guiones.
- Es único dentro de un espacio. Una app de chat no puede usar el mismo ID personalizado para diferentes mensajes.
En el siguiente código, se muestra un ejemplo de cómo una app de Chat puede enviar un mensaje de texto con un ID a un espacio determinado en nombre de un usuario autenticado:
Node.js
Python
Java
Apps Script
Para ejecutar esta muestra, reemplaza lo siguiente:
SPACE_NAME: Es el ID del camponamedel espacio. Puedes obtener el ID llamando al métodoListSpaces()o desde la URL del espacio.MESSAGE-ID: Es un nombre para el mensaje que comienza concustom-. Debe ser único y diferente de cualquier otro nombre de mensaje creado por la app de Chat en el espacio especificado.
Cómo citar un mensaje
Puedes citar otro mensaje llamando a CreateMessage() (rpc, rest) y configurando quotedMessageMetadata (rpc, rest) en la solicitud.
Puedes citar mensajes dentro de un hilo o en el chat principal, pero no puedes citar un mensaje de otro hilo.
En el siguiente código, se muestra cómo crear un mensaje que cita otro mensaje:
Node.js
import {createClientWithUserCredentials} from './authentication-utils.js';

const USER_AUTH_OAUTH_SCOPES = ['https://www.googleapis.com/auth/chat.messages.create'];

// This sample shows how to create a message that quotes another message.
async function main() {

  // Create a client
  const chatClient = await createClientWithUserCredentials(USER_AUTH_OAUTH_SCOPES);

  // Initialize request argument(s)
  const request = {

    // TODO(developer): Replace SPACE_NAME .
    parent: 'spaces/SPACE_NAME',

    message: {
      text: 'I am responding to a quoted message!',

      // quotedMessageMetadata lets chat apps respond to a message by quoting it.
      quotedMessageMetadata: {

        // TODO(developer): Replace QUOTED_MESSAGE_NAME
        // and QUOTED_MESSAGE_LAST_UPDATE_TIME.
        name: 'QUOTED_MESSAGE_NAME',
        lastUpdateTime: 'QUOTED_MESSAGE_LAST_UPDATE_TIME'
      }
    }
  };

  // Make the request
  const response = await chatClient.createMessage(request);

  // Handle the response
  console.log(response);
}

main().catch(console.error);
Python
from authentication_utils import create_client_with_user_credentials
from google.apps import chat_v1 as google_chat
from google.protobuf.timestamp_pb2 import Timestamp

SCOPES = ['https://www.googleapis.com/auth/chat.messages.create']

# This sample shows how to create a message that quotes another message.
def create_message_quote_message():
    '''Creates a message that quotes another message.'''

    # Create a client
    client = create_client_with_user_credentials(SCOPES)

    # Create a timestamp from the RFC-3339 string.
    # TODO(developer): Replace QUOTED_MESSAGE_LAST_UPDATE_TIME.
    last_update_time = Timestamp()
    last_update_time.FromJsonString('QUOTED_MESSAGE_LAST_UPDATE_TIME')

    # Initialize request argument(s)
    request = google_chat.CreateMessageRequest(

        # TODO(developer): Replace SPACE_NAME.
        parent='spaces/SPACE_NAME',

        # Create the message.
        message = google_chat.Message(
            text='I am responding to a quoted message!',

            # quotedMessageMetadata lets chat apps respond to a message by quoting it.
            quoted_message_metadata=google_chat.QuotedMessageMetadata(

                name='QUOTED_MESSAGE_NAME',
                last_update_time=last_update_time
            )
        )
    )

    # Make the request
    response = client.create_message(request)

    # Handle the response
    print(response)

create_message_quote_message()
Java
import com.google.chat.v1.ChatServiceClient;
import com.google.chat.v1.CreateMessageRequest;
import com.google.chat.v1.Message;
import com.google.chat.v1.QuotedMessageMetadata;
import com.google.protobuf.util.Timestamps;
import com.google.workspace.api.chat.samples.utils.AuthenticationUtils;
import java.text.ParseException;

// This sample shows how to create a message that quotes another message.
public class CreateMessageQuoteMessage {
  public static void main(String[] args) throws Exception, ParseException {
    // Create a client.
    ChatServiceClient chatClient = AuthenticationUtils.createClientWithUserCredentials();

    // Initialize request argument(s).
    // TODO(developer): Replace SPACE_NAME, QUOTED_MESSAGE_NAME,
    // and QUOTED_MESSAGE_LAST_UPDATE_TIME here.
    String parent = "spaces/SPACE_NAME";
    String quotedMessageName = "QUOTED_MESSAGE_NAME";
    String lastUpdateTime = "QUOTED_MESSAGE_LAST_UPDATE_TIME";

    QuotedMessageMetadata quotedMessageMetadata =
        QuotedMessageMetadata.newBuilder()
            .setName(quotedMessageName)
            .setLastUpdateTime(Timestamps.parse(lastUpdateTime))
            .build();

    Message message = Message.newBuilder()
        .setText("I am responding to a quoted message!")
        .setQuotedMessageMetadata(quotedMessageMetadata)
        .build();

    CreateMessageRequest request =
        CreateMessageRequest.newBuilder()
            .setParent(parent)
            .setMessage(message)
            .build();

    // Make the request.
    Message response = chatClient.createMessage(request);

    // Handle the response.
    System.out.println(response);
  }
}
Apps Script
/**
 * Creates a message that quotes another message.
 *
 * Relies on the OAuth2 scope 'https://www.googleapis.com/auth/chat.messages.create'
 * referenced in the manifest file (appsscript.json).
 */
function createMessageQuoteMessage() {

  // Initialize request argument(s)
  // TODO(developer): Replace SPACE_NAME here.
  const parent = 'spaces/SPACE_NAME';

  const message = {

    // The text content of the message.
    text: 'I am responding to a quoted message!',

    // quotedMessageMetadata lets chat apps respond to a message by quoting it.
    //
    // TODO(developer): Replace QUOTED_MESSAGE_NAME
    // and QUOTED_MESSAGE_LAST_UPDATE_TIME .
    quotedMessageMetadata: {
      name: 'QUOTED_MESSAGE_NAME',
      lastUpdateTime: 'QUOTED_MESSAGE_LAST_UPDATE_TIME',
    }
  };

  // Make the request
  const response = Chat.Spaces.Messages.create(message, parent);

  // Handle the response
  console.log(response);
}
Para ejecutar esta muestra, reemplaza lo siguiente:
SPACE_NAME: Es el ID del camponamedel espacio. Puedes obtener el ID llamando al métodoListSpaces()(rpc,rest) o desde la URL del espacio.QUOTED_MESSAGE_NAME: Es el recurso de mensajename(rpc,rest) del mensaje que se citará en el formatospaces/{space}/messages/{message}.QUOTED_MESSAGE_LAST_UPDATE_TIME: Es la fecha y hora de la última actualización del mensaje que deseas citar. Si el mensaje nunca se editó, corresponde acreateTime(rpc,rest). Si el mensaje se editó, corresponde alastUpdateTime(rpc,rest).
Solucionar problemas
Cuando una app o una tarjeta de Google Chat muestra un error, la interfaz de Chat muestra un mensaje que dice "Se produjo un error". o "No se pudo procesar tu solicitud". A veces, la IU de Chat no muestra ningún mensaje de error, pero la app o la tarjeta de Chat producen un resultado inesperado. Por ejemplo, es posible que no aparezca un mensaje de la tarjeta.
Si bien es posible que no se muestre un mensaje de error en la IU de Chat, hay mensajes de error descriptivos y datos de registro disponibles para ayudarte a corregir errores cuando se activa el registro de errores para las apps de Chat. Para obtener ayuda para ver, depurar y corregir errores, consulta Soluciona y corrige errores de Google Chat.
Temas relacionados
- Usa Card Builder para diseñar y obtener una vista previa de los mensajes de tarjetas JSON para apps de Chat.
- Cómo darles formato a los mensajes
- Obtén detalles sobre un mensaje.
- Enumera los mensajes en un espacio.
- Actualiza un mensaje.
- Borra un mensaje.
- Identifica a los usuarios en los mensajes de Google Chat.
- Envía mensajes a Google Chat con webhooks entrantes.