
Page Summary
-
The Google Chat API enables apps to act on behalf of users, such as creating spaces and managing memberships, after proper user authentication using OAuth 2.0.
-
Workspace administrators have control over app and space management through domain-wide delegation or administrator privileges.
-
Developers need a Google Workspace account, a Google Cloud project with the Chat API enabled, and specific language tools to utilize the API.
-
Building Chat apps involves configuring a consent screen, creating an OAuth client ID, implementing the authentication flow, and potentially utilizing admin authentication methods.
-
Google Chat API also facilitates space creation by setting up credentials, installing libraries, and scripting API calls using various programming languages like Java, Python, Node.js, and Apps Script.
This guide explains how to use OAuth 2.0 with users' Google credentials to access the Chat API. Authenticating and authorizing with user credentials lets Chat apps access user data and perform operations on the authenticated user's behalf. By authenticating on a user's behalf, the app has the same permissions as that user and can perform actions as if it were performed by that user.
After authenticating and authorizing an API call with user credentials, Chat apps can do the following:
- Create Chat spaces.
- Add users to Chat spaces and group conversations.
- Work with user data in other Workspace APIs such as the following:
- Create events in Google Calendar.
- Log items in Google Sheets.
- Send an email with Gmail.
When an app performs an action with user authentication (such as creating a space), Google Chat displays an attribution message that tells users the name of the app that performed the action for the user who authorized it.
To learn more about when Chat apps require authentication and what kind of authentication to use, see Types of required authentication in the Chat API authentication and authorization overview.
Authenticate and authorize as a Google Workspace administrator
This section explains how Google Workspace workspace administrators can manage Google Chat apps and spaces across their organization with user authentication.
Authenticate and authorize using domain-wide delegation
If you're a domain administrator, you can grant domain-wide delegation of authority to authorize an application's service account to access your users' data without requiring each user to give consent. After you configure domain-wide delegation, the service account can impersonate a user account. Although a service account is used for authentication, domain-wide delegation impersonates a user and is therefore considered user authentication. Any functionality that requires user authentication, you can use domain-wide delegation.
Authenticate and authorize using administrator privileges
If you're a domain administrator or a delegated administrator with administrator privileges, you can authenticate and authorize your calls to the Google Chat API with administrator privileges by setting the useAdminAccess field in the requests of applicable methods. For more information, see the API reference documentation.
Note that when a Google Chat app performs an action with administrator privileges, Chat won't tell users the name of the Chat app that performed the action or the name of the administrator who authorized it but only tell users that the action is performed by their organization's administrator.
Prerequisites
Java
- A Business or Enterprise Google Workspace account with access to Google Chat.
- Create a Google Cloud project.
- Enable and configure the Google Chat API with a name, icon, and description for your Chat app.
- JDK 1.7 or greater
- The Maven package management tool
-
An initialized Maven project. To initialize a new project, run the following command in your
command-line interface:
mvn archetype:generate -DgroupId=com.google.chat.app.authsample -DartifactId=auth-sample-app -DarchetypeArtifactId=maven-archetype-quickstart -DarchetypeVersion=1.4 -DinteractiveMode=false
Python
- A Business or Enterprise Google Workspace account with access to Google Chat.
- Create a Google Cloud project.
- Enable and configure the Google Chat API with a name, icon, and description for your Chat app.
- Python 3.6 or greater
- The pip package management tool
Node.js
- A Business or Enterprise Google Workspace account with access to Google Chat.
- Create a Google Cloud project.
- Enable and configure the Google Chat API with a name, icon, and description for your Chat app.
- Node.js 14 or greater
- The npm package management tool
-
An initialized Node.js project. To initialize a new project, create and
switch into a new folder, then run the following command in your command-line interface:
npm init
Apps Script
- A Business or Enterprise Google Workspace account with access to Google Chat.
- Create a Google Cloud project.
- Enable and configure the Google Chat API with a name, icon, and description for your Chat app.
- Create a standalone Apps Script project, and turn on the Advanced Chat Service.
Step 1: Configure the OAuth consent screen, specify scopes, and register your app
When you use OAuth 2.0 for authorization, Google displays a consent screen to the user including a summary of your project, its policies, and the requested authorization scopes. Configuring your app's OAuth consent screen defines what Google displays to users and app reviewers, and registers your app so you can publish it later.
All apps using OAuth 2.0 require a consent screen configuration, but you only need to list scopes for apps used by people outside your Google Workspace organization.
In the Google API Console, go to Menu > Google Auth platform > Branding.
If you have already configured the Google Auth platform, you can configure the following OAuth Consent Screen settings in Branding, Audience, and Data Access. If you see a message that says Google Auth platform not configured yet, click Get Started:
- Under App Information, in App name, enter an App name.
- In User support email, choose a support email address where users can contact you if they have questions about their consent.
- Click Next.
- Under Audience, select Internal. If you can't select Internal, select External.
- Click Next.
- Under Contact Information, enter an Email address where you can be notified about any changes to your project.
- Click Next.
- Under Finish, review the Google API Services User Data Policy and if you agree, select I agree to the Google API Services: User Data Policy.
- Click Continue.
- Click Create.
- If you selected External for user type, add test users:
- Click Audience.
- Under Test users, click Add users.
- Enter your email address and any other authorized test users, then click Save.
Click Data Access > Add or Remove Scopes. A panel appears with a list of scopes for each API that you've enabled in your Google Cloud project.
- Under Manually add scopes, paste
https://www.googleapis.com/auth/chat.spaces.create, which is required to run the authentication example in this guide. To review available scopes for Chat API, see Chat API Scopes in the authentication overview. - Click Add to Table.
- Click Update.
- After selecting the scopes required by your app, on the Data Access page, click Save.
- Under Manually add scopes, paste
Step 2: Create OAuth client ID credentials in Google API Console
To authenticate as an end user and access user data in your app, you need to create one or more OAuth 2.0 Client IDs. A client ID is used to identify a single app to Google's OAuth servers. If your app runs on multiple platforms—like Android, iOS, and Web—you need to create a separate client ID for each platform.
Create OAuth client ID credentials
Choose your application type for specific instructions about how to create an OAuth client ID:
Web application
- In the Google API Console, go to Menu > Google Auth platform > Clients.
- Click Create Client.
- Click Application type > Web application.
- In the Name field, type a name for the credential. This name is only shown in the Google API Console.
- Add authorized URIs related to your app:
- Client-side apps (JavaScript)–Under Authorized JavaScript origins, click Add URI. Then, enter a URI to use for browser requests. This identifies the domains from which your application can send API requests to the OAuth 2.0 server.
- Server-side apps (Java, Python, and more)–Under Authorized redirect URIs, click Add URI. Then, enter an endpoint URI to which the OAuth 2.0 server can send responses.
- Click Create.
The newly created credential appears under OAuth 2.0 Client IDs.
Note the Client ID. Client secrets aren't used for Web applications.
Android
- In the Google API Console, go to Menu > Google Auth platform > Clients.
- Click Create Client.
- Click Application type > Android.
- In the "Name" field, type a name for the credential. This name is only shown in the Google API Console.
- In the "Package name" field, enter the package name from your
AndroidManifest.xmlfile. - In the "SHA-1 certificate fingerprint" field, enter your generated SHA-1 certificate fingerprint.
- Click Create.
The newly created credential appears under "OAuth 2.0 Client IDs."
iOS
- In the Google API Console, go to Menu > Google Auth platform > Clients.
- Click Create Client.
- Click Application type > iOS.
- In the "Name" field, type a name for the credential. This name is only shown in the Google API Console.
- In the "Bundle ID" field, enter the bundle identifier as listed in the app's
Info.plistfile. - Optional: If your app appears in the Apple App Store, enter the App Store ID.
- Optional: In the "Team ID" field, enter the unique 10-character string that's generated by Apple and assigned to your team.
- Click Create.
The newly created credential appears under "OAuth 2.0 Client IDs."
Chrome app
- In the Google API Console, go to Menu > Google Auth platform > Clients.
- Click Create Client.
- Click Application type > Chrome Extension.
- In the "Name" field, type a name for the credential. This name is only shown in the Google API Console.
- In the "Item ID" field, enter your app's unique 32-character ID string. You can find this ID value in your app's Chrome Web Store URL and in the Chrome Web Store Developer Dashboard.
- Click Create.
The newly created credential appears under "OAuth 2.0 Client IDs."
Desktop app
- In the Google API Console, go to Menu > Google Auth platform > Clients.
- Click Create Client.
- Click Application type > Desktop app.
- In the Name field, type a name for the credential. This name is only shown in the Google API Console.
- Click Create.
The newly created credential appears under "OAuth 2.0 Client IDs."
TVs & Limited Input devices
- In the Google API Console, go to Menu > Google Auth platform > Clients.
- Click Create Client.
- Click Application type > TVs & Limited Input devices.
- In the "Name" field, type a name for the credential. This name is only shown in the Google API Console.
- Click Create.
The newly created credential appears under "OAuth 2.0 Client IDs."
Universal Windows Platform (UWP)
- In the Google API Console, go to Menu > > Clients.
- Click Create Client.
- Click Application type > Universal Windows Platform (UWP).
- In the "Name" field, type a name for the credential. This name is only shown in the Google API Console.
- In the "Store ID" field, enter your app's unique, 12-character Microsoft Store ID value. You can find this ID in your app's Microsoft Store URL and in the Partner Center.
- Click Create.
The newly created credential appears under "OAuth 2.0 Client IDs."
Download the client secret JSON file
The client secret file is a JSON representation of the OAuth client ID credentials that your Chat app can reference when providing credentials.
In the Google API Console, go to Menu > APIs & Services > Credentials.
Under OAuth 2.0 Client IDs, click the client ID that you created.
Click Download JSON.
Save the file as
credentials.json.
Step 3: Install the Google client library and other dependencies
Install the Google client library and other dependencies required for the project.
Java
To add the Google client libraries and other required dependencies to your
Maven project, edit the file pom.xml in your project's directory and add the
following dependencies:
<dependencies>
  <!-- ... existing dependencies ... -->
  <dependency>
    <groupId>com.google.apis</groupId>
    <artifactId>google-api-services-chat</artifactId>
    <version>v1-rev20230905-2.0.0</version>
  </dependency>
  <dependency>
    <groupId>com.google.auth</groupId>
    <artifactId>google-auth-library-oauth2-http</artifactId>
    <version>1.19.0</version>
  </dependency>
  <dependency>
    <groupId>com.google.oauth-client</groupId>
    <artifactId>google-oauth-client-jetty</artifactId>
    <version>1.34.1</version>
  </dependency>
  <dependency>
      <groupId>com.google.code.gson</groupId>
      <artifactId>gson</artifactId>
      <version>2.10.1</version>
  </dependency>
</dependencies>
Python
If you haven't already installed the Google client libraries for Python, run the following command in your command-line interface:
pip3 install --upgrade google-api-python-client google-auth-oauthlibNode.js
To add the Google client libraries and other required dependencies to your Node.js project, switch into your project's directory and run the following command in your command-line interface:
npm install "@googleapis/chat" open server-destroyApps Script
This sample uses the Advanced Chat service to call Google Chat API. To turn on the service for your Apps Script project:
- At the left, click Editor .
- At the left, next to Services, click Add a service .
- Select Google Chat API.
- In Version, select v1.
- Click Add.
You can use any language supported by our client libraries.
Step 4: Write a script that calls the Chat API
Calling an API with OAuth authorization is a multi-step process. In web or desktop applications, the process is typically as follows:
- The app directs the user to an authorization page requesting access to user data specified by authorization scopes. The app identifies itself with client ID credentials.
- The user reviews the permissions requested by the app and approves the request.
- Google's authentication server redirects the browser to the app's HTTP endpoint along with an authorization code.
- The application sends another request to Google's authorization server to exchange the authorization code for an access token.
- The application uses the access token to call the API on behalf of the user.
To learn more about the OAuth authorization process, see Using OAuth 2.0 to Access Google APIs Guide.
The following code samples in Java, Python, and Node.js use a client library to execute the OAuth authorization flow. It opens a local HTTP server to receive the authorization code back from the authorization server, which it then exchanges for an access token. In the Apps Script code sample, this authorization flow is handled by Apps Script.
After completing the authentication flow, the script authenticates with the Chat API using the user's access token, and then creates a space.
Java
- In your project's directory, open the file
src/main/java/com/google/chat/app/authsample/App.java. Replace the contents in
App.javawith the following code:package com.google.chat.app.authsample; import com.google.api.client.auth.oauth2.Credential; import com.google.api.client.extensions.java6.auth.oauth2.AuthorizationCodeInstalledApp; import com.google.api.client.extensions.jetty.auth.oauth2.LocalServerReceiver; import com.google.api.client.googleapis.auth.oauth2.GoogleAuthorizationCodeFlow; import com.google.api.client.googleapis.auth.oauth2.GoogleClientSecrets; import com.google.api.client.googleapis.javanet.GoogleNetHttpTransport; import com.google.api.client.http.HttpTransport; import com.google.api.client.json.JsonFactory; import com.google.api.client.json.gson.GsonFactory; import com.google.api.client.util.store.FileDataStoreFactory; import com.google.api.services.chat.v1.HangoutsChat; import com.google.api.services.chat.v1.model.Space; import java.io.InputStreamReader; import java.util.Collection; import java.util.Collections; /** * Authenticates with Chat API via user credentials, then creates a Chat space. */ public class App { // Application OAuth credentials. private static final String KEYS_RESOURCE_URI = "/credentials.json"; // Define your app's authorization scopes. private static final Collection<String> SCOPES = Collections.singleton("https://www.googleapis.com/auth/chat.spaces.create"); // Directory to store user credentials. private static final java.io.File DATA_STORE_DIR = new java.io.File(System.getProperty("user.home"), ".store/auth-sample-app"); // Global instance of the JSON factory. private static final JsonFactory JSON_FACTORY = GsonFactory.getDefaultInstance(); // Global instance of the HTTP transport. private static HttpTransport httpTransport; // Global instance of the DataStoreFactory. The best practice is to make it a single // globally shared instance across your application. private static FileDataStoreFactory dataStoreFactory; public static void main( String[] args ) { try { // Run app. httpTransport = GoogleNetHttpTransport.newTrustedTransport(); dataStoreFactory = new FileDataStoreFactory(DATA_STORE_DIR); Credential userCredential = authorize(); Space response = App.createChatSpace(userCredential); // Print details about the created space. System.out.println(response); } catch (Exception e) { e.printStackTrace(); } } /** * Authorizes the installed application to access user's protected data. */ private static Credential authorize() throws Exception { // Load client secrets. GoogleClientSecrets clientSecrets = GoogleClientSecrets.load(JSON_FACTORY, new InputStreamReader(App.class.getResourceAsStream("/credentials.json"))); // Set up authorization code flow. GoogleAuthorizationCodeFlow flow = new GoogleAuthorizationCodeFlow.Builder( httpTransport, JSON_FACTORY, clientSecrets, SCOPES) .setDataStoreFactory(dataStoreFactory) .build(); // Authorize. return new AuthorizationCodeInstalledApp(flow, new LocalServerReceiver()).authorize("user"); } /** * Creates a Chat space. */ private static Space createChatSpace(Credential userCredential) throws Exception { // Build the Chat API client and authenticate with the user account. HangoutsChat chatService = new HangoutsChat.Builder( httpTransport, JSON_FACTORY, userCredential) .setApplicationName("auth-sample-app") .build(); // Create a Chat space. Space space = new Space() // To create a named space, set spaceType to SPACE. .setSpaceType("SPACE") // The user-visible name of the space. .setDisplayName("API-made"); return chatService.spaces().create(space).execute(); } }Create a new subdirectory named
resourceswithin your project's directory.Copy the file
credentials.jsonto theresourcessubdirectory.To configure Maven to include the client secrets file in the project package, edit the file
pom.xmlin your project's directory and add the following configuration to the<build>section:<build> <!-- ... existing configurations ... --> <resources> <resource> <directory>resources</directory> </resource> </resources> </build>To configure Maven to include the dependencies in the project package and to execute your application's main class, edit the file
pom.xmlin your project's directory and add the following configuration to the<plugins>section:<plugins> <!-- ... existing configurations ... --> <plugin> <artifactId>maven-assembly-plugin</artifactId> <configuration> <archive> <manifest> <mainClass>com.google.chat.app.authsample.App</mainClass> </manifest> </archive> <descriptorRefs> <descriptorRef>jar-with-dependencies</descriptorRef> </descriptorRefs> </configuration> </plugin> </plugins>
Python
Save the following code in a file named
chat_space_create_named.pyin the same directory that holdscredentials.json:from google_auth_oauthlib.flow import InstalledAppFlow from googleapiclient.discovery import build # Define your app's authorization scopes. # When modifying these scopes, delete the file token.json, if it exists. SCOPES = ["https://www.googleapis.com/auth/chat.spaces.create"] def main(): ''' Authenticates with Chat API via user credentials, then creates a Chat space. ''' flow = InstalledAppFlow.from_client_secrets_file( 'credentials.json', SCOPES) creds = flow.run_local_server() # Build a service endpoint for Chat API. service = build('chat', 'v1', credentials=creds) # Use the service endpoint to call Chat API. result = service.spaces().create( # Details about the space to create. body = { # To create a named space, set spaceType to SPACE. 'spaceType': 'SPACE', # The user-visible name of the space. 'displayName': 'API-made' } ).execute() # Prints details about the created space. print(result) if __name__ == '__main__': main()
Node.js
Save the following code in a file named
chat_space_create_named.jsin the same directory that holds the Node.js project andcredentials.json:const fs = require('fs'); const path = require('path'); const http = require('http'); const url = require('url'); const destroyer = require('server-destroy'); const chat = require('@googleapis/chat'); // Application OAuth credentials. const keys = require('./credentials.json').installed; // Define your app's authorization scopes. // When modifying these scopes, delete the file token.json, if it exists. const scopes = ["https://www.googleapis.com/auth/chat.spaces.create"]; // Create a new OAuth2 client with the configured keys. const oauth2Client = new chat.auth.OAuth2( keys.client_id, keys.client_secret, 'http://localhost:3000' ); /** * Opens an HTTP server to accept the OAuth callback. * In this simple example, the only request to our webserver is to /?code=<code>. */ async function authenticate(scopes) { const opn = (await import('open')).default; return new Promise((resolve, reject) => { // Generate the URL for authorization. const authorizeUrl = oauth2Client.generateAuthUrl({ access_type: 'offline', scope: scopes.join(' '), }); // Start the HTTP server to listen for the callback. const server = http .createServer(async (req, res) => { try { const qs = new url.URL(req.url, 'http://localhost:3000').searchParams; res.end('Authentication successful! Please return to the console.'); server.destroy(); const { tokens } = await oauth2Client.getToken(qs.get('code')); oauth2Client.credentials = tokens; resolve(oauth2Client); } catch (e) { reject(e); } }) .listen(3000, () => { // Open the browser to the authorize URL to start the workflow. opn(authorizeUrl, { wait: false }).then(cp => cp.unref()); }); destroyer(server); }); } /** * Authenticates with Chat API via user credentials, then creates a Chat space. */ async function createSpace() { // Create the Chat API client and authenticate with the authorized user. const chatClient = await chat.chat({ version: 'v1', auth: oauth2Client }); // Call the Chat API to create a space. const result = await chatClient.spaces.create({ // Details about the space to create. requestBody: { // To create a named space, set spaceType to SPACE. 'spaceType': 'SPACE', // The user-visible name of the space. 'displayName': 'API-made' } }); return result; } // Authenticate the user, execute the function, // then print details about the created space. authenticate(scopes) .then(createSpace) .then(console.log);
Apps Script
In the Apps Script editor, edit the file
appsscript.jsonand add the OAuth scope necessary to call the API:"oauthScopes": [ "https://www.googleapis.com/auth/chat.spaces.create" ]Save the following code in a file named
ChatSpaceCreateNamed.gsin your Apps Script project:/** * Authenticates with Chat API via user credentials, then creates a * Chat space. */ function createSpace() { try { // Details about the space to create. // To create a named space, set spaceType to SPACE. // The user-visible name of the space is displayName. const space = {'displayName': 'API-made', 'spaceType': 'SPACE'}; // Call Chat API with user credentials to create the space. const result = Chat.Spaces.create(space); // Log details about the created space. console.log(result); } catch (err) { // TODO (developer) - Handle exception console.log('Failed to create space with error %s', err.message); } }
Step 5: Run the example script
To run the example, from the command line, navigate to the directory that holds your project files, then execute the following command:
Java
mvn compile assembly:singlejava -jar target/auth-sample-app-1.0-SNAPSHOT-jar-with-dependencies.jar
Python
python3 chat_space_create_named.pyNode.js
node chat_space_create_named.jsApps Script
Open the file ChatSpaceCreateNamed.gs in the Apps Script
Editor and click Run.
A browser opens and prompts you to sign in to your Google Account:
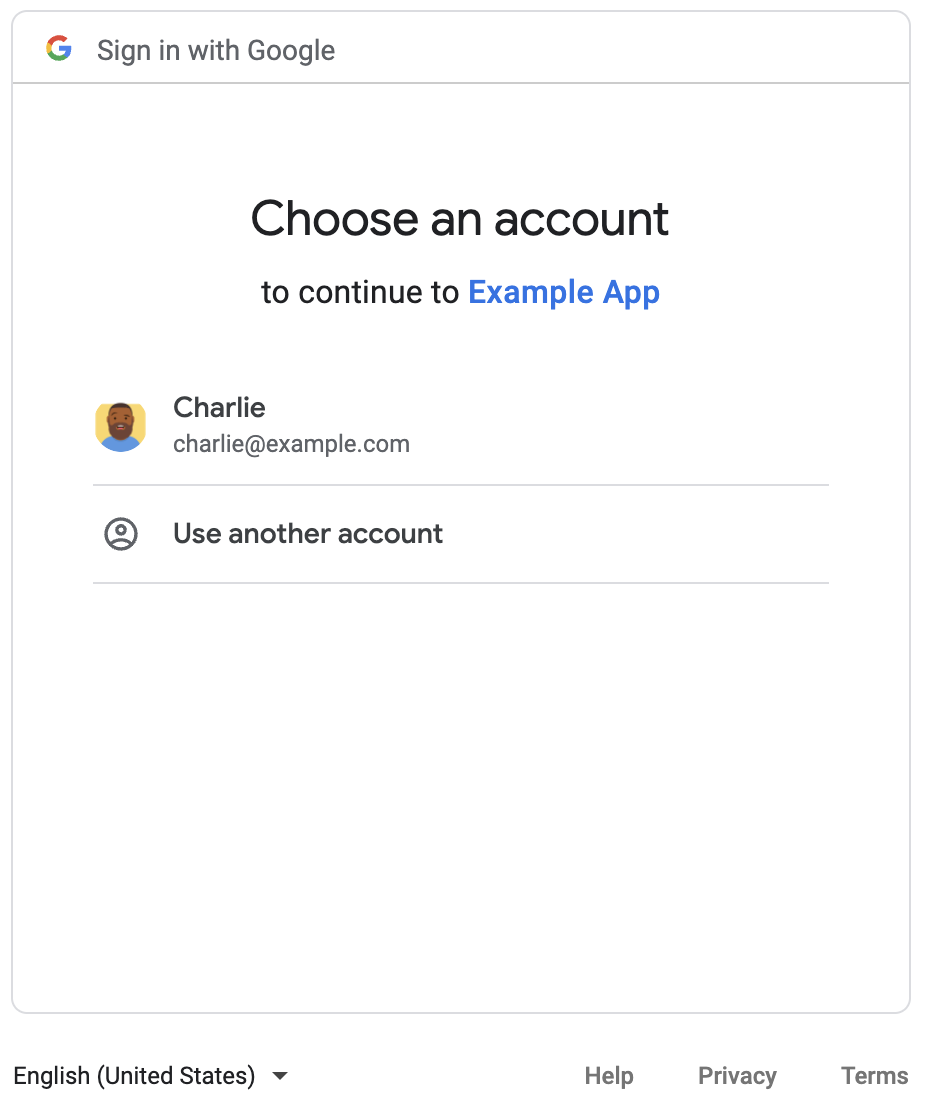
After you sign in, the OAuth consent screen appears and asks you to grant permission to the app.
After you grant permission, the script calls the
Chat API, which responds by creating the
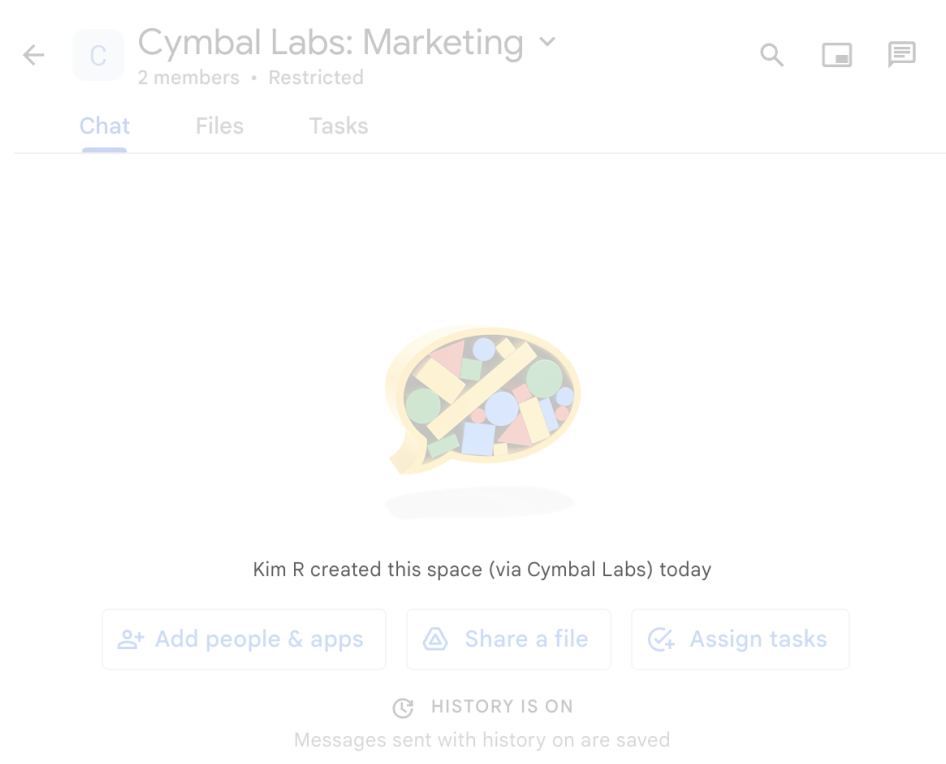
Chat space with the display name API-made. The console prints
details of the API call. To find the space, go to the Spaces panel in
Google Chat.
Troubleshoot the example
When running chat_space_create_named.py, you might receive an error that says:
Expected a JSON object with a single property for a "web" or "installed" application
This error message means that the credentials.json file that you downloaded
from the Google API Console doesn't begin with the "web" or "installed"
property. After authenticating with the downloaded file, if your code doesn't
save the access token in a new file like token.json, then the access token is
written to credentials.json, which can cause this error during subsequent
authorization attempts.
To resolve the error, download the client secret file from the Google API Console again, and save the new file in the current file's place.
Related topics
If your application needs to continue using the user tokens outside the scope of a single flow, it can store the tokens to reuse them later. In this case, your application needs to handle user tokens securely and handle refresh token revocation and expiration. For more information, see Using OAuth 2.0 Best Practices Guide and the User Authorization app sample:
- Java User Authorization app sample
- Python User Authorization app sample
- Node.js User Authorization app sample
- The Apps Script integration with Google Chat handles user
tokens automatically. For more information, see
Advanced Chat service.
If you add the required OAuth scopes to the
appsscript.jsonfile for an interactive Chat app, the Apps Script integration automatically stores user tokens securely and transparently and reuses them next time the script calls the Chat API for the same user.
To manage granular OAuth permissions, see Manage granular OAuth permissions for Google Chat apps.
Learn what else Chat API can do by reviewing the Chat API reference documentation.