
Page Summary
-
A map style is a customizable set of visual elements applied to a map using a map ID, which is referenced in your application code.
-
You can create a map style by starting fresh, duplicating an existing style/version, or importing JSON styling code.
-
Map styles exist as either draft or published versions, with published versions actively displayed on maps using the associated map ID.
-
Once a map style is created, you can further customize its appearance, manage version history, associate it with map IDs, and perform other actions like renaming, duplicating, or deleting it.
-
Styles can be associated with multiple map IDs for use across various Google Maps applications, but each map ID can only be linked to one style at a time.
A map style is a set of visual customizations to map features that you associate with a map ID. You then reference the map ID in your application code to display the customized map.
You can create a map style before you have a map ID; however, to use the style, you must associate the style with a map ID. To use a map style, you must take all of these steps:
Create and publish a map Style. For details, see Create a style and Publish a style.
Create a map ID. For details, see Create a map ID.
Associate the map style with a map ID. For details, see Associate a map ID to a map style.
Add the map ID to your app to display your style. For details, see Add the map ID to your map.
This document describes how to create, edit, and publish map styles and how to associate them to a map ID.
Create a map style
Create a map style using one of these methods:
Create a new style using the default Google map style.
Copy and modify an existing customized style.
Import a JSON map style to use as a customized style.
Create a new style
In the Google Cloud console, go to Map Styles, and select a project, if needed.
In Map styles, click Create style.
In the dialog, under the Google styles tab, select a mode.
- Light creates a light themed style, ideal for bright or outdoor environments.
- Dark creates a dark themed style, ideal for low light environments.
For more information about light and dark mode styles, see Learn about modes and map types.
(Optional) To apply the monochrome variation to your map style, select Monochrome.
Alternatively, you can click the JSON tab to import a JSON map style.
Select Customize to create a new untitled style.
Select map features and change their style to create the map style you want.
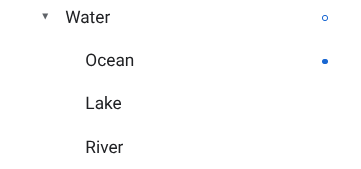
Map features with custom styles have a solid blue dot next to them. If you customize a child style, the parent style displays a blue circle. For more information on map style hierarchy, see Understand map style inheritance and hierarchy.
Click Save.
In the Save and publish map style box, enter a name for your style and optionally a description, and click Save.
The style is automatically published, and you see the style details page for your new style.
Copy a style
Go to Map Styles, and select a project, if needed.
Select one of your existing styles.
On the style page, click Make a copy.
In the Make a copy dialog, enter a new map style name and optionally a description.
(Optional) To create the complementary light or dark mode version of the copied style, select the checkbox in the Style mode options section.
Click Save.
The style is automatically published, and you can see your new style's main page. Associate it with a map ID to use it for your maps. For details, see Associate a map ID to a map style.
If you want to modify the style, click Customize, make changes, and click Save.
Publish a style
When you first create a new map style, that first instance of the new map style is automatically published. After that, you save changes as a draft and when you're happy with the changes, you must publish.
Make the changes to the map style or duplicated map style. For details, see Change a style.
Click Save to save changes as a draft.
When you're ready to publish and have your changes go live for any map IDs using that map style, click Publish.
Published versus Draft map styles
Published: A published map style is live. Any maps that use the map style display the published version of it.
Draft: Draft versions of a map style are works in progress and aren't displayed in maps until you publish them.
Change a style
If you want to make changes to your map style, you can make the changes right in the style editor. You have a couple of choices when you update a style:
If you want changes to go live as soon as you're ready: Click Customize and make your changes. Click Save to save your changes as a draft, and then click Publish when you are ready.
If you want to test your changes in a test environment first: Instead of making changes directly in the map style, duplicate the style first. For details, see Copy a style and Test map style updates.
Once you've created a map style, you can make changes to it on the style's detail page in any of the following ways:
Edit: Click Customize.
Make a copy: For details, see Copy a style.
Rename: Rename the map style.
Delete: Delete the map style.
Use data-driven styling and datasets
In the style details page, you can enable and view layers for data-driven styling for boundaries and data-driven styling for datasets on light mode styles.
When you link a light mode style that has data-driven styling or datasets enabled to a map ID, the enabled layers are also available for the dark mode style.
To use data-driven styling or datasets with a dark mode style, you must do the following in the Google Cloud console:
Go to Map Styles and either select a light mode style or create one.
In the style details page, enable your choice of layers on the light mode style.
Associate the light mode style to the same map ID as the dark mode style.
Associate your style to a map ID
Associate your style to a map ID to display your custom style on your website and in your app. A map ID can have only one light mode style and one dark mode style associated with it.
To change the associated styles for a map ID, do the following in the Google Cloud console:
Go to Map Management and select a map ID.
In the Map styles section, click Edit for light or dark mode.
In the panel, select a style to associate to this map ID.
Click Done.
(Optional) Apply your style to different map types.
By default, your style is applied to all the available map types (
roadmap,navigation,terrain,hybrid,3D roadmap,3D hybrid). To apply your style to specific map types, click Show more and select the checkbox for each map type listed for both light and dark modes. To apply the default Google map style for that mode instead, clear the checkbox for a map type.For more information about map types, see Learn about modes and map types.
Click Save to apply all changes.
To use your cloud-based map style, add the map ID to your app.