
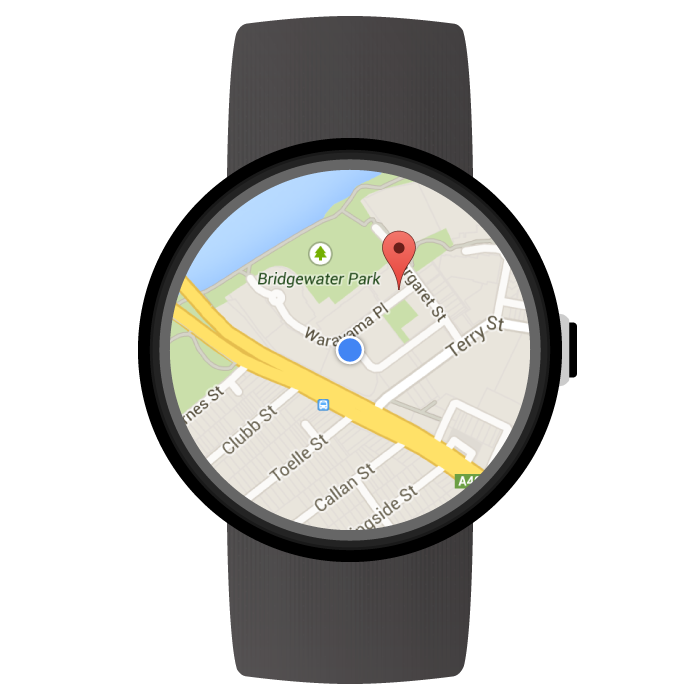
Android용 Maps SDK를 사용하면 Wear OS by Google 기기에서 바로 실행되는 지도 기반 웨어러블 앱을 만들 수 있습니다. 앱 사용자는 손목의 시계만 봐도 지도에서 자신의 위치를 확인할 수 있습니다. 예를 들어 자신의 위치를 경로에 표시한 후 확대하여 세부정보를 확인하거나 마커를 탭하여 앱에서 제공하는 정보 창을 확인할 수도 있습니다.
이 페이지에서는 Wear 기기에서 사용할 수 있는 API 기능을 설명하고 앱 빌드를 시작하는 데 도움이 되는 정보를 제공합니다.
Wear OS에서 시작하기
Android용 Maps SDK를 사용하여 웨어러블 앱을 빌드하는 것은 기본적으로 다른 Android 기기용 Google 지도 앱을 빌드하는 것과 동일합니다. 단지 차이가 있다면 앱의 가용성과 성능을 최적화하도록 웨어러블 기기의 작은 폼 팩터에 맞게 설계를 달리해야 한다는 것입니다.
Android 스튜디오는 프로젝트 설정, 라이브러리 제공, 패키징의 편의성 측면에서 Wear OS 개발 도구로 권장됩니다.
웨어러블 앱 설계에 관한 일반적인 도움말은 Wear OS 설계 가이드라인을 참고하세요. 처음으로 웨어러블 앱을 만드는 데 도움이 필요하다면 웨어러블 앱 만들기 가이드를 참조하세요.
Wear OS에서 처음으로 지도 앱 빌드하기
이 빠른 가이드에서는 개발자가 Android용 Maps SDK에 익숙하고 Wear OS 가이드에 따라 앱에서 웨어러블 모듈을 만들었으며 웨어러블 모듈에 지도를 추가하고자 한다고 가정합니다.
Wear 모듈의 종속 항목 추가하기
앱의 Wear OS 모듈의 build.gradle 파일에 다음 종속 항목이
포함되어 있어야 합니다.
dependencies {
    // ...
    compileOnly 'com.google.android.wearable:wearable:2.9.0'
    implementation 'com.google.android.support:wearable:2.9.0'
    implementation 'com.google.android.gms:play-services-maps:18.2.0'

    // This dependency is necessary for ambient mode
    implementation 'androidx.wear:wear:1.3.0'
}
종속 항목에 관한 자세한 내용은 기존 프로젝트에 Wear OS 모듈 추가 가이드를 참고하세요.
스와이프하여 닫기 동작 구현 및 초기 배경색 설정하기
SwipeDismissFrameLayout을 사용하여 웨어러블 기기에 지도를
표시하는 것이 좋습니다. SwipeDismissFrameLayout 클래스를 사용하여
스와이프하여 닫기 동작을 구현하면 사용자가
화면의 왼쪽 가장자리에서 스와이프하여 앱을 종료할 수 있습니다.
초기 배경색을 맞춤설정하려면 map:backgroundColor XML 속성을 사용하여
실제 지도 타일이 로드될 때까지 표시할 색상을 정의합니다.
다음과 같이 SwipeDismissFrameLayout 및 backgroundColor 요소를 SupportMapFragment의 컨테이너로
레이아웃 정의에 추가합니다.
  <androidx.wear.widget.SwipeDismissFrameLayout
      android:id="@+id/map_container"
      android:layout_width="match_parent"
      android:layout_height="match_parent">
    <fragment
        android:id="@+id/map"
        android:name="com.google.android.gms.maps.SupportMapFragment"
        android:layout_width="match_parent"
        android:layout_height="match_parent"
        map:backgroundColor="#fff0b2dd" />
  </androidx.wear.widget.SwipeDismissFrameLayout>
활동에서 SwipeDismissFrameLayout 객체를 가져올 때 콜백을 추가하고
아래와 같이 필요한 닫기 작업을 실행할 수 있도록
콜백의 동작을 설정합니다.
Kotlin
class MainActivity : AppCompatActivity(), OnMapReadyCallback,
                     AmbientModeSupport.AmbientCallbackProvider {


    public override fun onCreate(savedState: Bundle?) {
        super.onCreate(savedState)

        // Set the layout. It only contains a SupportMapFragment and a DismissOverlay.
        setContentView(R.layout.activity_main)

        // Enable ambient support, so the map remains visible in simplified, low-color display
        // when the user is no longer actively using the app but the app is still visible on the
        // watch face.
        val controller = AmbientModeSupport.attach(this)
        Log.d(MainActivity::class.java.simpleName, "Is ambient enabled: " + controller.isAmbient)

        // Retrieve the containers for the root of the layout and the map. Margins will need to be
        // set on them to account for the system window insets.
        val mapFrameLayout = findViewById<SwipeDismissFrameLayout>(R.id.map_container)
        mapFrameLayout.addCallback(object : SwipeDismissFrameLayout.Callback() {
            override fun onDismissed(layout: SwipeDismissFrameLayout) {
                onBackPressed()
            }
        })

        // Obtain the MapFragment and set the async listener to be notified when the map is ready.
        mapFragment = supportFragmentManager
            .findFragmentById(R.id.map) as SupportMapFragment
        mapFragment.getMapAsync(this)
    }

    // ...
}
Java
public class MainActivity extends AppCompatActivity implements OnMapReadyCallback,
    AmbientModeSupport.AmbientCallbackProvider {


    public void onCreate(Bundle savedState) {
        super.onCreate(savedState);

        // Set the layout. It only contains a SupportMapFragment and a DismissOverlay.
        setContentView(R.layout.activity_main);

        // Enable ambient support, so the map remains visible in simplified, low-color display
        // when the user is no longer actively using the app but the app is still visible on the
        // watch face.
        AmbientModeSupport.AmbientController controller = AmbientModeSupport.attach(this);
        Log.d(MainActivity.class.getSimpleName(), "Is ambient enabled: " + controller.isAmbient());

        // Retrieve the containers for the root of the layout and the map. Margins will need to be
        // set on them to account for the system window insets.
        final SwipeDismissFrameLayout mapFrameLayout = (SwipeDismissFrameLayout) findViewById(
            R.id.map_container);
        mapFrameLayout.addCallback(new SwipeDismissFrameLayout.Callback() {
            @Override
            public void onDismissed(SwipeDismissFrameLayout layout) {
                onBackPressed();
            }
        });

        // Obtain the MapFragment and set the async listener to be notified when the map is ready.
        mapFragment = (SupportMapFragment) getSupportFragmentManager()
            .findFragmentById(R.id.map);
        mapFragment.getMapAsync(this);
    }

    // ...
}
지도 추가하기
평소와 같이 onMapReady(GoogleMap) 콜백 메서드를 사용하여
GoogleMap 객체에 핸들을 가져옵니다. 지도를
사용할 준비가 되면 콜백이 트리거됩니다. 콜백 메서드에서 지도에
마커 또는 다중선을 추가하거나 리스너를 추가할 수 있으며 카메라를 이동할 수 있습니다. 아래
예시에서는 시드니 오페라 하우스 근처에 마커를 추가합니다.
Kotlin
private val sydney = LatLng(-33.85704, 151.21522)

override fun onMapReady(googleMap: GoogleMap) {
    // Add a marker with a title that is shown in its info window.
    googleMap.addMarker(
        MarkerOptions().position(sydney)
            .title("Sydney Opera House")
    )

    // Move the camera to show the marker.
    googleMap.moveCamera(CameraUpdateFactory.newLatLngZoom(sydney, 10f))
}
Java
private static final LatLng SYDNEY = new LatLng(-33.85704, 151.21522);

@Override
public void onMapReady(@NonNull GoogleMap googleMap) {
    // Add a marker with a title that is shown in its info window.
    googleMap.addMarker(new MarkerOptions().position(SYDNEY)
        .title("Sydney Opera House"));

    // Move the camera to show the marker.
    googleMap.moveCamera(CameraUpdateFactory.newLatLngZoom(SYDNEY, 10));
}
대기 모드 사용 설정하기
Android용 Maps SDK는 웨어러블 앱에 필요한 대기 모드를 지원합니다. 대기 모드를 지원하는 앱을 상시 사용 설정 앱이라고도 합니다. 대기 모드는 사용자가 앱을 더 이상 사용하지 않을 때 활성화되며 웨어러블 기기에 앱이 계속 표시됩니다.
Android용 Maps SDK는 대기 모드에서 사용할 수 있는 보다 단순한 저색조 렌더링의 지도를 제공하며 지도 스타일은 기기가 대화형 모드에서 대기 모드로 전환될 때 자동으로 조정됩니다. 대기 모드에서는 마커, 객체, UI 컨트롤이 모두 사라집니다. 이렇게 하면 앱의 전력 소모가 줄어들고 시계 화면 등 다른 대기 모드 앱과 일관된 디자인 및 느낌을 연출할 수 있습니다.
앱에서 지도의 대기 모드를 사용하려면 다음 단계를 따릅니다.
- 활동이 대기 모드로 전환될 수 있도록 하는 API를 제공하는 Android 6.0(API 23) 이상의 플랫폼을 포함하도록 Android SDK를 업데이트합니다. SDK를 업데이트하는 방법은 SDK 패키지 추가에 관한 Android 문서를 참고하세요.
- 앱 매니페스트에서
targetSdkVersion을 23 이상으로 설정하여 프로젝트 대상을 Android 6.0 이상으로 지정합니다. - 앱의
build.gradle파일에 웨어러블 종속 항목을 추가합니다. 이 페이지의 샘플을 참고하세요. - 앱을 지속적으로 표시하는 방법에 관한 Android 교육 과정에서 설명한 대로 웨어러블 공유 라이브러리 항목을 웨어러블 앱 매니페스트에 추가합니다.
- 앱을 지속적으로 표시하는 방법에 관한 Android 교육 과정에서
설명한 대로
WAKE_LOCK권한을 휴대기기 앱 및 웨어러블 앱 매니페스트에 추가합니다. - 활동의
onCreate()메서드에서AmbientModeSupport.attach()메서드를 호출합니다. 이 메서드는 애플리케이션이 상시 작동한다는 것을 운영체제에 알려 기기의 전원이 부족하면 기기가 시계 화면으로 돌아가지 않고 대기 모드로 진입하도록 합니다. - 대기 모드 상태 변경사항을 수신할 수 있도록 활동에
AmbientModeSupport.AmbientCallbackProvider인터페이스를 구현합니다. - 지도가 대기 모드를 지원하도록 설정합니다. 활동의 XML 레이아웃 파일에서
map:ambientEnabled="true"속성을 설정하거나GoogleMapOptions.ambientEnabled(true)를 설정하여 프로그래매틱 방식으로 대기 모드를 지원하도록 설정할 수 있습니다. 이 설정은 대기 모드에서 사용할 필요한 지도 타일을 미리 로드해야 한다고 API에 알립니다. - 활동이 대기 모드로 전환되면 시스템은 개발자가 제공하는
AmbientCallback에서onEnterAmbient()메서드를 호출합니다.onEnterAmbient()를 재정의하고SupportMapFragment.onEnterAmbient(ambientDetails)또는MapView.onEnterAmbient(ambientDetails)를 호출합니다. API가 비대화형 저색조 렌더링의 지도로 전환합니다. - 마찬가지로
onExitAmbient()에서SupportMapFragment.onExitAmbient()또는MapView.onExitAmbient()를 호출합니다. API가 일반 렌더링의 지도로 전환합니다.
다음 코드 샘플은 활동에서 대기 모드를 활성화합니다.
Kotlin
class AmbientActivity : AppCompatActivity(), AmbientModeSupport.AmbientCallbackProvider {

    private lateinit var mapFragment: SupportMapFragment

    public override fun onCreate(savedState: Bundle?) {
        super.onCreate(savedState)

        // Set the layout. It only contains a SupportMapFragment and a DismissOverlay.
        setContentView(R.layout.activity_main)

        // Enable ambient support, so the map remains visible in simplified, low-color display
        // when the user is no longer actively using the app but the app is still visible on the
        // watch face.
        val controller = AmbientModeSupport.attach(this)
        Log.d(AmbientActivity::class.java.simpleName, "Is ambient enabled: " + controller.isAmbient)

        // Obtain the MapFragment and set the async listener to be notified when the map is ready.
        mapFragment = supportFragmentManager
            .findFragmentById(R.id.map) as SupportMapFragment
    }

    override fun getAmbientCallback(): AmbientModeSupport.AmbientCallback {
        return object : AmbientModeSupport.AmbientCallback() {
            /**
             * Starts ambient mode on the map.
             * The API swaps to a non-interactive and low-color rendering of the map when the user is no
             * longer actively using the app.
             */
            override fun onEnterAmbient(ambientDetails: Bundle) {
                super.onEnterAmbient(ambientDetails)
                mapFragment.onEnterAmbient(ambientDetails)
            }

            /**
             * Exits ambient mode on the map.
             * The API swaps to the normal rendering of the map when the user starts actively using the app.
             */
            override fun onExitAmbient() {
                super.onExitAmbient()
                mapFragment.onExitAmbient()
            }
        }
    }
}
Java
public class AmbientActivity extends AppCompatActivity implements
    AmbientModeSupport.AmbientCallbackProvider {

    private SupportMapFragment mapFragment;

    public void onCreate(Bundle savedState) {
        super.onCreate(savedState);

        // Set the layout. It only contains a SupportMapFragment and a DismissOverlay.
        setContentView(R.layout.activity_main);

        // Enable ambient support, so the map remains visible in simplified, low-color display
        // when the user is no longer actively using the app but the app is still visible on the
        // watch face.
        AmbientModeSupport.AmbientController controller = AmbientModeSupport.attach(this);
        Log.d(AmbientActivity.class.getSimpleName(), "Is ambient enabled: " + controller.isAmbient());

        // Obtain the MapFragment and set the async listener to be notified when the map is ready.
        mapFragment = (SupportMapFragment) getSupportFragmentManager()
            .findFragmentById(R.id.map);
    }

    @Override
    public AmbientCallback getAmbientCallback() {
        return new AmbientCallback() {
            /**
             * Starts ambient mode on the map.
             * The API swaps to a non-interactive and low-color rendering of the map when the user is no
             * longer actively using the app.
             */
            @Override
            public void onEnterAmbient(Bundle ambientDetails) {
                super.onEnterAmbient(ambientDetails);
                mapFragment.onEnterAmbient(ambientDetails);
            }

            /**
             * Exits ambient mode on the map.
             * The API swaps to the normal rendering of the map when the user starts actively using the app.
             */
            @Override
            public void onExitAmbient() {
                super.onExitAmbient();
                mapFragment.onExitAmbient();
            }
        };
    }
}
앱이 대기 모드에 있을 때 화면을 업데이트할 수 있습니다. 콘텐츠 업데이트 및 대기 모드 전반에 관한 자세한 내용은 앱을 지속적으로 표시하는 방법에 관한 Android 교육 과정을 참고하세요.
Wear OS에서 스트리트 뷰 사용하기
웨어러블 기기는 스트리트 뷰의 모든 기능을 지원합니다.
사용자가 스트리트 뷰 파노라마를 볼 때
앱을 종료할 수 있도록 하려면 StreetViewPanorama.OnStreetViewPanoramaLongClickListener 인터페이스를
사용하여 긴 클릭 동작을 수신 대기합니다. 사용자가 스트리트 뷰
이미지의 한 지점을 길게 클릭하면
onStreetViewPanoramaLongClick(StreetViewPanoramaOrientation) 이벤트가 수신됩니다. 종료 버튼을 표시하려면
DismissOverlayView.show()를 호출합니다.
샘플 코드
앱의 시작점으로 사용할 수 있는 샘플 앱을 GitHub에서 사용할 수 있습니다. 샘플에서는 Wear OS에서 기본 Google 지도를 설정하는 방법을 보여줍니다.
Wear OS의 지도 API에서 지원되는 기능
이 섹션에서는 웨어러블 기기의 지도에서 지원되는 기능이 휴대기기(스마트폰 및 태블릿)와 비교할 때 어떻게 다른지 간략히 설명합니다. 아래 언급되지 않은 모든 API 기능은 전체 API에 대한 문서의 설명대로 작동합니다.
| 기능 | |
|---|---|
| 완전 대화형 모드 및 라이트 모드 | Android용 Maps SDK를 완전 대화형 모드 또는 라이트 모드로 사용할 수 있습니다. 웨어러블 기기에서 성능을 최적화하고자 하고 앱에서 동작 또는 지도의 화면 이동 및 확대/축소와 같은 상호작용을 지원할 필요가 없다면 라이트 모드를 고려하세요. 라이트 모드에서는 사용자가 지도를 탭할 때 Google 지도 모바일 앱을 시작하는 인텐트가 사용 중지되며 웨어러블 기기에서는 사용 설정할 수 없습니다. 라이트 모드와 완전 대화형 모드 간 차이점의 전체 목록은 라이트 모드 문서에서 확인하세요. |
| 지도 툴바 | 웨어러블 기기에서는 지도 툴바가 사용 중지되며 사용할 수 없습니다. |
| UI 컨트롤 | UI
컨트롤은 웨어러블 기기에서 기본적으로 사용 중지되어 있습니다. 여기에는
확대/축소, 나침반, 내 위치 컨트롤이 포함됩니다. 평소와 같이
UiSettings 클래스를 사용하여
사용 설정할 수 있습니다.
|
| 동작 | 원터치 동작이 정상적으로 작동합니다. 예를 들어, 터치 후 드래그하여 지도 화면 이동, 두 번 탭하여 확대, 두 손가락으로 탭하여 축소하는 등의 동작이 있습니다. 멀티 터치 동작 지원은 사용자의 기기에 따라 다릅니다. 멀티 터치 동작의 예에는 두 손가락을 밀어서 지도를 기울이거나 손가락을 모아서 확대/축소하기, 두 손가락 회전 등이 포함됩니다. |
| 실내 지도 및 건물 |
실내 지도는
웨어러블 기기에서 기본적으로 사용 중지되어 있습니다. 이는 GoogleMap.setIndoorEnabled(true)를 호출하여
사용 설정할 수 있습니다. 실내 지도가 사용 설정되어 있다면
지도에 기본 층 수가 표시됩니다.
층 선택도구
UI 요소는 웨어러블 기기에서 지원되지 않습니다. |
| 타일 오버레이 | 웨어러블 기기에서 타일 오버레이는 지원되지 않습니다. |
Wear OS에서 지도 API를 사용해 개발할 때의 권장사항
앱에서 최고의 사용자 경험을 제공하는 방법
- 지도는 화면에서 많은 부분을 차지합니다. 따라서 웨어러블 기기의 작은 폼 팩터에서 지도의 사용성을 최적화하는 것이 필요합니다.
- 앱의 사용자 환경을 설계할 때에는 웨어러블 기기의 배터리 전원이 충분하지 않다는 점을 고려해야 합니다. 화면을 활성화된 상태로 유지하고 지도를 계속 표시하면 배터리 성능에 영향을 미칩니다.