
Page Summary
-
The Google Chat API enables sending messages as a Chat app or on behalf of a user.
-
Chat apps can send rich messages with text, cards, and interactive elements, while user-sent messages are limited to text.
-
Messages can be sent to spaces, users directly, or within specific threads using a
thread_key. -
Developers can assign custom IDs to messages for easier retrieval and management.
-
Code examples in Node.js and Python are provided to guide developers in implementing message sending functionalities.
This guide explains how to use the
create()
method on the Message resource of the Google Chat API to do any of the following:
- Send messages that contain text, cards, and interactive widgets.
- Send messages privately to a specific Chat user.
- Start or reply to a message thread.
- Name a message, so that you can specify it in other Chat API requests.
The maximum message size (including any text or cards) is 32,000 bytes. To send a message that exceeds this size, your Chat app must send multiple messages instead.
In addition to calling the Chat API to create messages, Chat apps can create and send messages to reply to user interactions, such as posting a welcome message after a user adds the Chat app to a space. When responding to interactions, Chat apps can use other types of messaging features, including interactive dialogs and link preview interfaces. To reply to a user, the Chat app returns the message synchronously, without calling the Chat API. To learn about sending messages to respond to interactions, see Receive and respond to interactions with your Google Chat app.
How Chat displays and attributes messages created with the Chat API
You can call the create() method using
app authentication
and user authentication.
Chat attributes the message sender differently
depending on the type of authentication that you use.
When you authenticate as the Chat app, the Chat app sends the message.

App next to its name.When you authenticate as a user, the Chat app sends the message on behalf of the user. Chat also attributes the Chat app to the message by displaying its name.

The authentication type also determines which messaging features and interfaces that you can include in the message. With app authentication, Chat apps can send messages that contain rich text, card-based interfaces, and interactive widgets. Since Chat users can only send text in their messages, you can only include text when creating messages using user authentication. To learn more about messaging features available for the Chat API, see the Google Chat messages overview.
This guide explains how to use either authentication type to send a message with the Chat API.
Prerequisites
Node.js
- A Business or Enterprise Google Workspace account with access to Google Chat.
- Set up your environment:
- Create a Google Cloud project.
- Configure the OAuth consent screen.
- Enable and configure the Google Chat API with a name, icon, and description for your Chat app.
- Install the Node.js Cloud Client Library.
- Create access credentials based on how you want to authenticate in your Google Chat API
request:
- To authenticate as a Chat user,
create OAuth client ID
credentials and save the credentials as a JSON file named
credentials.jsonto your local directory. - To authenticate as the Chat app,
create service account
credentials and save the credentials as a JSON file named
credentials.json.
- To authenticate as a Chat user,
create OAuth client ID
credentials and save the credentials as a JSON file named
- Choose an authorization scope based on whether you want to authenticate as a user or the Chat app.
- A Google Chat space where the authenticated user or calling Chat app is a member. To authenticate as the Chat app, add the Chat app to the space.
Python
- A Business or Enterprise Google Workspace account with access to Google Chat.
- Set up your environment:
- Create a Google Cloud project.
- Configure the OAuth consent screen.
- Enable and configure the Google Chat API with a name, icon, and description for your Chat app.
- Install the Python Cloud Client Library.
- Create access credentials based on how you want to authenticate in your Google Chat API
request:
- To authenticate as a Chat user,
create OAuth client ID
credentials and save the credentials as a JSON file named
credentials.jsonto your local directory. - To authenticate as the Chat app,
create service account
credentials and save the credentials as a JSON file named
credentials.json.
- To authenticate as a Chat user,
create OAuth client ID
credentials and save the credentials as a JSON file named
- Choose an authorization scope based on whether you want to authenticate as a user or the Chat app.
- A Google Chat space where the authenticated user or calling Chat app is a member. To authenticate as the Chat app, add the Chat app to the space.
Java
- A Business or Enterprise Google Workspace account with access to Google Chat.
- Set up your environment:
- Create a Google Cloud project.
- Configure the OAuth consent screen.
- Enable and configure the Google Chat API with a name, icon, and description for your Chat app.
- Install the Java Cloud Client Library.
- Create access credentials based on how you want to authenticate in your Google Chat API
request:
- To authenticate as a Chat user,
create OAuth client ID
credentials and save the credentials as a JSON file named
credentials.jsonto your local directory. - To authenticate as the Chat app,
create service account
credentials and save the credentials as a JSON file named
credentials.json.
- To authenticate as a Chat user,
create OAuth client ID
credentials and save the credentials as a JSON file named
- Choose an authorization scope based on whether you want to authenticate as a user or the Chat app.
- A Google Chat space where the authenticated user or calling Chat app is a member. To authenticate as the Chat app, add the Chat app to the space.
Apps Script
- A Business or Enterprise Google Workspace account with access to Google Chat.
- Set up your environment:
- Create a Google Cloud project.
- Configure the OAuth consent screen.
- Enable and configure the Google Chat API with a name, icon, and description for your Chat app.
- Create a standalone Apps Script project, and turn on the Advanced Chat Service.
- In this guide, you must use either user or app authentication. To authenticate as the Chat app, create service account credentials. For steps, see Authenticate and authorize as a Google Chat app.
- Choose an authorization scope based on whether you want to authenticate as a user or the Chat app.
- A Google Chat space where the authenticated user or calling Chat app is a member. To authenticate as the Chat app, add the Chat app to the space.
Send a message as the Chat app
This section explains how to send messages that contain text, cards, and interactive accessory widgets using app authentication.

To call the CreateMessage()
method using app authentication, you must specify the following fields in the
request:
- The
chat.botauthorization scope. - The
Spaceresource in which you want to post the message. The Chat app must be a member of the space. - The
Messageresource to create. To define the content of the message, you can include rich text (text), one or more card interfaces (cardsV2), or both.
Optionally, you can include the following:
- The
accessoryWidgetsfield to include interactive buttons at the bottom of the message. - The
privateMessageViewerfield to send the message privately to a specified user. - The
messageIdfield, which lets you name the message to use in other API requests. - The
thread.threadKeyandmessageReplyOptionfields to start or reply to a thread. If the space doesn't use threading, this field is ignored.
The following code shows an example of how a Chat app can send a message posted as the Chat app that contains text, a card, and a clickable button at the bottom of the message:
Node.js
Python
Java
Apps Script
To run this sample, replace SPACE_NAME with the ID from
the space's
name
field. You can obtain the ID by calling the
ListSpaces()
method or from the space's URL.
Add interactive widgets at the bottom of a message
In the first code sample of this guide, the Chat app message displays a clickable button at the bottom of the message, known as an accessory widget. Accessory widgets appear after any text or cards in a message. You can use these widgets to prompt users to interact with your message in many ways, including the following:
- Rate the accuracy or satisfaction of a message.
- Report an issue with the message or Chat app.
- Open a link to related content, such as documentation.
- Dismiss or snooze similar messages from the Chat app for a specific period of time.
To add accessory widgets, include the
accessoryWidgets[]
field in the body of your request and specify one or more widgets that you want
to include.
The following image shows a Chat app that appends a text message with accessory widgets so that users can rate their experience with the Chat app.
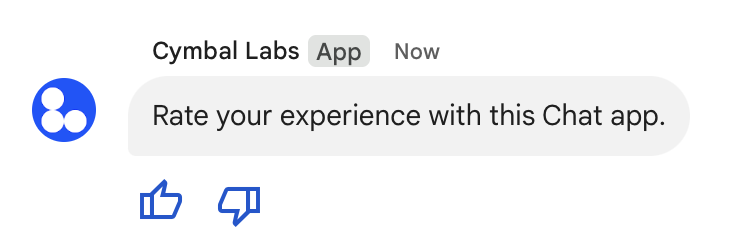
The following shows the body of the request that creates a text message with
two accessory buttons. When a user clicks a button, the corresponding
function (such as doUpvote) processes the interaction:
{
  text: "Rate your experience with this Chat app.",
  accessoryWidgets: [{ buttonList: { buttons: [{
    icon: { material_icon: {
      name: "thumb_up"
    }},
    color: { red: 0, blue: 255, green: 0 },
    onClick: { action: {
      function: "doUpvote"
    }}
  }, {
    icon: { material_icon: {
      name: "thumb_down"
    }},
    color: { red: 0, blue: 255, green: 0 },
    onClick: { action: {
      function: "doDownvote"
    }}
  }]}}]
}
Send a message privately
Chat apps can send messages privately so that the message is only visible to a specific user in the space. When a Chat app sends a private message, the message shows a label that notifies the user that the message is only visible to them.
To send a message privately using the Chat API, specify the
privateMessageViewer
field in the body of your request. To specify the user, you set the value to
the
User
resource that represents the Chat user. You can also use the
name
field of the User resource, as shown in the following example:
{
  text: "Hello private world!",
  privateMessageViewer: {
    name: "users/USER_ID"
  }
}
To use this sample, replace USER_ID
with a unique ID for the user, such as 12345678987654321 or
hao@cymbalgroup.com. For more information about specifying users, see
Identify and specify Google Chat users.
To send a message privately, you must omit the following in your request:
Send a text message on behalf of a user
This section explains how to send messages on behalf of a user using user authentication. With user authentication, the content of the message can only contain text and must omit messaging features that are only available to Chat apps, including card interfaces and interactive widgets.

To call the CreateMessage() method using user authentication, you must specify
the following fields in the request:
- An authorization scope
that supports user authentication for this method. The following sample uses
the
chat.messages.createscope. - The
Spaceresource in which you want to post the message. The authenticated user must be a member of the space. - The
Messageresource to create. To define the content of the message, you must include thetextfield.
Optionally, you can include the following:
- The
messageIdfield, which lets you name the message to use in other API requests. - The
thread.threadKeyandmessageReplyOptionfields to start or reply to a thread. If the space doesn't use threading, this field is ignored.
The following code shows an example of how a Chat app can send a text message in a given space on behalf of an authenticated user:
Node.js
Python
Java
Apps Script
To run this sample, replace SPACE_NAME with the ID from
the space's
name
field. You can obtain the ID by calling the
ListSpaces()
method or from the space's URL.
Start or reply in a thread
For spaces that use threads, you can specify whether a new message starts a thread, or replies to an existing thread.
By default, messages that you create using the Chat API start a new thread. To help you identify the thread and reply to it later, you can specify a thread key in your request:
- In the body of your request, specify the
thread.threadKeyfield. - Specify the query parameter
messageReplyOptionto determine what happens if the key already exists.
To create a message that replies to an existing thread:
- In the body of your request, include the
threadfield. If set, you can specify thethreadKeythat you created. Otherwise, you must use thenameof the thread. - Specify the query parameter
messageReplyOption.
The following code shows an example of how a Chat app can send a text message that starts or replies to a given thread identified by key of a given space on behalf of an authenticated user:
Node.js
Python
Java
Apps Script
To run this sample, replace the following:
THREAD_KEY: an existing thread key in the space, or to create a new thread, a unique name for the thread.SPACE_NAME: the ID from the space'snamefield. You can obtain the ID by calling theListSpaces()method or from the space's URL.
Name a message
To retrieve or specify a message in future API calls, you can name a message
by setting the messageId field in your request.
Naming your message lets you specify the message without needing to store the
system-assigned ID from the resource name of the message (represented in the
name
field).
For example, to retrieve a message using the get() method, you use the
resource name to specify which message to retrieve. The resource name is
formatted as spaces/{space}/messages/{message}, where {message} represents
the system-assigned ID or the custom name that you set when you created the
message.
To name a message, specify a custom ID in the
messageId
field when you create the message. The messageId field sets the value for the
clientAssignedMessageId
field of the Message resource.
You can only name a message when you create the message. You can't name or modify a custom ID for existing messages. The custom ID must meet the following requirements:
- Begins with
client-. For example,client-custom-nameis a valid custom ID, butcustom-nameis not. - Contains up to 63 characters and only lowercase letters, numbers, and hyphens.
- Is unique within a space. A Chat app can't use the same custom ID for different messages.
The following code shows an example of how a Chat app can send a text message with an ID to a given space on behalf of an authenticated user:
Node.js
Python
Java
Apps Script
To run this sample, replace the following:
SPACE_NAME: the ID from the space'snamefield. You can obtain the ID by calling theListSpaces()method or from the space's URL.MESSAGE-ID: a name for the message that begins withcustom-. Must be unique from any other message names created by the Chat app in the specified space.
Quote a message
You can quote another message by calling
CreateMessage()
(rpc,
rest)
and setting quotedMessageMetadata
(rpc,
rest)
in the request.
You can quote messages within a thread or in the main chat, but you can't quote a message from a different thread.
The following code shows how to create a message that quotes another message:
Node.js
import {createClientWithUserCredentials} from './authentication-utils.js';

const USER_AUTH_OAUTH_SCOPES = ['https://www.googleapis.com/auth/chat.messages.create'];

// This sample shows how to create a message that quotes another message.
async function main() {

  // Create a client
  const chatClient = await createClientWithUserCredentials(USER_AUTH_OAUTH_SCOPES);

  // Initialize request argument(s)
  const request = {

    // TODO(developer): Replace SPACE_NAME .
    parent: 'spaces/SPACE_NAME',

    message: {
      text: 'I am responding to a quoted message!',

      // quotedMessageMetadata lets chat apps respond to a message by quoting it.
      quotedMessageMetadata: {

        // TODO(developer): Replace QUOTED_MESSAGE_NAME
        // and QUOTED_MESSAGE_LAST_UPDATE_TIME.
        name: 'QUOTED_MESSAGE_NAME',
        lastUpdateTime: 'QUOTED_MESSAGE_LAST_UPDATE_TIME'
      }
    }
  };

  // Make the request
  const response = await chatClient.createMessage(request);

  // Handle the response
  console.log(response);
}

main().catch(console.error);
Python
from authentication_utils import create_client_with_user_credentials
from google.apps import chat_v1 as google_chat
from google.protobuf.timestamp_pb2 import Timestamp

SCOPES = ['https://www.googleapis.com/auth/chat.messages.create']

# This sample shows how to create a message that quotes another message.
def create_message_quote_message():
    '''Creates a message that quotes another message.'''

    # Create a client
    client = create_client_with_user_credentials(SCOPES)

    # Create a timestamp from the RFC-3339 string.
    # TODO(developer): Replace QUOTED_MESSAGE_LAST_UPDATE_TIME.
    last_update_time = Timestamp()
    last_update_time.FromJsonString('QUOTED_MESSAGE_LAST_UPDATE_TIME')

    # Initialize request argument(s)
    request = google_chat.CreateMessageRequest(

        # TODO(developer): Replace SPACE_NAME.
        parent='spaces/SPACE_NAME',

        # Create the message.
        message = google_chat.Message(
            text='I am responding to a quoted message!',

            # quotedMessageMetadata lets chat apps respond to a message by quoting it.
            quoted_message_metadata=google_chat.QuotedMessageMetadata(

                name='QUOTED_MESSAGE_NAME',
                last_update_time=last_update_time
            )
        )
    )

    # Make the request
    response = client.create_message(request)

    # Handle the response
    print(response)

create_message_quote_message()
Java
import com.google.chat.v1.ChatServiceClient;
import com.google.chat.v1.CreateMessageRequest;
import com.google.chat.v1.Message;
import com.google.chat.v1.QuotedMessageMetadata;
import com.google.protobuf.util.Timestamps;
import com.google.workspace.api.chat.samples.utils.AuthenticationUtils;
import java.text.ParseException;

// This sample shows how to create a message that quotes another message.
public class CreateMessageQuoteMessage {
  public static void main(String[] args) throws Exception, ParseException {
    // Create a client.
    ChatServiceClient chatClient = AuthenticationUtils.createClientWithUserCredentials();

    // Initialize request argument(s).
    // TODO(developer): Replace SPACE_NAME, QUOTED_MESSAGE_NAME,
    // and QUOTED_MESSAGE_LAST_UPDATE_TIME here.
    String parent = "spaces/SPACE_NAME";
    String quotedMessageName = "QUOTED_MESSAGE_NAME";
    String lastUpdateTime = "QUOTED_MESSAGE_LAST_UPDATE_TIME";

    QuotedMessageMetadata quotedMessageMetadata =
        QuotedMessageMetadata.newBuilder()
            .setName(quotedMessageName)
            .setLastUpdateTime(Timestamps.parse(lastUpdateTime))
            .build();

    Message message = Message.newBuilder()
        .setText("I am responding to a quoted message!")
        .setQuotedMessageMetadata(quotedMessageMetadata)
        .build();

    CreateMessageRequest request =
        CreateMessageRequest.newBuilder()
            .setParent(parent)
            .setMessage(message)
            .build();

    // Make the request.
    Message response = chatClient.createMessage(request);

    // Handle the response.
    System.out.println(response);
  }
}
Apps Script
/**
 * Creates a message that quotes another message.
 *
 * Relies on the OAuth2 scope 'https://www.googleapis.com/auth/chat.messages.create'
 * referenced in the manifest file (appsscript.json).
 */
function createMessageQuoteMessage() {

  // Initialize request argument(s)
  // TODO(developer): Replace SPACE_NAME here.
  const parent = 'spaces/SPACE_NAME';

  const message = {

    // The text content of the message.
    text: 'I am responding to a quoted message!',

    // quotedMessageMetadata lets chat apps respond to a message by quoting it.
    //
    // TODO(developer): Replace QUOTED_MESSAGE_NAME
    // and QUOTED_MESSAGE_LAST_UPDATE_TIME .
    quotedMessageMetadata: {
      name: 'QUOTED_MESSAGE_NAME',
      lastUpdateTime: 'QUOTED_MESSAGE_LAST_UPDATE_TIME',
    }
  };

  // Make the request
  const response = Chat.Spaces.Messages.create(message, parent);

  // Handle the response
  console.log(response);
}
To run this sample, replace the following:
SPACE_NAME: the ID from the space'snamefield. You can obtain the ID by calling theListSpaces()(rpc,rest) method or from the space's URL.QUOTED_MESSAGE_NAME: the message resourcename(rpc,rest) of the message to quote in the formatspaces/{space}/messages/{message}.QUOTED_MESSAGE_LAST_UPDATE_TIME: the last update time of the message that you want to quote. If the message was never edited, corresponds withcreateTime(rpc,rest). If the message was edited, corresponds withlastUpdateTime(rpc,rest).
Troubleshoot
When a Google Chat app or card returns an error, the Chat interface surfaces a message saying "Something went wrong." or "Unable to process your request." Sometimes the Chat UI doesn't display any error message, but the Chat app or card produces an unexpected result; for example, a card message might not appear.
Although an error message might not display in the Chat UI, descriptive error messages and log data are available to help you fix errors when error logging for Chat apps is turned on. For help viewing, debugging, and fixing errors, see Troubleshoot and fix Google Chat errors.
Related topics
- Use the Card Builder to design and preview JSON card messages for Chat apps.
- Format messages.
- Get details about a message.
- List messages in a space.
- Update a message.
- Delete a message.
- Identify users in Google Chat messages.
- Send messages to Google Chat with incoming webhooks.