
This guide explains how to create a step that users can add to a flow in Google Workspace Studio.
A step is a single step in a flow's sequence of tasks. Steps can't start a flow.
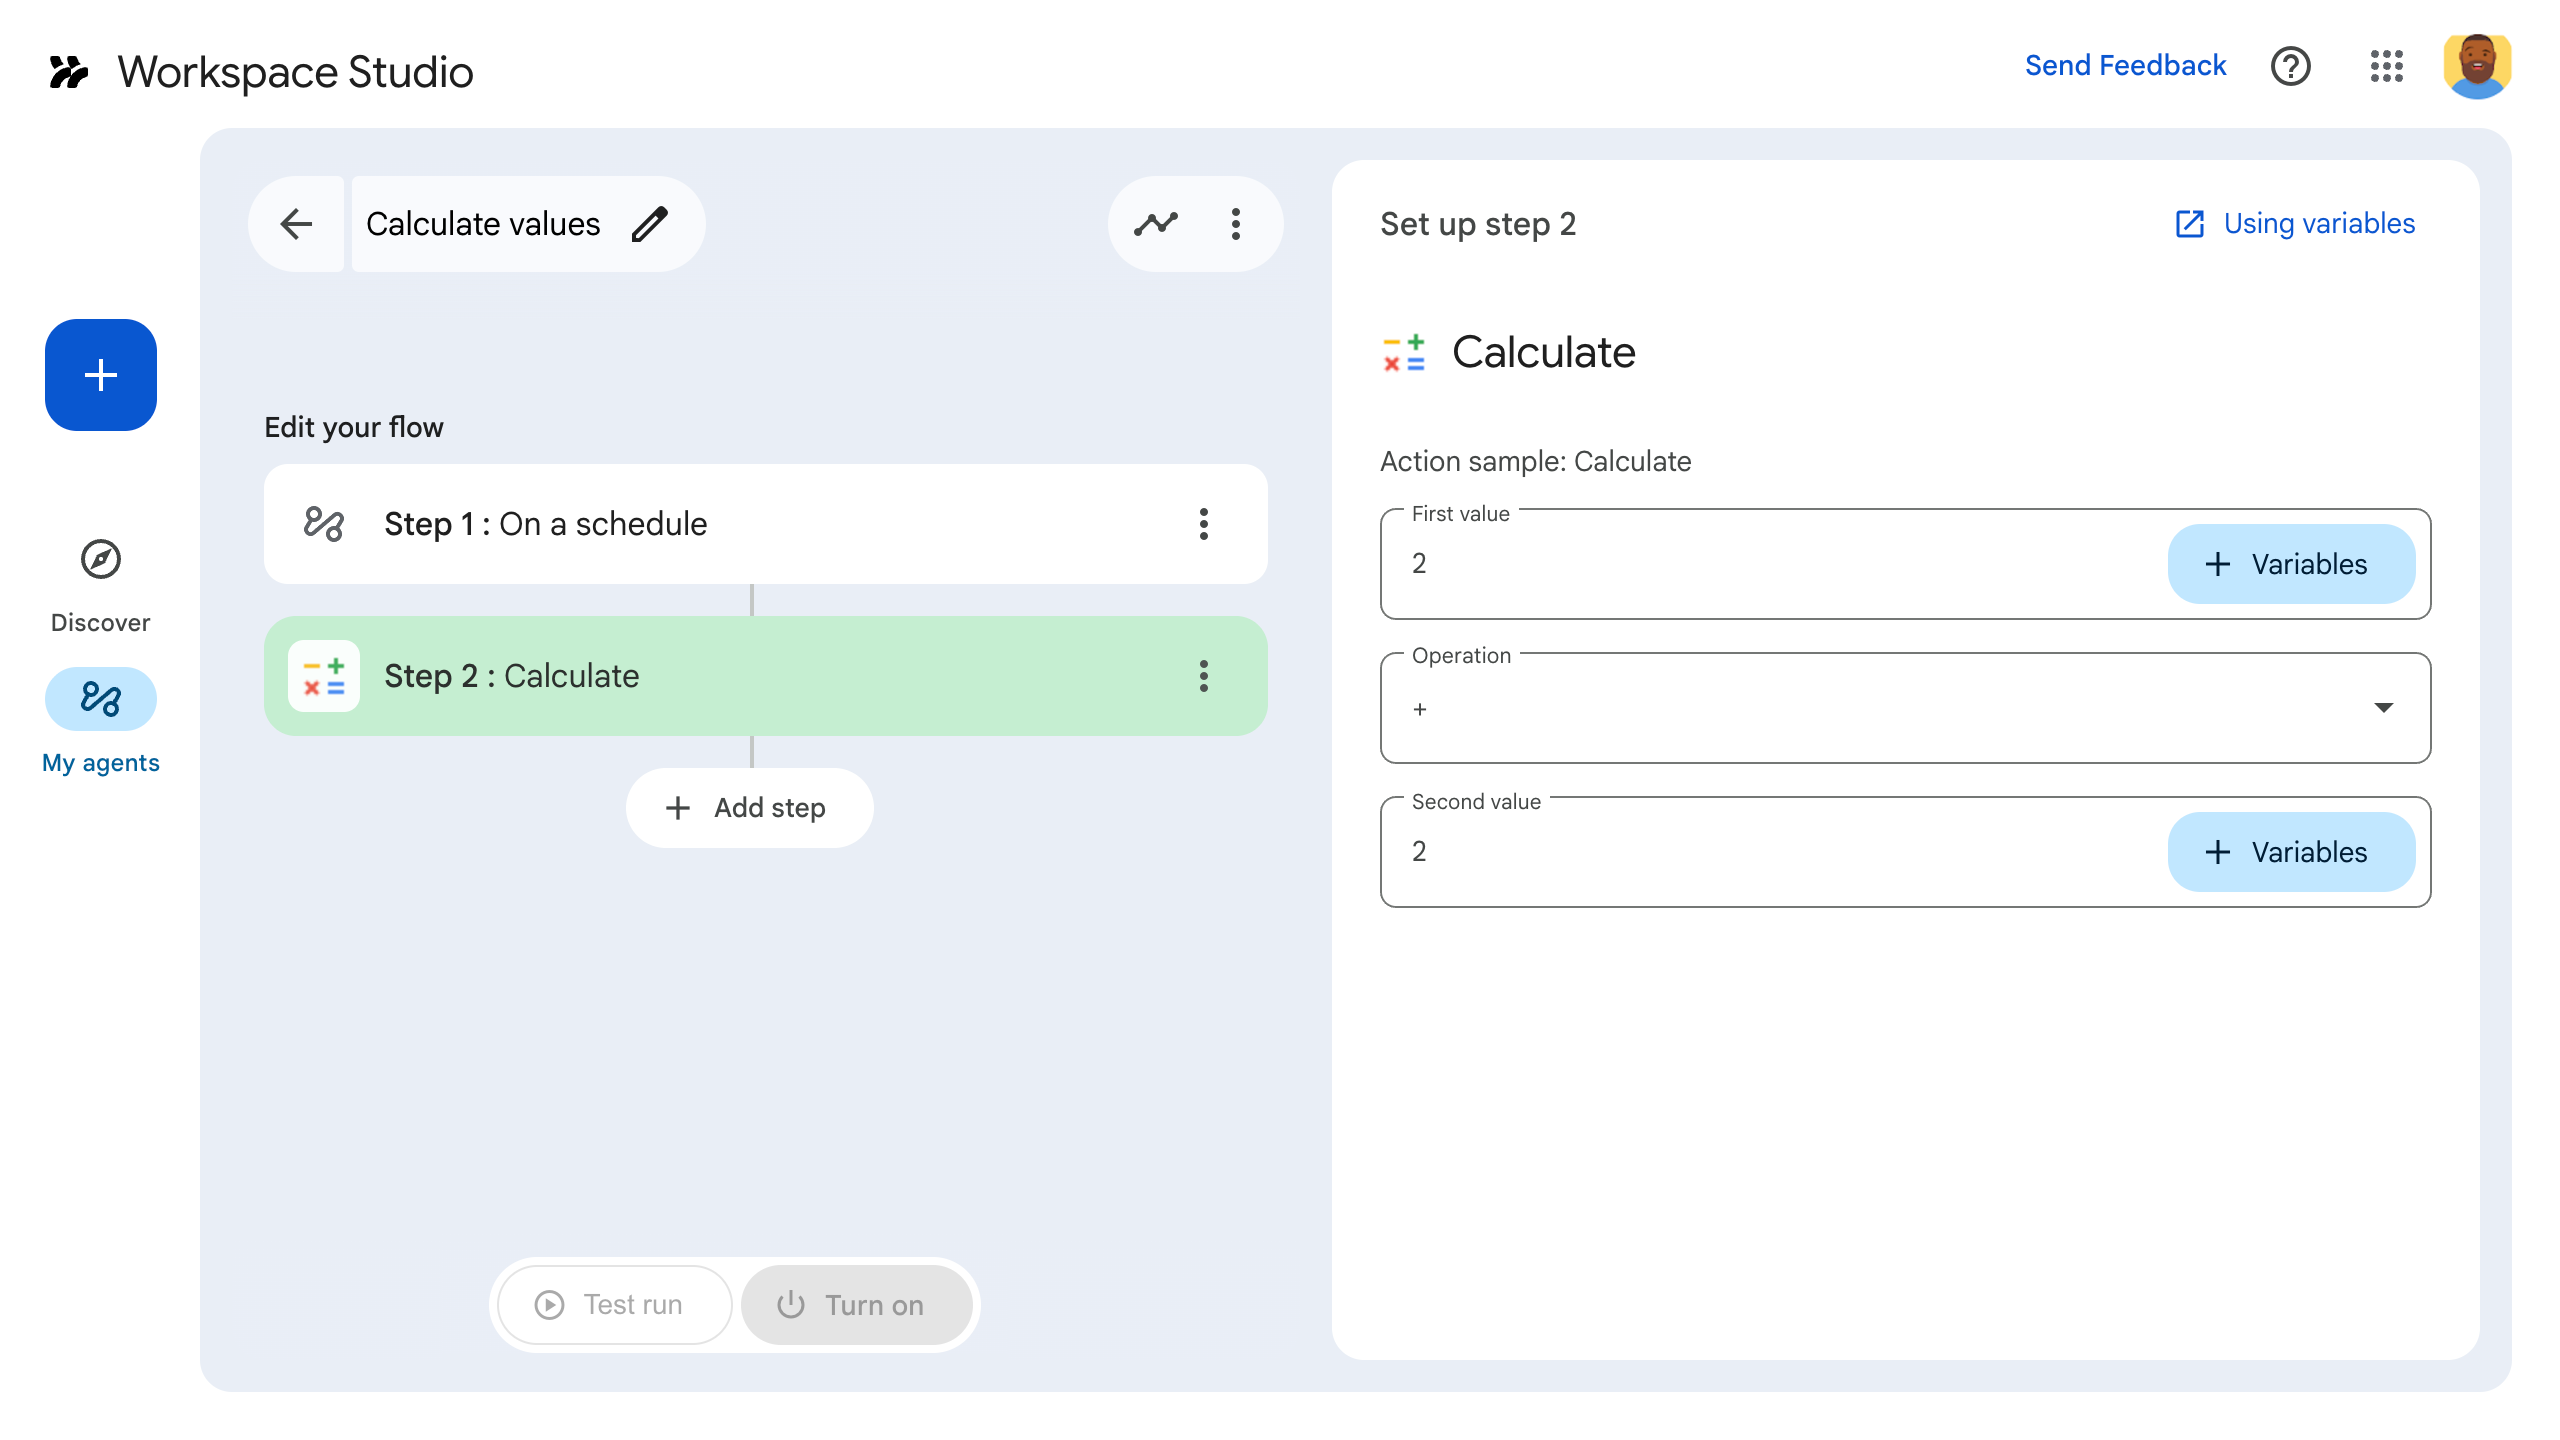
As an example, consider a step that does arithmetic. It asks the user for two values and a math operation. It then performs the math operation on the values and outputs the result.
To build a step, configure it in the add-on's manifest file, write application logic in the Google Workspace add-on's code, and deploy and test the step.
Define the step
To configure a step, define it in the manifest file and write its application logic in code.
Define the step in the manifest file
In the manifest file, appsscript.json:
- Set
onConfigFunctionandonExecuteFunctionto the names of corresponding functions in the add-on's code. In this example, the functions are calledonConfigCalculate()andonExecuteCalculate().onConfigFunctionsets up and configures the step. If necessary, gathers data from users necessary to execute the step, like the address to send an email. In this guide's example, we ask for two values and a math operation.onExecuteFunctionexecutes the step. If data was gathered from users, that data passes to this function. If applicable, returns an output. In this guide's example, outputs the result of a math calculation.
Set required inputs and outputs, which lets the step gather data and send it to later steps. In this example, ask the user for two values and a math operation defined in
inputs[]. Output the calculated result as defined inoutputs[].To learn more about inputs and outputs, see Input variables and Output variables. To make sure flows run without error, validate input variables.
Here's the manifest file for the Calculator step:
JSON
{
  "timeZone": "America/Los_Angeles",
  "exceptionLogging": "STACKDRIVER",
  "runtimeVersion": "V8",
  "addOns": {
    "common": {
      "name": "Calculator",
      "logoUrl": "https://www.gstatic.com/images/branding/productlogos/calculator_search/v1/web-24dp/logo_calculator_search_color_1x_web_24dp.png",
      "useLocaleFromApp": true
    },
    "flows": {
      "workflowElements": [
        {
          "id": "calculatorDemo",
          "state": "ACTIVE",
          "name": "Calculate",
          "description": "Asks the user for two values and a math operation, then performs the math operation on the values and outputs the result.",
          "workflowAction": {
            "inputs": [
              {
                "id": "value1",
                "description": "value1",
                "cardinality": "SINGLE",
                "dataType": {
                  "basicType": "INTEGER"
                }
              },
              {
                "id": "value2",
                "description": "value2",
                "cardinality": "SINGLE",
                "dataType": {
                  "basicType": "INTEGER"
                }
              },
              {
                "id": "operation",
                "description": "operation",
                "cardinality": "SINGLE",
                "dataType": {
                  "basicType": "STRING"
                }
              }
            ],
            "outputs": [
              {
                "id": "result",
                "description": "Calculated result",
                "cardinality": "SINGLE",
                "dataType": {
                  "basicType": "INTEGER"
                }
              }
            ],
            "onConfigFunction": "onConfigCalculate",
            "onExecuteFunction": "onExecuteCalculate"
          }
        }
      ]
    }
  }
}
Next, write the supporting code by defining the step in code.
Define the step in code
In application code, do the following:
Write the
onConfigFunction, calledonConfigCalculate()in this example. When users add the step to a flow, they can configure aspects of the step in the flow builder. To gather required info from the user, theonConfigFunctiondefines a configuration card.Cards are the building blocks for user interfaces in add-ons. Cards support a defined layout, interactive UI elements like buttons, and rich media like images. Cards are how you can get data from a user that the step needs to run, like an email address for sending an email.
The
OnConfigFunctionreturns a card. This card defines the UI where users set the step's data. In this example, theonConfigFunctionbuilds a card that asks the user for two values and a math operation.Write the
onExecuteFunctioncalledonExecuteCalculate()in this example. When your step runs in a flow, theOnExecuteFunctionruns. Any input values that the user set during configuration as defined in theonConfigurationFunctionare passed toOnExecuteFunction.Write
OnExecuteFunction()so that it synchronously executes its task using the provided inputs. Remember,OnExecuteFunction()must return all outputs defined in your flow's manifest, otherwise an error occurs.
This code sample includes a supporting function, outputVariables(), which
constructs and sends provided variables as output from the step.
Your step is ready for testing.
Here's the code for the Calculator step:
Apps Script
/**
 * Generates and displays a configuration card for the sample calculation step.
 *
 * This function creates a card with input fields for two values and a drop-down
 * for selecting an arithmetic operation.
 *
 * The input fields are configured to let the user select outputs from previous
 * steps as input values using the `hostAppDataSource` property.
 */
function onConfigCalculate() {
  const firstInput = CardService.newTextInput()
  .setFieldName("value1")
  .setTitle("First Value")
  .setHostAppDataSource(
    CardService.newHostAppDataSource()
      .setWorkflowDataSource(
        CardService.newWorkflowDataSource()
          .setIncludeVariables(true)
      )
  );
  const secondInput = CardService.newTextInput()
    .setFieldName("value2")
    .setTitle("Second Value").setHostAppDataSource(
      CardService.newHostAppDataSource()
        .setWorkflowDataSource(
          CardService.newWorkflowDataSource()
            .setIncludeVariables(true)
        )
    );
  const selectionInput = CardService.newSelectionInput()
    .setTitle("operation")
    .setFieldName("operation")
    .setType(CardService.SelectionInputType.DROPDOWN)
    .addItem("+", "+", false)
    .addItem("-", "-", true)
    .addItem("x", "x", false)
    .addItem("/", "/", false);

  const sections = CardService.newCardSection()
    .setHeader("Action_sample: Calculate")
    .setId("section_1")
    .addWidget(firstInput)
    .addWidget(selectionInput)
    .addWidget(secondInput)

  var card = CardService.newCardBuilder()
    .addSection(sections)
    .build();

  return card;
}

/**
* Returns output variables from a step.
*
* This function constructs an object that, when returned, sends the
* provided variable values as output from the current step.
* The variable values are logged to the console for debugging purposes.
*/
function outputVariables(variableDataMap) {
const workflowAction = AddOnsResponseService.newReturnOutputVariablesAction()
  .setVariableDataMap(variableDataMap);

const hostAppAction = AddOnsResponseService.newHostAppAction()
  .setWorkflowAction(workflowAction);

const renderAction = AddOnsResponseService.newRenderActionBuilder()
  .setHostAppAction(hostAppAction)
  .build();

return renderAction;
}

/**
 * Executes the calculation step based on the inputs from a flow event.
 *
 * This function retrieves input values and the operation from the flow event,
 * performs the calculation, and returns the result as an output variable.
 * The function logs the event for debugging purposes.
 */
function onExecuteCalculate(event) {
  console.log("output: " + JSON.stringify(event));
  var calculatedValue = 0;
  var value1 = event.workflow.actionInvocation.inputs["value1"].integerValues[0];
  var value2 = event.workflow.actionInvocation.inputs["value2"].integerValues[0];
  var operation = event.workflow.actionInvocation.inputs["operation"].stringValues[0];

  if (operation == "+") {
    calculatedValue = value1 + value2;
  } else if (operation == "-") {
    calculatedValue = value1 - value2;
  } else if (operation == "x") {
    calculatedValue = value1 * value2;
  } else if (operation == "/") {
    calculatedValue = value1 / value2;
  }

  const variableDataMap = { "result": AddOnsResponseService.newVariableData().addIntegerValue(calculatedValue) };

  return outputVariables(variableDataMap);
}
Test your step
To test your step, set up a test deployment for your add-on, add the step to a flow and then run the flow.
Set up a test deployment for your add-on:
- Open the script project in the Apps Script editor.
- Click Deploy > Test deployments.
- Click Install.
- At the bottom, click Done.
You can let other users test the add-on by sharing the Apps Script project with their account (edit access is required). Then prompt the users to follow the previous steps.
Once installed, the add-on is immediately available in Flows. You may need to refresh Flows before the add-on appears. You must also authorize the add-on before using it.
To learn more about test deployments, see Install an unpublished add-on.
Open Flows.
Create a flow that includes your step:
- Click New flow.
- Select how the flow starts. When testing a step, it's a good idea to choose a starter that you can set off yourself, like sending yourself an email. If your step requires an input variable, configure the input variable as part of the starter's output.
- Click Add step. Select the step you built or updated, called Calculate.
- Configure your step. For the calculate step, choose two values and a math operation. The step saves automatically.
- To test your step's output, add another step. For example, to add output to an email message, you might add Gmail's Send a message step. In Message, click Variables and select your step's output. For the calculate step, select Variables > Step 2: Calculated result > Calculated result. The variable appears as a chip in the Message field.
- Click Turn on. Your flow is ready to run.
Run the flow by setting off your flow's starter. For example, if your flow starts when you receive an email, send yourself an email.
Verify the flow runs as expected. Check logs by visiting the flow builder's Activity tab. To learn how to create custom logs in the Activity tab, see Activity logs.
Related topics
- Input variables
- Validate an input variable
- Output variables
- Define a custom resource
- Dynamic variables
- Log activity and errors
- Workspace Studio event objects