
課金を有効化して API キーを作成したら、アプリの開発に使う Xcode プロジェクトをセットアップする準備が整います。
リリースノートは、各 リリースで提供されます。
ステップ 1: 必要なソフトウェアをインストールする
Maps SDK for iOS を使用してプロジェクトを作成するには、以下をダウンロードしてインストールする必要があります。
- Xcode バージョン 26.0 以降
ステップ 2: Xcode プロジェクトを作成して Maps SDK for iOS をインストールする
SDK のインストール サイズは変動する可能性があります。 たとえば、Maps SDK for iOS バージョン 9.0 のインストール サイズは約 18 MB です。
Swift Package Manager
Maps SDK for iOS は、 Swift Package Manager を使用してインストールできます。SDK を追加するには、既存の Maps SDK for iOS の依存関係を削除する必要があります。
SDK を新規または既存のプロジェクトに追加する手順は次のとおりです。
-
Xcode の
projectまたはworkspaceを開き、[File] > [Add Package Dependencies] に移動します。 - URL としてhttps://github.com/googlemaps/ios-maps-sdkと入力し、**Enter** キーを押してパッケージをプルし、[Add Package] をクリックします。
-
特定の
versionをインストールするには、[Dependency Rule] フィールドをバージョン ベースのオプションのいずれかに設定します。新しいプロジェクトの場合は、最新バージョンを指定して [Exact Version] オプションを使用することをおすすめします。完了したら、[Add Package] をクリックします。
既存のプロジェクトの package を更新する手順は次のとおりです。
9.0.0 より前のバージョンからアップグレードする場合: アップグレード後に、
GoogleMapsBase、GoogleMapsCore、およびGoogleMapsM4Bの依存関係を削除する必要があります。GoogleMapsの依存関係は削除しないでください。詳細については、 バージョン 9.0.0 のリリースノートをご覧ください。Xcode プロジェクトの構成設定で、[Frameworks, Libraries, and Embedded Content] を見つけます。マイナス記号(-) を使用して、次のフレームワークを削除します。
GoogleMapsBase(9.0.0 より前のバージョンからアップグレードする場合のみ)GoogleMapsCore(9.0.0 より前のバージョンからアップグレードする場合のみ)GoogleMapsM4B(9.0.0 より前のバージョンからアップグレードする場合のみ)
- Xcode で、[File] > [Packages] > [Update To Latest Package Versions] に移動します。
- インストールを確認するには、[Package Dependencies] セクションの [Project Navigator] に移動して、パッケージとそのバージョンを確認します。
既存の Maps SDK for iOS の依存関係を削除する手順は次のとおりです。CocoaPods
- Xcode ワークスペースを閉じます。ターミナルを開き、次のコマンドを実行します。
sudo gem install cocoapods-deintegrate cocoapods-clean
pod deintegrate
pod cache clean --all
-
Podfile、Podfile.resolved、Xcode のworkspaceを CocoaPods 以外の用途で使用していない場合は、削除します。
-
Xcode プロジェクトの構成設定で、[Frameworks, Libraries,
and Embedded Content] を見つけます。マイナス記号(-) を使用して、次のフレームワークを削除します。
GoogleMapsGoogleMapsBase(バージョン 9.2.0 より前のインストールの場合のみ)GoogleMapsCore(バージョン 9.2.0 より前のインストールの場合のみ)GoogleMapsM4B(バージョン 9.0.0 より前のインストールの場合のみ)
-
Xcode プロジェクトの最上位ディレクトリから
GoogleMapsバンドルを削除します。
手動インストール
このガイドでは、Maps SDK for iOS を含む XCFramework をプロジェクトに手動で追加し、Xcode でビルドを構成する方法を説明します。XCFramework は、Apple シリコンを使用するマシンなど、複数のプラットフォームで使用できるバイナリ パッケージです。
- 次の SDK バイナリとリソース ファイルをダウンロードします。
- ファイルを抽出して、XCFramework とリソースにアクセスします。
- Xcode プロジェクトをまだ作成していない場合は、ここで作成してローカルマシンに保存します
iOS アプリを初めて開発する場合は、次の手順を行います。
- 新しいプロジェクトを作成する。
- [iOS > App] テンプレートを選択します。
- プロジェクト オプション画面で、次の操作を行います。
- プロジェクト名 を入力します。
- [Bundle identifier] フィールドの値を記録します。この値を使用して、後で API キーを制限できます。
- プロジェクトの [Interface] を [Storyboard] に設定します。
- [Language] を [Swift] または [Objective-C] に設定します。
-
[General] タブを開きます。次の XCFramework をプロジェクト
の [Frameworks, Libraries, and Embedded Content] の下にドラッグします。[**Do Not Embed**] を選択してください。
GoogleMaps.xcframework-
ダウンロードした GoogleMapsResources から
GoogleMaps.bundleをコピーして、Xcode プロジェクトの最上位ディレクトリに貼り付けます。プロンプトが表示されたら、[Copy items into destination group's folder] を選択してください。 - プロジェクト ナビゲータで目的のプロジェクトを選択し、アプリのターゲットを選択します。
-
アプリのターゲットの [Build Phases] タブを開きます。
-
[Link Binary with Libraries] で、次のフレームワークとライブラリを追加します。
Accelerate.frameworkContacts.frameworkCoreData.frameworkCoreGraphics.frameworkCoreImage.frameworkCoreLocation.frameworkCoreTelephony.frameworkCoreText.frameworkGLKit.frameworkImageIO.frameworklibc++.tbdlibz.tbdMetal.frameworkMetricKit.frameworkOpenGLES.framework(OpenGL を使用している場合のみ)QuartzCore.frameworkSecurity.frameworkSystemConfiguration.frameworkUIKit.framework
-
(特定のターゲットではなく)プロジェクトを選択して、 [Build Settings] タブを開きます。[Linking - General -> Other Linker Flags] セクションで、
-ObjCを [Debug] と [Release] に追加します。これらの設定が表示されない場合は、[Build Settings] バーのフィルタを [Basic] から [All] に変更します。 -
Places SDK for iOS XCFramework をインストールするには、 スタートガイド をご覧ください。
CocoaPods
Maps SDK for iOS は CocoaPods ポッドとして提供されています。CocoaPods は、Swift と Objective-C の Cocoa プロジェクトで依存関係を管理するためのオープンソース ツールです。
CocoaPods ツールがない場合は、ターミナルから以下のコマンドを実行して、macOS 上に CocoaPods ツールをインストールします。詳しくは、 CocoaPods スタートガイドをご覧ください。
sudo gem install cocoapods
Maps SDK for iOS の Podfile を作成し、これを使用して
API とその依存関係をインストールします。
- Xcode プロジェクトをまだ作成していない場合は、ここで作成してローカルマシンに保存します
iOS アプリを初めて開発する場合は、次の手順を行います。
- 新しいプロジェクトを作成する。
- [iOS > App] テンプレートを選択します。
- プロジェクト オプション画面で、次の操作を行います。
- プロジェクト名 を入力します。
- [Bundle identifier] フィールドの値を記録します。この値を使用して、後で API キーを制限できます。
- プロジェクトの [Interface] を [Storyboard] に設定します。
- [Language] を [Swift] または [Objective-C] に設定します。
- プロジェクトのディレクトリに、
Podfileという名前のファイルを作成します。この ファイルでプロジェクトの依存関係を定義します。 Podfileを編集して、依存関係とその バージョンを追加します。 次の例では、Maps SDK for iOS に必要な依存関係を追加しています。source 'https://github.com/CocoaPods/Specs.git' platform :ios, '16.0' target 'YOUR_APPLICATION_TARGET_NAME_HERE' do pod 'GoogleMaps', '10.14.0' end
pod outdated` を定期的に実行して、新しい バージョンがあるかどうかを検出して、常に最新バージョンを使用していることを確認します。必要に応じて、 最新バージョンにアップグレードします。Podfileを保存します。ターミナルを開き、
Podfileを含むディレクトリに移動します。cd <path-to-project>
pod installコマンドを実行します。Podfileで指定した API とその依存関係がインストールされます。pod install
Xcode を終了し、プロジェクトの
.xcworkspaceファイルを(ダブルクリックして)開いて、Xcode を起動します。これ以降、 このプロジェクトを開くには.xcworkspaceファイルを使用する必要があります。
既存のプロジェクトの API を更新する手順は次のとおりです。
- ターミナルを開き、
Podfileを含むプロジェクト ディレクトリに移動します。 pod updateコマンドを実行します。これにより、Podfileで指定されたすべての API が最新バージョンに更新されます。
ステップ 3: API キーをプロジェクトに追加する
API キーを取得するで、アプリの API キーを生成しました。このキーを Xcode プロジェクトに追加します。
以下の例で YOUR_API_KEY とある箇所は、実際の API キーに置き替えてください。
Swift
次のように、API キーを AppDelegate.swift に追加します。
- 以下のインポート文を追加します。
import GoogleMaps
- API キーを使用して、次のコードを
application(_:didFinishLaunchingWithOptions:)メソッドに追加します。GMSServices.provideAPIKey("YOUR_API_KEY")
- Places API も使用している場合は、次のようにキーを再度追加します。
GMSPlacesClient.provideAPIKey("YOUR_API_KEY")
Objective-C
次のように、API キーを AppDelegate.m に追加します。
- 以下のインポート文を追加します。
@import GoogleMaps;
- API キーを使用して、次のコードを
application:didFinishLaunchingWithOptions:メソッドに追加します。[GMSServices provideAPIKey:@"YOUR_API_KEY"];
- Places API も使用している場合は、次のようにキーを再度追加します。
[GMSPlacesClient provideAPIKey:@"YOUR_API_KEY"];
ステップ 4(省略可): Apple プライバシー マニフェスト ファイルを確認する
Apple は、App Store のアプリのプライバシーの詳細を要求しています。最新情報と詳細については、Apple App Store のプライバシーの詳細ページをご覧ください。
Apple プライバシー マニフェスト ファイルは、SDK のリソース バンドルに含まれています。プライバシー マニフェスト ファイルが含まれていることを確認し、その内容を確認するには、アプリのアーカイブを作成し、アーカイブからプライバシー レポートを生成します。
ステップ 5(省略可): API で使用される URL スキームを宣言する
iOS 9 と Xcode 7 以降では、アプリの Info.plist ファイルでスキームを指定することで、開く URL スキームを宣言できます。Maps SDK for iOS は、ユーザーが地図上の Google ロゴをクリックすると Google マップ モバイルアプリを開くため、アプリは関連する URL スキームを宣言できます。
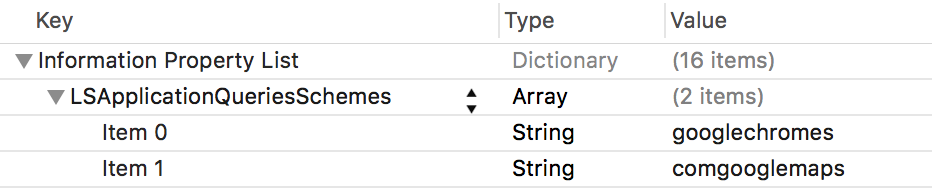
Maps SDK for iOS で使用される URL スキームを宣言するには、Info.plist に次の行を追加します。
 <key>LSApplicationQueriesSchemes</key>
 <array>
        <string>googlechromes</string>
        <string>comgooglemaps</string>
    </array>
次のスクリーンショットは、Xcode でのユーザー インターフェースでの設定を示しています。
上記の宣言がない場合、ユーザーが地図上の Google ロゴをタップすると、次のエラーが発生する可能性があります。
-canOpenURL: failed for URL: "comgooglemaps://" - error: "This app is not
allowed to query for scheme comgooglemaps"
-canOpenURL: failed for URL: "googlechromes://" - error: "This app is not allowed to query for scheme googlechromes"
これらのエラーを解消するには、Info.plist に宣言を追加します。
次のステップ
これで API キーと Xcode プロジェクトが用意できたので、アプリを作成・実行する準備が整いました。 Navigation SDK for iOS には、開発を始めるのに役立つチュートリアルやサンプルアプリが豊富に用意されています。詳しくは、以下をご覧ください。
- 出発点として、次のチュートリアルをおすすめします。
- 利用可能な コードサンプル と Codelab を確認する。
- エンドツーエンドのソリューションについては、利用可能な Maps ソリューションを確認する。