ติดตามกลุ่มอุปกรณ์ของคุณด้วยไลบรารีการติดตามกลุ่ม JavaScript

ไลบรารีการติดตามยานพาหนะของ JavaScript ช่วยให้คุณเห็นภาพตำแหน่ง ของยานพาหนะที่อยู่ในกองยานแบบเกือบเรียลไทม์ ไลบรารีดังกล่าวใช้ Deliveries API เพื่อให้แสดงภาพยานพาหนะการนำส่งรวมถึงงาน เหมือนกับไลบรารีการติดตามการจัดส่งของ JavaScript ที่มีคอมโพเนนต์แผนที่ JavaScript ที่เป็นการแทนที่แบบดรอปอินสำหรับเอนทิตี google.maps.Map มาตรฐานและคอมโพเนนต์ข้อมูลเพื่อเชื่อมต่อกับ Fleet Engine

คอมโพเนนต์

JavaScript ไลบรารีการติดตามยานพาหนะของ JavaScript มีคอมโพเนนต์สำหรับการแสดงภาพยานพาหนะและป้ายหยุดขนส่ง รวมทั้งฟีดข้อมูลดิบสำหรับเวลาถึงโดยประมาณหรือระยะทางที่เหลือของการนำส่ง

มุมมองแผนที่การติดตามยานพาหนะ

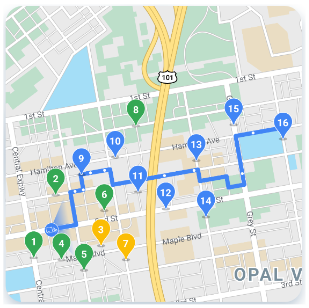
คอมโพเนนต์มุมมองแผนที่การติดตามยานพาหนะจะแสดง ตำแหน่งของยานพาหนะและงาน หากทราบเส้นทางของรถ คอมโพเนนต์มุมมองแผนที่จะเคลื่อนไหวยานพาหนะตามเส้นทางที่คาดคะเน

ตัวอย่างมุมมองแผนที่การติดตามยานพาหนะ

ผู้ให้บริการตำแหน่ง

ผู้ให้บริการตำแหน่งจะทำงานร่วมกับข้อมูลที่จัดเก็บไว้ใน Fleet Engine เพื่อส่งข้อมูลตำแหน่งสำหรับออบเจ็กต์ที่ติดตามไปยังแผนที่การแชร์เส้นทาง

ผู้ให้บริการสถานที่นำส่งยานพาหนะ

ผู้ให้บริการตำแหน่งยานพาหนะที่นำส่งจะแสดงข้อมูลตำแหน่งของยานพาหนะที่นำส่งหนึ่งๆ ซึ่งมีข้อมูลตำแหน่งของรถ รวมถึงงานที่รถส่งทำเสร็จเรียบร้อย

ผู้ให้บริการตำแหน่งยานพาหนะจัดส่ง

ผู้ให้บริการตำแหน่งยานพาหนะที่นำส่งจะแสดง ข้อมูลตำแหน่งของรถหลายคัน คุณสามารถเลือกกรองยานพาหนะหรือสถานที่ ที่ต้องการ หรือแสดงทั้งกลุ่มก็ได้

ควบคุมการเปิดเผยสถานที่ที่ติดตาม

ส่วนนี้จะอธิบายกฎระดับการเข้าถึงสำหรับออบเจ็กต์ตำแหน่งที่ติดตามบนแผนที่สำหรับผู้ให้บริการตำแหน่งที่กำหนดไว้ล่วงหน้าของ Fleet Engine ผู้ให้บริการสถานที่ที่กำหนดเองหรือที่ได้มาอาจเปลี่ยนกฎการเปิดเผย

ยานพาหนะส่งของ

ยานพาหนะที่นำส่งจะปรากฏให้เห็นทันทีที่สร้างขึ้นใน Fleet Engine และมองเห็นได้ตลอดเส้นทางไม่ว่ารถจะทำงานอย่างไร

เครื่องหมายระบุตำแหน่งงาน

จุดจอดที่วางแผนไว้จะแสดงในแผนที่เป็นเครื่องหมายหยุดรถ เครื่องหมายสำหรับงานที่ทำเสร็จแล้วจะแสดงในรูปแบบที่แตกต่างจากจุดหยุดที่วางแผนไว้ของรถ

สถานที่ของผลลัพธ์ของงานจะแสดงพร้อมเครื่องหมายผลลัพธ์ของงาน งานที่มีผลลัพธ์ SUCCEEDED จะแสดงพร้อมตัวทำเครื่องหมายงานว่าสำเร็จ ส่วนงานอื่นๆ ทั้งหมดจะแสดงพร้อมเครื่องหมายงานที่ไม่สำเร็จ

เริ่มต้นใช้งานไลบรารีการติดตามกลุ่ม JavaScript

ก่อนใช้ไลบรารีการติดตามกลุ่ม JavaScript ต้องแน่ใจว่าคุณคุ้นเคยกับ Fleet Engine และการได้รับคีย์ API แล้ว จากนั้นสร้างรหัสงานและอ้างสิทธิ์รหัสยานพาหนะที่นำส่ง

สร้างรหัสงานและอ้างสิทธิ์รหัสยานพาหนะที่นำส่ง

หากต้องการติดตามยานพาหนะนำส่งโดยใช้ผู้ให้บริการตำแหน่งยานพาหนะนำส่ง ให้สร้าง JSON Web Token (JWT) พร้อมรหัสงานและการอ้างสิทธิ์รหัสยานพาหนะที่นำส่ง

หากต้องการสร้างเปย์โหลด JWT ให้เพิ่มการอ้างสิทธิ์เพิ่มเติมในส่วนการให้สิทธิ์ด้วยคีย์ taskid และ deliveryvehicleid แล้วตั้งค่า ของแต่ละคีย์เป็น * โทเค็นควรสร้างโดยใช้บทบาท Cloud IAM ของผู้ใช้บริการ Fleet Engine ระดับสูง โปรดทราบว่าการดำเนินการนี้จะให้สิทธิ์เข้าถึงแบบกว้างเพื่อสร้าง อ่าน และแก้ไขเอนทิตี Fleet Engine และควรแชร์กับผู้ใช้ที่เชื่อถือได้เท่านั้น

ตัวอย่างต่อไปนี้แสดงวิธีสร้างโทเค็นสำหรับการติดตามตามยานพาหนะและงาน

{
  "alg": "RS256",
  "typ": "JWT",
  "kid": "private_key_id_of_consumer_service_account"
}
.
{
  "iss": "superuser@yourgcpproject.iam.gserviceaccount.com",
  "sub": "superuser@yourgcpproject.iam.gserviceaccount.com",
  "aud": "https://fleetengine.googleapis.com/",
  "iat": 1511900000,
  "exp": 1511903600,
  "scope": "https://www.googleapis.com/auth/xapi",
  "authorization": {
     "taskid": "*",
     "deliveryvehicleid": "*",
   }
}

สร้างตัวเรียกโทเค็นการตรวจสอบสิทธิ์

คุณสร้างตัวดึงข้อมูลโทเค็นการตรวจสอบสิทธิ์เพื่อเรียกข้อมูลโทเค็นที่สร้างด้วยการอ้างสิทธิ์ที่เหมาะสมในเซิร์ฟเวอร์ได้โดยใช้ใบรับรองบัญชีบริการสำหรับโปรเจ็กต์ของคุณ การสร้างโทเค็น (Mint) บนเซิร์ฟเวอร์เป็นสิ่งสำคัญเท่านั้น และอย่าแชร์ใบรับรองกับไคลเอ็นต์ มิฉะนั้น อาจส่งผลต่อความปลอดภัยของระบบ

ตัวดึงข้อมูลต้องแสดงผลโครงสร้างข้อมูลที่มี 2 ช่องซึ่งรวมอยู่ใน "คำสัญญา"

  • สตริง token
  • หมายเลข expiresInSeconds โทเค็นจะหมดอายุภายในช่วงเวลานี้หลังจากดึงข้อมูล

ไลบรารีการติดตามกลุ่ม JavaScript จะขอโทเค็นผ่านตัวดึงข้อมูลโทเค็นการตรวจสอบสิทธิ์เมื่อข้อใดข้อหนึ่งต่อไปนี้เป็นจริง

  • ไม่มีโทเค็นที่ถูกต้อง เช่น ในกรณีที่ไม่ได้เรียกใช้ Fetcher ในการโหลดหน้าเว็บใหม่ หรือเมื่อ Googlebot ไม่ได้ส่งโทเค็นกลับมา
  • โทเค็นที่ดึงข้อมูลไว้ก่อนหน้านี้หมดอายุแล้ว
  • โทเค็นที่ดึงข้อมูลก่อนหน้านี้จะปรากฏภายใน 1 นาทีก่อนจะหมดอายุ

ไม่เช่นนั้น ไลบรารีจะใช้โทเค็นที่ออกให้ก่อนหน้านี้ซึ่งยังคงใช้งานได้ และไม่เรียกใช้ตัวดึงข้อมูล

ตัวอย่างต่อไปนี้แสดงวิธีสร้างตัวดึงข้อมูลโทเค็นการตรวจสอบสิทธิ์

JavaScript

function authTokenFetcher(options) {
  // options is a record containing two keys called 
  // serviceType and context. The developer should
  // generate the correct SERVER_TOKEN_URL and request
  // based on the values of these fields.
  const response = await fetch(SERVER_TOKEN_URL);
  if (!response.ok) {
    throw new Error(response.statusText);
  }
  const data = await response.json();
  return {
    token: data.Token,
    expiresInSeconds: data.ExpiresInSeconds
  };
}

TypeScript

function authTokenFetcher(options: {
  serviceType: google.maps.journeySharing.FleetEngineServiceType,
  context: google.maps.journeySharing.AuthTokenContext,
}): Promise<google.maps.journeySharing.AuthToken> {
  // The developer should generate the correct
  // SERVER_TOKEN_URL based on options.
  const response = await fetch(SERVER_TOKEN_URL);
  if (!response.ok) {
    throw new Error(response.statusText);
  }
  const data = await response.json();
  return {
    token: data.token,
    expiresInSeconds: data.expiration_timestamp_ms - Date.now(),
  };
}

เมื่อใช้ปลายทางฝั่งเซิร์ฟเวอร์เพื่อสร้างโทเค็น โปรดคำนึงถึงสิ่งต่อไปนี้

  • ปลายทางต้องแสดงเวลาหมดอายุของโทเค็น ในตัวอย่างด้านบนจะระบุเป็น data.ExpiresInSeconds
  • ตัวดึงข้อมูลโทเค็นการตรวจสอบสิทธิ์จะต้องส่งผ่านเวลาหมดอายุ (เป็นวินาที นับจากเวลาที่มีการดึงข้อมูล) ไปยังไลบรารีตามที่แสดงในตัวอย่าง
  • SERVER_TOKEN_URL ขึ้นอยู่กับการติดตั้งใช้งานแบ็กเอนด์ URL ต่อไปนี้คือ URL สำหรับตัวอย่างแบ็กเอนด์ของแอป
    • https://SERVER_URL/token/delivery_driver/DELIVERY_VEHICLE_ID
    • https://SERVER_URL/token/delivery_consumer/TRACKING_ID
    • https://SERVER_URL/token/fleet_reader

โหลดแผนที่จาก HTML

ตัวอย่างต่อไปนี้แสดงวิธีโหลดไลบรารีการแชร์เส้นทางการท่องเว็บของ JavaScript จาก URL ที่ระบุ พารามิเตอร์ callback จะทํางานฟังก์ชัน initMap หลังจากโหลด API แอตทริบิวต์ defer ช่วยให้เบราว์เซอร์แสดงผลส่วนที่เหลือของหน้าเว็บต่อไปได้ขณะที่ API โหลด

<script src="https://maps.googleapis.com/maps/api/js?key=YOUR_API_KEY&callback=initMap&libraries=journeySharing" defer></script>

ติดตามยานพาหนะที่นำส่งสินค้า

ส่วนนี้จะแสดงวิธีใช้ไลบรารี JavaScript การติดตามยานพาหนะ เพื่อติดตามยานพาหนะที่นำส่ง อย่าลืมโหลดไลบรารีจากฟังก์ชันเรียกกลับที่ระบุในแท็กสคริปต์ก่อนที่จะเรียกใช้โค้ด

สร้างอินสแตนซ์ผู้ให้บริการตำแหน่งรถส่งของ

JavaScript Fleet Tracking Library กำหนดผู้ให้บริการตำแหน่งสำหรับ Fleet Engine Deliveries API ไว้ล่วงหน้า ใช้รหัสโปรเจ็กต์และการอ้างอิงโรงงานโทเค็นเพื่อสร้างอินสแตนซ์

JavaScript

locationProvider =
    new google.maps.journeySharing
        .FleetEngineDeliveryVehicleLocationProvider({
          projectId,
          authTokenFetcher,

          // Optionally, you may specify 
          // deliveryVehicleId to immediately start
          // tracking.
          deliveryVehicleId: 'your-delivery-id',
});

TypeScript

locationProvider =
    new google.maps.journeySharing
        .FleetEngineDeliveryVehicleLocationProvider({
          projectId,
          authTokenFetcher,

          // Optionally, you may specify
          // deliveryVehicleId to immediately start
          // tracking.
          deliveryVehicleId: 'your-delivery-id',
});

เริ่มต้นมุมมองแผนที่

หลังจากโหลดไลบรารีการแชร์เส้นทางการท่องเว็บแล้ว ให้เริ่มต้นมุมมองแผนที่ แล้วเพิ่มลงในหน้า HTML หน้าเว็บของคุณควรมีองค์ประกอบ <div> ที่มีมุมมองแผนที่ องค์ประกอบ <div> มีชื่อว่า map_canvas ในตัวอย่างด้านล่าง

JavaScript

const mapView = new 
    google.maps.journeySharing.JourneySharingMapView({
  element: document.getElementById('map_canvas'), 
  locationProviders: [locationProvider],
  // Styling customizations; see below.
  vehicleMarkerSetup: vehicleMarkerSetup,
  anticipatedRoutePolylineSetup:
      anticipatedRoutePolylineSetup,
  // Any undefined styling options will use defaults.
});

// If you did not specify a delivery vehicle ID in the 
// location provider constructor, you may do so here.
// Location tracking will start as soon as this is set.
locationProvider.deliveryVehicleId 
                        = 'your-delivery-vehicle-id';

// Give the map an initial viewport to allow it to 
// initialize; otherwise the 'ready' event above may 
// not fire. The user also has access to the mapView
// object to customize as they wish.
mapView.map.setCenter('Times Square, New York, NY');
mapView.map.setZoom(14);

TypeScript

const mapView = new 
    google.maps.journeySharing.JourneySharingMapView({
  element: document.getElementById('map_canvas'),
  locationProviders: [locationProvider],
  // Styling customizations; see below.
  vehicleMarkerSetup: vehicleMarkerSetup,
  anticipatedRoutePolylineSetup:
      anticipatedRoutePolylineSetup,
  // Any undefined styling options will use defaults.
});

// If you did not specify a delivery vehicle ID in the 
// location provider constructor, you may do so here.
// Location tracking will start as soon as this is set.
locationProvider.deliveryVehicleId 
                        = 'your-delivery-vehicle-id';

// Give the map an initial viewport to allow it to 
// initialize; otherwise the 'ready' event above may 
// not fire. The user also has access to the mapView 
// object to customize as they wish.
mapView.map.setCenter('Times Square, New York, NY');
mapView.map.setZoom(14);

ฟังเหตุการณ์การเปลี่ยนแปลง

คุณเรียกข้อมูลเมตาเกี่ยวกับงานจากออบเจ็กต์ deliveryVehicle ได้โดยใช้ผู้ให้บริการตำแหน่ง ข้อมูลเมตาจะระบุเวลาถึงโดยประมาณและระยะทางที่เหลืออยู่ก่อนถึงเวลารับหรือส่งคืนรถคันถัดไป การเปลี่ยนแปลงข้อมูลเมตาจะทำให้เกิดเหตุการณ์ update ตัวอย่างต่อไปนี้แสดงวิธีฟังเหตุการณ์การเปลี่ยนแปลงเหล่านี้

JavaScript

locationProvider.addListener('update', e => {
  // e.deliveryVehicle contains data that may be        
  // useful to the rest of the UI.  
  if (e.deliveryVehicle) {
    console.log(e.deliveryVehicle.remainingDuration);
  }
});

TypeScript

locationProvider.addListener('update',
    (e: google.maps.journeySharing.FleetEngineDeliveryVehicleLocationProviderUpdateEvent) => {
  // e.deliveryVehicle contains data that may be
  // useful to the rest of the UI.
  if (e.deliveryVehicle) {
    console.log(e.deliveryVehicle.remainingDuration);
  }
});

ฟังข้อผิดพลาด

ข้อผิดพลาดที่เกิดขึ้นแบบไม่พร้อมกันจากการส่งคำขอข้อมูลยานพาหนะที่นำส่งจะทำให้เกิดเหตุการณ์ข้อผิดพลาด ตัวอย่างต่อไปนี้แสดงวิธีติดตามเหตุการณ์เหล่านี้เพื่อจัดการกับข้อผิดพลาด

JavaScript

locationProvider.addListener('error', e => {
  // e.error is the error that triggered the event.
  console.error(e.error);
});

TypeScript

locationProvider.addListener('error', (e: google.maps.ErrorEvent) => {
  // e.error is the error that triggered the event.
  console.error(e.error);
});

หยุดติดตาม

หากต้องการหยุดผู้ให้บริการตำแหน่งไม่ให้ติดตามยานพาหนะที่นำส่ง ให้นำรหัสยานพาหนะที่นำส่งออกจากผู้ให้บริการสถานที่

JavaScript

locationProvider.deliveryVehicleId = '';

TypeScript

locationProvider.deliveryVehicleId = '';

นำผู้ให้บริการตำแหน่งออกจากมุมมองแผนที่

ตัวอย่างต่อไปนี้แสดงวิธีนำผู้ให้บริการตำแหน่งออกจากมุมมองแผนที่

JavaScript

mapView.removeLocationProvider(locationProvider);

TypeScript

mapView.removeLocationProvider(locationProvider);

ดูกลุ่มอุปกรณ์การนำส่ง

ส่วนนี้จะแสดงวิธีใช้ไลบรารีการแชร์เส้นทางการท่องเว็บของ JavaScript เพื่อดูกลุ่มการส่ง อย่าลืมโหลดไลบรารีจากฟังก์ชันเรียกกลับที่ระบุในแท็กสคริปต์ก่อนที่จะเรียกใช้โค้ด

สร้างอินสแตนซ์ผู้ให้บริการตำแหน่งยานพาหนะจัดส่ง

JavaScript Fleet Tracking Library กำหนดผู้ให้บริการตำแหน่งที่ดึงข้อมูลยานพาหนะหลายคันจาก FleetEngine Deliveries API ล่วงหน้า ใช้รหัสโปรเจ็กต์ รวมทั้งการอ้างอิงถึงตัวเรียกโทเค็นเพื่อสร้างอินสแตนซ์

JavaScript

locationProvider =
    new google.maps.journeySharing
        .FleetEngineDeliveryFleetLocationProvider({
          projectId,
          authTokenFetcher,

          // Optionally, specify location bounds to
          // limit which delivery vehicles are
          // retrieved and immediately start tracking.
          locationRestriction: {
            north: 37.3,
            east: -121.8,
            south: 37.1,
            west: -122,
          },
          // Optionally, specify a filter to limit
          // which delivery vehicles are retrieved.
          deliveryVehicleFilter:
            'attributes.foo = "bar" AND attributes.baz = "qux"',
        });

TypeScript

locationProvider =
    new google.maps.journeySharing
        .FleetEngineDeliveryFleetLocationProvider({
          projectId,
          authTokenFetcher,

          // Optionally, specify location bounds to
          // limit which delivery vehicles are
          // retrieved and immediately start tracking.
          locationRestriction: {
            north: 37.3,
            east: -121.8,
            south: 37.1,
            west: -122,
          },
          // Optionally, specify a filter to limit
          // which delivery vehicles are retrieved.
          deliveryVehicleFilter:
            'attributes.foo = "bar" AND attributes.baz = "qux"',
        });

deliveryVehicleFilter ระบุคำค้นหาที่ใช้เพื่อกรองยานพาหนะที่แสดงในแผนที่ ระบบจะส่งตัวกรองนี้ไปยัง Fleet Engine โดยตรง ดูรูปแบบที่รองรับได้ที่ ListDeliveryVehiclesRequest.filter

locationRestriction จำกัดพื้นที่ที่จะแสดงยานพาหนะบนแผนที่ อีกทั้งยังเป็นการควบคุมว่าจะใช้งานการติดตามตําแหน่งหรือไม่ การติดตามตำแหน่งจะไม่เริ่มขึ้นจนกว่าจะมีการตั้งค่านี้

เมื่อสร้างผู้ให้บริการตำแหน่งแล้ว ให้เริ่มต้นมุมมองแผนที่

ตั้งค่าการจำกัดตำแหน่งโดยใช้วิวพอร์ตของแผนที่

สามารถกำหนดค่าขอบเขต locationRestriction ให้ตรงกับพื้นที่ปัจจุบัน ในมุมมองแผนที่

JavaScript

google.maps.event.addListenerOnce(
  mapView.map, 'bounds_changed', () => {
    const bounds = mapView.map.getBounds();
    if (bounds) {
      // If you did not specify a location restriction in the
      // location provider constructor, you may do so here.
      // Location tracking will start as soon as this is set.
      locationProvider.locationRestriction = bounds;
    }
  });

TypeScript

google.maps.event.addListenerOnce(
  mapView.map, 'bounds_changed', () => {
    const bounds = mapView.map.getBounds();
    if (bounds) {
      // If you did not specify a location restriction in the
      // location provider constructor, you may do so here.
      // Location tracking will start as soon as this is set.
      locationProvider.locationRestriction = bounds;
    }
  });

ฟังเหตุการณ์การเปลี่ยนแปลง

คุณจะเรียกข้อมูลเมตาเกี่ยวกับกองยานจากออบเจ็กต์ deliveryVehicles ได้โดยใช้ผู้ให้บริการตำแหน่ง ข้อมูลเมตามีพร็อพเพอร์ตี้ของรถยนต์ เช่น สถานะการนำทาง ระยะทางที่เหลืออยู่ และแอตทริบิวต์ที่กำหนดเอง ดูเอกสารอ้างอิงสำหรับรายละเอียดเพิ่มเติม การเปลี่ยนแปลงข้อมูลเมตาจะทริกเกอร์เหตุการณ์ update ตัวอย่างต่อไปนี้แสดงวิธีติดตามเหตุการณ์การเปลี่ยนแปลงเหล่านี้

JavaScript

locationProvider.addListener('update', e => {
  // e.deliveryVehicles contains data that may be
  // useful to the rest of the UI.
  if (e.deliveryVehicles) {
    for (vehicle of e.deliveryVehicles) {
      console.log(vehicle.remainingDistanceMeters);
    }
  }
});

TypeScript

locationProvider.addListener('update',
    (e: google.maps.journeySharing.FleetEngineDeliveryFleetLocationProviderUpdateEvent) => {
  // e.deliveryVehicles contains data that may be
  // useful to the rest of the UI.
  if (e.deliveryVehicles) {
    for (vehicle of e.deliveryVehicles) {
      console.log(vehicle.remainingDistanceMeters);
    }
  }
});

ฟังข้อผิดพลาด

ข้อผิดพลาดที่เกิดขึ้นแบบอะซิงโครนัสจากการส่งคำขอข้อมูลกลุ่มการส่ง จะทำให้มีเหตุการณ์ข้อผิดพลาดเกิดขึ้น สำหรับตัวอย่างแสดงวิธีฟังเหตุการณ์เหล่านี้ โปรดดูฟังข้อผิดพลาด

หยุดติดตาม

หากต้องการหยุดผู้ให้บริการตำแหน่งไม่ให้ติดตามกองยานพาหนะ ให้กำหนดขอบเขตของผู้ให้บริการตำแหน่งเป็น Null

JavaScript

locationProvider.locationRestriction = null;

TypeScript

locationProvider.locationRestriction = null;

นำผู้ให้บริการตำแหน่งออกจากมุมมองแผนที่

ตัวอย่างต่อไปนี้แสดงวิธีนำผู้ให้บริการตำแหน่งออกจากมุมมองแผนที่

JavaScript

mapView.removeLocationProvider(locationProvider);

TypeScript

mapView.removeLocationProvider(locationProvider);

ติดตามยานพาหนะที่ขนส่งขณะดูยานพาหนะที่นำส่ง

ขณะดูยานพาหนะ คุณสามารถแสดงเส้นทางและงานที่กำลังจะมาถึงสำหรับยานพาหนะที่นำส่งสินค้าหนึ่งๆ ได้ ในการดำเนินการนี้ ให้สร้างอินสแตนซ์ทั้งผู้ให้บริการนำส่งตำแหน่งยานพาหนะ และผู้ให้บริการตำแหน่งยานพาหนะสำหรับนำส่ง แล้วเพิ่มทั้ง 2 รายลงในมุมมองแผนที่

JavaScript

deliveryFleetLocationProvider =
    new google.maps.journeySharing
        .FleetEngineDeliveryFleetLocationProvider({
          projectId,
          authTokenFetcher,

          // Optionally, specify location bounds to
          // limit which delivery vehicles are
          // retrieved and immediately start tracking.
          locationRestriction: {
            north: 37.3,
            east: -121.8,
            south: 37.1,
            west: -122,
          },
          // Optionally, specify a filter to limit
          // which delivery vehicles are retrieved.
          deliveryVehicleFilter:
            'attributes.foo = "bar" AND attributes.baz = "qux"',
        });

deliveryVehicleLocationProvider =
    new google.maps.journeySharing
        .FleetEngineDeliveryVehicleLocationProvider({
          projectId,
          authTokenFetcher
        });

const mapView = new
    google.maps.journeySharing.JourneySharingMapView({
  element: document.getElementById('map_canvas'),
  locationProviders: [
    deliveryFleetLocationProvider,
    deliveryVehicleLocationProvider,
  ],
  // Any other options
});

TypeScript

deliveryFleetLocationProvider =
    new google.maps.journeySharing
        .FleetEngineDeliveryFleetLocationProvider({
          projectId,
          authTokenFetcher,

          // Optionally, specify location bounds to
          // limit which delivery vehicles are
          // retrieved and immediately start tracking.
          locationRestriction: {
            north: 37.3,
            east: -121.8,
            south: 37.1,
            west: -122,
          },
          // Optionally, specify a filter to limit
          // which delivery vehicles are retrieved.
          deliveryVehicleFilter:
            'attributes.foo = "bar" AND attributes.baz = "qux"',
        });

deliveryVehicleLocationProvider =
    new google.maps.journeySharing
        .FleetEngineDeliveryVehicleLocationProvider({
          projectId,
          authTokenFetcher
        });

const mapView = new
    google.maps.journeySharing.JourneySharingMapView({
  element: document.getElementById('map_canvas'),
  locationProviders: [
    deliveryFleetLocationProvider,
    deliveryVehicleLocationProvider,
  ],
  // Any other options
});

ผู้ให้บริการตำแหน่งยานพาหนะที่ขนส่งจะเริ่มแสดงยานพาหนะที่นำส่งสินค้าบนแผนที่ ใช้การปรับแต่งเครื่องหมายระบุตำแหน่งเพื่อให้ผู้ให้บริการตำแหน่งยานพาหนะนำส่งติดตามยานพาหนะนำส่งเมื่อมีการคลิกเครื่องหมายระบุตำแหน่งยานพาหนะ ดังนี้

JavaScript

// Specify the customization function either separately, or as a field in
// the options for the delivery fleet location provider constructor.
deliveryFleetLocationProvider.deliveryVehicleMarkerCustomization =
  (params) => {
    if (params.isNew) {
      params.marker.addListener('click', () => {
        // params.vehicle.name follows the format
        // "providers/{provider}/deliveryVehicles/{vehicleId}".
        // Only the vehicleId portion is used for the delivery vehicle
        // location provider.
        deliveryVehicleLocationProvider.deliveryVehicleId =
            params.vehicle.name.split('/').pop();
      });
    }
  };

TypeScript

// Specify the customization function either separately, or as a field in
// the options for the delivery fleet location provider constructor.
deliveryFleetLocationProvider.deliveryVehicleMarkerCustomization =
  (params: google.maps.journeySharing.DeliveryVehicleMarkerCustomizationFunctionParams) => {
    if (params.isNew) {
      params.marker.addListener('click', () => {
        // params.vehicle.name follows the format
        // "providers/{provider}/deliveryVehicles/{vehicleId}".
        // Only the vehicleId portion is used for the delivery vehicle
        // location provider.
        deliveryVehicleLocationProvider.deliveryVehicleId =
            params.vehicle.name.split('/').pop();
      });
    }
  };

ซ่อนเครื่องหมายจากผู้ให้บริการตำแหน่งยานพาหนะที่นำส่งเพื่อไม่ให้แสดงภาพเครื่องหมาย 2 ตัวสำหรับรถคันเดียวกัน

JavaScript

// Specify the customization function either separately, or as a field in 
// the options for the delivery vehicle location provider constructor.
deliveryVehicleLocationProvider.deliveryVehicleMarkerCustomization =
  (params) => {
    if (params.isNew) {
      params.marker.setVisible(false);
    }
  };

TypeScript

// Specify the customization function either separately, or as a field in
// the options for the delivery vehicle location provider constructor.
deliveryVehicleLocationProvider.deliveryVehicleMarkerCustomization =
  (params: deliveryVehicleMarkerCustomizationFunctionParams) => {
    if (params.isNew) {
      params.marker.setVisible(false);
    }
  };

ปรับแต่งรูปลักษณ์และความรู้สึกของแผนที่ฐาน

หากต้องการปรับแต่งรูปลักษณ์ของคอมโพเนนต์แผนที่ ให้จัดรูปแบบแผนที่โดยใช้เครื่องมือในระบบคลาวด์หรือโดยตั้งค่าตัวเลือกในโค้ดโดยตรง

ใช้การจัดรูปแบบแผนที่ในระบบคลาวด์

การจัดรูปแบบแผนที่ในระบบคลาวด์ ช่วยให้คุณสามารถสร้างและแก้ไขรูปแบบแผนที่สำหรับแอปใดก็ตามที่ใช้ Google Maps จากคอนโซล Google Cloud โดยไม่ต้องเปลี่ยนแปลงโค้ด ระบบจะบันทึกรูปแบบแผนที่เป็นรหัสแผนที่ในโปรเจ็กต์ที่อยู่ในระบบคลาวด์ หากต้องการใช้รูปแบบกับแผนที่การติดตามกลุ่ม JavaScript ให้ระบุ mapId เมื่อสร้าง JourneySharingMapView เปลี่ยนแปลงหรือเพิ่มช่อง mapId ไม่ได้หลังจากสร้างอินสแตนซ์ JourneySharingMapView แล้ว ตัวอย่างต่อไปนี้แสดงวิธีเปิดใช้รูปแบบแผนที่ที่สร้างไว้ก่อนหน้านี้ด้วยรหัสแผนที่

JavaScript

const mapView = new google.maps.journeySharing.JourneySharingMapView({
  element: document.getElementById('map_canvas'),
  locationProviders: [locationProvider],
  mapOptions: {
    mapId: 'YOUR_MAP_ID'
  }
});

TypeScript

const mapView = new google.maps.journeySharing.JourneySharingMapView({
  element: document.getElementById('map_canvas'),
  locationProviders: [locationProvider],
  mapOptions: {
    mapId: 'YOUR_MAP_ID'
  }
});

ใช้การจัดรูปแบบแผนที่แบบโค้ด

การปรับแต่งการจัดรูปแบบแผนที่อีกวิธีหนึ่งคือการตั้งค่า mapOptions เมื่อคุณสร้าง JourneySharingMapView

JavaScript

const mapView = new google.maps.journeySharing.JourneySharingMapView({
  element: document.getElementById('map_canvas'),
  locationProviders: [locationProvider],
  mapOptions: {
    styles: [
      {
        "featureType": "road.arterial",
        "elementType": "geometry",
        "stylers": [
          { "color": "#CCFFFF" }
        ]
      }
    ]
  }
});

TypeScript

const mapView = new google.maps.journeySharing.JourneySharingMapView({
  element: document.getElementById('map_canvas'),
  locationProviders: [locationProvider],
  mapOptions: {
    styles: [
      {
        "featureType": "road.arterial",
        "elementType": "geometry",
        "stylers": [
          { "color": "#CCFFFF" }
        ]
      }
    ]
  }
});

ใช้การปรับแต่งเครื่องหมาย

ไลบรารีการติดตามกลุ่ม JavaScript ของ JavaScript จะช่วยให้คุณปรับแต่งรูปลักษณ์ของเครื่องหมายที่เพิ่มลงในแผนที่ได้ คุณสามารถทำเช่นนี้ได้โดยระบุการกำหนดค่าเครื่องหมาย ซึ่งไลบรารีการติดตามยานพาหนะจะนำมาใช้ก่อนเพิ่มเครื่องหมายลงในแผนที่ และเมื่อมีการอัปเดตเครื่องหมายทุกครั้ง

การปรับแต่งที่ง่ายที่สุดคือการระบุออบเจ็กต์ MarkerOptions ซึ่งจะนำไปใช้กับเครื่องหมายทั้งหมดในประเภทเดียวกัน การเปลี่ยนแปลงที่ระบุในออบเจ็กต์จะมีผลหลังจากสร้างเครื่องหมายแต่ละตัวโดยเขียนทับตัวเลือกเริ่มต้น

ตัวเลือกขั้นสูงขึ้นคือการระบุฟังก์ชันการปรับแต่ง ฟังก์ชันการปรับแต่งทำให้สามารถจัดรูปแบบเครื่องหมายโดยอิงตามข้อมูลได้ รวมถึงเพิ่มการโต้ตอบลงในเครื่องหมาย เช่น การจัดการคลิก กล่าวคือ การติดตามยานพาหนะจะส่งข้อมูลไปยังฟังก์ชันการปรับแต่งเกี่ยวกับประเภทของวัตถุที่เครื่องหมายแสดง เช่น ยานพาหนะ จุดแวะ หรืองาน ซึ่งจะทำให้การจัดรูปแบบเครื่องหมายเปลี่ยนแปลงตามสถานะปัจจุบันขององค์ประกอบตัวทำเครื่องหมาย เช่น จำนวนจุดแวะพักที่เหลืออยู่หรือประเภทงาน คุณยังสามารถเชื่อมโยงกับข้อมูลจากแหล่งที่มาภายนอก Fleet Engine และจัดรูปแบบเครื่องหมายโดยอาศัยข้อมูลดังกล่าวได้

นอกจากนี้ คุณยังสามารถใช้ฟังก์ชันการปรับแต่งเพื่อกรองการแสดงเครื่องหมายได้ด้วย หากต้องการใช้วิธีนี้ ให้เรียก setVisible(false) บนเครื่องหมาย

อย่างไรก็ตาม เนื่องด้วยเหตุผลด้านประสิทธิภาพ เราขอแนะนำให้คุณกรองด้วยการกรองแบบเนทีฟในผู้ให้บริการตำแหน่ง เช่น FleetEngineDeliveryFleetLocationProvider.deliveryVehicleFilter แต่หากต้องการฟังก์ชันการกรองเพิ่มเติม คุณก็ใช้ตัวกรองโดยใช้ฟังก์ชันการปรับแต่งได้

ไลบรารีการติดตามยานพาหนะมีพารามิเตอร์การปรับแต่งต่อไปนี้

เปลี่ยนรูปแบบของเครื่องหมายโดยใช้ MarkerOptions

ตัวอย่างต่อไปนี้แสดงวิธีกำหนดค่าการจัดรูปแบบของเครื่องหมายยานพาหนะด้วยออบเจ็กต์ MarkerOptions ทำตามรูปแบบนี้เพื่อปรับแต่งการจัดรูปแบบของเครื่องหมายโดยใช้พารามิเตอร์การปรับแต่งเครื่องหมายที่แสดงด้านบน

JavaScript

deliveryVehicleMarkerCustomization = {
  cursor: 'grab'
};

TypeScript

deliveryVehicleMarkerCustomization = {
  cursor: 'grab'
};

เปลี่ยนแปลงรูปแบบของเครื่องหมายโดยใช้ฟังก์ชันการปรับแต่ง

ตัวอย่างต่อไปนี้แสดงวิธีกำหนดค่าการจัดรูปแบบของเครื่องหมายยานพาหนะ ทำตามรูปแบบนี้เพื่อปรับแต่งการจัดรูปแบบของเครื่องหมายโดยใช้พารามิเตอร์การกำหนดค่าเครื่องหมายที่แสดงด้านบน

JavaScript

deliveryVehicleMarkerCustomization =
  (params) => {
    var stopsLeft = params.vehicle.remainingVehicleJourneySegments.length;
    params.marker.setLabel(`${stopsLeft}`);
  };

TypeScript

deliveryVehicleMarkerCustomization =
  (params: DeliveryVehicleMarkerCustomizationFunctionParams) => {
    var stopsLeft = params.vehicle.remainingVehicleJourneySegments.length;
    params.marker.setLabel(`${stopsLeft}`);
  };

เพิ่มการจัดการคลิกลงในเครื่องหมาย

ตัวอย่างต่อไปนี้แสดงวิธีการเพิ่มการจัดการคลิกลงในเครื่องหมายยานพาหนะ ทำตามรูปแบบนี้เพื่อเพิ่มการจัดการคลิกลงในเครื่องหมายโดยใช้พารามิเตอร์การกำหนดค่าเครื่องหมายที่แสดงด้านบน

JavaScript

deliveryVehicleMarkerCustomization =
  (params) => {
    if (params.isNew) {
      params.marker.addListener('click', () => {
        // Perform desired action.
      });
    }
  };

TypeScript

deliveryVehicleMarkerCustomization =
  (params: DeliveryVehicleMarkerCustomizationFunctionParams) => {
    if (params.isNew) {
      params.marker.addListener('click', () => {
        // Perform desired action.
      });
    }
  };

กรองเครื่องหมายที่ปรากฏ

ตัวอย่างต่อไปนี้แสดงวิธีกรองเครื่องหมายยานพาหนะที่จะแสดง ทำตามรูปแบบนี้เพื่อกรองเครื่องหมายโดยใช้พารามิเตอร์การปรับแต่งเครื่องหมายที่แสดงข้างต้น

JavaScript

deliveryVehicleMarkerCustomization =
  (params) => {
    var stopsLeft = params.vehicle.remainingVehicleJourneySegments.length;
    if (stopsLeft > 10) {
      params.marker.setVisible(false);
    }
  };

TypeScript

deliveryVehicleMarkerCustomization =
  (params: DeliveryVehicleMarkerCustomizationFunctionParams) => {
    var stopsLeft = params.vehicle.remainingVehicleJourneySegments.length;
    if (stopsLeft > 10) {
      params.marker.setVisible(false);
    }
  };

ใช้การปรับแต่งเส้นประกอบเมื่อติดตามยานพาหนะที่นำส่ง

ด้วยไลบรารี JavaScript การติดตามยานพาหนะ คุณยังสามารถปรับแต่งรูปลักษณ์และความรู้สึกของเส้นทางรถติดตามบนแผนที่ได้อีกด้วย ไลบรารีจะสร้างออบเจ็กต์ google.maps.Polyline สำหรับพิกัดแต่ละคู่ในเส้นทางที่ใช้งานอยู่หรือที่เหลืออยู่ของรถ คุณจัดรูปแบบวัตถุ Polyline ได้โดยการระบุการปรับแต่งเส้นประกอบ จากนั้นไลบรารีจะใช้การกำหนดค่าเหล่านี้ใน 2 สถานการณ์คือ ก่อนเพิ่มออบเจ็กต์ลงในแผนที่ และเมื่อข้อมูลที่ใช้สำหรับออบเจ็กต์มีการเปลี่ยนแปลง

คุณระบุชุดของ PolylineOptions เพื่อใช้กับออบเจ็กต์ Polyline ที่ตรงกันทั้งหมดเมื่อมีการสร้างหรืออัปเดตได้ เช่นเดียวกับการปรับแต่งเครื่องหมาย

นอกจากนั้น คุณสามารถระบุฟังก์ชันการปรับแต่งได้ด้วย ฟังก์ชันการปรับแต่งช่วยให้สามารถจัดรูปแบบวัตถุทีละรายการตามข้อมูลที่ส่งโดย Fleet Engine ฟังก์ชันดังกล่าวจะเปลี่ยนสไตล์ของวัตถุแต่ละชิ้นตามสถานะของยานพาหนะในปัจจุบันได้ เช่น การทำให้วัตถุ Polyline เป็นเฉดสีที่เข้มขึ้น หรือปรับให้หนาขึ้นเมื่อยานพาหนะเคลื่อนไหวช้าลง คุณยังผนวกกับแหล่งที่มาภายนอก Fleet Engine และจัดรูปแบบออบเจ็กต์ Polyline โดยอิงตามข้อมูลดังกล่าวได้อีกด้วย

คุณระบุการปรับแต่งได้โดยใช้พารามิเตอร์ที่ให้ไว้ใน FleetEngineDeliveryVehicleLocationProviderOptions คุณสามารถตั้งค่าการกำหนดค่าสำหรับสถานะเส้นทางต่างๆ ในเส้นทางของรถได้ กล่าวคือ เดินทางแล้ว เดินทางแล้ว หรือยังไม่ได้เดินทาง พารามิเตอร์มีดังนี้

เปลี่ยนการจัดรูปแบบของวัตถุ Polyline โดยใช้ PolylineOptions

ตัวอย่างต่อไปนี้แสดงวิธีกำหนดค่าการจัดรูปแบบสำหรับออบเจ็กต์ Polyline ด้วย PolylineOptions ทำตามรูปแบบนี้เพื่อปรับแต่งการจัดรูปแบบของออบเจ็กต์ Polyline โดยใช้การปรับแต่งเส้นประกอบใดก็ได้ที่ระบุไว้ก่อนหน้านี้

JavaScript

activePolylineCustomization = {
  strokeWidth: 5,
  strokeColor: 'black',
};

TypeScript

activePolylineCustomization = {
  strokeWidth: 5,
  strokeColor: 'black',
};

เปลี่ยนการจัดรูปแบบของวัตถุ Polyline โดยใช้ฟังก์ชันการปรับแต่ง

ตัวอย่างต่อไปนี้แสดงวิธีกำหนดค่าการจัดรูปแบบสำหรับออบเจ็กต์ Polyline ที่ใช้งานอยู่โดยใช้ฟังก์ชันการปรับแต่ง ทำตามรูปแบบนี้เพื่อปรับแต่งสไตล์ของออบเจ็กต์ Polyline โดยใช้พารามิเตอร์การปรับแต่งโพลีไลน์ใดก็ได้ที่ระบุไว้ก่อนหน้านี้

JavaScript

// Color the Polyline objects in green if the vehicle is nearby.
activePolylineCustomization =
  (params) => {
    const distance = params.deliveryVehicle.remainingDistanceMeters;
    if (distance < 1000) {

      // params.polylines contains an ordered list of Polyline objects for
      // the path.
      for (const polylineObject of params.polylines) {
        polylineObject.setOptions({strokeColor: 'green'});
      }
    }
  };

TypeScript

// Color the Polyline objects in green if the vehicle is nearby.
activePolylineCustomization =
  (params: DeliveryVehiclePolylineCustomizationFunctionParams) => {
    const distance = params.deliveryVehicle.remainingDistanceMeters;
    if (distance < 1000) {

      // params.polylines contains an ordered list of Polyline objects for
      // the path.
      for (const polylineObject of params.polylines) {
        polylineObject.setOptions({strokeColor: 'green'});
      }
    }
  };

ควบคุมการมองเห็นออบเจ็กต์ Polyline รายการ

โดยค่าเริ่มต้นจะแสดงวัตถุทั้งหมด Polyline รายการ หากต้องการซ่อนออบเจ็กต์ Polyline ให้ตั้งค่าพร็อพเพอร์ตี้ visible ดังนี้

JavaScript

remainingPolylineCustomization = {visible: false};

TypeScript

remainingPolylineCustomization = {visible: false};

แสดง InfoWindow สำหรับยานพาหนะหรือเครื่องหมายระบุตำแหน่ง

คุณสามารถใช้ InfoWindow เพื่อแสดงข้อมูลเพิ่มเติมเกี่ยวกับรถหรือเครื่องหมายระบุตำแหน่งได้

ตัวอย่างต่อไปนี้แสดงวิธีสร้าง InfoWindow และติดเข้ากับเครื่องหมายบนยานพาหนะ

JavaScript

// 1. Create an info window.
const infoWindow = new google.maps.InfoWindow(
    {disableAutoPan: true});

// (Assumes a delivery vehicle location provider.)
locationProvider.addListener('update', e => {
  if (e.deliveryVehicle) {
    const distance = 
           e.deliveryVehicle.remainingDistanceMeters;
    infoWindow.setContent(
        `Your vehicle is ${distance}m away from the next task.`);

    // 2. Attach the info window to a vehicle marker.   
    // This property can return multiple markers.
    const marker = mapView.vehicleMarkers[0];
    infoWindow.open(mapView.map, marker);
  }
});

// 3. Close the info window.
infoWindow.close();

TypeScript

// 1. Create an info window.
const infoWindow = new google.maps.InfoWindow(
    {disableAutoPan: true});

// (Assumes a delivery vehicle location provider.)
locationProvider.addListener('update', (e: google.maps.journeySharing.FleetEngineDeliveryVehicleLocationProviderUpdateEvent) => {
  if (e.deliveryVehicle) {
    const distance = 
           e.deliveryVehicle.remainingDistanceMeters;
    infoWindow.setContent(
        `Your vehicle is ${distance}m away from the next task.`);

    // 2. Attach the info window to a vehicle marker.   
    // This property can return multiple markers.
    const marker = mapView.vehicleMarkers[0];
    infoWindow.open(mapView.map, marker);
  }
});

// 3. Close the info window.
infoWindow.close();

ปิดใช้การปรับให้พอดีอัตโนมัติ

คุณสามารถหยุดแผนที่ไม่ให้ปรับวิวพอร์ตเข้ากับยานพาหนะและเส้นทางที่คาดไว้โดยอัตโนมัติได้โดยปิดใช้การปรับพอดีอัตโนมัติ ตัวอย่างต่อไปนี้แสดงวิธีปิดใช้การปรับพอดีอัตโนมัติเมื่อคุณกำหนดค่ามุมมองแผนที่การแชร์เส้นทาง

JavaScript

const mapView = new
    google.maps.journeySharing.JourneySharingMapView({
  element: document.getElementById('map_canvas'),
  locationProviders: [locationProvider],
  automaticViewportMode:
      google.maps.journeySharing
          .AutomaticViewportMode.NONE,
  ...
});

TypeScript

const mapView = new
    google.maps.journeySharing.JourneySharingMapView({
  element: document.getElementById('map_canvas'),
  locationProviders: [locationProvider],
  automaticViewportMode:
      google.maps.journeySharing
          .AutomaticViewportMode.NONE,
  ...
});

แทนที่แผนที่ที่มีอยู่

คุณสามารถแทนที่แผนที่ที่มีอยู่ซึ่งมีเครื่องหมายหรือการปรับแต่งอื่นๆ โดยไม่สูญเสียการปรับแต่งเหล่านั้น

ตัวอย่างเช่น สมมติว่าคุณมีหน้าเว็บที่มีเอนทิตี google.maps.Map มาตรฐานที่แสดงเครื่องหมาย

<!DOCTYPE html>
<html>
  <head>
    <style>
       /* Set the size of the div element that contains the map */
      #map {
        height: 400px;  /* The height is 400 pixels */
        width: 100%;  /* The width is the width of the web page */
       }
    </style>
  </head>
  <body>
    <h3>My Google Maps Demo</h3>
    <!--The div element for the map -->
    <div id="map"></div>
    <script>
// Initialize and add the map
function initMap() {
  // The location of Uluru
  var uluru = {lat: -25.344, lng: 131.036};
  // The map, initially centered at Mountain View, CA.
  var map = new google.maps.Map(document.getElementById('map'));
  map.setOptions({center: {lat: 37.424069, lng: -122.0916944}, zoom: 14});

  // The marker, now positioned at Uluru
  var marker = new google.maps.Marker({position: uluru, map: map});
}
    </script>
    <!-- Load the API from the specified URL.
       * The async attribute allows the browser to render the page while the API loads.
       * The key parameter will contain your own API key (which is not needed for this tutorial).
       * The callback parameter executes the initMap() function.
    -->
    <script defer src="https://maps.googleapis.com/maps/api/js?key=YOUR_API_KEY&callback=initMap">
    </script>
  </body>
</html>

วิธีเพิ่มไลบรารีการแชร์เส้นทางการท่องเว็บของ JavaScript ซึ่งรวมการติดตามยานพาหนะ

  1. เพิ่มโค้ดสำหรับต้นทางโทเค็นการตรวจสอบสิทธิ์
  2. เริ่มต้นผู้ให้บริการตำแหน่งในฟังก์ชัน initMap()
  3. เริ่มต้นมุมมองแผนที่ในฟังก์ชัน initMap() มุมมองที่มีแผนที่
  4. ย้ายการปรับแต่งไปไว้ในฟังก์ชันเรียกกลับสำหรับการเริ่มต้นมุมมองแผนที่
  5. เพิ่มไลบรารีตำแหน่งลงในตัวโหลด API

ตัวอย่างต่อไปนี้แสดงการเปลี่ยนแปลงที่ควรทำ

<!DOCTYPE html>
<html>
  <head>
    <style>
       /* Set the size of the div element that contains the map */
      #map {
        height: 400px;  /* The height is 400 pixels */
        width: 100%;  /* The width is the width of the web page */
       }
    </style>
  </head>
  <body>
    <h3>My Google Maps Demo</h3>
    <!--The div element for the map -->
    <div id="map"></div>
    <script>
let locationProvider;

// (1) Authentication Token Fetcher
function authTokenFetcher(options) {
  // options is a record containing two keys called 
  // serviceType and context. The developer should
  // generate the correct SERVER_TOKEN_URL and request
  // based on the values of these fields.
  const response = await fetch(SERVER_TOKEN_URL);
      if (!response.ok) {
        throw new Error(response.statusText);
      }
      const data = await response.json();
      return {
        token: data.Token,
        expiresInSeconds: data.ExpiresInSeconds
      };
}

// Initialize and add the map
function initMap() {
  // (2) Initialize location provider. Use FleetEngineDeliveryVehicleLocationProvider
  // as appropriate.
  locationProvider = new google.maps.journeySharing.FleetEngineDeliveryVehicleLocationProvider({
    YOUR_PROVIDER_ID,
    authTokenFetcher,
  });

  // (3) Initialize map view (which contains the map).
  const mapView = new google.maps.journeySharing.JourneySharingMapView({
    element: document.getElementById('map'),
    locationProviders: [locationProvider],
    // any styling options
  });

mapView.addListener('ready', () => {
  locationProvider.deliveryVehicleId = DELIVERY_VEHICLE_ID;

    // (4) Add customizations like before.

    // The location of Uluru
    var uluru = {lat: -25.344, lng: 131.036};
    // The map, initially centered at Mountain View, CA.
    var map = mapView.map;
    map.setOptions({center: {lat: 37.424069, lng: -122.0916944}, zoom: 14});
    // The marker, now positioned at Uluru
    var marker = new google.maps.Marker({position: uluru, map: map});
  };
}
    </script>
    <!-- Load the API from the specified URL
      * The async attribute allows the browser to render the page while the API loads
      * The key parameter will contain your own API key (which is not needed for this tutorial)
      * The callback parameter executes the initMap() function
      *
      * (5) Add the journey sharing library to the API loader, which includes Fleet Tracking functionality.
    -->
    <script defer
    src="https://maps.googleapis.com/maps/api/js?key=YOUR_API_KEY&callback=initMap&libraries=journeySharing">
    </script>
  </body>
</html>

หากคุณใช้งานยานพาหนะที่นำส่งที่มีรหัสที่ระบุใกล้กับ Uluru