Auf einer Karte den aktuellen Ort auswählen und Details einblenden
In diesem Tutorial erfahren Sie, wie Sie eine iOS-App erstellen, die den aktuellen Standort des Geräts abruft, identifiziert mögliche Standorte, fordert den Nutzer auf, den besten Treffer auszuwählen, und zeigt eine Kartenmarkierung an für den ausgewählten Standort.
Sie eignet sich für Nutzer mit Vorkenntnissen in Swift oder Objective-C und einer allgemeine Kenntnisse über Xcode. Einen Leitfaden für fortgeschrittene Nutzer Karten erstellen, lesen Sie Entwickler .
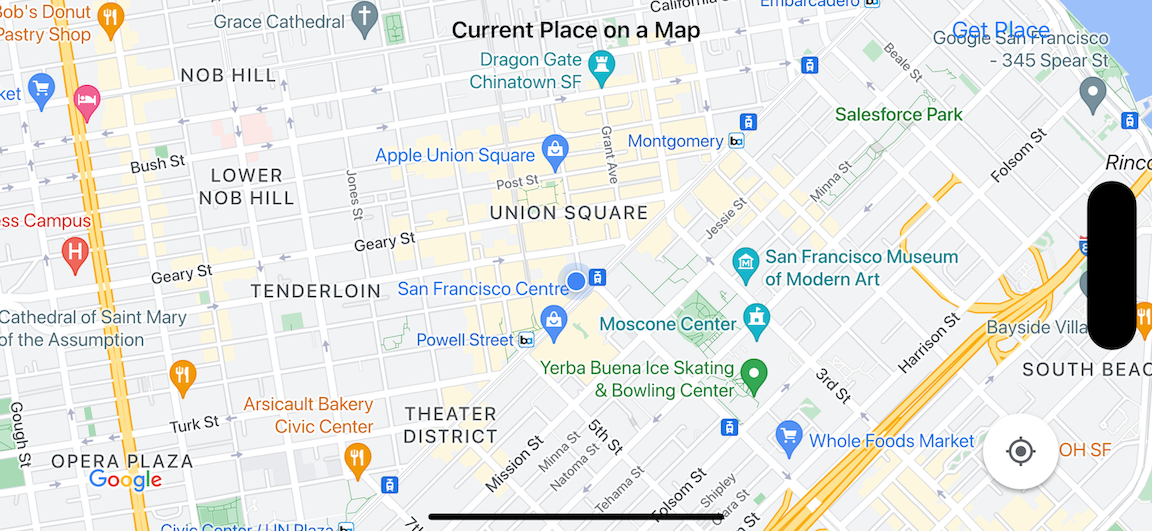
In dieser Anleitung erstellen Sie die folgende Karte. Die Kartenmarkierung befindet sich in aus San Francisco, Kalifornien, wird jedoch an den Ort verschoben, an dem sich das Gerät oder der Simulator befindet.
In dieser Anleitung wird die Methode Places SDK for iOS das Maps SDK for iOS und das Apple Core Location Framework.
Code abrufen
Klonen oder herunterladen Google Maps iOS-Beispiel-Repository von GitHub.Klicken Sie alternativ auf die folgende Schaltfläche, um den Quellcode herunterzuladen:
MapViewController
Swift
import UIKit
import GoogleMaps
import GooglePlaces

class MapViewController: UIViewController {

  var locationManager: CLLocationManager!
  var currentLocation: CLLocation?
  var mapView: GMSMapView!
  var placesClient: GMSPlacesClient!
  var preciseLocationZoomLevel: Float = 15.0
  var approximateLocationZoomLevel: Float = 10.0

  // An array to hold the list of likely places.
  var likelyPlaces: [GMSPlace] = []

  // The currently selected place.
  var selectedPlace: GMSPlace?

  // Update the map once the user has made their selection.
  @IBAction func unwindToMain(segue: UIStoryboardSegue) {
    // Clear the map.
    mapView.clear()

    // Add a marker to the map.
    if let place = selectedPlace {
      let marker = GMSMarker(position: place.coordinate)
      marker.title = selectedPlace?.name
      marker.snippet = selectedPlace?.formattedAddress
      marker.map = mapView
    }

    listLikelyPlaces()
  }

  override func viewDidLoad() {
    super.viewDidLoad()

    // Initialize the location manager.
    locationManager = CLLocationManager()
    locationManager.desiredAccuracy = kCLLocationAccuracyBest
    locationManager.requestWhenInUseAuthorization()
    locationManager.distanceFilter = 50
    locationManager.startUpdatingLocation()
    locationManager.delegate = self

    placesClient = GMSPlacesClient.shared()

    // A default location to use when location permission is not granted.
    let defaultLocation = CLLocation(latitude: -33.869405, longitude: 151.199)

    // Create a map.
    let zoomLevel = locationManager.accuracyAuthorization == .fullAccuracy ? preciseLocationZoomLevel : approximateLocationZoomLevel
    let camera = GMSCameraPosition.camera(withLatitude: defaultLocation.coordinate.latitude,
                                          longitude: defaultLocation.coordinate.longitude,
                                          zoom: zoomLevel)
    mapView = GMSMapView.map(withFrame: view.bounds, camera: camera)
    mapView.settings.myLocationButton = true
    mapView.autoresizingMask = [.flexibleWidth, .flexibleHeight]
    mapView.isMyLocationEnabled = true

    // Add the map to the view, hide it until we've got a location update.
    view.addSubview(mapView)
    mapView.isHidden = true

    listLikelyPlaces()
  }

  // Populate the array with the list of likely places.
  func listLikelyPlaces() {
    // Clean up from previous sessions.
    likelyPlaces.removeAll()

    let placeFields: GMSPlaceField = [.name, .coordinate]
    placesClient.findPlaceLikelihoodsFromCurrentLocation(withPlaceFields: placeFields) { (placeLikelihoods, error) in
      guard error == nil else {
        // TODO: Handle the error.
        print("Current Place error: \(error!.localizedDescription)")
        return
      }

      guard let placeLikelihoods = placeLikelihoods else {
        print("No places found.")
        return
      }

      // Get likely places and add to the list.
      for likelihood in placeLikelihoods {
        let place = likelihood.place
        self.likelyPlaces.append(place)
      }
    }
  }

  // Prepare the segue.
  override func prepare(for segue: UIStoryboardSegue, sender: Any?) {
    if segue.identifier == "segueToSelect" {
      if let nextViewController = segue.destination as? PlacesViewController {
        nextViewController.likelyPlaces = likelyPlaces
      }
    }
  }
}

// Delegates to handle events for the location manager.
extension MapViewController: CLLocationManagerDelegate {

  // Handle incoming location events.
  func locationManager(_ manager: CLLocationManager, didUpdateLocations locations: [CLLocation]) {
    let location: CLLocation = locations.last!
    print("Location: \(location)")

    let zoomLevel = locationManager.accuracyAuthorization == .fullAccuracy ? preciseLocationZoomLevel : approximateLocationZoomLevel
    let camera = GMSCameraPosition.camera(withLatitude: location.coordinate.latitude,
                                          longitude: location.coordinate.longitude,
                                          zoom: zoomLevel)

    if mapView.isHidden {
      mapView.isHidden = false
      mapView.camera = camera
    } else {
      mapView.animate(to: camera)
    }

    listLikelyPlaces()
  }

  // Handle authorization for the location manager.
  func locationManager(_ manager: CLLocationManager, didChangeAuthorization status: CLAuthorizationStatus) {
    // Check accuracy authorization
    let accuracy = manager.accuracyAuthorization
    switch accuracy {
    case .fullAccuracy:
        print("Location accuracy is precise.")
    case .reducedAccuracy:
        print("Location accuracy is not precise.")
    @unknown default:
      fatalError()
    }

    // Handle authorization status
    switch status {
    case .restricted:
      print("Location access was restricted.")
    case .denied:
      print("User denied access to location.")
      // Display the map using the default location.
      mapView.isHidden = false
    case .notDetermined:
      print("Location status not determined.")
    case .authorizedAlways: fallthrough
    case .authorizedWhenInUse:
      print("Location status is OK.")
    @unknown default:
      fatalError()
    }
  }

  // Handle location manager errors.
  func locationManager(_ manager: CLLocationManager, didFailWithError error: Error) {
    locationManager.stopUpdatingLocation()
    print("Error: \(error)")
  }
}
Objective-C
#import "MapViewController.h"
#import "PlacesViewController.h"
@import CoreLocation;
@import GooglePlaces;
@import GoogleMaps;

@interface MapViewController () <CLLocationManagerDelegate>

@end

@implementation MapViewController {
  CLLocationManager *locationManager;
  CLLocation * _Nullable currentLocation;
  GMSMapView *mapView;
  GMSPlacesClient *placesClient;
  float preciseLocationZoomLevel;
  float approximateLocationZoomLevel;

  // An array to hold the list of likely places.
  NSMutableArray<GMSPlace *> *likelyPlaces;

  // The currently selected place.
  GMSPlace * _Nullable selectedPlace;
}

- (void)viewDidLoad {
  [super viewDidLoad];
  preciseLocationZoomLevel = 15.0;
  approximateLocationZoomLevel = 15.0;

  // Initialize the location manager.
  locationManager = [[CLLocationManager alloc] init];
  locationManager.desiredAccuracy = kCLLocationAccuracyBest;
  [locationManager requestWhenInUseAuthorization];
  locationManager.distanceFilter = 50;
  [locationManager startUpdatingLocation];
  locationManager.delegate = self;

  placesClient = [GMSPlacesClient sharedClient];

  // A default location to use when location permission is not granted.
  CLLocationCoordinate2D defaultLocation = CLLocationCoordinate2DMake(-33.869405, 151.199);

  // Create a map.
  float zoomLevel = locationManager.accuracyAuthorization == CLAccuracyAuthorizationFullAccuracy ? preciseLocationZoomLevel : approximateLocationZoomLevel;
  GMSCameraPosition *camera = [GMSCameraPosition cameraWithLatitude:defaultLocation.latitude
                                                          longitude:defaultLocation.longitude
                                                               zoom:zoomLevel];
  mapView = [GMSMapView mapWithFrame:self.view.bounds camera:camera];
  mapView.settings.myLocationButton = YES;
  mapView.autoresizingMask = UIViewAutoresizingFlexibleWidth | UIViewAutoresizingFlexibleHeight;
  mapView.myLocationEnabled = YES;

  // Add the map to the view, hide it until we've got a location update.
  [self.view addSubview:mapView];
  mapView.hidden = YES;

  [self listLikelyPlaces];
}

// Populate the array with the list of likely places.
- (void) listLikelyPlaces
{
  // Clean up from previous sessions.
  likelyPlaces = [NSMutableArray array];

  GMSPlaceField placeFields = GMSPlaceFieldName | GMSPlaceFieldCoordinate;
  [placesClient findPlaceLikelihoodsFromCurrentLocationWithPlaceFields:placeFields callback:^(NSArray<GMSPlaceLikelihood *> * _Nullable likelihoods, NSError * _Nullable error) {
    if (error != nil) {
      // TODO: Handle the error.
      NSLog(@"Current Place error: %@", error.localizedDescription);
      return;
    }

    if (likelihoods == nil) {
      NSLog(@"No places found.");
      return;
    }

    for (GMSPlaceLikelihood *likelihood in likelihoods) {
      GMSPlace *place = likelihood.place;
      [likelyPlaces addObject:place];
    }
  }];
}

// Update the map once the user has made their selection.
- (void) unwindToMain:(UIStoryboardSegue *)segue
{
  // Clear the map.
  [mapView clear];

  // Add a marker to the map.
  if (selectedPlace != nil) {
    GMSMarker *marker = [GMSMarker markerWithPosition:selectedPlace.coordinate];
    marker.title = selectedPlace.name;
    marker.snippet = selectedPlace.formattedAddress;
    marker.map = mapView;
  }

  [self listLikelyPlaces];
}

// Prepare the segue.
- (void)prepareForSegue:(UIStoryboardSegue *)segue sender:(id)sender
{
  if ([segue.identifier isEqualToString:@"segueToSelect"]) {
    if ([segue.destinationViewController isKindOfClass:[PlacesViewController class]]) {
      PlacesViewController *placesViewController = (PlacesViewController *)segue.destinationViewController;
      placesViewController.likelyPlaces = likelyPlaces;
    }
  }
}

// Delegates to handle events for the location manager.
#pragma mark - CLLocationManagerDelegate

// Handle incoming location events.
- (void)locationManager:(CLLocationManager *)manager didUpdateLocations:(NSArray<CLLocation *> *)locations
{
  CLLocation *location = locations.lastObject;
  NSLog(@"Location: %@", location);

  float zoomLevel = locationManager.accuracyAuthorization == CLAccuracyAuthorizationFullAccuracy ? preciseLocationZoomLevel : approximateLocationZoomLevel;
  GMSCameraPosition * camera = [GMSCameraPosition cameraWithLatitude:location.coordinate.latitude
                                                           longitude:location.coordinate.longitude
                                                                zoom:zoomLevel];

  if (mapView.isHidden) {
    mapView.hidden = NO;
    mapView.camera = camera;
  } else {
    [mapView animateToCameraPosition:camera];
  }

  [self listLikelyPlaces];
}

// Handle authorization for the location manager.
- (void)locationManager:(CLLocationManager *)manager didChangeAuthorizationStatus:(CLAuthorizationStatus)status
{
  // Check accuracy authorization
  CLAccuracyAuthorization accuracy = manager.accuracyAuthorization;
  switch (accuracy) {
    case CLAccuracyAuthorizationFullAccuracy:
      NSLog(@"Location accuracy is precise.");
      break;
    case CLAccuracyAuthorizationReducedAccuracy:
      NSLog(@"Location accuracy is not precise.");
      break;
  }

  // Handle authorization status
  switch (status) {
    case kCLAuthorizationStatusRestricted:
      NSLog(@"Location access was restricted.");
      break;
    case kCLAuthorizationStatusDenied:
      NSLog(@"User denied access to location.");
      // Display the map using the default location.
      mapView.hidden = NO;
    case kCLAuthorizationStatusNotDetermined:
      NSLog(@"Location status not determined.");
    case kCLAuthorizationStatusAuthorizedAlways:
    case kCLAuthorizationStatusAuthorizedWhenInUse:
      NSLog(@"Location status is OK.");
  }
}

// Handle location manager errors.
- (void)locationManager:(CLLocationManager *)manager didFailWithError:(NSError *)error
{
  [manager stopUpdatingLocation];
  NSLog(@"Error: %@", error.localizedDescription);
}

@end
PlacesViewController
Swift
import UIKit
import GooglePlaces

class PlacesViewController: UIViewController {

  // ...

  // Pass the selected place to the new view controller.
  override func prepare(for segue: UIStoryboardSegue, sender: Any?) {
    if segue.identifier == "unwindToMain" {
      if let nextViewController = segue.destination as? MapViewController {
        nextViewController.selectedPlace = selectedPlace
      }
    }
  }
}

// Respond when a user selects a place.
extension PlacesViewController: UITableViewDelegate {
  func tableView(_ tableView: UITableView, didSelectRowAt indexPath: IndexPath) {
    selectedPlace = likelyPlaces[indexPath.row]
    performSegue(withIdentifier: "unwindToMain", sender: self)
  }

  // Adjust cell height to only show the first five items in the table
  // (scrolling is disabled in IB).
  func tableView(_ tableView: UITableView, heightForRowAt indexPath: IndexPath) -> CGFloat {
    return self.tableView.frame.size.height/5
  }

  // Make table rows display at proper height if there are less than 5 items.
  func tableView(_ tableView: UITableView, heightForFooterInSection section: Int) -> CGFloat {
    if (section == tableView.numberOfSections - 1) {
      return 1
    }
    return 0
  }
}

// Populate the table with the list of most likely places.
extension PlacesViewController: UITableViewDataSource {
  func tableView(_ tableView: UITableView, numberOfRowsInSection section: Int) -> Int {
    return likelyPlaces.count
  }

  func tableView(_ tableView: UITableView, cellForRowAt indexPath: IndexPath) -> UITableViewCell {
    let cell = tableView.dequeueReusableCell(withIdentifier: cellReuseIdentifier, for: indexPath)
    let collectionItem = likelyPlaces[indexPath.row]

    cell.textLabel?.text = collectionItem.name

    return cell
  }
}
Objective-C
#import "PlacesViewController.h"

@interface PlacesViewController () <UITableViewDataSource, UITableViewDelegate>
// ...

-(void)prepareForSegue:(UIStoryboardSegue *)segue sender:(id)sender
{

}

#pragma mark - UITableViewDelegate

// Respond when a user selects a place.
-(void)tableView:(UITableView *)tableView didSelectRowAtIndexPath:(NSIndexPath *)indexPath
{
  self.selectedPlace = [self.likelyPlaces objectAtIndex:indexPath.row];
  [self performSegueWithIdentifier:@"unwindToMain" sender:self];
}

// Adjust cell height to only show the first five items in the table
// (scrolling is disabled in IB).
-(CGFloat)tableView:(UITableView *)tableView heightForRowAtIndexPath:(NSIndexPath *)indexPath
{
  return self.tableView.frame.size.height/5;
}

// Make table rows display at proper height if there are less than 5 items.
-(CGFloat)tableView:(UITableView *)tableView heightForFooterInSection:(NSInteger)section
{
  if (section == tableView.numberOfSections - 1) {
    return 1;
  }
  return 0;
}

#pragma mark - UITableViewDataSource

- (NSInteger)tableView:(UITableView *)tableView numberOfRowsInSection:(NSInteger)section
{
  return self.likelyPlaces.count;
}

- (UITableViewCell *)tableView:(UITableView *)tableView cellForRowAtIndexPath:(NSIndexPath *)indexPath
{
  return [tableView dequeueReusableCellWithIdentifier:cellReuseIdentifier forIndexPath:indexPath];
}
@end
Erste Schritte
Swift-Paketmanager
Das Maps SDK for iOS kann mit dem Swift-Paketmanager installiert werden.
- Prüfen Sie, ob alle vorhandenen Abhängigkeiten des Maps SDK for iOS entfernt wurden.
- Öffnen Sie ein Terminalfenster und wechseln Sie zum Verzeichnis
tutorials/current-place-on-map. -
Achten Sie darauf, dass der Xcode-Arbeitsbereich geschlossen ist, und führen Sie die folgenden Befehle aus:
sudo gem install cocoapods-deintegrate cocoapods-clean
pod deintegrate
pod cache clean --all
rm Podfile
rm current-place-on-map.xcworkspace
- Öffnen Sie Ihr Xcode-Projekt und löschen Sie die Podfile-Datei.
- Fügen Sie das Places SDK und das Maps SDK hinzu:
- Wählen Sie Datei > Paketabhängigkeiten hinzufügen.
- Geben Sie https://github.com/googlemaps/ios-places-sdk ein. als URL verwenden, drücken Sie die Eingabetaste, um das Paket abzurufen, und klicken Sie auf Paket hinzufügen.
- Geben Sie https://github.com/googlemaps/ios-maps-sdk ein als URL verwenden, drücken Sie die Eingabetaste, um das Paket abzurufen, und klicken Sie auf Paket hinzufügen.
- Möglicherweise müssen Sie den Paket-Cache über Datei > Pakete > Paket-Cache zurücksetzen.
Mit CocoaPods
- Laden Sie Xcode herunter und installieren Sie es. Version 15.0 oder höher.
- Wenn Sie noch keine CocoaPods haben,
Installieren Sie sie unter macOS, indem Sie im Terminal den folgenden Befehl ausführen:
sudo gem install cocoapods
- Rufen Sie das Verzeichnis
tutorials/current-place-on-mapauf. - Führe den Befehl
pod installaus. Dadurch werden die inPodfileangegebenen Maps und Places SDKs zusammen mit allen Abhängigkeiten installiert. - Führen Sie
pod outdatedaus, um die installierte Pod-Version mit neuen Updates zu vergleichen. Wenn eine neue Version erkannt wird, führen Siepod updateaus, umPodfilezu aktualisieren und das neueste SDK zu installieren. Weitere Informationen finden Sie im CocoaPods-Leitfaden. - Öffnen Sie die Datei current-place-on-map.xcworkspace des Projekts (Doppelklick).
-Datei, um sie in Xcode zu öffnen. Sie müssen die Datei
.xcworkspaceverwenden, um das Projekt zu öffnen.
API-Schlüssel abrufen und die erforderlichen APIs aktivieren
Für diese Anleitung benötigen Sie einen Google API-Schlüssel, der berechtigt ist, das Maps SDK for iOS und die Places API verwenden
- Folgen Sie der Anleitung unter Erste Schritte mit der Google Maps Platform, um ein Rechnungskonto und ein Projekt einzurichten, das für diese beiden Produkte aktiviert ist.
- Folgen Sie der Anleitung unter API-Schlüssel anfordern, um einen API-Schlüssel für das zuvor eingerichtete Entwicklungsprojekt zu erstellen.
API-Schlüssel zur App hinzufügen
Füge deinen API-Schlüssel folgendermaßen in AppDelegate.swift ein:
- Beachten Sie, dass der Datei die folgende Importanweisung hinzugefügt wurde:
import GooglePlaces
import GoogleMaps
- Bearbeite die folgende Zeile in deinem
application(_:didFinishLaunchingWithOptions:)und ersetzen Sie dabei YOUR_API_KEY durch Ihren API-Schlüssel:GMSPlacesClient.provideAPIKey("YOUR_API_KEY") GMSServices.provideAPIKey("YOUR_API_KEY")
App erstellen und ausführen
- Verbinden Sie ein iOS-Gerät mit Ihrem Computer oder wählen Sie ein Simulator aus dem Pop-up-Menü für das Xcode-Schema aus.
- Wenn Sie ein Gerät verwenden, achten Sie darauf, dass die Standortdienste aktiviert sind. Wenn Sie einen Simulator verwenden, wählen Sie in den Funktionen einen Standort aus. .
- Klicken Sie in Xcode auf die Menüoption Product/Run (Produkt/Ausführen) oder .
- Xcode erstellt die App und führt sie dann auf dem Gerät oder auf dem Simulator.
- Nun sollte eine Karte mit einer Reihe von Markierungen angezeigt werden, die um die aktuelle Standort.
Fehlerbehebung:
- Wenn Sie keine Karte sehen, prüfen Sie, ob Sie einen API-Schlüssel erhalten und dem Code an die App gesendet werden, wie oben beschrieben. Prüfen Debugging-Konsole von Xcode für Fehlermeldungen zum API-Schlüssel
- Wenn Sie den API-Schlüssel durch den iOS-Paket-Identifikator eingeschränkt haben, bearbeiten Sie die
um den Paket-Identifikator für die App hinzuzufügen:
com.google.examples.current-place-on-map - Die Karte wird nicht korrekt angezeigt, wenn die Berechtigungsanfrage für
Standortdienste abgelehnt wurden.
- Wenn du ein Gerät verwendest, gehe zu Einstellungen/Allgemein/Datenschutz/Standort. Dienste und aktivieren Sie die Standortdienste wieder.
- Wenn Sie einen Simulator verwenden, gehen Sie zu Simulator/Reset Content and Einstellungen...
- Sie benötigen eine gute WLAN- oder GPS-Verbindung.
- Wenn die App gestartet wird, aber keine Karte angezeigt wird, überprüfen Sie, ob Sie hat die Info.plist-Datei für Ihr Projekt mit dem entsprechenden Speicherort aktualisiert. Berechtigungen. Weitere Informationen zur Handhabung von Berechtigungen finden Sie im Leitfaden Berechtigung zur Standortermittlung in der App anfordern unten.
- Xcode-Debugging-Tools verwenden um Logs anzuzeigen und Fehler in der Anwendung zu beheben.
Code verstehen
In diesem Teil des Tutorials werden die wichtigsten Teile des current-place-on-map zeigen. einer ähnlichen App.
Die App current-place-on-map bietet zwei Ansichts-Controller:
Mit einem der Karten wird der aktuell vom Nutzer ausgewählte Ort angezeigt.
um dem Nutzer eine Liste mit Orten anzuzeigen, aus denen er auswählen kann. Beachten Sie, dass
hat jeder Ansichts-Controller dieselben Variablen zum Verfolgen der Liste
Orte (likelyPlaces) und zur Angabe des Standorts des Nutzers
Auswahl (selectedPlace). Die Navigation zwischen den Ansichten ist
mithilfe von Übergängen erreicht.
Berechtigung zur Standortermittlung wird angefordert
Ihre App muss den Nutzer um seine Einwilligung zur Verwendung der Standortdienste bitten. Aufgabe
Fügen Sie dabei den Schlüssel NSLocationAlwaysUsageDescription in die
Info.plist für die Anwendung und legen Sie für jeden Schlüssel einen Wert fest.
String, der beschreibt, wie die App Standortdaten verwenden möchte.
Standortmanager einrichten
Verwenden Sie CLLocationManager, um den aktuellen Standort des Geräts zu ermitteln und regelmäßige Updates anzufordern, wenn die an einen neuen Standort verlegt wird. Dieses Tutorial enthält den Code, den Sie benötigen, um auf den Standort des Geräts. Weitere Informationen finden Sie im Leitfaden zur Standort des Nutzers abrufen in der Entwicklerdokumentation von Apple.
- Geben Sie den Standort-Manager, den aktuellen Standort, die Kartenansicht, den Places-Client, und die Standard-Zoomstufe auf Klassenebene.
- Initialisieren Sie den Standortmanager und
GMSPlacesClientinviewDidLoad(). - Deklarieren Sie Variablen, die die Liste möglicher Orte und den vom Nutzer ausgewählten Ort enthalten.
- Fügen Sie mithilfe einer Erweiterung Bevollmächtigte hinzu, um Ereignisse für den Standortmanager zu verarbeiten. Klausel.
Swift
var locationManager: CLLocationManager!
var currentLocation: CLLocation?
var mapView: GMSMapView!
var placesClient: GMSPlacesClient!
var preciseLocationZoomLevel: Float = 15.0
var approximateLocationZoomLevel: Float = 10.0
Objective-C
CLLocationManager *locationManager;
CLLocation * _Nullable currentLocation;
GMSMapView *mapView;
GMSPlacesClient *placesClient;
float preciseLocationZoomLevel;
float approximateLocationZoomLevel;
Swift
// Initialize the location manager.
locationManager = CLLocationManager()
locationManager.desiredAccuracy = kCLLocationAccuracyBest
locationManager.requestWhenInUseAuthorization()
locationManager.distanceFilter = 50
locationManager.startUpdatingLocation()
locationManager.delegate = self

placesClient = GMSPlacesClient.shared()
Objective-C
// Initialize the location manager.
locationManager = [[CLLocationManager alloc] init];
locationManager.desiredAccuracy = kCLLocationAccuracyBest;
[locationManager requestWhenInUseAuthorization];
locationManager.distanceFilter = 50;
[locationManager startUpdatingLocation];
locationManager.delegate = self;

placesClient = [GMSPlacesClient sharedClient];
Swift
// An array to hold the list of likely places.
var likelyPlaces: [GMSPlace] = []

// The currently selected place.
var selectedPlace: GMSPlace?
Objective-C
// An array to hold the list of likely places.
NSMutableArray<GMSPlace *> *likelyPlaces;

// The currently selected place.
GMSPlace * _Nullable selectedPlace;
Swift
// Delegates to handle events for the location manager.
extension MapViewController: CLLocationManagerDelegate {

  // Handle incoming location events.
  func locationManager(_ manager: CLLocationManager, didUpdateLocations locations: [CLLocation]) {
    let location: CLLocation = locations.last!
    print("Location: \(location)")

    let zoomLevel = locationManager.accuracyAuthorization == .fullAccuracy ? preciseLocationZoomLevel : approximateLocationZoomLevel
    let camera = GMSCameraPosition.camera(withLatitude: location.coordinate.latitude,
                                          longitude: location.coordinate.longitude,
                                          zoom: zoomLevel)

    if mapView.isHidden {
      mapView.isHidden = false
      mapView.camera = camera
    } else {
      mapView.animate(to: camera)
    }

    listLikelyPlaces()
  }

  // Handle authorization for the location manager.
  func locationManager(_ manager: CLLocationManager, didChangeAuthorization status: CLAuthorizationStatus) {
    // Check accuracy authorization
    let accuracy = manager.accuracyAuthorization
    switch accuracy {
    case .fullAccuracy:
        print("Location accuracy is precise.")
    case .reducedAccuracy:
        print("Location accuracy is not precise.")
    @unknown default:
      fatalError()
    }

    // Handle authorization status
    switch status {
    case .restricted:
      print("Location access was restricted.")
    case .denied:
      print("User denied access to location.")
      // Display the map using the default location.
      mapView.isHidden = false
    case .notDetermined:
      print("Location status not determined.")
    case .authorizedAlways: fallthrough
    case .authorizedWhenInUse:
      print("Location status is OK.")
    @unknown default:
      fatalError()
    }
  }

  // Handle location manager errors.
  func locationManager(_ manager: CLLocationManager, didFailWithError error: Error) {
    locationManager.stopUpdatingLocation()
    print("Error: \(error)")
  }
}
Objective-C
// Delegates to handle events for the location manager.
#pragma mark - CLLocationManagerDelegate

// Handle incoming location events.
- (void)locationManager:(CLLocationManager *)manager didUpdateLocations:(NSArray<CLLocation *> *)locations
{
  CLLocation *location = locations.lastObject;
  NSLog(@"Location: %@", location);

  float zoomLevel = locationManager.accuracyAuthorization == CLAccuracyAuthorizationFullAccuracy ? preciseLocationZoomLevel : approximateLocationZoomLevel;
  GMSCameraPosition * camera = [GMSCameraPosition cameraWithLatitude:location.coordinate.latitude
                                                           longitude:location.coordinate.longitude
                                                                zoom:zoomLevel];

  if (mapView.isHidden) {
    mapView.hidden = NO;
    mapView.camera = camera;
  } else {
    [mapView animateToCameraPosition:camera];
  }

  [self listLikelyPlaces];
}

// Handle authorization for the location manager.
- (void)locationManager:(CLLocationManager *)manager didChangeAuthorizationStatus:(CLAuthorizationStatus)status
{
  // Check accuracy authorization
  CLAccuracyAuthorization accuracy = manager.accuracyAuthorization;
  switch (accuracy) {
    case CLAccuracyAuthorizationFullAccuracy:
      NSLog(@"Location accuracy is precise.");
      break;
    case CLAccuracyAuthorizationReducedAccuracy:
      NSLog(@"Location accuracy is not precise.");
      break;
  }

  // Handle authorization status
  switch (status) {
    case kCLAuthorizationStatusRestricted:
      NSLog(@"Location access was restricted.");
      break;
    case kCLAuthorizationStatusDenied:
      NSLog(@"User denied access to location.");
      // Display the map using the default location.
      mapView.hidden = NO;
    case kCLAuthorizationStatusNotDetermined:
      NSLog(@"Location status not determined.");
    case kCLAuthorizationStatusAuthorizedAlways:
    case kCLAuthorizationStatusAuthorizedWhenInUse:
      NSLog(@"Location status is OK.");
  }
}

// Handle location manager errors.
- (void)locationManager:(CLLocationManager *)manager didFailWithError:(NSError *)error
{
  [manager stopUpdatingLocation];
  NSLog(@"Error: %@", error.localizedDescription);
}
Karte hinzufügen
Erstellen Sie eine Karte und fügen Sie sie der Ansicht in viewDidLoad() im
Hauptansicht-Controller. Die Karte bleibt ausgeblendet, bis ein Standortupdate empfangen wird
(Standortaktualisierungen werden in der CLLocationManagerDelegate vorgenommen.
Erweiterung).
Swift
// A default location to use when location permission is not granted.
let defaultLocation = CLLocation(latitude: -33.869405, longitude: 151.199)

// Create a map.
let zoomLevel = locationManager.accuracyAuthorization == .fullAccuracy ? preciseLocationZoomLevel : approximateLocationZoomLevel
let camera = GMSCameraPosition.camera(withLatitude: defaultLocation.coordinate.latitude,
                                      longitude: defaultLocation.coordinate.longitude,
                                      zoom: zoomLevel)
mapView = GMSMapView.map(withFrame: view.bounds, camera: camera)
mapView.settings.myLocationButton = true
mapView.autoresizingMask = [.flexibleWidth, .flexibleHeight]
mapView.isMyLocationEnabled = true

// Add the map to the view, hide it until we've got a location update.
view.addSubview(mapView)
mapView.isHidden = true
Objective-C
// A default location to use when location permission is not granted.
CLLocationCoordinate2D defaultLocation = CLLocationCoordinate2DMake(-33.869405, 151.199);

// Create a map.
float zoomLevel = locationManager.accuracyAuthorization == CLAccuracyAuthorizationFullAccuracy ? preciseLocationZoomLevel : approximateLocationZoomLevel;
GMSCameraPosition *camera = [GMSCameraPosition cameraWithLatitude:defaultLocation.latitude
                                                        longitude:defaultLocation.longitude
                                                             zoom:zoomLevel];
mapView = [GMSMapView mapWithFrame:self.view.bounds camera:camera];
mapView.settings.myLocationButton = YES;
mapView.autoresizingMask = UIViewAutoresizingFlexibleWidth | UIViewAutoresizingFlexibleHeight;
mapView.myLocationEnabled = YES;

// Add the map to the view, hide it until we've got a location update.
[self.view addSubview:mapView];
mapView.hidden = YES;
Aufforderung des Nutzers, seinen aktuellen Ort auszuwählen
Verwenden Sie das Places SDK for iOS, um die ersten fünf Plätze zu erhalten.
basierend auf dem aktuellen Standort der Nutzenden
und präsentieren die Liste in einer
UITableView Wenn der Nutzer einen Ort auswählt, fügen Sie eine Markierung zum
- Liste mit Orten abrufen, die wahrscheinlich in ein
UITableView-Element aufgenommen werden, unter dem der Nutzer seinen aktuellen Standort auswählen kann. - Öffnen Sie eine neue Ansicht, um dem Nutzer Orte zu präsentieren, die wahrscheinlich von Ihnen stammen. Wenn Nutzende
auf "Get Place" tippen, wechseln wir zu einer neuen Ansicht und zeigen dem Nutzer eine Liste der möglichen
Orte zur Auswahl. Die Funktion
preparewird aktualisiertPlacesViewControllerdurch die Liste der aktuell wahrscheinlichen Orte, und wird bei einem Übergang automatisch aufgerufen. - Füllen Sie die Tabelle in
PlacesViewControllermithilfe der Liste mit den meisten wahrscheinlich Orte finden. Verwenden Sie dazu dieUITableViewDataSourceDelegate-Erweiterung. - Sie können die Auswahl des Nutzers mit dem
UITableViewDelegateverarbeiten. Delegaterweiterung.
Swift
// Populate the array with the list of likely places.
func listLikelyPlaces() {
  // Clean up from previous sessions.
  likelyPlaces.removeAll()

  let placeFields: GMSPlaceField = [.name, .coordinate]
  placesClient.findPlaceLikelihoodsFromCurrentLocation(withPlaceFields: placeFields) { (placeLikelihoods, error) in
    guard error == nil else {
      // TODO: Handle the error.
      print("Current Place error: \(error!.localizedDescription)")
      return
    }

    guard let placeLikelihoods = placeLikelihoods else {
      print("No places found.")
      return
    }

    // Get likely places and add to the list.
    for likelihood in placeLikelihoods {
      let place = likelihood.place
      self.likelyPlaces.append(place)
    }
  }
}
Objective-C
// Populate the array with the list of likely places.
- (void) listLikelyPlaces
{
  // Clean up from previous sessions.
  likelyPlaces = [NSMutableArray array];

  GMSPlaceField placeFields = GMSPlaceFieldName | GMSPlaceFieldCoordinate;
  [placesClient findPlaceLikelihoodsFromCurrentLocationWithPlaceFields:placeFields callback:^(NSArray<GMSPlaceLikelihood *> * _Nullable likelihoods, NSError * _Nullable error) {
    if (error != nil) {
      // TODO: Handle the error.
      NSLog(@"Current Place error: %@", error.localizedDescription);
      return;
    }

    if (likelihoods == nil) {
      NSLog(@"No places found.");
      return;
    }

    for (GMSPlaceLikelihood *likelihood in likelihoods) {
      GMSPlace *place = likelihood.place;
      [likelyPlaces addObject:place];
    }
  }];
}
Swift
// Prepare the segue.
override func prepare(for segue: UIStoryboardSegue, sender: Any?) {
  if segue.identifier == "segueToSelect" {
    if let nextViewController = segue.destination as? PlacesViewController {
      nextViewController.likelyPlaces = likelyPlaces
    }
  }
}
Objective-C
// Prepare the segue.
- (void)prepareForSegue:(UIStoryboardSegue *)segue sender:(id)sender
{
  if ([segue.identifier isEqualToString:@"segueToSelect"]) {
    if ([segue.destinationViewController isKindOfClass:[PlacesViewController class]]) {
      PlacesViewController *placesViewController = (PlacesViewController *)segue.destinationViewController;
      placesViewController.likelyPlaces = likelyPlaces;
    }
  }
}
Swift
// Populate the table with the list of most likely places.
extension PlacesViewController: UITableViewDataSource {
  func tableView(_ tableView: UITableView, numberOfRowsInSection section: Int) -> Int {
    return likelyPlaces.count
  }

  func tableView(_ tableView: UITableView, cellForRowAt indexPath: IndexPath) -> UITableViewCell {
    let cell = tableView.dequeueReusableCell(withIdentifier: cellReuseIdentifier, for: indexPath)
    let collectionItem = likelyPlaces[indexPath.row]

    cell.textLabel?.text = collectionItem.name

    return cell
  }
}
Objective-C
#pragma mark - UITableViewDataSource

- (NSInteger)tableView:(UITableView *)tableView numberOfRowsInSection:(NSInteger)section
{
  return self.likelyPlaces.count;
}

- (UITableViewCell *)tableView:(UITableView *)tableView cellForRowAtIndexPath:(NSIndexPath *)indexPath
{
  return [tableView dequeueReusableCellWithIdentifier:cellReuseIdentifier forIndexPath:indexPath];
}
@end
Swift
class PlacesViewController: UIViewController {

  // ...

  // Pass the selected place to the new view controller.
  override func prepare(for segue: UIStoryboardSegue, sender: Any?) {
    if segue.identifier == "unwindToMain" {
      if let nextViewController = segue.destination as? MapViewController {
        nextViewController.selectedPlace = selectedPlace
      }
    }
  }
}

// Respond when a user selects a place.
extension PlacesViewController: UITableViewDelegate {
  func tableView(_ tableView: UITableView, didSelectRowAt indexPath: IndexPath) {
    selectedPlace = likelyPlaces[indexPath.row]
    performSegue(withIdentifier: "unwindToMain", sender: self)
  }

  // Adjust cell height to only show the first five items in the table
  // (scrolling is disabled in IB).
  func tableView(_ tableView: UITableView, heightForRowAt indexPath: IndexPath) -> CGFloat {
    return self.tableView.frame.size.height/5
  }

  // Make table rows display at proper height if there are less than 5 items.
  func tableView(_ tableView: UITableView, heightForFooterInSection section: Int) -> CGFloat {
    if (section == tableView.numberOfSections - 1) {
      return 1
    }
    return 0
  }
}
Objective-C
@interface PlacesViewController () <UITableViewDataSource, UITableViewDelegate>
// ...

-(void)prepareForSegue:(UIStoryboardSegue *)segue sender:(id)sender
{

}

#pragma mark - UITableViewDelegate

// Respond when a user selects a place.
-(void)tableView:(UITableView *)tableView didSelectRowAtIndexPath:(NSIndexPath *)indexPath
{
  self.selectedPlace = [self.likelyPlaces objectAtIndex:indexPath.row];
  [self performSegueWithIdentifier:@"unwindToMain" sender:self];
}

// Adjust cell height to only show the first five items in the table
// (scrolling is disabled in IB).
-(CGFloat)tableView:(UITableView *)tableView heightForRowAtIndexPath:(NSIndexPath *)indexPath
{
  return self.tableView.frame.size.height/5;
}

// Make table rows display at proper height if there are less than 5 items.
-(CGFloat)tableView:(UITableView *)tableView heightForFooterInSection:(NSInteger)section
{
  if (section == tableView.numberOfSections - 1) {
    return 1;
  }
  return 0;
}
Markierung zur Karte hinzufügen
Trifft der Nutzer eine Auswahl, kehrt mit einem Abspann-Übergang zum
vorherige Ansicht und fügen Sie die Markierung zur Karte hinzu. Das unwindToMain
IBAction wird automatisch aufgerufen, wenn Sie zum Controller der Hauptansicht zurückkehren.
Swift
// Update the map once the user has made their selection.
@IBAction func unwindToMain(segue: UIStoryboardSegue) {
  // Clear the map.
  mapView.clear()

  // Add a marker to the map.
  if let place = selectedPlace {
    let marker = GMSMarker(position: place.coordinate)
    marker.title = selectedPlace?.name
    marker.snippet = selectedPlace?.formattedAddress
    marker.map = mapView
  }

  listLikelyPlaces()
}
Objective-C
// Update the map once the user has made their selection.
- (void) unwindToMain:(UIStoryboardSegue *)segue
{
  // Clear the map.
  [mapView clear];

  // Add a marker to the map.
  if (selectedPlace != nil) {
    GMSMarker *marker = [GMSMarker markerWithPosition:selectedPlace.coordinate];
    marker.title = selectedPlace.name;
    marker.snippet = selectedPlace.formattedAddress;
    marker.map = mapView;
  }

  [self listLikelyPlaces];
}
Glückwunsch! Sie haben eine iOS-App erstellt, mit der Nutzer ihren aktuellen Standort und zeigt das Ergebnis auf einer Google-Karte an. Im Laufe des haben Sie gelernt, wie Sie die Places SDK for iOS das Maps SDK for iOS und das Apple Core Location Framework.