
如果您的 Google Workspace 外掛程式連線至需要驗證的第三方服務或 API,該外掛程式可以提示使用者登入並授予存取權。
本頁面說明如何使用授權流程 (例如 OAuth) 驗證使用者,其中包含下列步驟:
- 可偵測是否需要授權。
- 傳回提示使用者登入服務的卡片介面。
- 重新整理外掛程式,讓使用者可以存取服務或受保護的資源。
如果外掛程式只需要使用者身分,您可以使用使用者的 Google Workspace ID 或電子郵件地址,直接驗證使用者。如要使用電子郵件地址進行驗證,請參閱驗證 JSON 要求。如果您已使用 Google Apps Script 建構外掛程式,請參閱 Apps Script 說明文件,瞭解如何將外掛程式連線至第三方服務。
偵測是否需要授權
使用外掛程式時,使用者可能會因為各種原因而無權存取受保護的資源,例如:
- 尚未產生用於連線至第三方服務的存取權杖尚未產生或已過期。
- 存取權杖不適用於要求的資源。
- 存取權杖不包含要求所需的範圍。
您的外掛程式應偵測這些情況,方便使用者登入並存取您的服務。
提示使用者登入服務
當您的外掛程式偵測到需要授權時,外掛程式必須傳回資訊卡介面,提示使用者登入服務。登入資訊卡必須重新導向使用者,完成基礎架構上的第三方驗證和授權程序。
建議您利用 Google 登入功能保護目標應用程式,並使用登入期間核發的識別權杖取得使用者 ID。子宣告包含使用者的專屬 ID,可與外掛程式中的 ID 建立關聯。
建構並傳回登入資訊卡
如果是服務的登入資訊卡,您可以使用 Google 的基本授權資訊卡,也可以自訂資訊卡來顯示其他資訊,例如貴機構的標誌。如要公開發布外掛程式,就必須使用自訂資訊卡。
基本授權卡
下圖為 Google 基本授權卡範例:
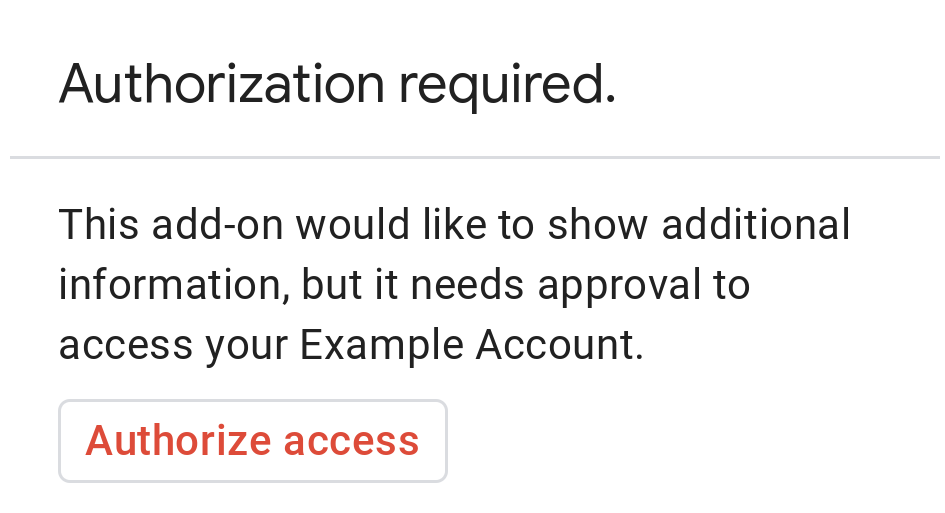
如要使用基本授權卡,請傳回以下 JSON 回應:
{
  "basic_authorization_prompt": {
    "authorization_url": "AUTHORIZATION_REDIRECT",
    "resource": "RESOURCE_DISPLAY_NAME"
  }
}
更改下列內容:
AUTHORIZATION_REDIRECT:處理授權的網頁應用程式網址。RESOURCE_DISPLAY_NAME:受保護資源或服務的顯示名稱。這個名稱會顯示在授權提示中。舉例來說,如果您的RESOURCE_DISPLAY_NAME為Example Account,系統會顯示「這個外掛程式需要顯示其他資訊,但必須獲得核准,才能存取範例帳戶」。
完成授權後,系統會提示使用者重新整理外掛程式,以便存取受保護的資源。
自訂授權卡片
如要修改授權提示,您可以為服務的登入體驗建立自訂資訊卡。
如果您要公開發布外掛程式,就必須使用自訂授權卡片。如要進一步瞭解 Google Workspace Marketplace 發布規定,請參閱「關於應用程式審查」。
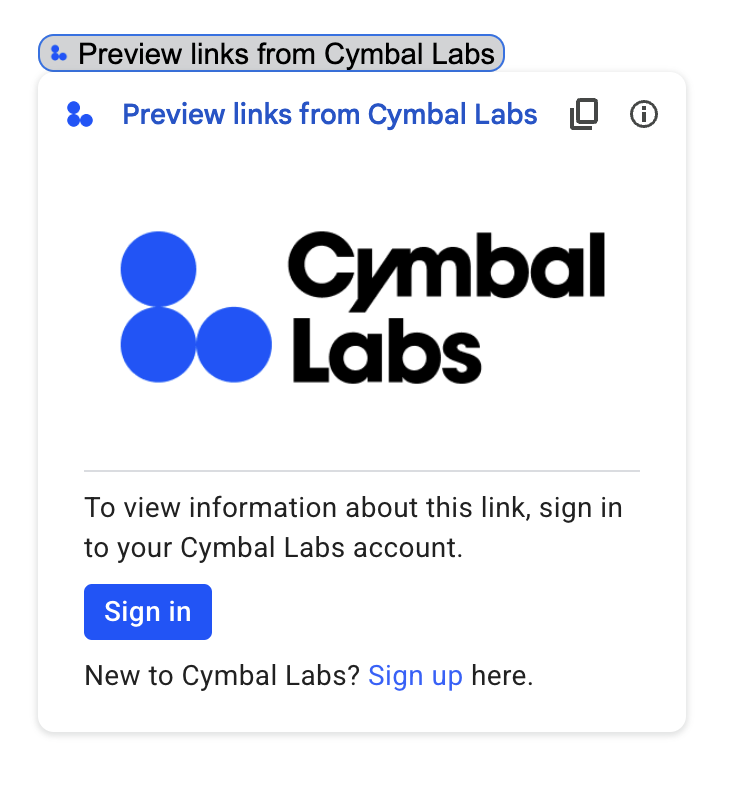
下圖顯示外掛程式的首頁自訂授權資訊卡範例。資訊卡包含標誌、說明和登入按鈕:
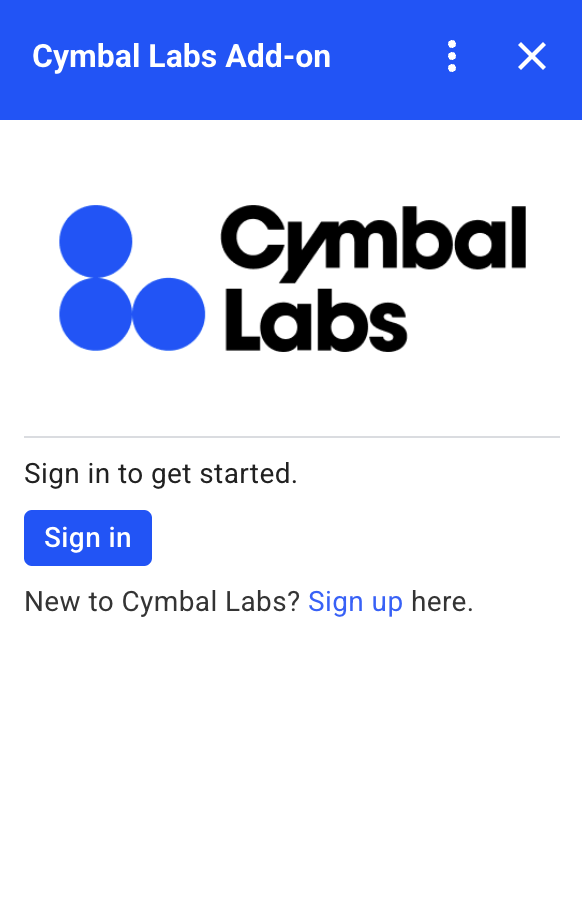
如要使用此自訂資訊卡範例,請傳回以下 JSON 回應:
{
  "custom_authorization_prompt": {
    "action": {
      "navigations": [
        {
          "pushCard": {
            "sections": [
              {
                "widgets": [
                  {
                    "image": {
                      "imageUrl": "LOGO_URL",
                      "altText": "LOGO_ALT_TEXT"
                    }
                  },
                  {
                    "divider": {}
                  },
                  {
                    "textParagraph": {
                      "text": "DESCRIPTION"
                    }
                  },
                  {
                    "buttonList": {
                      "buttons": [
                        {
                          "text": "Sign in",
                          "onClick": {
                            "openLink": {
                              "url": "AUTHORIZATION_REDIRECT",
                              "onClose": "RELOAD",
                              "openAs": "OVERLAY"
                            }
                          },
                          "color": {
                            "red": 0,
                            "green": 0,
                            "blue": 1,
                            "alpha": 1,
                          }
                        }
                      ]
                    }
                  },
                  {
                    "textParagraph": {
                      "text": "TEXT_SIGN_UP"
                    }
                  }
                ]
              }
            ]
          }
        }
      ]
    }
  }
}
更改下列內容:
LOGO_URL:標誌或圖片的網址。必須是公開網址。LOGO_ALT_TEXT:標誌或圖片的替代文字,例如Cymbal Labs Logo。DESCRIPTION:使用者登入帳戶的行動號召,例如Sign in to get started。- 如要更新登入按鈕,請按照下列步驟操作:
AUTHORIZATION_REDIRECT:處理授權的網頁應用程式網址。- 選用:如要變更按鈕顏色,請更新
color欄位的 RGBA 浮點值。
TEXT_SIGN_UP:提示使用者建立帳戶的文字 (如果使用者沒有帳戶)。例如New to Cymbal Labs? <a href=\"https://www.example.com/signup\">Sign up</a> here。