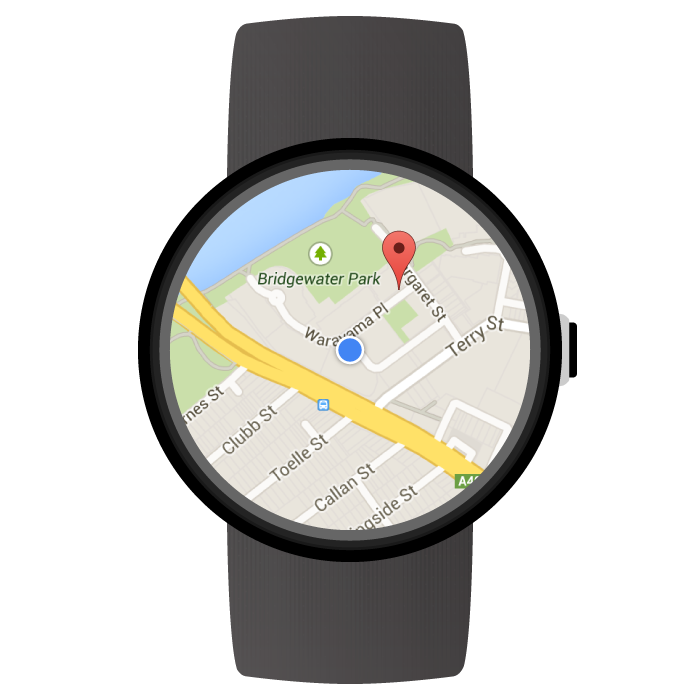
Android के लिए Maps SDK का इस्तेमाल करके, मैप पर आधारित वियरेबल ऐप्लिकेशन बनाया जा सकता है. यह ऐप्लिकेशन, Wear OS by Google डिवाइसों पर सीधे तौर पर काम करता है. आपके ऐप्लिकेशन के उपयोगकर्ता, सिर्फ़ अपनी कलाई पर नज़र डालकर मैप पर अपनी जगह देख सकते हैं. उदाहरण के लिए, वे किसी रास्ते पर अपनी जगह को प्लॉट कर सकते हैं. इसके बाद, ज़्यादा जानकारी के लिए ज़ूम इन कर सकते हैं या आपके ऐप्लिकेशन से मिली जानकारी वाली विंडो देखने के लिए, किसी मार्कर पर टैप कर सकते हैं.
इस पेज पर, Wear डिवाइस पर उपलब्ध एपीआई की सुविधाओं के बारे में बताया गया है. साथ ही, इससे आपको अपना ऐप्लिकेशन बनाने में मदद मिलती है.
Wear OS पर शुरू करना
Maps SDK for Android का इस्तेमाल करके, पहनने लायक डिवाइस के लिए ऐप्लिकेशन बनाना, किसी अन्य Android डिवाइस के लिए Google Maps ऐप्लिकेशन बनाने जैसा ही है. फ़र्क़ यह है कि आपको पहनने वाले छोटे डिवाइस के लिए, ऐप्लिकेशन का डिज़ाइन अलग से बनाना होगा. इससे ऐप्लिकेशन को इस्तेमाल करना आसान होगा और उसकी परफ़ॉर्मेंस भी बेहतर होगी.
Wear OS के डेवलपमेंट के लिए, Android Studio का इस्तेमाल करने का सुझाव दिया जाता है. इसकी मदद से, प्रोजेक्ट सेटअप करने, लाइब्रेरी शामिल करने, और पैकेजिंग से जुड़ी सुविधाएं मिलती हैं.
स्मार्टवॉच के लिए ऐप्लिकेशन डिज़ाइन करने से जुड़ी सामान्य मदद पाने के लिए, Wear OS के डिज़ाइन से जुड़े दिशा-निर्देश देखें. पहला Wearable ऐप्लिकेशन बनाने में मदद पाने के लिए, Wearable ऐप्लिकेशन बनाने से जुड़ी गाइड देखें.
Wear OS पर अपना पहला Maps ऐप्लिकेशन बनाना
इस क्विक गाइड में यह माना गया है कि आपको Maps SDK for Android के बारे में जानकारी है. साथ ही, आपने अपने ऐप्लिकेशन में Wear OS मॉड्यूल बनाने के लिए, Wear OS की गाइड में दिए गए निर्देशों का पालन किया है. इसके अलावा, अब आपको Wear OS मॉड्यूल में मैप जोड़ना है.
Wear मॉड्यूल के लिए डिपेंडेंसी जोड़ना
पक्का करें कि आपके ऐप्लिकेशन के Wear OS मॉड्यूल की build.gradle.kts फ़ाइल में ये डिपेंडेंसी शामिल हों:
dependencies {
    // ...
    compileOnly("com.google.android.wearable:wearable:2.9.0")
    implementation("com.google.android.support:wearable:2.9.0")
    implementation("com.google.android.gms:play-services-maps:19.0.0")

    // This dependency is necessary for ambient mode
    implementation("androidx.wear:wear:1.3.0")
}
डिपेंडेंसी के बारे में ज़्यादा जानने के लिए, अपनी मौजूदा परियोजना में Wear OS मॉड्यूल जोड़ने से जुड़ी गाइड देखें.
स्வைப் करके खारिज करने की सुविधा लागू करना और बैकग्राउंड का शुरुआती रंग सेट करना
हमारा सुझाव है कि आप मैप को वियरेबल डिवाइस पर दिखाने के लिए, SwipeDismissFrameLayout का इस्तेमाल करें. SwipeDismissFrameLayout क्लास का इस्तेमाल करके, स्वाइप करके खारिज करने के जेस्चर को लागू किया जा सकता है. इससे उपयोगकर्ताओं को स्क्रीन के सबसे बाएं किनारे से स्वाइप करके ऐप्लिकेशन से बाहर निकलने का विकल्प मिलता है.
बैकग्राउंड के लिए अपनी पसंद का शुरुआती रंग सेट करने के लिए, map:backgroundColor XML एट्रिब्यूट का इस्तेमाल करें. इससे, मैप की असली टाइलें लोड होने तक दिखने वाले रंग को तय किया जा सकता है.
अपने लेआउट की परिभाषा में SwipeDismissFrameLayout और backgroundColor एलिमेंट को SupportMapFragment के कंटेनर के तौर पर जोड़ें:
  <androidx.wear.widget.SwipeDismissFrameLayout
      android:id="@+id/map_container"
      android:layout_width="match_parent"
      android:layout_height="match_parent">
    <fragment
        android:id="@+id/map"
        android:name="com.google.android.gms.maps.SupportMapFragment"
        android:layout_width="match_parent"
        android:layout_height="match_parent"
        map:backgroundColor="#fff0b2dd" />
  </androidx.wear.widget.SwipeDismissFrameLayout>
अपनी गतिविधि में SwipeDismissFrameLayout ऑब्जेक्ट पाने के बाद, कॉलबैक जोड़ें. साथ ही, कॉलबैक के व्यवहार को इस तरह सेट करें कि वह ज़रूरी डिसमिस ऐक्शन कर सके. इसके लिए, यहां दिया गया तरीका अपनाएं:
Kotlin
class MainActivity : AppCompatActivity(), OnMapReadyCallback,
                     AmbientModeSupport.AmbientCallbackProvider {


    public override fun onCreate(savedInstanceState: Bundle?) {
        super.onCreate(savedInstanceState)

        // Set the layout. It only contains a SupportMapFragment and a DismissOverlay.
        setContentView(R.layout.activity_main)

        // Enable ambient support, so the map remains visible in simplified, low-color display
        // when the user is no longer actively using the app but the app is still visible on the
        // watch face.
        val controller = AmbientModeSupport.attach(this)
        Log.d(MainActivity::class.java.simpleName, "Is ambient enabled: " + controller.isAmbient)

        // Retrieve the containers for the root of the layout and the map. Margins will need to be
        // set on them to account for the system window insets.
        val mapFrameLayout = findViewById<SwipeDismissFrameLayout>(R.id.map_container)
        mapFrameLayout.addCallback(object : SwipeDismissFrameLayout.Callback() {
            override fun onDismissed(layout: SwipeDismissFrameLayout) {
                onBackPressed()
            }
        })

        // Obtain the MapFragment and set the async listener to be notified when the map is ready.
        mapFragment = supportFragmentManager
            .findFragmentById(R.id.map) as SupportMapFragment
        mapFragment.getMapAsync(this)
    }

    // ...
}
Java
public class MainActivity extends AppCompatActivity implements OnMapReadyCallback,
    AmbientModeSupport.AmbientCallbackProvider {


    public void onCreate(Bundle savedState) {
        super.onCreate(savedState);

        // Set the layout. It only contains a SupportMapFragment and a DismissOverlay.
        setContentView(R.layout.activity_main);

        // Enable ambient support, so the map remains visible in simplified, low-color display
        // when the user is no longer actively using the app but the app is still visible on the
        // watch face.
        AmbientModeSupport.AmbientController controller = AmbientModeSupport.attach(this);
        Log.d(MainActivity.class.getSimpleName(), "Is ambient enabled: " + controller.isAmbient());

        // Retrieve the containers for the root of the layout and the map. Margins will need to be
        // set on them to account for the system window insets.
        final SwipeDismissFrameLayout mapFrameLayout = (SwipeDismissFrameLayout) findViewById(
            R.id.map_container);
        mapFrameLayout.addCallback(new SwipeDismissFrameLayout.Callback() {
            @Override
            public void onDismissed(SwipeDismissFrameLayout layout) {
                onBackPressed();
            }
        });

        // Obtain the MapFragment and set the async listener to be notified when the map is ready.
        mapFragment = (SupportMapFragment) getSupportFragmentManager()
            .findFragmentById(R.id.map);
        mapFragment.getMapAsync(this);
    }

    // ...
}
मैप जोड़ना
GoogleMap ऑब्जेक्ट का हैंडल पाने के लिए, onMapReady(GoogleMap) कॉलबैक तरीके का इस्तेमाल करें. मैप के इस्तेमाल के लिए तैयार होने पर, कॉलबैक ट्रिगर होता है. कॉलबैक तरीके में, मैप में मार्कर या पॉलीलाइन जोड़ी जा सकती हैं. साथ ही, लिसनर जोड़े जा सकते हैं या कैमरे को मूव किया जा सकता है. यहां दिए गए उदाहरण में, सिडनी ऑपरा हाउस के पास एक मार्कर जोड़ा गया है:
Kotlin
private val sydney = LatLng(-33.85704, 151.21522)

override fun onMapReady(googleMap: GoogleMap) {
    // Add a marker with a title that is shown in its info window.
    googleMap.addMarker(
        MarkerOptions().position(sydney)
            .title("Sydney Opera House")
    )

    // Move the camera to show the marker.
    googleMap.moveCamera(CameraUpdateFactory.newLatLngZoom(sydney, 10f))
}
Java
private static final LatLng SYDNEY = new LatLng(-33.85704, 151.21522);

@Override
public void onMapReady(@NonNull GoogleMap googleMap) {
    // Add a marker with a title that is shown in its info window.
    googleMap.addMarker(new MarkerOptions().position(SYDNEY)
        .title("Sydney Opera House"));

    // Move the camera to show the marker.
    googleMap.moveCamera(CameraUpdateFactory.newLatLngZoom(SYDNEY, 10));
}
ऐंबियंट मोड चालू करना
Android के लिए Maps SDK, पहने जाने वाले डिवाइसों पर काम करने वाले ऐप्लिकेशन के लिए ऐम्बिएंट मोड के साथ काम करता है. आस-पास की आवाज़ें सुनाने वाले मोड के साथ काम करने वाले ऐप्लिकेशन को कभी-कभी हमेशा चालू रहने वाले ऐप्लिकेशन कहा जाता है. ऐंबियंट मोड तब चालू होता है, जब उपयोगकर्ता ऐप्लिकेशन का इस्तेमाल नहीं कर रहा होता है. इससे ऐप्लिकेशन, पहनने लायक डिवाइस पर दिखता रहता है.
Android के लिए Maps SDK, ऐंबियंट मोड में इस्तेमाल करने के लिए, मैप की आसान और कम रंग वाली रेंडरिंग उपलब्ध कराता है. साथ ही, जब डिवाइस इंटरैक्टिव मोड से ऐंबियंट मोड पर स्विच करता है, तो मैप की स्टाइल अपने-आप अडजस्ट हो जाती है. ऐंबियंट मोड में सभी मार्कर, ऑब्जेक्ट, और यूज़र इंटरफ़ेस (यूआई) कंट्रोल गायब हो जाते हैं. इससे आपके ऐप्लिकेशन की बैटरी की खपत कम होती है. साथ ही, यह पक्का किया जाता है कि ऐप्लिकेशन का लुक और फ़ील, आस-पास के अन्य ऐप्लिकेशन के जैसा हो. जैसे, वॉच फ़ेस.
यह पक्का करने के लिए कि आपका ऐप्लिकेशन, मैप के ऐंबियंट मोड का इस्तेमाल करता है, यह तरीका अपनाएं:
- अपने Android SDK को Android 6.0 (एपीआई 23) या उसके बाद के वर्शन पर अपडेट करें. इससे आपको ऐसे एपीआई मिलेंगे जिनकी मदद से, ऐक्टिविटी को ऐंबियंट मोड में ले जाया जा सकता है. एसडीके को अपडेट करने के तरीके के बारे में जानने के लिए, एसडीके पैकेज जोड़ने के बारे में Android का दस्तावेज़ देखें.
- पक्का करें कि आपका प्रोजेक्ट Android 6.0 या उसके बाद के वर्शन को टारगेट करता हो. इसके लिए, ऐप्लिकेशन मेनिफ़ेस्ट में
targetSdkVersionको 23 या उसके बाद के वर्शन पर सेट करें. - अपने ऐप्लिकेशन की
build.gradle.ktsफ़ाइल में, Wearable डिपेंडेंसी जोड़ें. इस पेज पर मौजूद सैंपल देखें. - Android ट्रेनिंग क्लास में बताए गए तरीके से, Wearable ऐप्लिकेशन के मेनिफ़ेस्ट में Wearable Shared Library की एंट्री जोड़ें. इसके बारे में अपने ऐप्लिकेशन को दिखने लायक बनाना लेख में बताया गया है.
- हैंडहेल्ड और वियरेबल डिवाइस के ऐप्लिकेशन मेनिफ़ेस्ट में,
WAKE_LOCKअनुमति जोड़ें. इसके बारे में Android ट्रेनिंग क्लास में बताया गया है. अपने ऐप्लिकेशन को दिखने लायक बनाएं. - अपनी गतिविधि के
onCreate()तरीके में,AmbientModeSupport.attach()तरीके को कॉल करें. इससे ऑपरेटिंग सिस्टम को पता चलता है कि ऐप्लिकेशन हमेशा चालू रहता है. इसलिए, जब डिवाइस बंद हो जाता है, तो उसे वॉच फ़ेस पर वापस जाने के बजाय, ऐंबियंट मोड में चला जाना चाहिए. - अपनी गतिविधि में
AmbientModeSupport.AmbientCallbackProviderइंटरफ़ेस लागू करें, ताकि वह ऐंबियंट मोड की स्थिति में हुए बदलावों को पा सके. - एंबिएंट मोड के साथ काम करने के लिए, मैप को सेट करें. इसके लिए, ऐक्टिविटी की एक्सएमएल लेआउट फ़ाइल में
map:ambientEnabled="true"एट्रिब्यूट सेट करें. इसके अलावा,GoogleMapOptions.ambientEnabled(true)सेट करके प्रोग्राम के हिसाब से भी ऐसा किया जा सकता है. इस सेटिंग से एपीआई को यह जानकारी मिलती है कि उसे ऐंबियंट मोड में इस्तेमाल करने के लिए, ज़रूरी मैप टाइल पहले से लोड करनी होंगी. - जब गतिविधि, ऐंबियंट मोड पर स्विच करती है, तब सिस्टम आपके दिए गए
AmbientCallbackमेंonEnterAmbient()तरीके को कॉल करता है.onEnterAmbient()को अनदेखा करें औरSupportMapFragment.onEnterAmbient(ambientDetails)याMapView.onEnterAmbient(ambientDetails)को कॉल करें. एपीआई, मैप को कम रंग में और बिना इंटरैक्टिव सुविधा के रेंडर करता है. - इसी तरह,
onExitAmbient()पर कॉल करेंSupportMapFragment.onExitAmbient()याMapView.onExitAmbient(). यह एपीआई, मैप को सामान्य तौर पर रेंडर करने की सुविधा पर स्विच करता है.
नीचे दिए गए कोड सैंपल से, गतिविधि में ऐंबियंट मोड चालू किया जा सकता है:
Kotlin
class AmbientActivity : AppCompatActivity(), AmbientModeSupport.AmbientCallbackProvider {

    private lateinit var mapFragment: SupportMapFragment

    public override fun onCreate(savedInstanceState: Bundle?) {
        super.onCreate(savedInstanceState)

        // Set the layout. It only contains a SupportMapFragment and a DismissOverlay.
        setContentView(R.layout.activity_main)

        // Enable ambient support, so the map remains visible in simplified, low-color display
        // when the user is no longer actively using the app but the app is still visible on the
        // watch face.
        val controller = AmbientModeSupport.attach(this)
        Log.d(AmbientActivity::class.java.simpleName, "Is ambient enabled: " + controller.isAmbient)

        // Obtain the MapFragment and set the async listener to be notified when the map is ready.
        mapFragment = supportFragmentManager
            .findFragmentById(R.id.map) as SupportMapFragment
    }

    override fun getAmbientCallback(): AmbientModeSupport.AmbientCallback {
        return object : AmbientModeSupport.AmbientCallback() {
            /**
             * Starts ambient mode on the map.
             * The API swaps to a non-interactive and low-color rendering of the map when the user is no
             * longer actively using the app.
             */
            override fun onEnterAmbient(ambientDetails: Bundle) {
                super.onEnterAmbient(ambientDetails)
                mapFragment.onEnterAmbient(ambientDetails)
            }

            /**
             * Exits ambient mode on the map.
             * The API swaps to the normal rendering of the map when the user starts actively using the app.
             */
            override fun onExitAmbient() {
                super.onExitAmbient()
                mapFragment.onExitAmbient()
            }
        }
    }
}
Java
public class AmbientActivity extends AppCompatActivity implements
    AmbientModeSupport.AmbientCallbackProvider {

    private SupportMapFragment mapFragment;

    public void onCreate(Bundle savedState) {
        super.onCreate(savedState);

        // Set the layout. It only contains a SupportMapFragment and a DismissOverlay.
        setContentView(R.layout.activity_main);

        // Enable ambient support, so the map remains visible in simplified, low-color display
        // when the user is no longer actively using the app but the app is still visible on the
        // watch face.
        AmbientModeSupport.AmbientController controller = AmbientModeSupport.attach(this);
        Log.d(AmbientActivity.class.getSimpleName(), "Is ambient enabled: " + controller.isAmbient());

        // Obtain the MapFragment and set the async listener to be notified when the map is ready.
        mapFragment = (SupportMapFragment) getSupportFragmentManager()
            .findFragmentById(R.id.map);
    }

    @Override
    public AmbientCallback getAmbientCallback() {
        return new AmbientCallback() {
            /**
             * Starts ambient mode on the map.
             * The API swaps to a non-interactive and low-color rendering of the map when the user is no
             * longer actively using the app.
             */
            @Override
            public void onEnterAmbient(Bundle ambientDetails) {
                super.onEnterAmbient(ambientDetails);
                mapFragment.onEnterAmbient(ambientDetails);
            }

            /**
             * Exits ambient mode on the map.
             * The API swaps to the normal rendering of the map when the user starts actively using the app.
             */
            @Override
            public void onExitAmbient() {
                super.onExitAmbient();
                mapFragment.onExitAmbient();
            }
        };
    }
}
ऐप्लिकेशन के ऐंबियंट मोड में होने पर भी, स्क्रीन को अपडेट किया जा सकता है. कॉन्टेंट अपडेट करने और ऐंबियंट मोड के बारे में ज़्यादा जानकारी के लिए, अपने ऐप्लिकेशन को दिखने लायक बनाए रखना के बारे में Android ट्रेनिंग क्लास देखें.
Wear OS पर Street View का इस्तेमाल करना
स्ट्रीट व्यू की सुविधा, पहनने वाले डिवाइसों पर पूरी तरह से काम करती है.
उपयोगकर्ताओं को Street View पैनोरामा देखते समय ऐप्लिकेशन से बाहर निकलने की अनुमति देने के लिए, StreetViewPanorama.OnStreetViewPanoramaLongClickListener इंटरफ़ेस का इस्तेमाल करें. इससे, लंबे समय तक क्लिक करने वाले जेस्चर को सुना जा सकेगा. जब कोई उपयोगकर्ता Street View इमेज पर कहीं भी देर तक क्लिक करता है, तो आपको onStreetViewPanoramaLongClick(StreetViewPanoramaOrientation) इवेंट मिलेगा. कॉल
DismissOverlayView.show() से बाहर निकलने का बटन दिखता है.
नमूना कोड
GitHub पर एक सैंपल ऐप्लिकेशन उपलब्ध है. इसका इस्तेमाल, अपने ऐप्लिकेशन को शुरू करने के लिए किया जा सकता है. इस सैंपल से आपको यह पता चलेगा कि Wear OS पर बुनियादी Google Map कैसे सेट अप किया जाता है.
Wear OS पर Maps API में काम करने वाली सुविधाएं
इस सेक्शन में, पहने जाने वाले डिवाइसों पर मैप की सुविधाओं के बारे में बताया गया है. साथ ही, यह भी बताया गया है कि ये सुविधाएं, फ़ोन और टैबलेट जैसे हैंडहेल्ड डिवाइसों पर मैप की सुविधाओं से किस तरह अलग हैं. यहां नहीं बताई गई सभी एपीआई सुविधाएं, एपीआई के पूरे दस्तावेज़ के हिसाब से काम करनी चाहिए.
| फ़ंक्शन | |
|---|---|
| पूरी तरह से इंटरैक्टिव मोड और लाइट मोड | Android के लिए Maps SDK टूल का इस्तेमाल, पूरी तरह से इंटरैक्टिव मोड या लाइट मोड में किया जा सकता है. अगर आपको स्मार्टवॉच पर परफ़ॉर्मेंस को ऑप्टिमाइज़ करना है और आपके ऐप्लिकेशन को जेस्चर या मैप को पैन और ज़ूम करने जैसे इंटरैक्शन की सुविधा देने की ज़रूरत नहीं है, तो लाइट मोड का इस्तेमाल करें. लाइट मोड में, जब उपयोगकर्ता मैप पर टैप करता है, तब Google Maps का मोबाइल ऐप्लिकेशन शुरू करने की सुविधा बंद होती है. इसे पहनने लायक डिवाइस पर चालू नहीं किया जा सकता. लाइट मोड और पूरी तरह से इंटरैक्टिव मोड के बीच के सभी अंतरों की पूरी सूची देखने के लिए, लाइट मोड का दस्तावेज़ देखें. |
| मैप टूलबार | मैप टूलबार बंद है और इसे पहने जाने वाले डिवाइस पर चालू नहीं किया जा सकता. |
| यूज़र इंटरफ़ेस (यूआई) कंट्रोल | वियरेबल डिवाइसों पर, यूज़र इंटरफ़ेस (यूआई) कंट्रोल डिफ़ॉल्ट रूप से बंद होते हैं. इसमें ज़ूम करने, कंपास, और मेरी जगह की जानकारी के कंट्रोल शामिल हैं. UiSettings क्लास का इस्तेमाल करके, इन्हें हमेशा की तरह चालू किया जा सकता है.
|
| हाथ के जेस्चर | सिंगल-टच इशारे उम्मीद के मुताबिक काम करते हैं. उदाहरण के लिए, मैप को पैन करने के लिए उसे दबाकर खींचें, ज़ूम इन करने के लिए दो बार टैप करें, और ज़ूम आउट करने के लिए दो उंगलियों से टैप करें. उपयोगकर्ता के डिवाइस के हिसाब से, मल्टी-टच जेस्चर के लिए सहायता अलग-अलग होती है. मल्टी-टच जेस्चर के उदाहरणों में, मैप को झुकाने के लिए दो उंगलियों से दबाना, ज़ूम करने के लिए पिंच करना, और दो उंगलियों से घुमाना शामिल है. |
| इनडोर मैप और इमारतें |
वियरेबल डिवाइस पर इनडोर मैप की सुविधा डिफ़ॉल्ट रूप से बंद होती है. इन्हें चालू करने के लिए, GoogleMap.setIndoorEnabled(true) पर कॉल करें. अगर इंडोर मैप चालू हैं, तो मैप में डिफ़ॉल्ट फ़्लोर लेवल दिखेगा.
लेवल पिकर यूज़र इंटरफ़ेस (यूआई) एलिमेंट, पहनने वाले डिवाइसों पर काम नहीं करता. |
| टाइलों के ओवरले | टाइल ओवरले की सुविधा, पहनने योग्य डिवाइसों पर काम नहीं करती. |
Wear OS पर Maps API का इस्तेमाल करके डेवलपमेंट करने के सबसे सही तरीके
अपने ऐप्लिकेशन में उपयोगकर्ताओं को बेहतर अनुभव देने के लिए:
- मैप को स्क्रीन के ज़्यादातर हिस्से पर दिखाना चाहिए. यह इसलिए ज़रूरी है, ताकि पहनने लायक डिवाइस की छोटी स्क्रीन पर मैप को बेहतर तरीके से इस्तेमाल किया जा सके.
- अपने ऐप्लिकेशन का यूज़र एक्सपीरियंस डिज़ाइन करते समय, इस बात का ध्यान रखें कि वियरेबल डिवाइस की बैटरी कम होती है. स्क्रीन को चालू रखने और मैप को दिखने से बैटरी पर असर पड़ेगा.