
บทแนะนำนี้จะแสดงวิธีเพิ่มแผนที่ Google ลงในแอป Android แผนที่ มีเครื่องหมายหรือที่เรียกว่าหมุด เพื่อระบุตำแหน่งที่เฉพาะเจาะจง
ทำตามบทแนะนำเพื่อสร้างแอป Android โดยใช้ Maps SDK สำหรับ Android สภาพแวดล้อมในการพัฒนาซอฟต์แวร์ที่แนะนำคือ Android Studio
รับโค้ด
โคลนหรือดาวน์โหลดที่เก็บตัวอย่าง Google Maps Android API v2 จาก GitHub
ดูเวอร์ชัน Java ของกิจกรรม
// Copyright 2020 Google LLC // // Licensed under the Apache License, Version 2.0 (the "License"); // you may not use this file except in compliance with the License. // You may obtain a copy of the License at // // http://www.apache.org/licenses/LICENSE-2.0 // // Unless required by applicable law or agreed to in writing, software // distributed under the License is distributed on an "AS IS" BASIS, // WITHOUT WARRANTIES OR CONDITIONS OF ANY KIND, either express or implied. // See the License for the specific language governing permissions and // limitations under the License. package com.example.mapwithmarker; import android.os.Bundle; import androidx.appcompat.app.AppCompatActivity; import com.google.android.gms.maps.CameraUpdateFactory; import com.google.android.gms.maps.GoogleMap; import com.google.android.gms.maps.OnMapReadyCallback; import com.google.android.gms.maps.SupportMapFragment; import com.google.android.gms.maps.model.LatLng; import com.google.android.gms.maps.model.MarkerOptions; /** * An activity that displays a Google map with a marker (pin) to indicate a particular location. */ public class MapsMarkerActivity extends AppCompatActivity implements OnMapReadyCallback { @Override protected void onCreate(Bundle savedInstanceState) { super.onCreate(savedInstanceState); // Retrieve the content view that renders the map. setContentView(R.layout.activity_maps); // Get the SupportMapFragment and request notification when the map is ready to be used. SupportMapFragment mapFragment = (SupportMapFragment) getSupportFragmentManager() .findFragmentById(R.id.map); mapFragment.getMapAsync(this); } /** * Manipulates the map when it's available. * The API invokes this callback when the map is ready to be used. * This is where we can add markers or lines, add listeners or move the camera. In this case, * we just add a marker near Sydney, Australia. * If Google Play services is not installed on the device, the user receives a prompt to install * Play services inside the SupportMapFragment. The API invokes this method after the user has * installed Google Play services and returned to the app. */ @Override public void onMapReady(GoogleMap googleMap) { // Add a marker in Sydney, Australia, // and move the map's camera to the same location. LatLng sydney = new LatLng(-33.852, 151.211); googleMap.addMarker(new MarkerOptions() .position(sydney) .title("Marker in Sydney")); googleMap.moveCamera(CameraUpdateFactory.newLatLng(sydney)); } }
ดูเวอร์ชัน Kotlin ของกิจกรรม
// Copyright 2020 Google LLC // // Licensed under the Apache License, Version 2.0 (the "License"); // you may not use this file except in compliance with the License. // You may obtain a copy of the License at // // http://www.apache.org/licenses/LICENSE-2.0 // // Unless required by applicable law or agreed to in writing, software // distributed under the License is distributed on an "AS IS" BASIS, // WITHOUT WARRANTIES OR CONDITIONS OF ANY KIND, either express or implied. // See the License for the specific language governing permissions and // limitations under the License. package com.example.mapwithmarker import android.os.Bundle import android.widget.Toast import androidx.appcompat.app.AppCompatActivity import com.google.android.gms.maps.CameraUpdateFactory import com.google.android.gms.maps.GoogleMap import com.google.android.gms.maps.OnMapReadyCallback import com.google.android.gms.maps.SupportMapFragment import com.google.android.gms.maps.model.LatLng import com.google.android.gms.maps.model.MarkerOptions /** * An activity that displays a Google map with a marker (pin) to indicate a particular location. */ class MapsMarkerActivity : AppCompatActivity(), OnMapReadyCallback { override fun onCreate(savedInstanceState: Bundle?) { super.onCreate(savedInstanceState) // Retrieve the content view that renders the map. setContentView(R.layout.activity_maps) // Get the SupportMapFragment and request notification when the map is ready to be used. val mapFragment = supportFragmentManager.findFragmentById(R.id.map) as? SupportMapFragment mapFragment?.getMapAsync(this) } override fun onMapReady(googleMap: GoogleMap) { val sydney = LatLng(-33.852, 151.211) googleMap.addMarker( MarkerOptions() .position(sydney) .title("Marker in Sydney") ) googleMap.moveCamera(CameraUpdateFactory.newLatLng(sydney)) } }
สร้างโปรเจ็กต์การพัฒนา
ทำตามขั้นตอนต่อไปนี้เพื่อสร้างโปรเจ็กต์บทแนะนำใน Android Studio
- ดาวน์โหลดและติดตั้ง Android Studio
- เพิ่มแพ็กเกจบริการ Google Play ลงใน Android Studio
- โคลนหรือดาวน์โหลดที่เก็บตัวอย่าง Google Maps Android API v2 หากคุณไม่ได้ทำเมื่อเริ่มอ่านบทแนะนำนี้
นำเข้าโปรเจ็กต์บทแนะนำ
- ใน Android Studio ให้เลือก File > New > Import Project
- ไปที่ตำแหน่งที่คุณบันทึกที่เก็บตัวอย่าง Google Maps Android API v2 หลังจากดาวน์โหลด
- ค้นหาโปรเจ็กต์ MapWithMarker ที่ตำแหน่งต่อไปนี้
PATH-TO-SAVED-REPO/android-samples/tutorials/java/MapWithMarker(Java) หรือ
PATH-TO-SAVED-REPO/android-samples/tutorials/kotlin/MapWithMarker(Kotlin) - เลือกไดเรกทอรีโปรเจ็กต์ แล้วคลิกเปิด ตอนนี้ Android Studio จะสร้างโปรเจ็กต์โดยใช้เครื่องมือบิลด์ Gradle
เปิดใช้ API ที่จำเป็นและรับคีย์ API
หากต้องการทำตามบทแนะนำนี้ให้เสร็จสมบูรณ์ คุณต้องมีโปรเจ็กต์ที่อยู่ในระบบคลาวด์ของ Google Cloud ที่เปิดใช้ API ที่จำเป็นและคีย์ API ที่ได้รับอนุญาตให้ใช้ Maps SDK สำหรับ Android ดูรายละเอียดเพิ่มเติมได้ที่
เพิ่มคีย์ API ลงในแอป
- เปิดไฟล์
local.propertiesของโปรเจ็กต์ เพิ่มสตริงต่อไปนี้ แล้วแทนที่
YOUR_API_KEYด้วยค่าของ คีย์ API ของคุณMAPS_API_KEY=YOUR_API_KEYเมื่อคุณสร้างแอป ปลั๊กอินข้อมูลลับ Gradle สำหรับ Android จะคัดลอกคีย์ API และทำให้พร้อมใช้งานเป็นตัวแปรบิลด์ใน ไฟล์ Manifest ของ Android ตามที่อธิบายด้านล่าง
สร้างและเรียกใช้แอป
วิธีสร้างและเรียกใช้แอป
เชื่อมต่ออุปกรณ์ Android กับคอมพิวเตอร์ ทำตามวิธีการเพื่อเปิดใช้ตัวเลือกสำหรับนักพัฒนาซอฟต์แวร์ในอุปกรณ์ Android และกำหนดค่าระบบให้ตรวจหาอุปกรณ์
หรือจะใช้ตัวจัดการอุปกรณ์เสมือน Android (AVD) เพื่อกำหนดค่าอุปกรณ์เสมือนก็ได้ เมื่อเลือกโปรแกรมจำลอง ให้เลือก อิมเมจที่มี Google API ดูรายละเอียดเพิ่มเติมได้ที่ ตั้งค่าโปรเจ็กต์ Android Studio
ใน Android Studio ให้คลิกตัวเลือกเมนูเรียกใช้ (หรือไอคอนปุ่มเล่น) เลือกอุปกรณ์ตามที่ได้รับแจ้ง
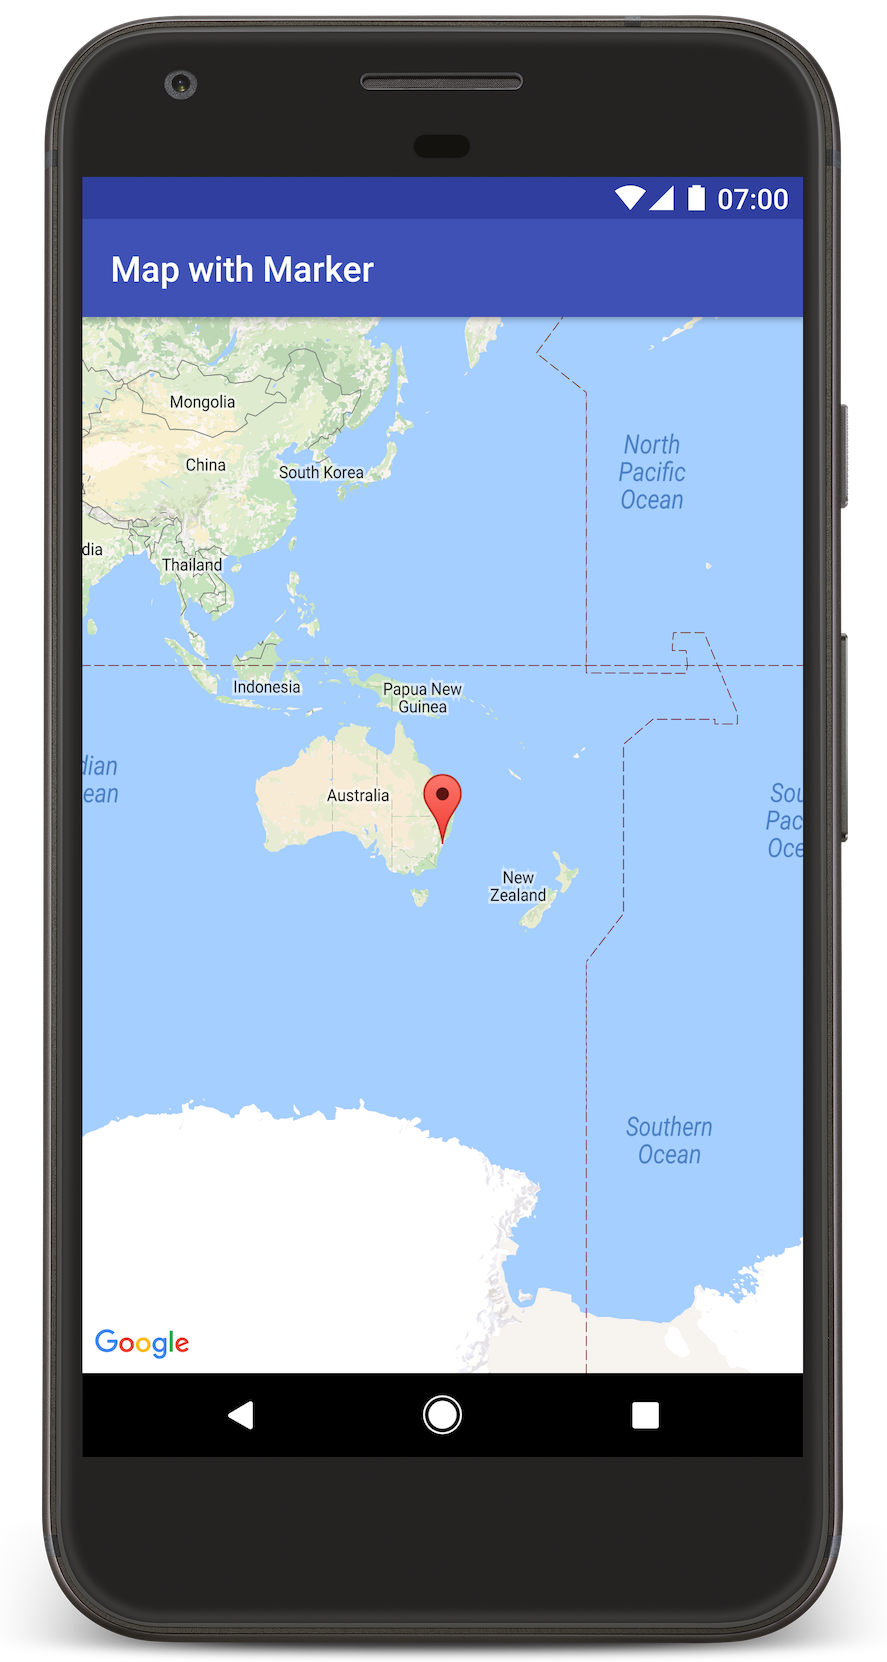
Android Studio จะเรียกใช้ Gradle เพื่อสร้างแอป แล้วเรียกใช้แอปในอุปกรณ์หรือในโปรแกรมจำลอง คุณควรเห็นแผนที่ที่มีเครื่องหมายชี้ไปที่ ซิดนีย์บนชายฝั่งตะวันออกของออสเตรเลีย ซึ่งคล้ายกับรูปภาพในหน้านี้
การแก้ปัญหา:
- หากไม่เห็นแผนที่ ให้ตรวจสอบว่าคุณได้รับคีย์ API และเพิ่มคีย์ดังกล่าวลงในแอปแล้วตามที่อธิบายไว้ข้างต้น ตรวจสอบบันทึกใน Android Monitor ของ Android Studio เพื่อดูข้อความแสดงข้อผิดพลาดเกี่ยวกับคีย์ API
- ใช้เครื่องมือแก้ไขข้อบกพร่องของ Android Studio เพื่อดูบันทึกและแก้ไขข้อบกพร่องของแอป
ทำความเข้าใจโค้ด
ส่วนนี้ของบทแนะนำจะอธิบายส่วนที่สำคัญที่สุดของแอป MapWithMarker เพื่อช่วยให้คุณเข้าใจวิธีสร้างแอปที่คล้ายกัน
ตรวจสอบไฟล์ Manifest ของ Android
โปรดสังเกตองค์ประกอบต่อไปนี้ในไฟล์ AndroidManifest.xml ของแอป
เพิ่มองค์ประกอบ
meta-dataเพื่อฝังเวอร์ชันของบริการ Google Play ที่ใช้คอมไพล์แอป<meta-data android:name="com.google.android.gms.version" android:value="@integer/google_play_services_version" />เพิ่มองค์ประกอบ
meta-dataที่ระบุคีย์ API ตัวอย่างที่มาพร้อมกับ บทแนะนำนี้จะแมปค่าสำหรับคีย์ API กับตัวแปรบิลด์ที่ตรงกับ ชื่อของคีย์ที่คุณกำหนดไว้ก่อนหน้านี้MAPS_API_KEYเมื่อคุณสร้างแอป Secrets Gradle Plugin สำหรับ Android จะทำให้คีย์ในไฟล์local.propertiesพร้อมใช้งานเป็นตัวแปรบิลด์ของ Manifest<meta-data android:name="com.google.android.geo.API_KEY" android:value="${MAPS_API_KEY}" />ในไฟล์
build.gradleบรรทัดต่อไปนี้จะส่งคีย์ API ไปยัง Manifest ของ Androidid 'com.google.android.libraries.mapsplatform.secrets-gradle-plugin'
ตัวอย่างไฟล์ Manifest แบบเต็มมีดังนี้
<?xml version="1.0" encoding="utf-8"?>
<!--
 Copyright 2020 Google LLC

 Licensed under the Apache License, Version 2.0 (the "License");
 you may not use this file except in compliance with the License.
 You may obtain a copy of the License at

      http://www.apache.org/licenses/LICENSE-2.0

 Unless required by applicable law or agreed to in writing, software
 distributed under the License is distributed on an "AS IS" BASIS,
 WITHOUT WARRANTIES OR CONDITIONS OF ANY KIND, either express or implied.
 See the License for the specific language governing permissions and
 limitations under the License.
-->

<manifest xmlns:android="http://schemas.android.com/apk/res/android">

    <application
        android:allowBackup="true"
        android:icon="@mipmap/ic_launcher"
        android:label="@string/app_name"
        android:supportsRtl="true"
        android:theme="@style/AppTheme">

        <meta-data
            android:name="com.google.android.gms.version"
            android:value="@integer/google_play_services_version" />

        <!--
             The API key for Google Maps-based APIs.
        -->
        <meta-data
            android:name="com.google.android.geo.API_KEY"
            android:value="${MAPS_API_KEY}" />

        <activity
            android:name=".MapsMarkerActivity"
            android:label="@string/title_activity_maps"
            android:exported="true">
            <intent-filter>
                <action android:name="android.intent.action.MAIN" />

                <category android:name="android.intent.category.LAUNCHER" />
            </intent-filter>
        </activity>
    </application>

</manifest>
เพิ่มแผนที่
แสดงแผนที่โดยใช้ Maps SDK สำหรับ Android
เพิ่มองค์ประกอบ
<fragment>ลงในไฟล์เลย์เอาต์ของกิจกรรมactivity_maps.xmlองค์ประกอบนี้กำหนดSupportMapFragmentให้ทำหน้าที่เป็นคอนเทนเนอร์สำหรับแผนที่ และให้สิทธิ์เข้าถึงออบเจ็กต์GoogleMapบทแนะนำนี้ใช้ Android Support Library เวอร์ชันของ MapFragment เพื่อให้มั่นใจถึงความเข้ากันได้แบบย้อนหลัง กับ Android Framework เวอร์ชันก่อนหน้า<!-- Copyright 2020 Google LLC Licensed under the Apache License, Version 2.0 (the "License"); you may not use this file except in compliance with the License. You may obtain a copy of the License at http://www.apache.org/licenses/LICENSE-2.0 Unless required by applicable law or agreed to in writing, software distributed under the License is distributed on an "AS IS" BASIS, WITHOUT WARRANTIES OR CONDITIONS OF ANY KIND, either express or implied. See the License for the specific language governing permissions and limitations under the License. --> <fragment xmlns:android="http://schemas.android.com/apk/res/android" xmlns:tools="http://schemas.android.com/tools" android:id="@+id/map" android:name="com.google.android.gms.maps.SupportMapFragment" android:layout_width="match_parent" android:layout_height="match_parent" tools:context="com.example.mapwithmarker.MapsMarkerActivity" />
ในเมธอด
onCreate()ของกิจกรรม ให้ตั้งค่าไฟล์เลย์เอาต์เป็นมุมมองเนื้อหา รับแฮนเดิลไปยัง MapFragment โดยการเรียกใช้FragmentManager.findFragmentById()จากนั้นใช้getMapAsync()เพื่อลงทะเบียนสำหรับการเรียกกลับของแผนที่Java
@Override protected void onCreate(Bundle savedInstanceState) { super.onCreate(savedInstanceState); // Retrieve the content view that renders the map. setContentView(R.layout.activity_maps); // Get the SupportMapFragment and request notification when the map is ready to be used. SupportMapFragment mapFragment = (SupportMapFragment) getSupportFragmentManager() .findFragmentById(R.id.map); mapFragment.getMapAsync(this); }
Kotlin
override fun onCreate(savedInstanceState: Bundle?) { super.onCreate(savedInstanceState) // Retrieve the content view that renders the map. setContentView(R.layout.activity_maps) // Get the SupportMapFragment and request notification when the map is ready to be used. val mapFragment = supportFragmentManager.findFragmentById(R.id.map) as? SupportMapFragment mapFragment?.getMapAsync(this) }
ใช้อินเทอร์เฟซ
OnMapReadyCallbackและ ลบล้างเมธอดonMapReady()เพื่อตั้งค่าแผนที่เมื่อออบเจ็กต์GoogleMapพร้อมใช้งานJava
public class MapsMarkerActivity extends AppCompatActivity implements OnMapReadyCallback { // ... @Override public void onMapReady(GoogleMap googleMap) { LatLng sydney = new LatLng(-33.852, 151.211); googleMap.addMarker(new MarkerOptions() .position(sydney) .title("Marker in Sydney")); } }
Kotlin
class MapsMarkerActivity : AppCompatActivity(), OnMapReadyCallback { // ... override fun onMapReady(googleMap: GoogleMap) { val sydney = LatLng(-33.852, 151.211) googleMap.addMarker( MarkerOptions() .position(sydney) .title("Marker in Sydney") ) } }
โดยค่าเริ่มต้น Maps SDK สำหรับ Android จะแสดงเนื้อหาของ หน้าต่างข้อมูลเมื่อผู้ใช้แตะเครื่องหมาย คุณไม่จำเป็นต้องเพิ่มเครื่องมือฟังการคลิก สำหรับเครื่องหมายหากต้องการใช้ลักษณะการทำงานเริ่มต้น
ขั้นตอนถัดไป
ดูข้อมูลเพิ่มเติมเกี่ยวกับออบเจ็กต์แผนที่และสิ่งที่คุณทำได้ด้วย เครื่องหมาย