Оптимизируйте свои подборки
Сохраняйте и классифицируйте контент в соответствии со своими настройками.
Для каждого создаваемого вами приложения Google Chat требуется отдельный проект Google Cloud с включённым и настроенным API чата. На этой странице показано, как настроить API чата.
Выберите отображаемое имя, аватар и описание для вашего приложения чата.
При включении API чата вы настраиваете информацию о вашем приложении чата, которая будет отображаться пользователям в чате, включая отображаемое имя, аватар и описание. Эта информация отображается только в чате. Чтобы опубликовать приложение чата в Marketplace, необходимо также указать информацию, которая будет отображаться в описании вашего приложения чата в Marketplace .
Для вызова API чата необходимо настроить приложение Google Chat, указав следующую информацию:
Поле
Описание
Формат
Название приложения
Отображаемое имя приложения «Чат».
До 25 буквенно-цифровых символов
URL-адрес аватара
Изображение, которое будет отображаться в качестве аватара вашего приложения чата.
HTTPS-URL, указывающий на квадратное графическое изображение (PNG или JPEG). Рекомендуемый размер — 256 x 256 пикселей или больше.
Описание
Краткое описание назначения приложения «Чат».
До 40 буквенно-цифровых символов
Название, аватар и описание приложения Chat отображаются для пользователей в интерфейсе Chat. В некоторых запросах на запись через API Chat Chat использует эту информацию для определения действий, выполняемых приложением Chat в Chat.
Например, если вы вызываете метод spaces.create() , Chat включает название приложения Chat в описание того, кто создал пространство, как показано на следующем рисунке:
Рисунок 1. Сообщение об атрибуции, которое Chat отображает при использовании метода 
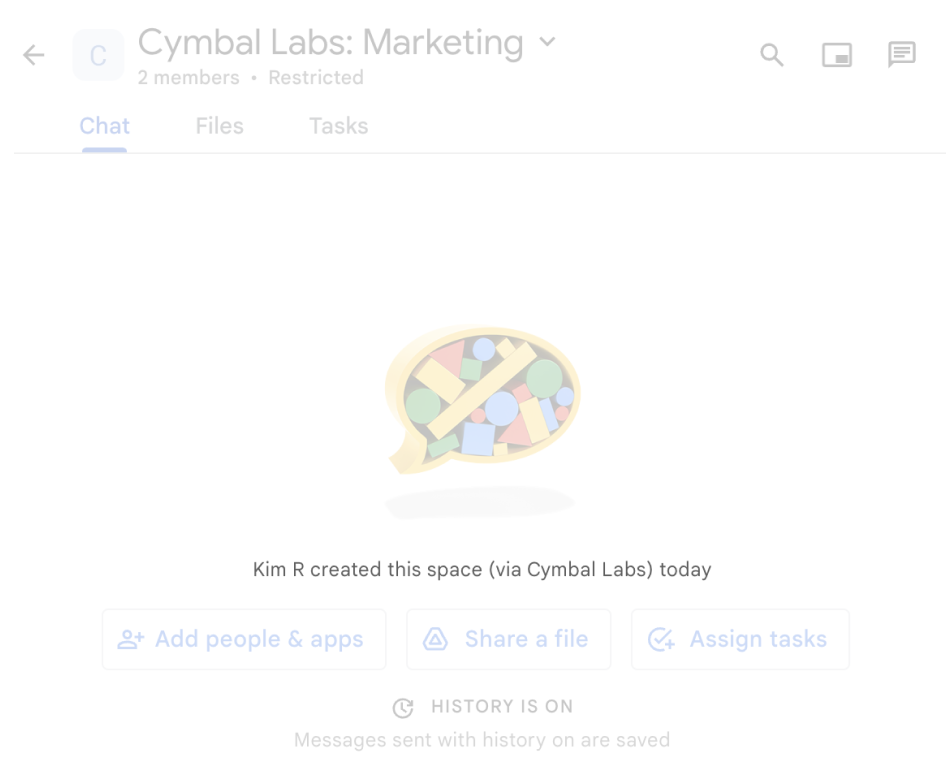
spaces.create() для создания пространства от имени пользователя.
Для взаимодействия с приложениями чата пользователи также могут просматривать или использовать эту информацию следующими способами:
Вызовите приложение чата, @упомянув его название.
Найдите приложение Chat и начните прямую переписку. В меню приложений в личных сообщениях отображается название и аватар приложения Chat.
На панели создания сообщения пользователи могут просматривать приложения чата и видеть свое имя, аватар и описание.
Настройте приложение чата в консоли Google Cloud
Когда у вас есть данные вашего приложения Chat, откройте свой проект Cloud и настройте API Chat:
В консоли Google Cloud перейдите на страницу Chat API и нажмите страницу Configuration :
В разделе «Информация о приложении» заполните поля «Название приложения» , «URL-адрес аватара» и «Описание» .
В разделе «Интерактивные функции» переведите переключатель «Включить интерактивные функции» в положение «Выкл.», чтобы отключить интерактивные функции для приложения «Чат». Вы можете настроить это позже. Подробнее о настройке и создании интерактивных функций см. в разделе Получение и ответ на взаимодействия с пользователем .
Необязательно: в разделе «Журналы» установите флажок «Записывать ошибки в журнал», чтобы использовать Google Cloud Logging. Подробнее см. в статье «Запрос журналов ошибок для приложений чата» .
Нажмите «Сохранить» .
Предоставьте другим пользователям разрешение на настройку API чата
Вы можете предоставить отдельным пользователям доступ к странице конфигурации приложения Chat, назначив им роль « Владелец приложения Chat» или «Наблюдатель приложения Chat»в Google Cloud Identity Access Management (IAM) . Пользователи с этими ролями не могут перейти на страницу конфигурации приложения Chat через панель управления API и служб , но могут получить к ней доступ, перейдя в консоль Google Cloud для облачного проекта хоста приложения Chat, как показано ниже:
[[["Прост для понимания","easyToUnderstand","thumb-up"],["Помог мне решить мою проблему","solvedMyProblem","thumb-up"],["Другое","otherUp","thumb-up"]],[["Отсутствует нужная мне информация","missingTheInformationINeed","thumb-down"],["Слишком сложен/слишком много шагов","tooComplicatedTooManySteps","thumb-down"],["Устарел","outOfDate","thumb-down"],["Проблема с переводом текста","translationIssue","thumb-down"],["Проблемы образцов/кода","samplesCodeIssue","thumb-down"],["Другое","otherDown","thumb-down"]],["Последнее обновление: 2025-08-29 UTC."],[[["\u003cp\u003eEvery Google Chat app needs its own Google Cloud project with the Chat API enabled and configured, following specific prerequisites.\u003c/p\u003e\n"],["\u003cp\u003eChat apps require a display name, avatar URL, and description, which are visible to users and used by Chat for attributions.\u003c/p\u003e\n"],["\u003cp\u003eThe Chat API is configured in the Google Cloud console, where you can set the app's details, enable/disable interactive features, and optionally enable error logging.\u003c/p\u003e\n"],["\u003cp\u003eAccess to the Chat app configuration page can be granted to other users via specific Google Cloud IAM roles.\u003c/p\u003e\n"]]],["Each Google Chat app requires a dedicated Google Cloud project with the Chat API enabled. Configuration involves setting up the app's display name (up to 25 characters), avatar URL (square image, 256x256 pixels or more), and description (up to 40 characters). In the Google Cloud console, you must fill out these application details, and optionally, enable or disable interactive features and log errors. Additionally, you can grant specific users access to configure the Chat API by assigning them the \"Chat apps Owner\" or \"Chat apps Viewer\" IAM roles.\n"],null,["# Configure the Google Chat API\n\nEach Google Chat app that you create requires its own\nGoogle Cloud project with the Chat API enabled and configured. This page\nshows you how to configure the Chat API.\n\nPrerequisites\n-------------\n\n- A Business or Enterprise [Google Workspace](https://support.google.com/a/answer/6043576) account with access to [Google Chat](https://workspace.google.com/products/chat/).\n- [Create a Google Cloud project](/workspace/guides/create-project).\n- [Configure the OAuth consent screen](/workspace/guides/configure-oauth-consent).\n- [Enable the Google Chat API](/workspace/guides/enable-apis).\n\nChoose a display name, avatar, and description for your Chat app\n----------------------------------------------------------------\n\nWhen you enable the Chat API, you configure the details about your\nChat app that appear to users in Chat,\nincluding a display name, avatar, and description. These details only appear\nin Chat. To publish your Chat app to the\nMarketplace, you must also specify the details that\nappear in your Chat app's\n[Marketplace listing](/workspace/marketplace/create-listing).\n\nTo call the Chat API, you must set up a\nGoogle Chat app with the following information:\n\n| Field | Description | Format |\n|-------------|-----------------------------------------------------|----------------------------------------------------------------------------------------------------------------|\n| App name | The display name for the Chat app. | Up to 25 alphanumeric characters |\n| Avatar URL | The image that displays as your Chat app's avatar. | An HTTPS URL pointing to a square graphics image (PNG or JPEG). Recommended size is 256 by 256 pixels or more. |\n| Description | A brief description of the purpose of the Chat app. | Up to 40 alphanumeric characters |\n\nThe Chat app's name, avatar, and description are\ndisplayed to users in the Chat UI. For some Chat API\nwrite requests, Chat uses this information to attribute the\nactions that a Chat app takes in Chat.\n\nFor example, if you call the `spaces.create()` method, Chat\nincludes the name of the Chat app in the\ndescription of who created the space, as shown in the following image:\n**Figure 1** . The attribution message that Chat displays when the `spaces.create()` method is used to create a space on behalf of a user.\n\nTo interact with Chat apps, users can also see or use this\ninformation in the following ways:\n\n- Invoke the Chat app by @mentioning its name.\n- Find and start a direct message with the Chat app. In the **Apps** menu, direct messages display the Chat app's name and avatar.\n- From the compose bar, users can browse Chat apps and see their name, avatar, and description.\n\nConfigure your Chat app in the Google Cloud console\n---------------------------------------------------\n\nWhen you have your Chat app details, open your\nCloud project and configure the Chat API:\n\n1. In the Google Cloud console, go to the Chat API page and click the\n **Configuration** page:\n\n [Go to Chat API Configuration page](https://console.cloud.google.com/apis/api/chat.googleapis.com/hangouts-chat)\n2. Under **Application info** , fill out the **App name** , **Avatar URL** ,\n and **Description** fields.\n\n3. Under Interactive features, click the **Enable interactive features** toggle\n to the off position to disable interactive features for the\n Chat app. You can set this up later. To learn about\n configuring and building interactive features, see\n [Receive and respond to user interactions](/workspace/chat/receive-respond-interactions).\n\n4. Optional: Under **Logs** , select the **Log errors to Logging** checkbox to\n use Google Cloud Logging. For more information, see\n [Query error logs for Chat apps](/workspace/chat/query-logs).\n\n5. Click **Save**.\n\nGrant other people permission to configure the Chat API\n-------------------------------------------------------\n\nYou can\n[give specific users access](https://cloud.google.com/iam/docs/granting-changing-revoking-access#single-role)\nto the Chat app configuration page by granting them\nthe **Chat apps Owner** or **Chat apps Viewer**\n[Google Cloud Identity Access Management (IAM) role](https://cloud.google.com/iam/docs/understanding-roles#chat-roles).\nUsers with these roles can't navigate to the Chat apps\nconfiguration page by using the **APIs \\& Services** dashboard, but can\naccess the configuration page by navigating to the Google Cloud console for the\nChat app's host Cloud project as follows: \n\n```\nhttps://console.developers.google.com/apis/api/chat.googleapis.com/hangouts-chat?project=PROJECT_ID\n```\n\nWhere \u003cvar translate=\"no\"\u003ePROJECT_ID\u003c/var\u003e is the project ID of the\nGoogle Cloud project hosting the Chat app.\n| Users with **Project** roles can also access the app configuration page.\n|\n|\n| Users with custom roles containing the\n| `resourcemanager.projects.(get|update)` permissions cannot access\n| the Chat app configuration. For custom roles, use\n| the `chat.bots.(get|update)` permissions instead.\n\nRelated topics\n--------------\n\n- [Choose a Chat app architecture](/workspace/chat/structure)\n- To configure your Chat app for interactive features, see [Receive and respond to user interactions](/workspace/chat/receive-respond-interactions)"]]