Zadbaj o dobrą organizację dzięki kolekcji
Zapisuj i kategoryzuj treści zgodnie ze swoimi preferencjami.
Każda utworzona przez Ciebie aplikacja Google Chat wymaga własnego projektu Google Cloud z włączonym i skonfigurowanym interfejsem Chat API. Na tej stronie dowiesz się, jak skonfigurować interfejs Chat API.
Wybieranie nazwy wyświetlanej, awatara i opisu aplikacji Chat
Gdy włączysz interfejs Chat API, skonfigurujesz szczegóły aplikacji do obsługi czatu, które będą widoczne dla użytkowników czatu, w tym nazwę wyświetlaną, awatar i opis. Te informacje pojawiają się tylko w Google Chat. Aby opublikować aplikację Google Chat w Marketplace, musisz też podać szczegóły, które będą widoczne w informacjach o aplikacji w Marketplace.
Aby wywołać interfejs Chat API, musisz skonfigurować aplikację Google Chat, podając te informacje:
Pole
Opis
Format
Nazwa aplikacji
Wyświetlana nazwa aplikacji Google Chat.
Do 25 znaków alfanumerycznych
URL awatara
Obraz, który wyświetla się jako awatar aplikacji Chat.
Adres URL HTTPS prowadzący do kwadratowego obrazu (PNG lub JPEG).
Zalecany rozmiar to co najmniej 256 x 256 pikseli.
Opis
Krótki opis przeznaczenia aplikacji Chat.
Maksymalnie 40 znaków alfanumerycznych
Nazwa, awatar i opis aplikacji Google Chat są wyświetlane użytkownikom w interfejsie Google Chat. W przypadku niektórych żądań zapisu do interfejsu Chat API usługa Chat używa tych informacji do przypisywania działań, które aplikacja Google Chat wykonuje w Google Chat.
Jeśli na przykład wywołasz metodę spaces.create(), Chat uwzględni nazwę aplikacji Chat w opisie osoby, która utworzyła pokój, jak pokazano na tym obrazie:
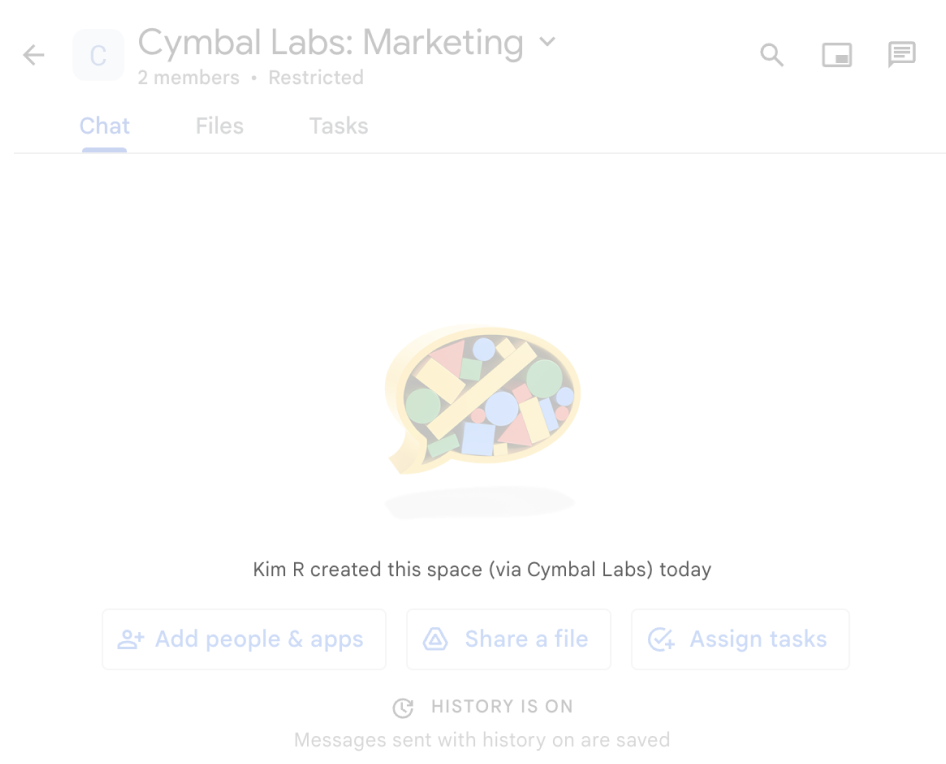
Rysunek 1. Wiadomość o atrybucji, którą wyświetla Chat, gdy do utworzenia pokoju w imieniu użytkownika używana jest metoda spaces.create().
Aby korzystać z aplikacji do obsługi czatu, użytkownicy mogą też wyświetlać lub wykorzystywać te informacje w następujący sposób:
Wywołaj aplikację Google Chat, wywołując ją za pomocą znaku @.
Znajdź i rozpocznij czat z aplikacją Google Chat. W menu Aplikacje czaty wyświetlają nazwę i awatar aplikacji Google Chat.
Na pasku tworzenia wiadomości użytkownicy mogą przeglądać aplikacje do Google Chat i wyświetlać ich nazwy, awatary i opisy.
Konfigurowanie aplikacji do obsługi Google Chat w konsoli Google Cloud
Gdy będziesz mieć szczegółowe informacje o aplikacji Google Chat, otwórz projekt Cloud i skonfiguruj interfejs Chat API:
W konsoli Google Cloud otwórz stronę Chat API i kliknij stronę Konfiguracja:
W sekcji Informacje o aplikacji wypełnij pola Nazwa aplikacji, URL awatara i Opis.
W sekcji Funkcje interaktywne kliknij przełącznik Włącz funkcje interaktywne, aby wyłączyć funkcje interaktywne w aplikacji do obsługi czatu. Możesz to skonfigurować później. Więcej informacji o konfigurowaniu i tworzeniu funkcji interaktywnych znajdziesz w artykule Otrzymywanie odpowiedzi na interakcje użytkowników.
Przyznawanie innym osobom uprawnień do konfigurowania interfejsu Chat API
Możesz przyznać dostęp określonym użytkownikom do strony konfiguracji aplikacji do obsługi czatu, przypisując im rolę właściciela aplikacji do obsługi czatu lub rolę wyświetlającego aplikacje do obsługi czatu w Google Cloud Identity Access Management (IAM).
Użytkownicy z tymi rolami nie mogą przejść na stronę konfiguracji aplikacji do obsługi czatu za pomocą panelu Interfejsy API i usługi, ale mogą uzyskać dostęp do strony konfiguracji, przechodząc do konsoli Google Cloud dla projektu hosta aplikacji do obsługi czatu w ten sposób:
[[["Łatwo zrozumieć","easyToUnderstand","thumb-up"],["Rozwiązało to mój problem","solvedMyProblem","thumb-up"],["Inne","otherUp","thumb-up"]],[["Brak potrzebnych mi informacji","missingTheInformationINeed","thumb-down"],["Zbyt skomplikowane / zbyt wiele czynności do wykonania","tooComplicatedTooManySteps","thumb-down"],["Nieaktualne treści","outOfDate","thumb-down"],["Problem z tłumaczeniem","translationIssue","thumb-down"],["Problem z przykładami/kodem","samplesCodeIssue","thumb-down"],["Inne","otherDown","thumb-down"]],["Ostatnia aktualizacja: 2025-08-29 UTC."],[[["\u003cp\u003eEvery Google Chat app needs its own Google Cloud project with the Chat API enabled and configured, following specific prerequisites.\u003c/p\u003e\n"],["\u003cp\u003eChat apps require a display name, avatar URL, and description, which are visible to users and used by Chat for attributions.\u003c/p\u003e\n"],["\u003cp\u003eThe Chat API is configured in the Google Cloud console, where you can set the app's details, enable/disable interactive features, and optionally enable error logging.\u003c/p\u003e\n"],["\u003cp\u003eAccess to the Chat app configuration page can be granted to other users via specific Google Cloud IAM roles.\u003c/p\u003e\n"]]],["Each Google Chat app requires a dedicated Google Cloud project with the Chat API enabled. Configuration involves setting up the app's display name (up to 25 characters), avatar URL (square image, 256x256 pixels or more), and description (up to 40 characters). In the Google Cloud console, you must fill out these application details, and optionally, enable or disable interactive features and log errors. Additionally, you can grant specific users access to configure the Chat API by assigning them the \"Chat apps Owner\" or \"Chat apps Viewer\" IAM roles.\n"],null,["# Configure the Google Chat API\n\nEach Google Chat app that you create requires its own\nGoogle Cloud project with the Chat API enabled and configured. This page\nshows you how to configure the Chat API.\n\nPrerequisites\n-------------\n\n- A Business or Enterprise [Google Workspace](https://support.google.com/a/answer/6043576) account with access to [Google Chat](https://workspace.google.com/products/chat/).\n- [Create a Google Cloud project](/workspace/guides/create-project).\n- [Configure the OAuth consent screen](/workspace/guides/configure-oauth-consent).\n- [Enable the Google Chat API](/workspace/guides/enable-apis).\n\nChoose a display name, avatar, and description for your Chat app\n----------------------------------------------------------------\n\nWhen you enable the Chat API, you configure the details about your\nChat app that appear to users in Chat,\nincluding a display name, avatar, and description. These details only appear\nin Chat. To publish your Chat app to the\nMarketplace, you must also specify the details that\nappear in your Chat app's\n[Marketplace listing](/workspace/marketplace/create-listing).\n\nTo call the Chat API, you must set up a\nGoogle Chat app with the following information:\n\n| Field | Description | Format |\n|-------------|-----------------------------------------------------|----------------------------------------------------------------------------------------------------------------|\n| App name | The display name for the Chat app. | Up to 25 alphanumeric characters |\n| Avatar URL | The image that displays as your Chat app's avatar. | An HTTPS URL pointing to a square graphics image (PNG or JPEG). Recommended size is 256 by 256 pixels or more. |\n| Description | A brief description of the purpose of the Chat app. | Up to 40 alphanumeric characters |\n\nThe Chat app's name, avatar, and description are\ndisplayed to users in the Chat UI. For some Chat API\nwrite requests, Chat uses this information to attribute the\nactions that a Chat app takes in Chat.\n\nFor example, if you call the `spaces.create()` method, Chat\nincludes the name of the Chat app in the\ndescription of who created the space, as shown in the following image:\n**Figure 1** . The attribution message that Chat displays when the `spaces.create()` method is used to create a space on behalf of a user.\n\nTo interact with Chat apps, users can also see or use this\ninformation in the following ways:\n\n- Invoke the Chat app by @mentioning its name.\n- Find and start a direct message with the Chat app. In the **Apps** menu, direct messages display the Chat app's name and avatar.\n- From the compose bar, users can browse Chat apps and see their name, avatar, and description.\n\nConfigure your Chat app in the Google Cloud console\n---------------------------------------------------\n\nWhen you have your Chat app details, open your\nCloud project and configure the Chat API:\n\n1. In the Google Cloud console, go to the Chat API page and click the\n **Configuration** page:\n\n [Go to Chat API Configuration page](https://console.cloud.google.com/apis/api/chat.googleapis.com/hangouts-chat)\n2. Under **Application info** , fill out the **App name** , **Avatar URL** ,\n and **Description** fields.\n\n3. Under Interactive features, click the **Enable interactive features** toggle\n to the off position to disable interactive features for the\n Chat app. You can set this up later. To learn about\n configuring and building interactive features, see\n [Receive and respond to user interactions](/workspace/chat/receive-respond-interactions).\n\n4. Optional: Under **Logs** , select the **Log errors to Logging** checkbox to\n use Google Cloud Logging. For more information, see\n [Query error logs for Chat apps](/workspace/chat/query-logs).\n\n5. Click **Save**.\n\nGrant other people permission to configure the Chat API\n-------------------------------------------------------\n\nYou can\n[give specific users access](https://cloud.google.com/iam/docs/granting-changing-revoking-access#single-role)\nto the Chat app configuration page by granting them\nthe **Chat apps Owner** or **Chat apps Viewer**\n[Google Cloud Identity Access Management (IAM) role](https://cloud.google.com/iam/docs/understanding-roles#chat-roles).\nUsers with these roles can't navigate to the Chat apps\nconfiguration page by using the **APIs \\& Services** dashboard, but can\naccess the configuration page by navigating to the Google Cloud console for the\nChat app's host Cloud project as follows: \n\n```\nhttps://console.developers.google.com/apis/api/chat.googleapis.com/hangouts-chat?project=PROJECT_ID\n```\n\nWhere \u003cvar translate=\"no\"\u003ePROJECT_ID\u003c/var\u003e is the project ID of the\nGoogle Cloud project hosting the Chat app.\n| Users with **Project** roles can also access the app configuration page.\n|\n|\n| Users with custom roles containing the\n| `resourcemanager.projects.(get|update)` permissions cannot access\n| the Chat app configuration. For custom roles, use\n| the `chat.bots.(get|update)` permissions instead.\n\nRelated topics\n--------------\n\n- [Choose a Chat app architecture](/workspace/chat/structure)\n- To configure your Chat app for interactive features, see [Receive and respond to user interactions](/workspace/chat/receive-respond-interactions)"]]