
本指南介绍了如何创建用户可以添加到 Google Workspace Studio 中的流程的步骤。
步骤是流程的任务序列中的单个步骤。步骤无法启动流程。
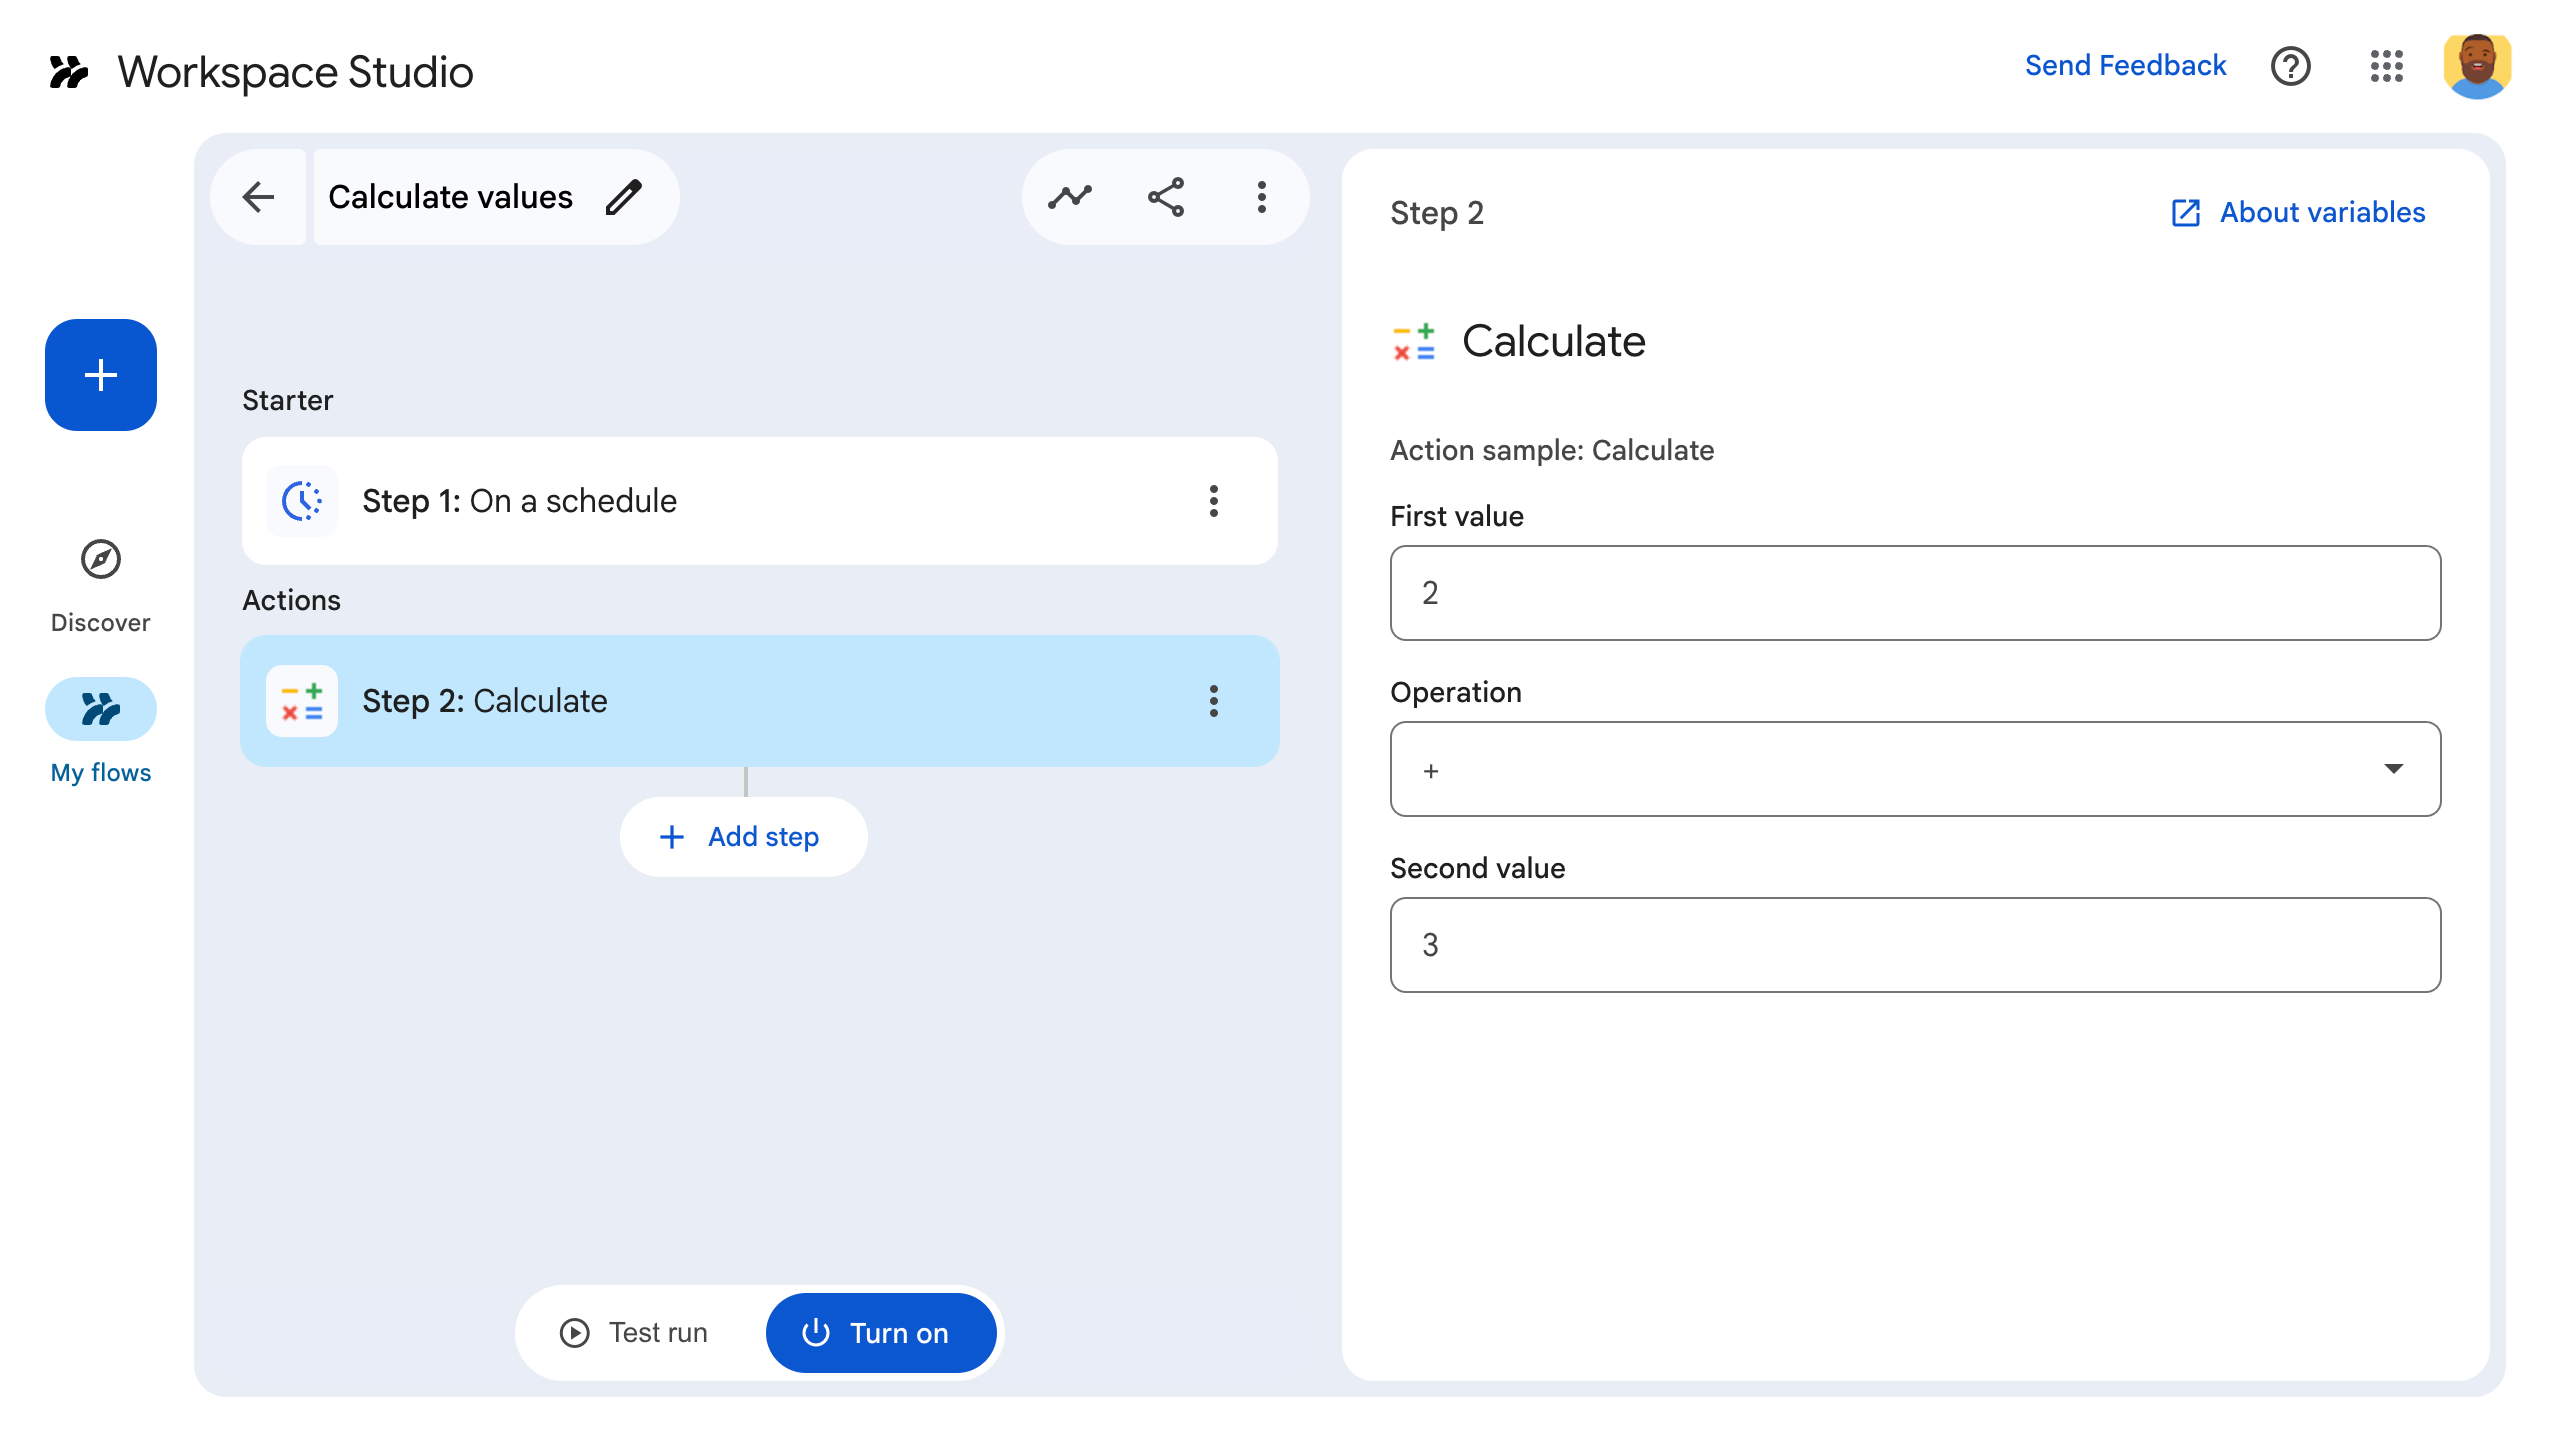
例如,假设有一个执行算术运算的步骤。它会要求用户提供两个值和一个数学运算。然后,它会对这些值执行数学运算并输出结果。
如需构建步骤,请在插件的清单文件中对其进行配置,在 Google Workspace 插件的代码中编写应用逻辑,然后部署并测试该步骤。
定义步骤
如需配置步骤,请在清单文件中定义该步骤,并在代码中编写其应用逻辑。
在清单文件中定义步骤
在清单文件 appsscript.json 中:
- 将
onConfigFunction和onExecuteFunction设置为插件代码中相应函数的名称。在本示例中,这些函数名为onConfigCalculate()和onExecuteCalculate()。onConfigFunction用于设置和配置步骤。如有必要,它会从用户那里收集执行该步骤所需的数据,例如发送电子邮件的地址。在本指南的示例中,我们会要求用户提供两个值和一个数学运算。onExecuteFunction用于执行该步骤。如果从用户那里收集了数据,则这些数据会传递给此函数。如果适用,则返回输出。在本指南的示例中,它会输出数学计算的结果。
设置必需的输入和输出,以便该步骤收集数据并将其发送到后续步骤。在本示例中,我们会要求用户提供两个值和一个数学运算,这些值和运算在
inputs[]中定义。输出计算结果,如outputs[]中所定义。
以下是计算器步骤的清单文件:
JSON
{
  "timeZone": "America/Los_Angeles",
  "exceptionLogging": "STACKDRIVER",
  "runtimeVersion": "V8",
  "addOns": {
    "common": {
      "name": "Calculator",
      "logoUrl": "https://www.gstatic.com/images/branding/productlogos/calculator_search/v1/web-24dp/logo_calculator_search_color_1x_web_24dp.png",
      "useLocaleFromApp": true
    },
    "flows": {
      "workflowElements": [
        {
          "id": "calculatorDemo",
          "state": "ACTIVE",
          "name": "Calculate",
          "description": "Asks the user for two values and a math operation, then performs the math operation on the values and outputs the result.",
          "workflowAction": {
            "inputs": [
              {
                "id": "value1",
                "description": "value1",
                "cardinality": "SINGLE",
                "dataType": {
                  "basicType": "INTEGER"
                }
              },
              {
                "id": "value2",
                "description": "value2",
                "cardinality": "SINGLE",
                "dataType": {
                  "basicType": "INTEGER"
                }
              },
              {
                "id": "operation",
                "description": "operation",
                "cardinality": "SINGLE",
                "dataType": {
                  "basicType": "STRING"
                }
              }
            ],
            "outputs": [
              {
                "id": "result",
                "description": "Calculated result",
                "cardinality": "SINGLE",
                "dataType": {
                  "basicType": "INTEGER"
                }
              }
            ],
            "onConfigFunction": "onConfigCalculate",
            "onExecuteFunction": "onExecuteCalculate"
          }
        }
      ]
    }
  }
}
接下来,通过在代码中定义该步骤来编写支持代码。
在代码中定义步骤
在应用代码中,执行以下操作:
编写
onConfigFunction,在本示例中称为onConfigCalculate()。 当用户将该步骤添加到流程时,他们可以在流程构建器中配置该步骤的各个方面。 为了从用户那里收集所需信息,onConfigFunction定义了一个配置卡片。卡片是插件中界面的构建块。 卡片支持定义的布局、交互式界面元素(如按钮)以及富媒体(如图片)。您可以通过卡片从用户那里获取运行该步骤所需的数据,例如用于发送电子邮件的电子邮件地址。
OnConfigFunction会返回一张卡片。此卡片定义了用户设置步骤数据的界面。在本示例中,onConfigFunction构建了一张卡片,要求用户提供两个值和一个数学运算。编写
onExecuteFunction,在本示例中称为onExecuteCalculate()。 当您的步骤在流程中运行时,OnExecuteFunction也会运行。用户在配置期间设置的任何输入值(如onConfigurationFunction中所定义)都会传递给OnExecuteFunction。编写
OnExecuteFunction(),使其使用提供的输入同步执行其任务。请注意,OnExecuteFunction()必须返回流程清单中定义的所有输出,否则会发生错误。
此代码示例包含一个支持函数 outputVariables(),该函数会构建提供的变量并将其作为步骤的输出发送。
您的步骤已可供测试。
以下是计算器步骤的代码:
Apps 脚本
/**
 * Generates and displays a configuration card for the sample calculation step.
 *
 * This function creates a card with input fields for two values and a drop-down
 * for selecting an arithmetic operation.
 *
 * The input fields are configured to let the user select outputs from previous
 * steps as input values using the `hostAppDataSource` property.
 */
function onConfigCalculate() {
  const firstInput = CardService.newTextInput()
  .setFieldName("value1")
  .setTitle("First Value")
  .setHostAppDataSource(
    CardService.newHostAppDataSource()
      .setWorkflowDataSource(
        CardService.newWorkflowDataSource()
          .setIncludeVariables(true)
      )
  );
  const secondInput = CardService.newTextInput()
    .setFieldName("value2")
    .setTitle("Second Value").setHostAppDataSource(
      CardService.newHostAppDataSource()
        .setWorkflowDataSource(
          CardService.newWorkflowDataSource()
            .setIncludeVariables(true)
        )
    );
  const selectionInput = CardService.newSelectionInput()
    .setTitle("operation")
    .setFieldName("operation")
    .setType(CardService.SelectionInputType.DROPDOWN)
    .addItem("+", "+", false)
    .addItem("-", "-", true)
    .addItem("x", "x", false)
    .addItem("/", "/", false);

  const sections = CardService.newCardSection()
    .setHeader("Action_sample: Calculate")
    .setId("section_1")
    .addWidget(firstInput)
    .addWidget(selectionInput)
    .addWidget(secondInput)

  var card = CardService.newCardBuilder()
    .addSection(sections)
    .build();

  return card;
}

/**
* Returns output variables from a step.
*
* This function constructs an object that, when returned, sends the
* provided variable values as output from the current step.
* The variable values are logged to the console for debugging purposes.
*/
function outputVariables(variableDataMap) {
const workflowAction = AddOnsResponseService.newReturnOutputVariablesAction()
  .setVariableDataMap(variableDataMap);

const hostAppAction = AddOnsResponseService.newHostAppAction()
  .setWorkflowAction(workflowAction);

const renderAction = AddOnsResponseService.newRenderActionBuilder()
  .setHostAppAction(hostAppAction)
  .build();

return renderAction;
}

/**
 * Executes the calculation step based on the inputs from a flow event.
 *
 * This function retrieves input values and the operation from the flow event,
 * performs the calculation, and returns the result as an output variable.
 * The function logs the event for debugging purposes.
 */
function onExecuteCalculate(event) {
  console.log("output: " + JSON.stringify(event));
  var calculatedValue = 0;
  var value1 = event.workflow.actionInvocation.inputs["value1"].integerValues[0];
  var value2 = event.workflow.actionInvocation.inputs["value2"].integerValues[0];
  var operation = event.workflow.actionInvocation.inputs["operation"].stringValues[0];

  if (operation == "+") {
    calculatedValue = value1 + value2;
  } else if (operation == "-") {
    calculatedValue = value1 - value2;
  } else if (operation == "x") {
    calculatedValue = value1 * value2;
  } else if (operation == "/") {
    calculatedValue = value1 / value2;
  }

  const variableDataMap = { "result": AddOnsResponseService.newVariableData().addIntegerValue(calculatedValue) };

  return outputVariables(variableDataMap);
}
测试步骤
如需测试步骤,请为插件设置测试部署,将该步骤添加到流程,然后运行该流程。
为插件设置测试部署:
- 在 Apps 脚本编辑器中打开脚本项目。
- 依次点击部署 > 测试部署 。
- 点击安装 。
- 点击底部的完成 。
您可以与其他用户共享 Apps 脚本项目(需要修改权限),让其他用户测试该插件。然后,提示用户按照之前的步骤操作。
安装后,该插件会立即在 Flows 中提供。您可能需要先刷新 Flows,然后该插件才会显示。您还必须先授权该插件,然后才能使用它。
如需详细了解测试部署,请参阅安装未发布的插件。
打开 Flows。
创建一个包含您的步骤的流程:
- 点击 新 流程。
- 选择流程的启动方式。在测试步骤时,最好选择您可以自行启动的启动器,例如给自己发送电子邮件。如果您的步骤需要输入变量,请将输入变量配置为启动器的输出的一部分。
- 点击“添加”图标 ,然后点击**添加步骤** 。选择您构建或更新的步骤,称为计算 。
- 配置您的步骤。对于计算步骤,请选择两个值和一个数学运算。该步骤会自动保存。
- 如需测试步骤的输出,请添加另一个步骤。例如,如需将输出添加到电子邮件,您可以添加 Gmail 的发送邮件 步骤。在邮件 中,点击 变量 并选择您的 步骤输出。对于计算步骤,请依次选择 变量 > 步骤 2:计算结果 > 计算结果。该变量会以芯片的形式显示在邮件 字段中。
- 点击开启 。您的流程可以运行了。
通过启动流程的启动器来运行流程。例如,如果您的流程在收到电子邮件时启动,请给自己发送电子邮件。
验证流程是否按预期运行。如需查看日志,请访问流程构建器的活动 标签页。 如需了解如何在“活动”标签页中创建自定义日志,请参阅 活动日志。