Fleet Engine
Fleet Engine
Fleet Engine は、運輸管理システムに統合するバックエンド サービスです。さまざまな API や SDK と相互運用して、マッピング、ルーティング、位置情報管理を強化します。次のモビリティ SDK も含まれます。
- Driver SDK
- コンシューマ SDK
- フリートの運用
ドライバー エクスペリエンス

ドライバー エクスペリエンス
Navigation SDK と Driver SDK は連携して、デリバリー モデルに合わせて運転体験を調整します。
- Navigation SDK: アプリにターンバイターン ナビゲーションを作成して、ドライバーにリアルタイムでガイダンスを提供します。
- Driver SDK: Fleet Engine でドライバーの位置情報とルートの進行状況を可視化できます。
消費者のエクスペリエンス

消費者のエクスペリエンス
Consumer SDK は、Fleet Engine でルートデータをモデル化し、ルートセッションを追跡するインターフェースを提供します。これにより、ルート情報を地図ベースで豊富に表示して一般ユーザーに提供できます。次の機能強化を利用できます。
- スタイル設定された地図: 地図がブランドにマッチします。
- 車両の位置情報: 配送の進捗状況をユーザーに知らせることができます。
- 予定時刻: リアルタイムの交通状況に基づいて到着時刻を表示します。
フリートの運用

フリートの運用
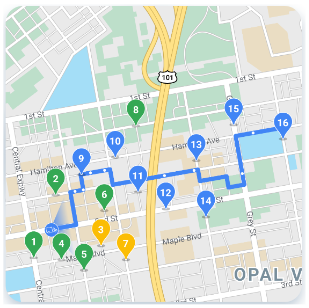
フリート内の配送車両の位置と停留所をニア リアルタイムで可視化します。ルートがわかっている場合、地図ビュー コンポーネントは、予測されたパスに沿って移動する車両をアニメーション化します。フリート オペレーションには次の機能が含まれます。
- 車両の追跡: 車両の位置情報、到着予定時刻、ルート、予定された停車地、完了したタスクをリアルタイムで表示します。
- Cloud Logging: 分析して指標の生成やフリートのパフォーマンス向上に使用できる広範なログを取得します。
Google Maps Platform モビリティ サービス
モビリティ サービスは、ビジネスの輸送や物流の運営を構築するための開発ツールキットです。このサービスには、次の 2 つの基本的なユースケースのために、アプリケーションに統合できるさまざまな API や SDK が含まれています。
- ライドシェアリングやフード デリバリーなど、オンデマンドのドライバー サービス
- 配送などの定期ドライバー サービス
このツールキットは、ウェブサービスと、地図、経路、場所の機能を、こうした業界のユースケース向けに特別に設計されたインターフェースにラップする一連の API を提供します。また、フリート オペレーション チーム向けのドライバーのジャーニー、分析、追跡サービスのオーケストレーションに役立つバックエンド サービスも含まれています。
右側の情報を参照して、各モビリティ サービスの内容をご確認ください。
モビリティ サービス パッケージ
ビジネスの輸送や物流の運営に役立つパッケージをご確認ください。詳しくは、割り当てをご覧ください。使用を開始する方法や詳細については、営業担当者にお問い合わせください。
Mobility Activate では、Navigation SDK を含む、幅広い Google Maps Platform API にアクセスできます。
モビリティ オプティマイズには、Mobility Activate パッケージのすべてのサービスに加え、速度制限と単一の車両ルート最適化のための API が含まれています。
Mobility Accelerate には、Mobility Optimize のすべてのサービスと、車両、ルート、タスクに関する情報を受信、維持、提供するステートフル Fleet Engine サービスとの統合に必要な API と SDK が含まれています。