
آمادهاید تا داستانهای سهبعدی جذابی بسازید که بینندگان را به سفری در مکانهای واقعی ببرد؟ این راهنما به شما نشان میدهد که چگونه با استفاده از ویرایشگر داخلی، یک داستان جدید بسازید.
از رابط کاربری ساده ما برای تنظیم عناوین، توضیحات، تصاویر و زاویه دوربین استفاده کنید. این رابط کاربری برای مبتدیان عالی است!
ویرایشگر داستان را باز کنید
راهکار داستانسرایی سهبعدی با یک ویرایشگر داخلی ارائه میشود که به شما امکان میدهد داستان را از رابط کاربری بسازید.
ویرایشگر در سمت چپ صفحه قرار دارد. با کلیک روی این آیکون کوچک آن را باز کنید:
شما میتوانید با مراجعه به نسخه میزبانیشدهی اپلیکیشن 3D Storytelling Admin یا با دانلود و نصب نمونهی Storytelling خودتان از گیتهاب، به ویرایشگر دسترسی پیدا کنید.
صفحه جلد را ایجاد کنید
از بخش «جزئیات داستان» برای تنظیم عنوان، تصویر، توضیحات و سایر جزئیات استفاده کنید. این کار داستان شما را به بیننده معرفی میکند.

اضافه کردن فصلها
هر فصل مانند یک ایستگاه در سفر شماست. در اینجا نحوه اضافه کردن آنها آورده شده است:
با استفاده از نوار جستجوی خودکار داخلی، مکانی را جستجو کنید.
پس از افزودن مکان، میتوانید با کلیک بر روی دکمه ویرایش در کنار مکان، جزئیات را به فصل اضافه کنید:

برای وارد کردن عنوان، توضیحات، تصویر و تاریخ برای فصل خود، روی « ویرایش » کلیک کنید.

اگر میخواهید یک فصل خاص را حذف کنید، دکمه حذف درست زیر دکمه ویرایش وجود دارد.
میتوانید با کشیدن و جابجایی با استفاده از آیکونهای نقطهچین سمت چپ، فصلها را دوباره مرتب کنید :

فصل را ذخیره کنید
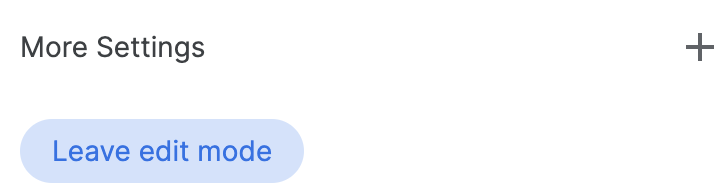
برای ذخیره یک فصل خاص، کافیست روی دکمه « ترک حالت ویرایش » کلیک کنید. دکمه «ترک حالت ویرایش» به عنوان دکمه ذخیره عمل میکند.
تنظیمات دوربین را سفارشی کنید
میتوانید تنظیمات مختلف دوربین را سفارشی کنید:
نمایش/پنهان کردن نشانگر مکان شاید نخواهید پین را در یک مکان خاص نمایش دهید و ترجیح میدهید یک منطقه عمومی را نمایش دهید. برای نمایش یا پنهان کردن پین، کادر «نمایش نشانگر مکان» را علامت بزنید/از حالت انتخاب خارج کنید.
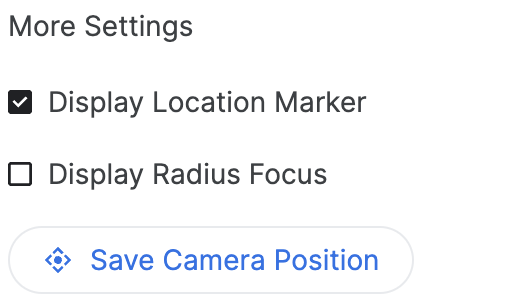
نمایش شعاع اطراف یک منطقه میتوانید با استفاده از ویژگی "نمایش شعاع فوکوس" (Display Radius Focus)، ناحیهای را در اطراف یک مکان خاص نمایش دهید. با علامت زدن این گزینه، یک نوار لغزنده شعاع باز میشود که به شما امکان میدهد شعاع مرزی فوکوس دوربین را کنترل کنید.
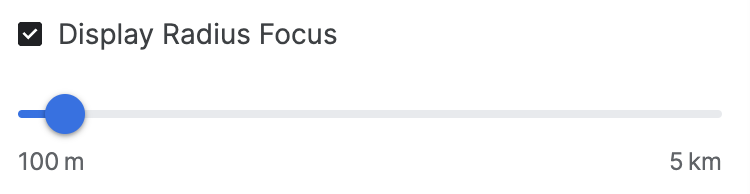
این نشان میدهد که چگونه گزینههای پیشرفته دوربین به ایجاد یک تجربه سفارشی کمک میکنند.
موقعیت دوربین را سفارشی کنید. زاویه خاص دوربین را که میخواهید با کنترلهای آسان دوربین نشان دهید، به طور دقیق تنظیم کنید:
شیب: نقشه را از بالا یا از سطح زمین ببینید. کلید کنترل (یا Cmd در برخی کامپیوترها) را نگه دارید و همزمان با کلیک کردن و کشیدن ماوس به بالا یا پایین، آن را تغییر دهید.
چرخش: برای نمای ۳۶۰ درجه، نقشه را بچرخانید. کلید کنترل (یا Cmd در برخی کامپیوترها) را نگه دارید و همزمان با کلیک کردن و کشیدن به چپ یا راست با ماوس، آن را بچرخانید.
بزرگنمایی: نمای نزدیک یا زاویه دید عریض داشته باشید. از چرخ اسکرول ماوس یا حرکات بزرگنمایی/کوچکنمایی آشنا استفاده کنید.
برای یافتن زاویه مناسب برای هر مکان، ترکیب شیب، چرخش و بزرگنمایی را آزمایش کنید. کنترلها ممکن است بسته به تنظیمات رایانه شما کمی متفاوت باشند.

نحوه کنترل بوم سه بعدی را برای رسیدن به زاویه دوربین مناسب خود بررسی کنید.
نهایی کردن و دانلود
پس از ساخت داستان و فصلها، فایل پیکربندی را دانلود کنید.
برای دریافت پیکربندی سفارشی خود در قالب JSON، روی « دانلود » کلیک کنید.
این پیکربندی میتواند برای ایجاد داستانسرایی سهبعدی خودتان با استفاده از کد موجود در گیتهاب مورد استفاده قرار گیرد.