
Page Summary
-
The 3D Storytelling solution allows you to create captivating geolocation stories by customizing the cover, chapters, and camera settings.
-
You can customize your story using an intuitive Admin app UI or by directly editing the JSON configuration file.
-
Camera settings like position, heading, pitch, and roll can be fine-tuned for each chapter to achieve the desired viewing angle.
-
The Admin app offers options to control camera movement, focus on specific areas using radius focus, and toggle location markers.
-
Advanced users can further customize the experience by modifying code parameters related to camera configurations and config file loading.
Introduction
This guide will walk you through different ways the 3D Storytelling solution can be customized, allowing you to create captivating geolocation stories.
You have the flexibility to configure their storytelling solution through two convenient methods. Firs, you can use the intuitive UI available in the Admin app, featuring a dedicated config panel. Within this panel, users can modify the main properties such as the imageUrl, title, date, and more, both for the overall story and individual chapters.
Second, you can fine-tune camera settings and focus options for each chapter using the GUI in the Admin app. Once satisfied with their configuration, users have the option to download the generated JSON file.
Alternatively, you can directly edit the JSON file. You can adjust the JSON structure, load the configured storytelling solution, and bypass the Admin control panel. This dual approach offers both a user-friendly interface and advanced JSON manipulation.
Getting started:
Enable
Create your own story
Overall layout of the story is divided into a cover story followed by chapters.
Both the cover and a chapter can be individually customized. Check out
details of how the stories can be built and customized using both the Admin app
as well as the config file.
Cover page
The first thing you will need to do is to create a cover page for your overall story. This adds the overview, a cover photo and description to your story.
Use Admin app
You start by adding a cover page for your story. You do that from the Admin app using the following screen:
Use config.json
Additionally, if you have the config file you can directly add these sections in the file:
- 1.
imageUrl: URL of the main media file (image, gif, or video) for the entire story.
This can be any publicly accessible URL pointing to an image, gif, or video file that you want to use as the main media for the entire story.
- 2.
title: Title of the entire story. - 3.
date: The date or timeframe associated with the story. - 4.
description: A brief description of the story. - 5.
createdBy: The creator or author of the story. - 6.
imageCredit: Credit for the main image. - 7.
cameraOptions: Initial camera settings for the entire story.
Chapters
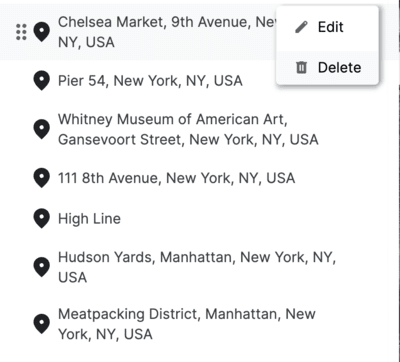
The story is divided into chapters, each with its own set of variables. You can create as many chapters as you like. You start by selecting an address and then add the following details to the chapter.
Use Admin app
Location search: Use the integrated Google Maps Platform Autocomplete search bar to find the location you want to show.
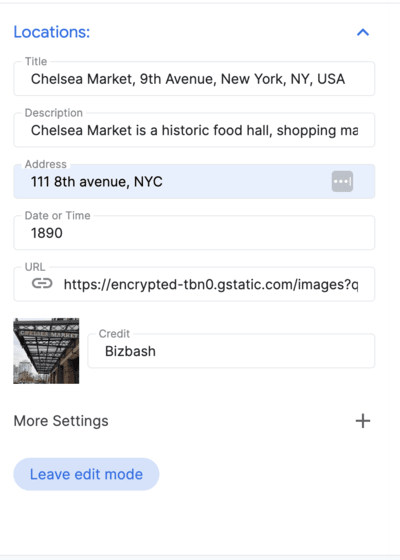
Once a location is added you can add details to the chapter by clicking on the Edit button next to the location:
Add details about the location:
Once you are happy with the overall configuration, download the json file and you can use it in the demo app.
Configure using config.json
You can edit the following variables directly in the downloaded config.json file to customize each chapter:
title: Title of the chapter.id: Unique identifier for the chapter.imageUrl: URL of the chapter's image.imageCredit: Credit for the chapter's image.content: Text content for the chapter.dateTime: Date or timeframe specific to the chapter.coords: Coordinates for the location associated with the chapter.lat: Latitude.lng: Longitude.
address: Address related to the chapter.
Camera settings
The application provides a lot of different controls on the camera. This section walks you through the different camera settings and how to customize them.
(Pan,zoom, tilt the camera to get your perfect viewing angle)
Use the Admin app
Camera: Adjust the camera movement speed and orbit type to create the chosen viewing experience.
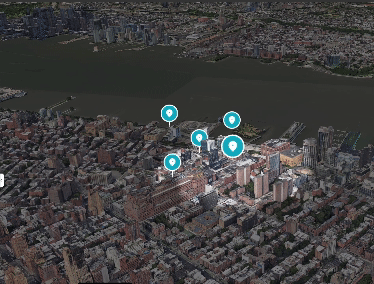
Location marker lets you to toggle between showing a pin in a specific location or hiding it.
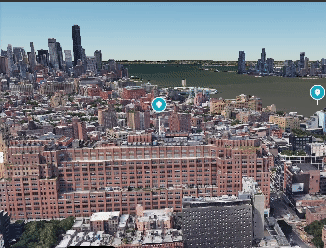
Radius focus creates a vignette shadow around a specific area without pinpointing specific location. This is great for showcasing a neighborhood or general area.
This shows how to change the focus of the camera to showcase an area instead of a specific point.
Use config.json
You can also customize all the camera parameters directly using the json config file:
cameraOptions: Camera settings for the chapter. (learn more about camera angles)position: The position parameter determines the spatial coordinates of the camera in the 3D environment. It consists of three values: x, y, and z. Each coordinate represents a point in the x, y, and z axes, defining the camera's location.heading: The heading parameter refers to the horizontal direction in which the camera is pointed. In geographical terms, it represents the angle between the camera's view and the north direction. A heading of 0 indicates the camera is pointing due north.pitch: The pitch parameter determines the vertical angle of the camera. It signifies the tilt or inclination of the camera's view. A positive pitch looks downwards, while a negative pitch points upwards.roll: The roll parameter defines the rotation around the camera's axis. It represents the twisting motion of the camera. A roll of 0 indicates no rotation, while positive or negative values denote a rotation to the right or left, respectively.
focusOptions: Options for focusing on a specific point.focusRadius: Radius for focus.showFocus: Boolean to show or hide focus.showLocationMarker: Boolean to show or hide the location marker.
Save your configuration
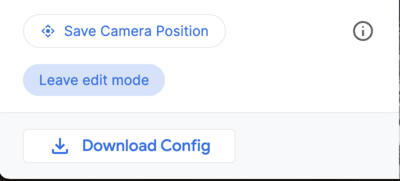
Lastly, click Save camera position to save your camera position, then click Leave edit mode to save your work
This application provides a user-friendly interface that lets you to customize the 3D experience. This the Admin app.
The final config.json
The final config.json file contains all the information needed to generate your custom storytelling experience. It includes the cover page details, chapters, and camera settings. You can use this file to fine-tune your story and make sure it looks and feels exactly the way you want it to.
To get started,download the config.json file from the Admin app or create a new one from scratch. Then, open the file in a text editor and start editing the values. You can change the text, images, and even the camera settings to create a unique and immersive experience for your audience.
A story overview json file can look like this:
{
  "properties": {
    "imageUrl": "https://storage.googleapis.com/gmp-3d-tiles-storytelling/assets/images/317-300x160.jpg",
    "title": "Title",
    "date": "1967",
    "description": ""his is where you put descriptions",
    "createdBy": "Add author",
    "imageCredit": "Add image credit",
    "cameraOptions": {
      "position": {
        "x": -2708127.031960028,
        "y": -4260747.583520751,
        "z": 3886346.825328216
      },
      "heading": -1.5708,
      "pitch": -0.785398,
      "roll": 0
    }
  }
And a specific chapter can look like this. Chapters is an array and can take many individual chapters inside the array.
"chapters": [
    {
      "title": "The Jimmy Hendrix Experience",
      "id": 4,
      "imageUrl": "https://storage.googleapis.com/gmp-3d-tiles-storytelling/assets/images/401-300x160.jpg",
      "imageCredit": "Hunter",
      "content": "XYZZZ",
      "dateTime": "Aug 10-12 1967",
      "coords": {
        "lat": 37.7749,
        "lng": -122.4194
      },
      "address": "The Filmore | 1805 Geary Blvd",
      "cameraOptions": {
        "position": {
          "x": -2706472.5713478313,
          "y": -4261528.277488908,
          "z": 3885143.750529967
        },
        "heading": 0,
        "pitch": 0,
        "roll": 0
      },
      "focusOptions": {
        "focusRadius": 3000,
        "showFocus": false,
        "showLocationMarker": true
      }
    },
Advanced customizations
You can dive in the code and can do several other customizations:
Load the config file from another location
Out of the box, the solution loads the storytelling configuration from a local file . However, this can be easily changed in config.js:
export async function loadConfig(configUrl) {
  try {
    // Fetch the configuration data from the specified URL.
    const configResponse = await fetch(configUrl);
Camera Configurations
The camera can be further customized from /utils/cesium.js file.
It defines a number of important variables like:
- RADIUS
- BASE_PITCH_RADIANS
- BASE_HEADING_RADIANS
- BASE_ROLL_RADIANS
- DEFAULT_HIGHLIGHT_RADIUS
Feel free to tweak these variables to get various camera angels and experiences.
Conclusion
In this documentS, we have provided a guide to customizing the 3D Storytelling application. We have explored the various options available in the Admin app and how they can be used to create immersive and engaging geolocation stories. We have also discussed the process of creating a custom story using the config.json file. Next Steps
Now that you have learned how to customize the 3D Storytelling application, you can start creating your own stories. Here are a few ideas to get you started:
- Create a story about your hometown or a place you have visited.
- Create a story about a historical event or a person who has inspired you.
- Create a story about a fictional world or a dream you have had.
The possibilities are endless! So let your imagination run wild and create something truly special.