
This page explains how to build a Google Workspace add-on that works in Google Chat and interfaces with an AI agent that uses the Agent2UI (A2UI) protocol. You develop the agent using the Agent Development Kit (ADK), and host it in Vertex AI Agent Engine.
AI agents autonomously perceive their environment, reason, and execute complex, multi-step actions to achieve a defined goal. In this tutorial, you deploy a basic AI agent that returns static profile information retrieved from a tool.
A2UI enables AI agents to generate adaptive, rich, interactive UIs that render natively. You can then focus on the logic of the AI agents, not the UIs.
-
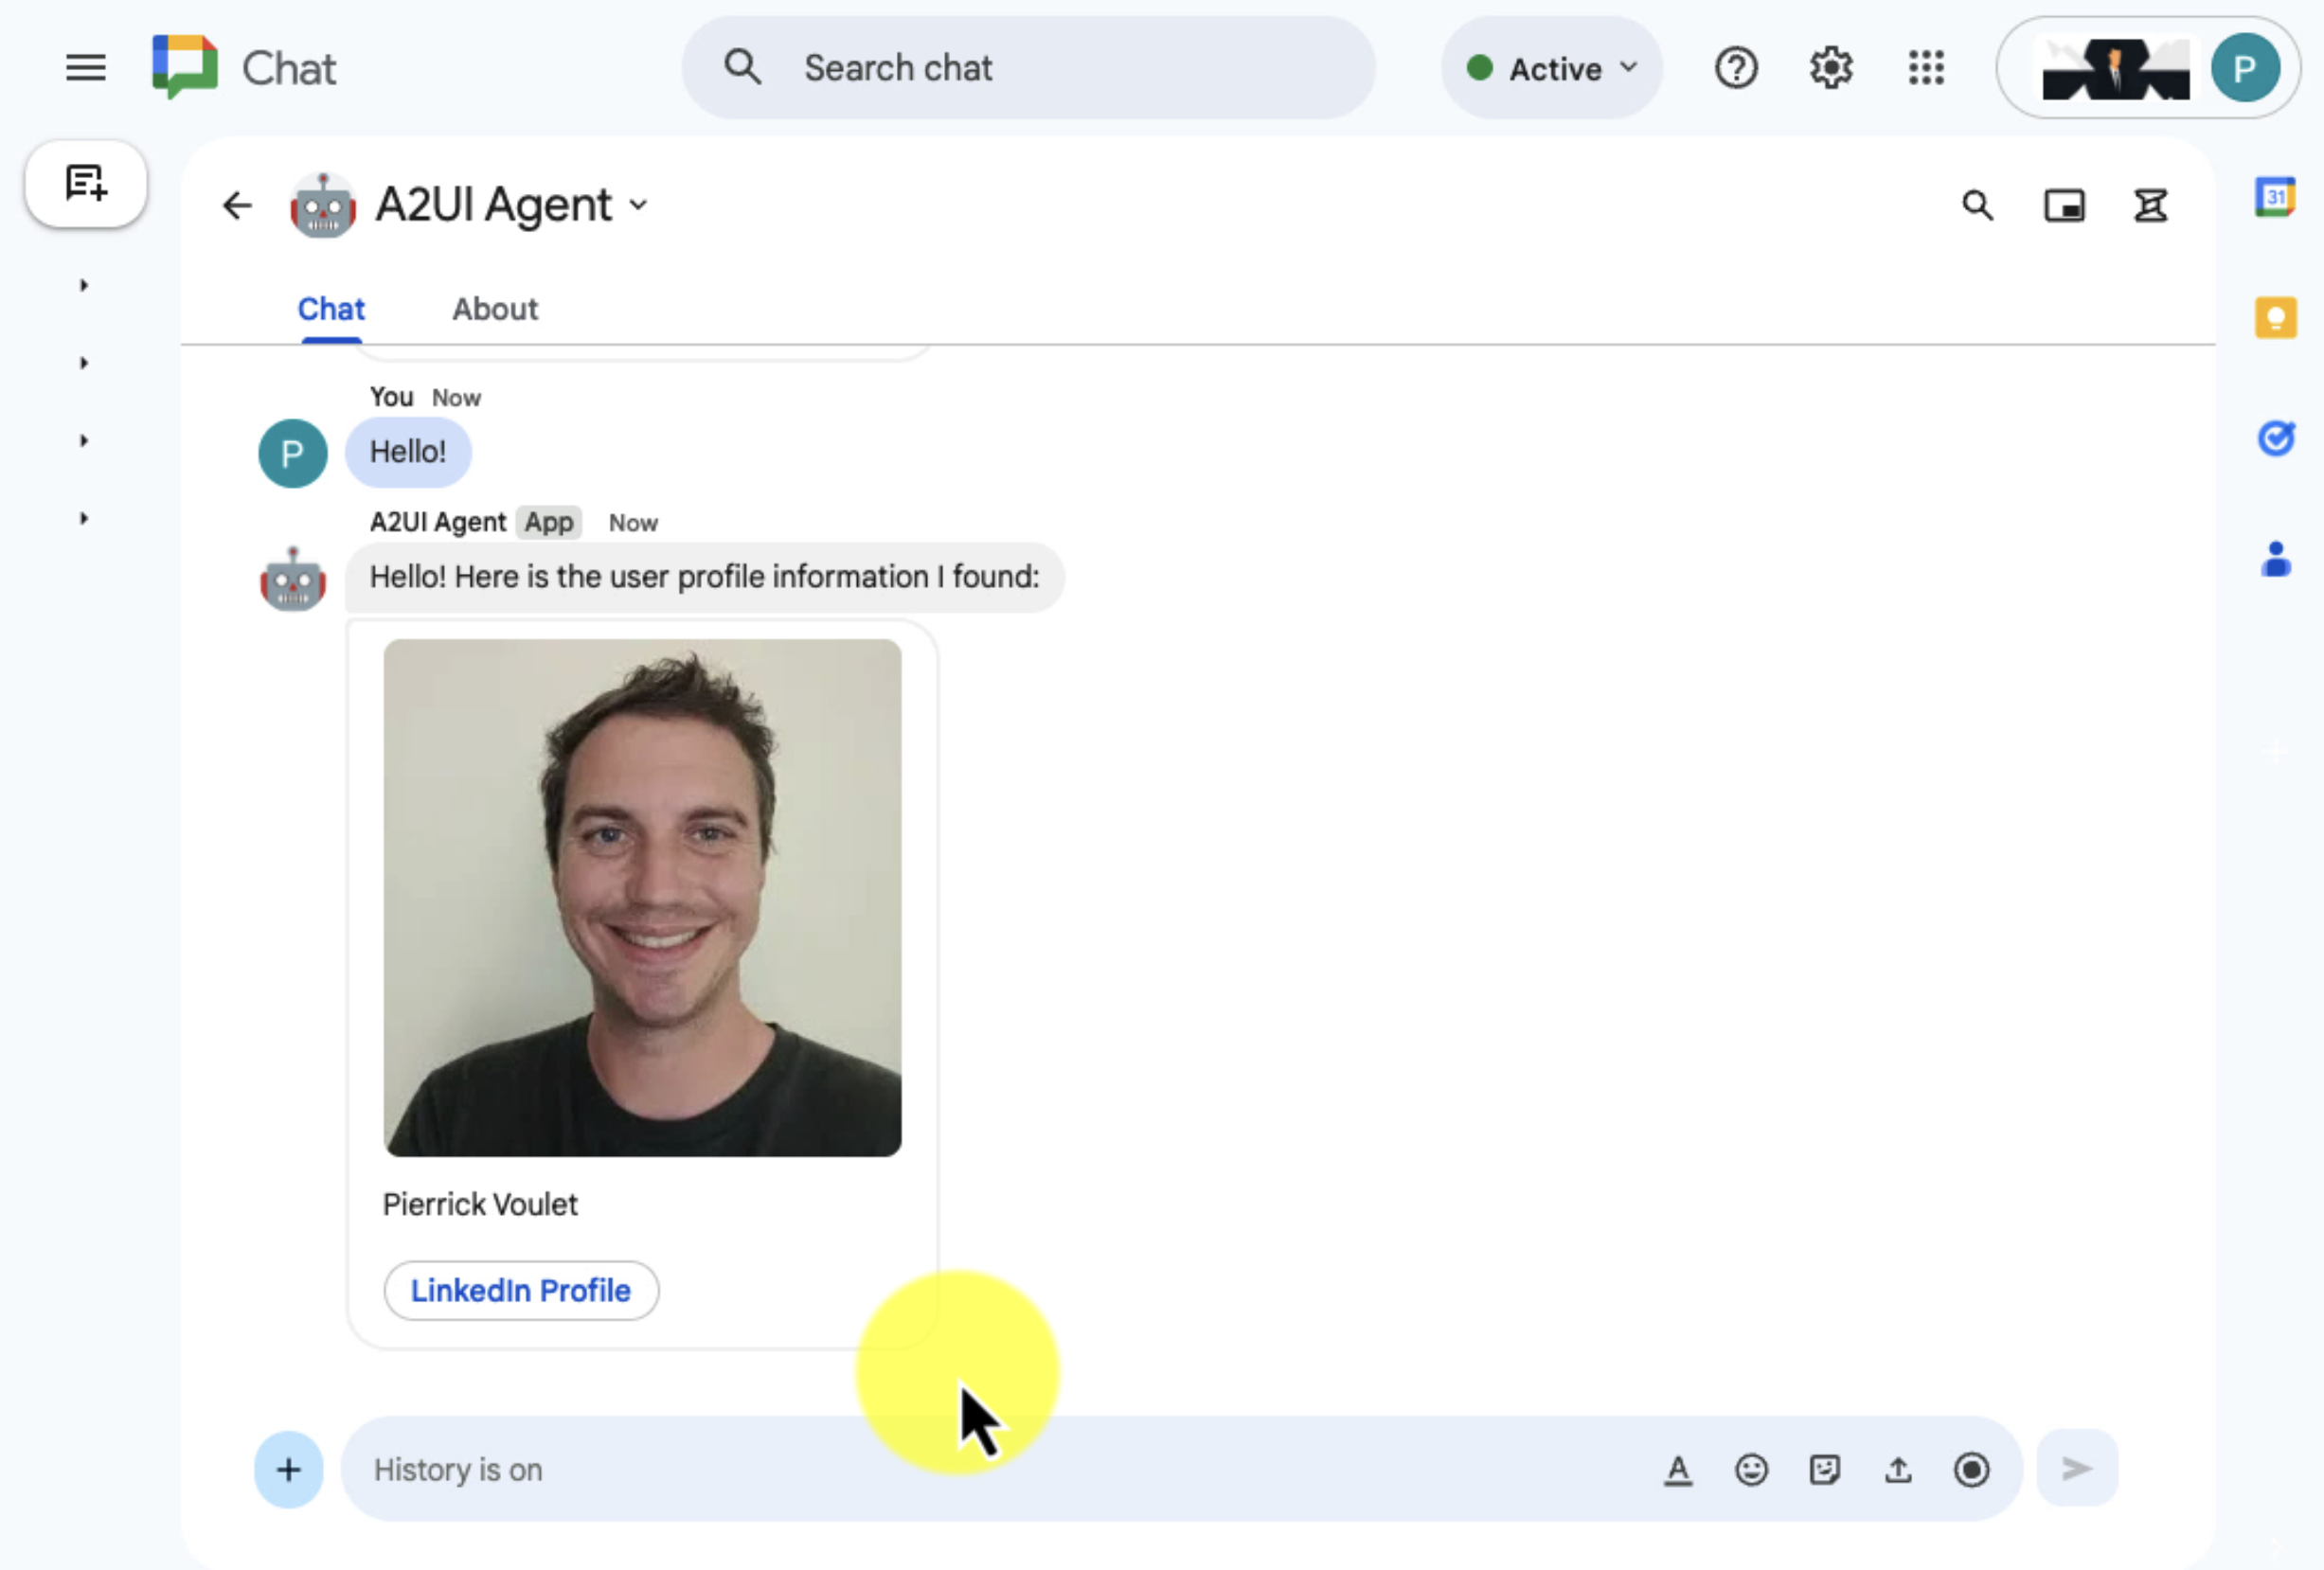
Figure 1. The A2UI agent responds to the user with text and a card containing the name, image, and LinkedIn button. -

Figure 2. The A2UI agent is updated to return the profile title as well. -
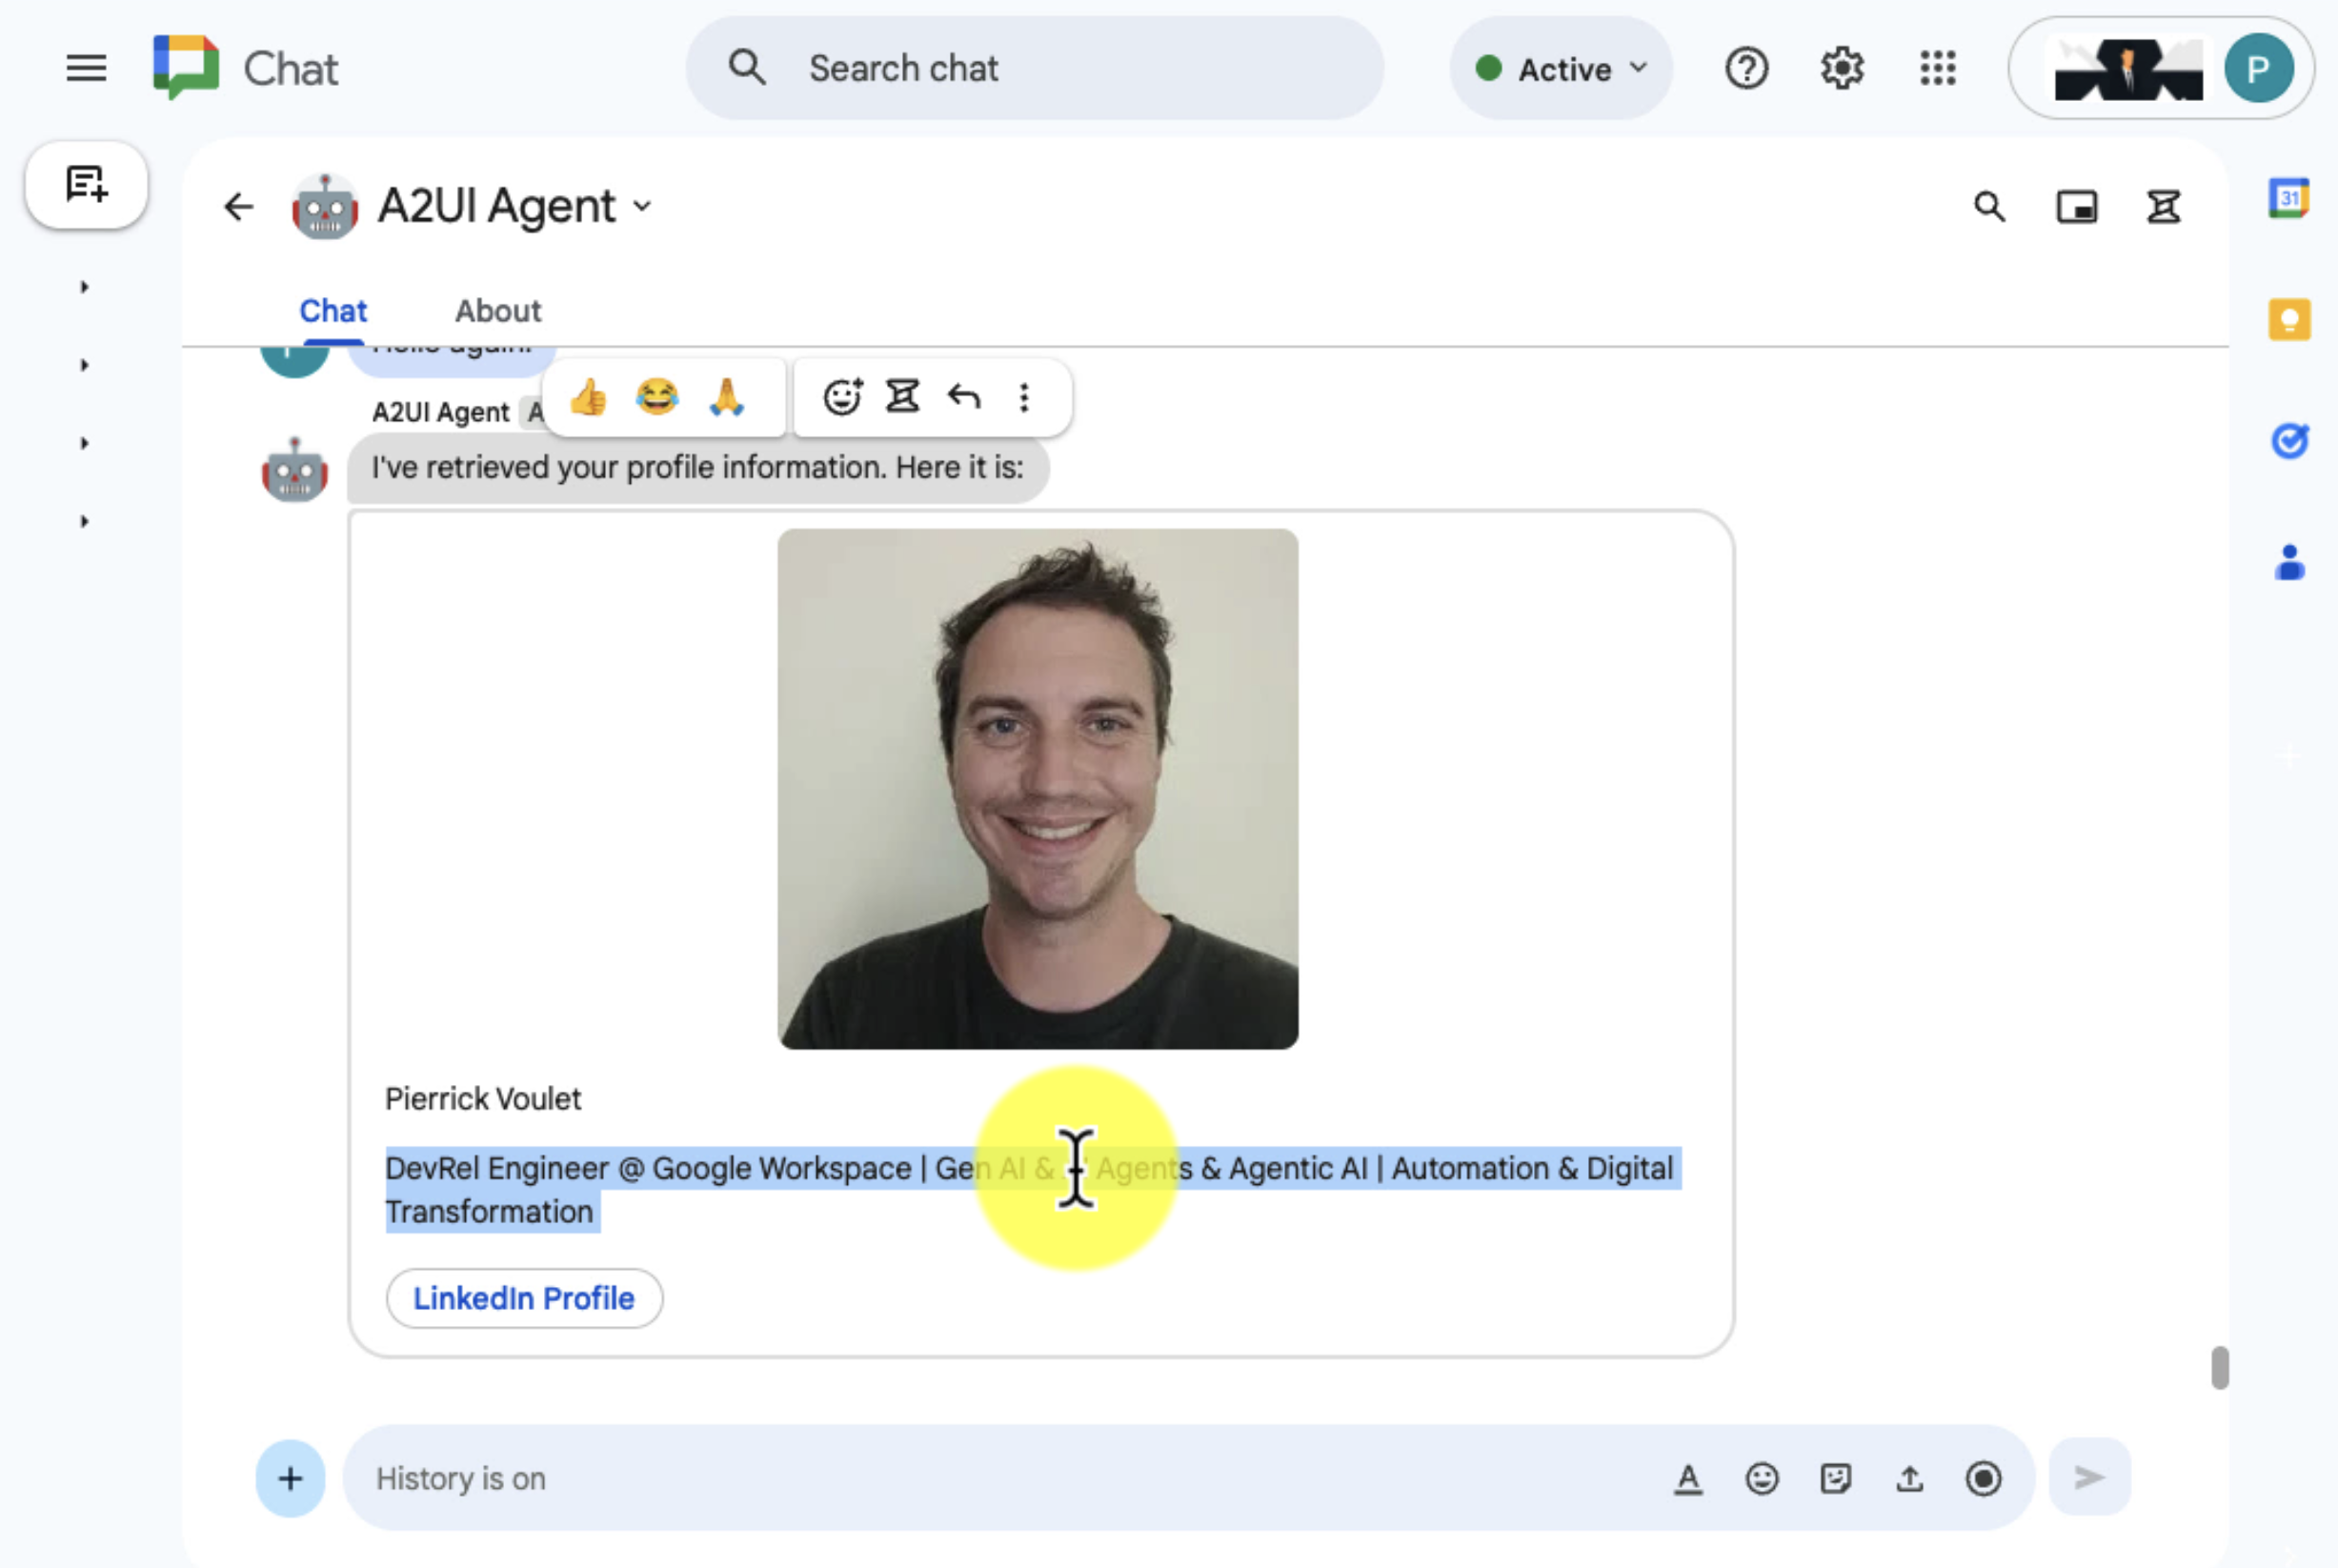
Figure 3. The A2UI agent responds to the user with a message that displays the profile name in the card.
The following diagram shows the architecture and messaging pattern:

In the diagram, a user interacting with a Chat app implemented with an A2UI agent has the following flow of information:
- A user sends a message to a Chat app, either in a direct message or in a Chat space.
- The Chat app logic that's implemented either in Apps Script or as a web server with HTTP endpoints receives and processes the message.
- The A2UI agent hosted with Vertex AI Agent Engine receives and processes the interaction.
- Optionally, the Chat app or AI agent can integrate with Google Workspace services, such as Calendar or Sheets, or other Google services, such as Google Maps or YouTube.
- The Chat app generates and sends adaptive responses asynchronously, using the Google Chat API to communicate the AI agent's progress.
- The responses are delivered to the user.
Objectives
- Set up your environment.
- Deploy the A2UI agent.
- Deploy the Chat app.
- Configure the Chat app.
- Test the Chat app.
Prerequisites
- A Business or Enterprise Google Workspace account with access to Google Chat.
- A Google Cloud project with billing enabled. To check that an existing project has billing enabled, see Verify the billing status of your projects. To create a project and set up billing, see Create a Google Cloud project.
- Python 3.11+: For installation, follow instructions on the official Python website.
- Python Poetry: For installation, follow instructions on the official Poetry website.
- Google Cloud CLI: For installation, follow instructions on the official Google Cloud website.
Set up your environment
Enable the Google Cloud APIs
Before using Google APIs, you need to turn them on in a Google Cloud project. You can turn on one or more APIs in a single Google Cloud project.In the Google Cloud console, enable the Google Chat, Vertex AI, and Cloud Resource Manager APIs.
Configure the OAuth consent screen
All apps using OAuth 2.0 require a consent screen configuration. Configuring your app's OAuth consent screen defines what is displayed to users and app reviewers, and registers your app so you can publish it later.
- In the Google API Console, go to Menu > Google Auth platform > Branding.
- If you have already configured the Google Auth platform, you can configure the following OAuth Consent Screen settings in Branding, Audience, and Data Access. If you see a message that says Google Auth platform not configured yet, click Get Started:
- Under App Information, in App name, enter a name for the app.
- In User support email, choose a support email address where users can contact you if they have questions about their consent.
- Click Next.
- Under Audience, select Internal.
- Click Next.
- Under Contact Information, enter an Email address where you can be notified about any changes to your project.
- Click Next.
- Under Finish, review the Google API Services User Data Policy and if you agree, select I agree to the Google API Services: User Data Policy.
- Click Continue.
- Click Create.
- For now, you can skip adding scopes. In the future, when you create an app for use outside of your Google Workspace organization, you must change the User type to External. Then add the authorization scopes that your app requires. To learn more, see the full Configure OAuth consent guide.
Create a service account in Google Cloud console
Create a new service account with the role Vertex AI User by following
these steps:
Google API Console
- In the Google API Console, go to Menu > IAM & Admin > Service Accounts.
- Click Create service account.
- Fill in the service account details, then click Create and continue.
- Optional: Assign roles to your service account to grant access to your Google Cloud project's resources. For more details, refer to Granting, changing, and revoking access to resources.
- Click Continue.
- Optional: Enter users or groups that can manage and perform actions with this service account. For more details, refer to Managing service account impersonation.
- Click Done. Make a note of the email address for the service account.
gcloud CLI
- Create the service account:
gcloud iam service-accounts createSERVICE_ACCOUNT_NAME\ --display-name="SERVICE_ACCOUNT_NAME" - Optional: Assign roles to your service account to grant access to your Google Cloud project's resources. For more details, refer to Granting, changing, and revoking access to resources.
The service account appears on the service account page.
Create a private key
To create and download a private key for the service account, follow these steps:
- In the Google Cloud console, go to Menu > IAM & Admin > Service Accounts.
- Select your service account.
- Click Keys > Add key > Create new key.
- Select JSON, then click Create.
Your new public/private key pair is generated and downloaded to your machine as a new file. Save the downloaded JSON file as
credentials.jsonin your working directory. This file is the only copy of this key. For information about how to store your key securely, see Managing service account keys. - Click Close.
For more information about service accounts, see service accounts in the Google Cloud IAM documentation.
Deploy the A2UI agent
If you haven't done so, authenticate with your Google Cloud account and configure the Google Cloud CLI to use your Google Cloud project.
gcloud auth application-default logingcloud config set project PROJECT_IDgcloud auth application-default set-quota-project PROJECT_IDReplace PROJECT_ID with the ID of your Cloud project.
Download the
googleworkspace/add-ons-samplesGitHub repository using this button:In your preferred local development environment, extract the downloaded archive file and open the
add-ons-samples/apps-script/chat/a2ui-ai-agent/a2uidirectory.unzip add-ons-samples-main.zipcd add-ons-samples/apps-script/chat/a2ui-ai-agent/a2uiCreate a new Cloud Storage bucket dedicated to the ADK agent.
gcloud storage buckets create gs://CLOUD_STORAGE_BUCKET_NAME --project=PROJECT_ID --location=PROJECT_LOCATIONReplace the following:
- CLOUD_STORAGE_BUCKET_NAME with a unique bucket name you want to use.
- PROJECT_ID with the ID of your Cloud project.
- PROJECT_LOCATION with the location of your Cloud project.
Set the following environment variables:
export GOOGLE_GENAI_USE_VERTEXAI=trueexport GOOGLE_CLOUD_PROJECT=PROJECT_IDexport GOOGLE_CLOUD_LOCATION=PROJECT_LOCATIONexport GOOGLE_CLOUD_STORAGE_BUCKET=CLOUD_STORAGE_BUCKET_NAMEReplace the following:
- CLOUD_STORAGE_BUCKET_NAME with the name of the bucket you created.
- PROJECT_ID with the ID of your Cloud project.
- PROJECT_LOCATION with the location your Cloud project.
Install and deploy ADK agent from virtual environment.
python3 -m venv myenvsource myenv/bin/activatepoetry install --with deploymentpython3 deployment/deploy.py --createRetrieve the agent ID. You need it later, when you configure the Chat app.
python3 deployment/deploy.py --list
Create and configure the Chat app project
Click the following button to open the A2UI AI Agent Quickstart Apps Script project.
Click Overview >
 Make a copy.
In your Apps Script project, click
 Project Settings
> Edit script properties > Add script property
to add the following script properties:
Project Settings
> Edit script properties > Add script property
to add the following script properties:
REASONING_ENGINE_RESOURCE_NAMEwith the Vertex AI agent resource name copied in previous steps.SERVICE_ACCOUNT_KEYwith the JSON key from the service account downloaded in previous steps such as{ ... }.
Click Save script properties.
In the Google API Console, go to Menu > IAM & Admin > Settings.
In the Project number field, copy the value.
In your Apps Script project, click
Project Settings.Under Google Cloud Platform (GCP) Project, click Change project.
In GCP project number, paste the Google Cloud project number copied in previous steps.
Click Set project. The Cloud project and Apps Script project are now connected.
Create a test deployment
You need a deployment ID for this Apps Script project, so that you can use it in the next step.
To get the head deployment ID, do the following:
- In the Chat app Apps Script project, click Deploy > Test deployments.
- Under Head deployment ID, click
Copy.
- Click Done.
Configure the Chat app
Using your Apps Script deployment, follow these steps to deploy the Google Chat app for testing:
- In the API Console, search for
Google Chat API, and click Google Chat API. - Click Manage.
Click Configuration and set up the Chat app:
- In the App name field, enter
A2UI Quickstart. - In the Avatar URL field, enter
https://developers.google.com/workspace/add-ons/images/quickstart-app-avatar.png. - In the Description field, enter
A2UI Quickstart. - Under Functionality, select Join spaces and group conversations.
- Under Connection settings, select Apps Script project.
- In the Deployment ID field, paste the Head deployment ID that you previously copied.
- Under Visibility, select Specific people and groups in your domain, and enter your email.
- In the App name field, enter
Click Save.
The Chat app is ready to respond to messages.
Test the Chat app
To test your Chat app, open a direct message space with the Chat app and send a message:
Open Google Chat using the Google Workspace account that you provided when you added yourself as a trusted tester.
- Click New chat.
- In the Add 1 or more people field, type the name of your Chat app.
Select your Chat app from the results. A direct message opens.
In the new direct message with the app, type
Hello!and pressenter.The Chat app replies a message with greeting text and a card containing the profile name, image, and LinkedIn button.
Update the implementation of the A2UI agent to start returning the profile title as well.
In your local development environment, open the file
a2ui/agent.pyand uncomment the line in the tool that adds the title to the returned data.Update the ADK previously deployed with the new version of the implementation.
python3 deployment/deploy.py --update --resource_id=RESOURCE_IDReplace RESOURCE_ID with the Vertex AI agent resource name copied in previous steps.
In the direct message with the app, type
Hello again!and pressenter.The Chat app replies a message with some text and a card containing the profile title.
To add trusted testers and learn more about testing interactive features, see Test interactive features for Google Chat apps.
Troubleshoot
When a Google Chat app or card returns an error, the Chat interface surfaces a message saying "Something went wrong." or "Unable to process your request." Sometimes the Chat UI doesn't display any error message, but the Chat app or card produces an unexpected result; for example, a card message might not appear.
Although an error message might not display in the Chat UI, descriptive error messages and log data are available to help you fix errors when error logging for Chat apps is turned on. For help viewing, debugging, and fixing errors, see Troubleshoot and fix Google Chat errors.
Clean up
To avoid incurring charges to your Google Cloud account for the resources used in this tutorial, we recommend that you delete the Cloud project.
- In the Google API Console, go to the Manage resources page. Click Menu > IAM & Admin > Manage Resources.
- In the project list, select the project you want to delete and then click Delete .
- In the dialog, type the project ID and then click Shut down to delete the project.
Related topics
- Build a Google Chat app with an ADK AI agent exposed by A2UI with user actions
- Build a Google Chat app with a Gemini Enterprise AI agent
- Build a Google Chat app with an ADK AI agent
- Build a Google Chat app with an A2A agent
- Build Gemini Enterprise agents that are tightly integrated with Workspace data stores, APIs, and Chat apps
- Build Vertex AI agents that are tightly integrated with Workspace data stores, APIs, and Chat apps
- Fact-check statements with an ADK AI agent and Gemini model
- Plan travels with an AI agent accessible across Google Workspace
- Integrate fundamental AI concepts in Chat apps
- Answer questions based on Chat conversations with a Gemini AI Chat app
- Respond to incidents with Google Chat, Vertex AI, Apps Script, and user authentication
- Manage projects with Google Chat, Vertex AI, and Firestore