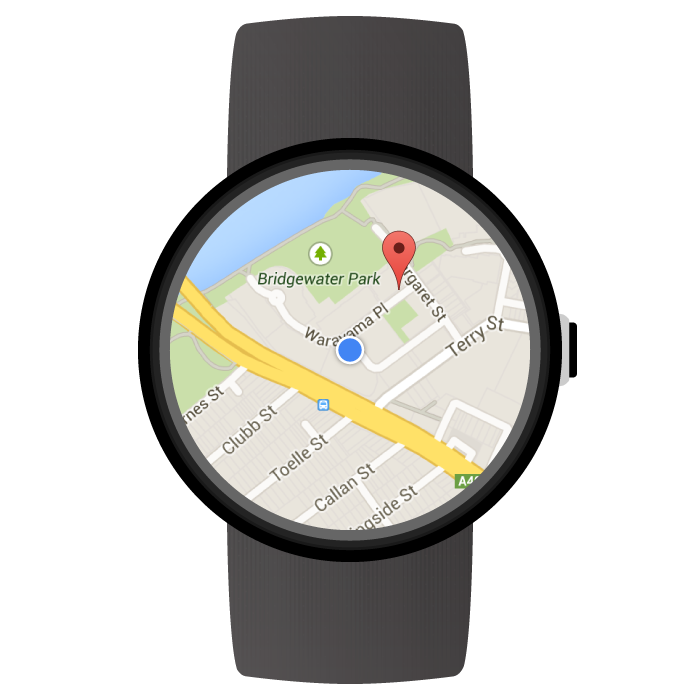
Maps SDK for Android を使って、Wear OS by Google デバイスで直接実行される地図ベースのウェアラブル アプリを作成できます。アプリのユーザーは、自分の手首をちらりと見るだけで、地図で現在地を確認できます。たとえば、ルート上に現在地を表示し、ズームインして詳細を確認したり、マーカーをタップしてアプリから提供される情報ウィンドウを表示したりできます。
このページでは、Wear デバイスで使用可能な API 機能について説明し、アプリの構築を開始できるよう支援します。
Wear OS のスタートガイド
Maps SDK for Android を使用したウェアラブル アプリの構築は、その他の Android デバイス用の Google マップ アプリの構築と基本的には同じです。違いは、アプリのユーザビリティとパフォーマンスを最適化するための、ウェアラブル デバイスのより小さいフォーム ファクタ用のデザインにあります。
Android Studio は、プロジェクトのセットアップ、ライブラリの登録、パッケージングが容易に行える Wear OS 開発の推奨ツールです。
ウェアラブル アプリのデザインに関する一般的なヘルプについては、Wear OS の設計ガイドラインをご覧ください。初めてウェアラブル アプリを作成する際のヘルプについては、ウェアラブル アプリの作成に関するガイドをご覧ください。
Wear OS で最初の地図アプリを構築する
このクイックガイドでは、読者が Maps SDK for Android をよく理解していること、Wear OS のガイドに従ってアプリにウェアラブル モジュールを作成していること、そのウェアラブル モジュールに地図を追加する必要があることを前提としています。
Wear モジュールの依存関係を追加する
アプリの Wear OS モジュールの build.gradle ファイルに以下の依存関係が含まれていることを確認します。
dependencies {
    // ...
    compileOnly 'com.google.android.wearable:wearable:2.9.0'
    implementation 'com.google.android.support:wearable:2.9.0'
    implementation 'com.google.android.gms:play-services-maps:18.1.0'

    // This dependency is necessary for ambient mode
    implementation 'androidx.wear:wear:1.2.0'
}
依存関係について詳しくは、既存のプロジェクトに Wear OS モジュールを追加する方法に関するガイドをご覧ください。
「スワイプして閉じる」操作を実装して背景色を設定する
ウェアラブル デバイスに地図を表示するには、SwipeDismissFrameLayout を使用することをおすすめします。SwipeDismissFrameLayout クラスを使用すると、「スワイプして閉じる」操作を実装して、ユーザーが画面の左端からスワイプすることでアプリを終了させることができるようになります。
カスタムの背景色を設定するには、map:backgroundColor XML 属性を使用して、実際の地図タイルが読み込まれるまで表示する色を定義します。
SwipeDismissFrameLayout 要素と backgroundColor 要素を SupportMapFragment のコンテナとしてレイアウト定義に追加します。
  <androidx.wear.widget.SwipeDismissFrameLayout
      android:id="@+id/map_container"
      android:layout_width="match_parent"
      android:layout_height="match_parent">
    <fragment
        android:id="@+id/map"
        android:name="com.google.android.gms.maps.SupportMapFragment"
        android:layout_width="match_parent"
        android:layout_height="match_parent"
        map:backgroundColor="#fff0b2dd" />
  </androidx.wear.widget.SwipeDismissFrameLayout>
アクティビティに SwipeDismissFrameLayout オブジェクトを取得したら、以下に示すように、コールバックを追加し、コールバックの動作を設定して、必要な終了アクションを実行します。
Java
public class MainActivity extends AppCompatActivity implements OnMapReadyCallback,
    AmbientModeSupport.AmbientCallbackProvider {

    public void onCreate(Bundle savedState) {
        super.onCreate(savedState);

        // Set the layout. It only contains a SupportMapFragment and a DismissOverlay.
        setContentView(R.layout.activity_main);

        // Enable ambient support, so the map remains visible in simplified, low-color display
        // when the user is no longer actively using the app but the app is still visible on the
        // watch face.
        AmbientModeSupport.AmbientController controller = AmbientModeSupport.attach(this);
        Log.d(MainActivity.class.getSimpleName(), "Is ambient enabled: " + controller.isAmbient());

        // Retrieve the containers for the root of the layout and the map. Margins will need to be
        // set on them to account for the system window insets.
        final SwipeDismissFrameLayout mapFrameLayout = (SwipeDismissFrameLayout) findViewById(
            R.id.map_container);
        mapFrameLayout.addCallback(new SwipeDismissFrameLayout.Callback() {
            @Override
            public void onDismissed(SwipeDismissFrameLayout layout) {
                onBackPressed();
            }
        });

        // Obtain the MapFragment and set the async listener to be notified when the map is ready.
        mapFragment = (SupportMapFragment) getSupportFragmentManager()
            .findFragmentById(R.id.map);
        mapFragment.getMapAsync(this);
    }

    // ...
}
Kotlin
class MainActivity : AppCompatActivity(), OnMapReadyCallback,
                     AmbientModeSupport.AmbientCallbackProvider {

    public override fun onCreate(savedState: Bundle?) {
        super.onCreate(savedState)

        // Set the layout. It only contains a SupportMapFragment and a DismissOverlay.
        setContentView(R.layout.activity_main)

        // Enable ambient support, so the map remains visible in simplified, low-color display
        // when the user is no longer actively using the app but the app is still visible on the
        // watch face.
        val controller = AmbientModeSupport.attach(this)
        Log.d(MainActivity::class.java.simpleName, "Is ambient enabled: " + controller.isAmbient)

        // Retrieve the containers for the root of the layout and the map. Margins will need to be
        // set on them to account for the system window insets.
        val mapFrameLayout = findViewById<SwipeDismissFrameLayout>(R.id.map_container)
        mapFrameLayout.addCallback(object : SwipeDismissFrameLayout.Callback() {
            override fun onDismissed(layout: SwipeDismissFrameLayout) {
                onBackPressed()
            }
        })

        // Obtain the MapFragment and set the async listener to be notified when the map is ready.
        mapFragment = supportFragmentManager
            .findFragmentById(R.id.map) as SupportMapFragment
        mapFragment.getMapAsync(this)
    }

    // ...
}
地図を追加する
通常どおり onMapReady(GoogleMap) コールバック メソッドを使って、GoogleMap オブジェクトに対するハンドルを取得します。地図を使用できるようになると、コールバックがトリガーされます。コールバック メソッドでは、地図にマーカーやポリラインを追加したり、リスナーを追加したり、カメラを移動したりできます。以下の例では、シドニーのオペラハウスの近くにマーカーを追加しています。
Java
private static final LatLng SYDNEY = new LatLng(-33.85704, 151.21522);

@Override
public void onMapReady(@NonNull GoogleMap googleMap) {
    // Add a marker with a title that is shown in its info window.
    googleMap.addMarker(new MarkerOptions().position(SYDNEY)
        .title("Sydney Opera House"));

    // Move the camera to show the marker.
    googleMap.moveCamera(CameraUpdateFactory.newLatLngZoom(SYDNEY, 10));
}
Kotlin
private val sydney = LatLng(-33.85704, 151.21522)

override fun onMapReady(googleMap: GoogleMap) {
    // Add a marker with a title that is shown in its info window.
    googleMap.addMarker(
        MarkerOptions().position(sydney)
            .title("Sydney Opera House")
    )

    // Move the camera to show the marker.
    googleMap.moveCamera(CameraUpdateFactory.newLatLngZoom(sydney, 10f))
}
「常に画面表示モード」を有効化する
Maps SDK for Android は、ウェアラブル アプリの常に画面表示モードをサポートしています。このモードをサポートするアプリは、常時オンアプリと呼ばれることもあります。常に画面表示モードは、ユーザーが実際にアプリを使用しなくなったときにアクティブ化され、アプリをウェアラブル デバイスに表示し続けることができるようにします。
Maps SDK for Android では、常に画面表示モードで使用する簡略化された、色数の少ない地図のレンダリングが提供されており、デバイスがインタラクティブ モードから常に画面表示モードに切り替わると、地図のスタイルが自動的に調整されます。常に画面表示モードでは、すべてのマーカー、オブジェクト、UI コントロールが非表示になります。これにより、アプリの電力消費が削減され、他の常時オンアプリと外観(ウォッチ フェイスなど)の一貫性が保持されます。
次のステップを実行して、アプリの地図が常に画面表示モードを使用するようにします。
- Android 6.0(API 23)以降のプラットフォームを含むように Android SDK をアップデートします。これにより、アクティビティを常に画面表示モードに切り替えることができる API が提供されます。SDK を更新する方法については、Android のドキュメントで SDK パッケージの追加をご覧ください。
- アプリ マニフェストで
targetSdkVersionを 23 以上に設定して、プロジェクトの対象が Android 6.0 以降になるようにします。 - アプリの
build.gradleファイルにウェアラブル依存関係を追加します。こちらのページのサンプルをご覧ください。 - アプリを表示したままにするための Android トレーニング クラスの説明に沿って、ウェアラブル共有ライブラリ エントリをウェアラブル アプリのマニフェストに追加します。
- アプリを表示したままにするための Android トレーニング クラスの説明に沿って、
WAKE_LOCKの権限をハンドヘルド アプリとウェアラブル アプリのマニフェストに追加します。 - アクティビティの
onCreate()メソッド内で、AmbientModeSupport.attach()メソッドを呼び出します。これにより、アプリケーションは常時オンであるため、デバイスの電力が低下した場合はウォッチ フェイスに戻るのではなく、常に画面表示モードに切り替える必要があることがオペレーティング システムに通知されます。 - アクティビティに
AmbientModeSupport.AmbientCallbackProviderインターフェースを実装して、常に画面表示モードの状態の変化を受信できるようにします。 - 常に画面表示モードをサポートするように地図を設定します。これには、アクティビティの XML レイアウト ファイルで属性の
map:ambientEnabled="true"を設定するか、GoogleMapOptions.ambientEnabled(true)を設定してプログラムにより設定します。この設定により、常に画面表示モードで使用するために必要な地図タイルを事前に読み込む必要があることが API に通知されます。 - アクティビティが常に画面表示モードに切り替わると、システムによって
onEnterAmbient()メソッドが指定したAmbientCallback内で呼び出されます。onEnterAmbient()をオーバーライドして、SupportMapFragment.onEnterAmbient(ambientDetails)またはMapView.onEnterAmbient(ambientDetails)を呼び出します。API により、非インタラクティブで色数の少ない地図のレンダリングに切り替えられます。 - 同様に、
onExitAmbient()でSupportMapFragment.onExitAmbient()またはMapView.onExitAmbient()を呼び出します。API により、地図の標準のレンダリングに切り替えられます。
次のコードサンプルでは、アクティビティで常に画面表示モードを有効にしています。
Java
public class AmbientActivity extends AppCompatActivity implements
    AmbientModeSupport.AmbientCallbackProvider {

    private SupportMapFragment mapFragment;

    public void onCreate(Bundle savedState) {
        super.onCreate(savedState);

        // Set the layout. It only contains a SupportMapFragment and a DismissOverlay.
        setContentView(R.layout.activity_main);

        // Enable ambient support, so the map remains visible in simplified, low-color display
        // when the user is no longer actively using the app but the app is still visible on the
        // watch face.
        AmbientModeSupport.AmbientController controller = AmbientModeSupport.attach(this);
        Log.d(AmbientActivity.class.getSimpleName(), "Is ambient enabled: " + controller.isAmbient());

        // Obtain the MapFragment and set the async listener to be notified when the map is ready.
        mapFragment = (SupportMapFragment) getSupportFragmentManager()
            .findFragmentById(R.id.map);
    }

    @Override
    public AmbientCallback getAmbientCallback() {
        return new AmbientCallback() {
            /**
             * Starts ambient mode on the map.
             * The API swaps to a non-interactive and low-color rendering of the map when the user is no
             * longer actively using the app.
             */
            @Override
            public void onEnterAmbient(Bundle ambientDetails) {
                super.onEnterAmbient(ambientDetails);
                mapFragment.onEnterAmbient(ambientDetails);
            }

            /**
             * Exits ambient mode on the map.
             * The API swaps to the normal rendering of the map when the user starts actively using the app.
             */
            @Override
            public void onExitAmbient() {
                super.onExitAmbient();
                mapFragment.onExitAmbient();
            }
        };
    }
}
Kotlin
class AmbientActivity : AppCompatActivity(), AmbientModeSupport.AmbientCallbackProvider {

    private lateinit var mapFragment: SupportMapFragment

    public override fun onCreate(savedState: Bundle?) {
        super.onCreate(savedState)

        // Set the layout. It only contains a SupportMapFragment and a DismissOverlay.
        setContentView(R.layout.activity_main)

        // Enable ambient support, so the map remains visible in simplified, low-color display
        // when the user is no longer actively using the app but the app is still visible on the
        // watch face.
        val controller = AmbientModeSupport.attach(this)
        Log.d(AmbientActivity::class.java.simpleName, "Is ambient enabled: " + controller.isAmbient)

        // Obtain the MapFragment and set the async listener to be notified when the map is ready.
        mapFragment = supportFragmentManager
            .findFragmentById(R.id.map) as SupportMapFragment
    }

    override fun getAmbientCallback(): AmbientModeSupport.AmbientCallback {
        return object : AmbientModeSupport.AmbientCallback() {
            /**
             * Starts ambient mode on the map.
             * The API swaps to a non-interactive and low-color rendering of the map when the user is no
             * longer actively using the app.
             */
            override fun onEnterAmbient(ambientDetails: Bundle) {
                super.onEnterAmbient(ambientDetails)
                mapFragment.onEnterAmbient(ambientDetails)
            }

            /**
             * Exits ambient mode on the map.
             * The API swaps to the normal rendering of the map when the user starts actively using the app.
             */
            override fun onExitAmbient() {
                super.onExitAmbient()
                mapFragment.onExitAmbient()
            }
        }
    }
}
アプリが常に画面表示モードになっている間に、画面をアップデートできます。コンテンツのアップデートに関する詳細と常に画面表示モードの一般的な詳細については、アプリを表示したままにするための Android トレーニング クラスをご覧ください。
Wear OS でストリートビューを使用する
ストリートビューは、ウェアラブル デバイスで完全にサポートされています。
ストリートビュー パノラマの表示中にユーザーがアプリを終了できるようにするには、StreetViewPanorama.OnStreetViewPanoramaLongClickListener インターフェースを使って、長押しクリック操作をリッスンします。ストリートビュー画像の任意の場所がユーザーにより長押しクリックされると、onStreetViewPanoramaLongClick(StreetViewPanoramaOrientation) イベントを受け取ります。DismissOverlayView.show() を呼び出して終了ボタンを表示します。
サンプルコード
GitHub にはサンプルアプリが用意されており、アプリのたたき台として使用できるようになっています。サンプルでは、Wear OS で基本的な Google マップを設定する方法を確認できます。
Wear OS の Maps API でサポートされている機能
このセクションでは、ウェアラブル デバイスとハンドヘルド デバイス(スマートフォンとタブレット)の地図でサポートされている機能を比較し、その違いについて概説します。以下に示されていない API 機能はすべて、完全な API のドキュメントに記されているとおりに動作します。
| 機能 | |
|---|---|
| 完全なインタラクティブ モードとライトモード | Maps SDK for Android は、完全なインタラクティブ モードまたはライトモードで使用できます。ウェアラブル デバイスでパフォーマンスを最適化する必要があり、アプリで操作や地図のパンとズームといったインタラクションをサポートする必要がない場合は、ライトモードの使用を検討してください。 ライトモードでは、ユーザーが地図をタップしたときに Google マップ モバイルアプリを起動するインテントが無効になっており、ウェアラブル デバイスでは有効にできません。 ライトモードと完全なインタラクティブ モードの違いをすべて記したリストについては、ライトモードに関するドキュメントをご覧ください。 |
| マップ ツールバー | マップ ツールバーは無効になっており、ウェアラブル デバイスでは有効にできません。 |
| ユーザー インターフェース コントロール | UI コントロールは、ウェアラブル デバイスではデフォルトで無効になっています。これには、ズーム、コンパス、現在地コントロールが含まれます。これらは、通常どおり、UiSettings クラスを使用して有効にできます。
|
| 操作 | シングルタッチ操作は、正しく機能します。たとえば、タップとドラッグによる地図のパン、ダブルタップによるズームイン、2 本指タップによるズームアウトなどがあります。 マルチタッチ操作のサポートは、ユーザーのデバイスによって異なります。マルチタッチ操作の例には、2 本指プッシュによるマップのチルト、ピンチによるズーム、2 本指の回転などがあります。 |
| インドアマップと建物 |
インドアマップは、ウェアラブル デバイスではデフォルトで無効になっています。これを有効にするには、GoogleMap.setIndoorEnabled(true) を呼び出します。インドアマップが有効になっている場合は、マップにデフォルトの階数レベルが表示されます。
レベルピッカー UI 要素は、ウェアラブル デバイスではサポートされていません。 |
| タイル オーバーレイ | タイル オーバーレイは、ウェアラブル デバイスではサポートされていません。 |
Wear OS での Maps API を使用した開発のベスト プラクティス
アプリで優れたユーザー エクスペリエンスを提供する方法を次に示します。
- 地図は画面の大部分を占めるように表示される必要があります。これは、ウェアラブル デバイスの小さいフォーム ファクタで地図のユーザビリティを最適化するために必要です。
- アプリのユーザー エクスペリエンスをデザインするときには、ウェアラブル デバイスのバッテリー電力が低いことを考慮してください。画面がアクティブで、地図が表示された状態のままにすると、バッテリー消費量に影響します。