
Vous êtes prêt à créer des récits 3D captivants qui emmènent les spectateurs dans des lieux réels ? Ce guide vous explique comment créer un récit à l'aide de l'éditeur intégré.
Utilisez notre interface intuitive pour ajuster les titres, les descriptions, les images et les angles de caméra. Elle est idéale pour les débutants.
Ouvrir l'éditeur de récit
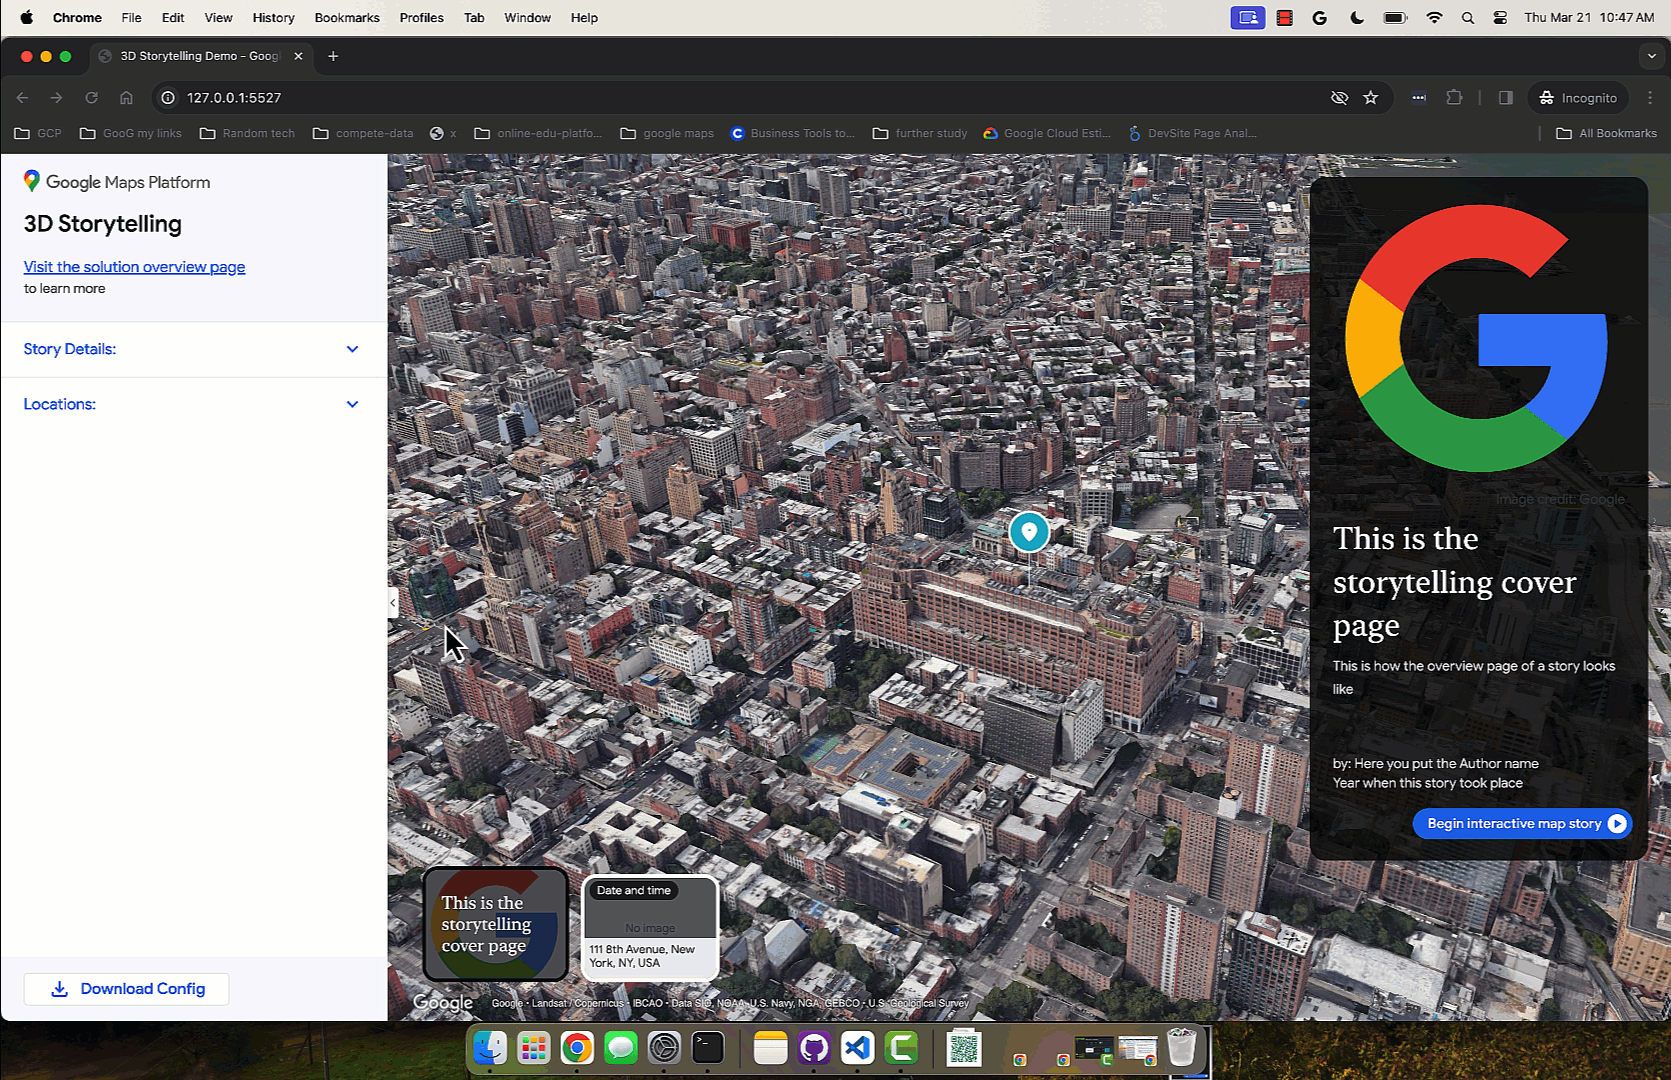
La solution 3D Storytelling est fournie avec un éditeur intégré qui vous permet de créer le récit à partir de l'interface utilisateur.
L'éditeur se trouve sur le côté gauche de la page. Ouvrez-le en cliquant sur cette petite icône :
Vous pouvez accéder à l'éditeur en accédant à la version hébergée de l'application d'administration 3D Storytelling ou en téléchargeant et en installant votre propre instance Storytelling à partir de GitHub.
Créer la page de couverture
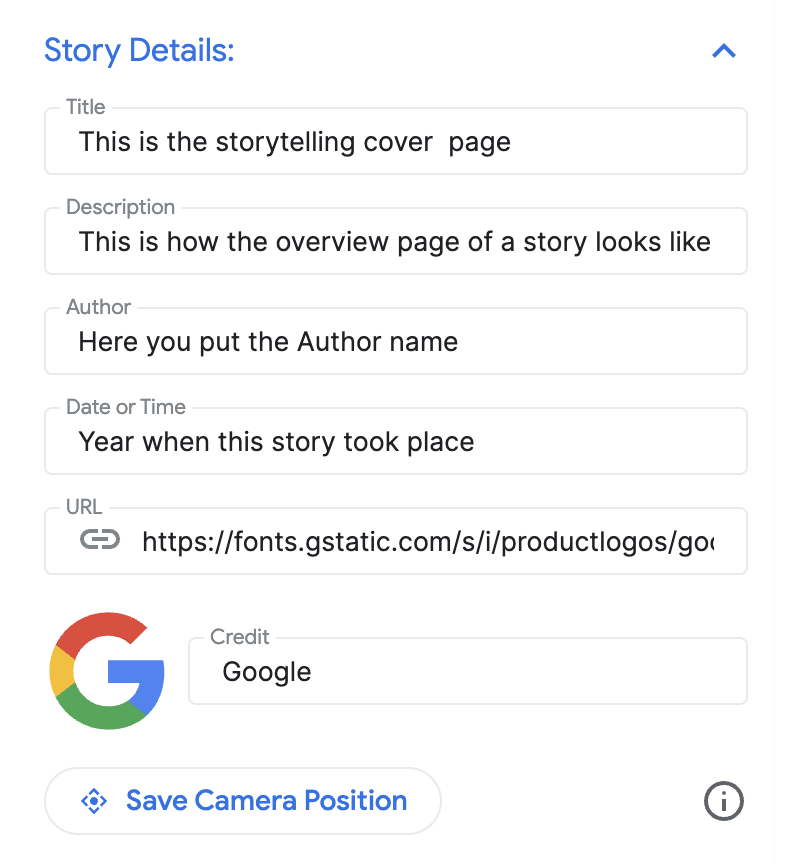
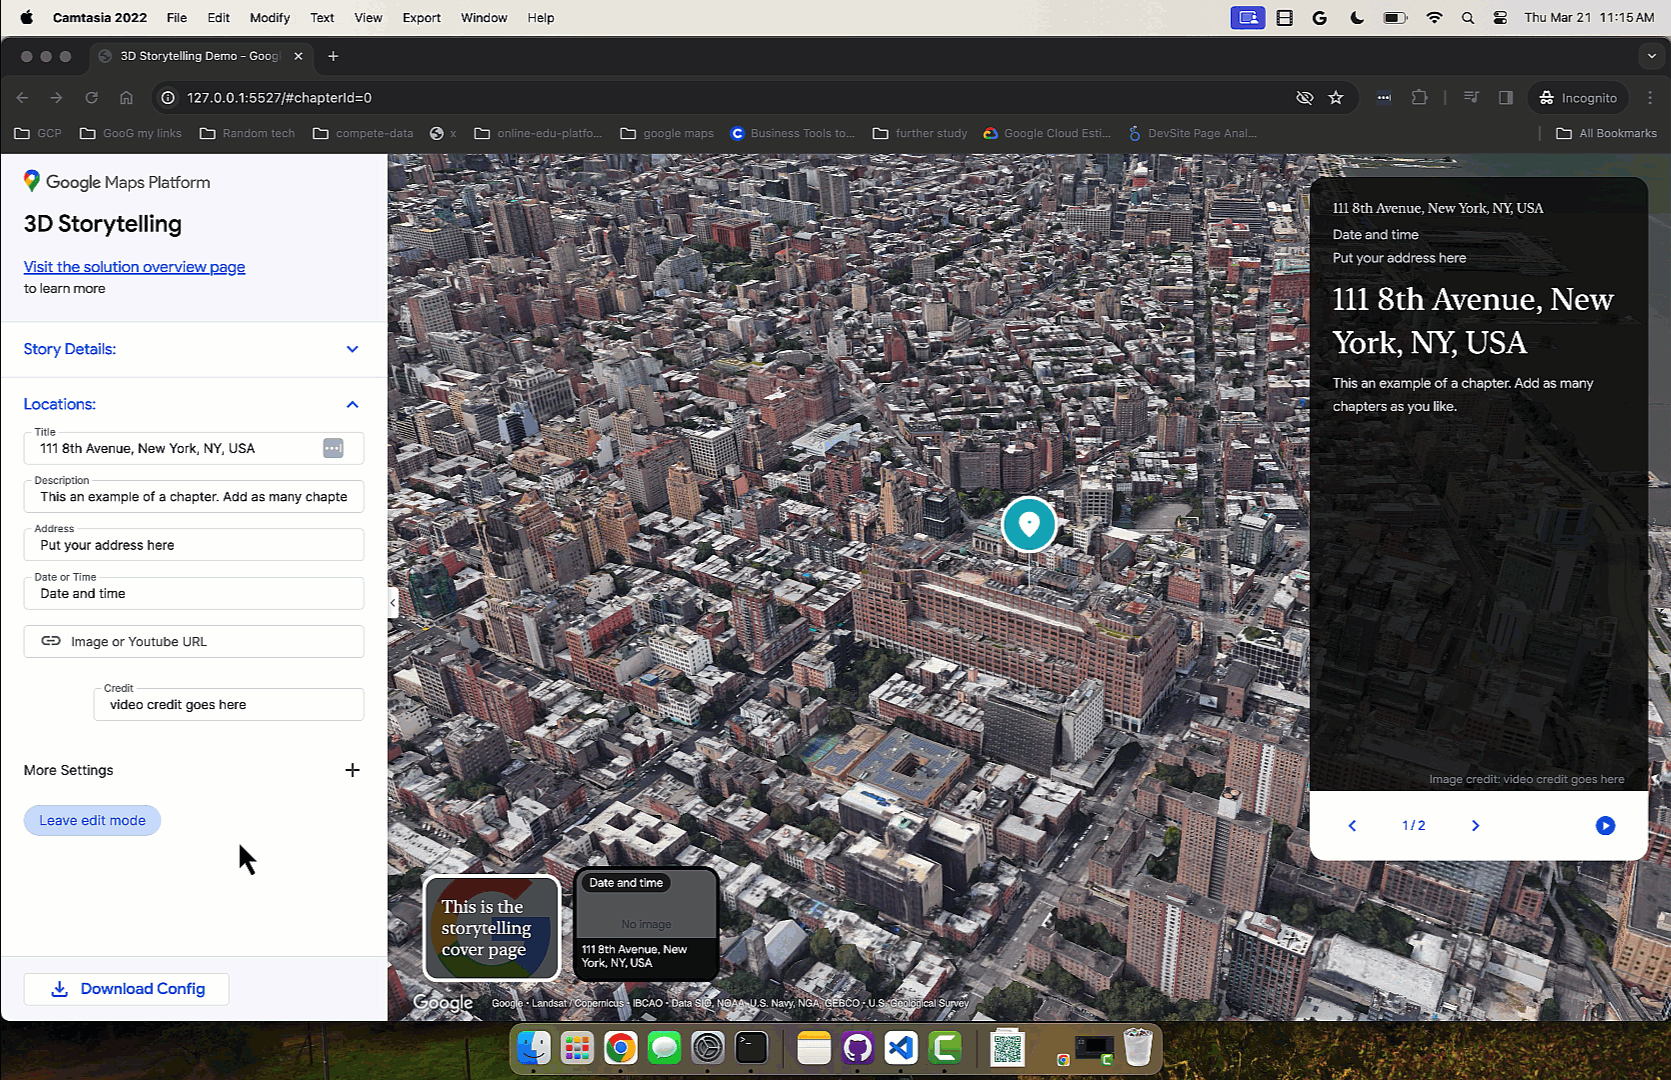
Utilisez la section "Détails du récit" pour définir un titre, une image, une description et d'autres informations. Cela présente votre récit au spectateur.
Ajouter des chapitres
Chaque chapitre est comme une étape de votre voyage. Voici comment les ajouter :
Recherchez un lieu à l'aide de la barre de recherche Autocomplete intégrée.
Une fois un lieu ajouté, vous pouvez ajouter des détails au chapitre en cliquant sur le bouton Modifier à côté du lieu :

Cliquez sur Modifier pour saisir le titre, la description, l'image et la date de votre chapitre.

Si vous souhaitez supprimer un chapitre en particulier, un bouton Supprimer se trouve juste en dessous du bouton "Modifier".
Vous pouvez réorganiser les chapitres en les faisant glisser à l'aide des icônes en pointillés à gauche :

Enregistrer le chapitre
Pour enregistrer un chapitre spécifique, cliquez simplement sur le bouton "Quitter le mode édition". Le bouton "Quitter le mode édition" fait office de bouton d'enregistrement.

Personnaliser les paramètres de la caméra
Vous pouvez personnaliser différents paramètres de la caméra :
Afficher/masquer le repère de lieu Vous pouvez choisir de ne pas afficher l'épingle sur un lieu spécifique, mais plutôt de présenter une zone générale. Cochez/décochez la case "Afficher le repère de lieu" pour afficher ou masquer une épingle.
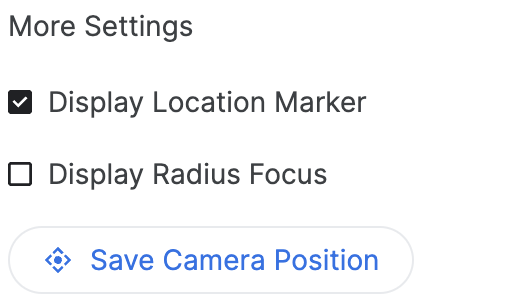
Afficher un rayon autour d'une zone Vous pouvez choisir d'afficher une zone autour d'un lieu spécifique à l'aide de la fonctionnalité "Afficher le rayon de mise au point". Lorsque cette option est cochée un curseur de rayon s'ouvre, ce qui vous permet de contrôler le rayon de la mise au point de la caméra.
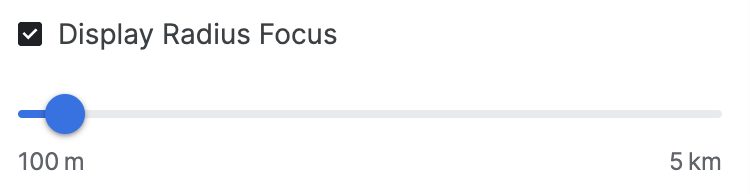
Cela montre comment les options avancées de la caméra permettent de créer une expérience personnalisée.
Personnaliser l'emplacement de la caméra Affinez l'angle de caméra spécifique que vous souhaitez afficher grâce à des commandes de caméra simples :
Inclinaison : affichez la carte d'en haut ou au niveau du sol. Maintenez la touche Ctrl (ou Cmd sur certains ordinateurs) enfoncée tout en cliquant et en faisant glisser la souris vers le haut ou vers le bas avec votre souris.
Rotation : faites pivoter la carte pour une vue à 360 degrés. Maintenez la touche Ctrl (ou Cmd sur certains ordinateurs) enfoncée tout en cliquant et en faisant glisser la souris vers la gauche ou vers la droite avec votre souris.
Zoom : obtenez une vue rapprochée ou grand-angle. Utilisez la molette de votre souris ou les gestes de zoom avant/arrière habituels.
Essayez de combiner l'inclinaison, la rotation et le zoom pour trouver l'angle idéal pour chaque lieu. Les commandes peuvent varier légèrement en fonction de la configuration de votre ordinateur's setup.

Découvrez comment contrôler le canevas 3D pour obtenir l'angle de caméra idéal.
Finaliser et télécharger
Une fois le récit et les chapitres créés, téléchargez la configuration.
Cliquez sur Télécharger pour obtenir votre configuration personnalisée au format JSON.
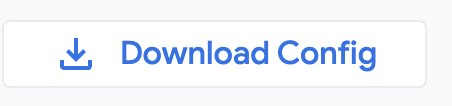
Cette configuration peut être utilisée pour créer votre propre 3D Storytelling en dupliquant le code à partir de GitHub.