
רוצים ליצור סיורים תלת-ממדיים מרתקים שלוקחים את הצופים למסע במקומות בעולם האמיתי? במדריך הזה נסביר איך ליצור כתבה חדשה באמצעות כלי העריכה המובנה.
בממשק האינטואיטיבי שלנו אפשר לשנות את השמות, התיאורים, התמונות וזוויות הצילום. הוא מושלם למתחילים!
פתיחת הכלי לעריכת סטורי
פתרון ה-3D Storytelling מגיע עם עורך מובנה שמאפשר לכם ליצור את הסיפור מממשק המשתמש.
הכלי לעריכה נמצא בצד ימין של הדף. פותחים בלחיצה על הסמל הקטן הזה:
אפשר לגשת לכלי העריכה דרך הגרסה המארחת של אפליקציה לשותפים של 3D Storytelling, או להוריד ולהתקין את המופע של Storytelling מ-GitHub.
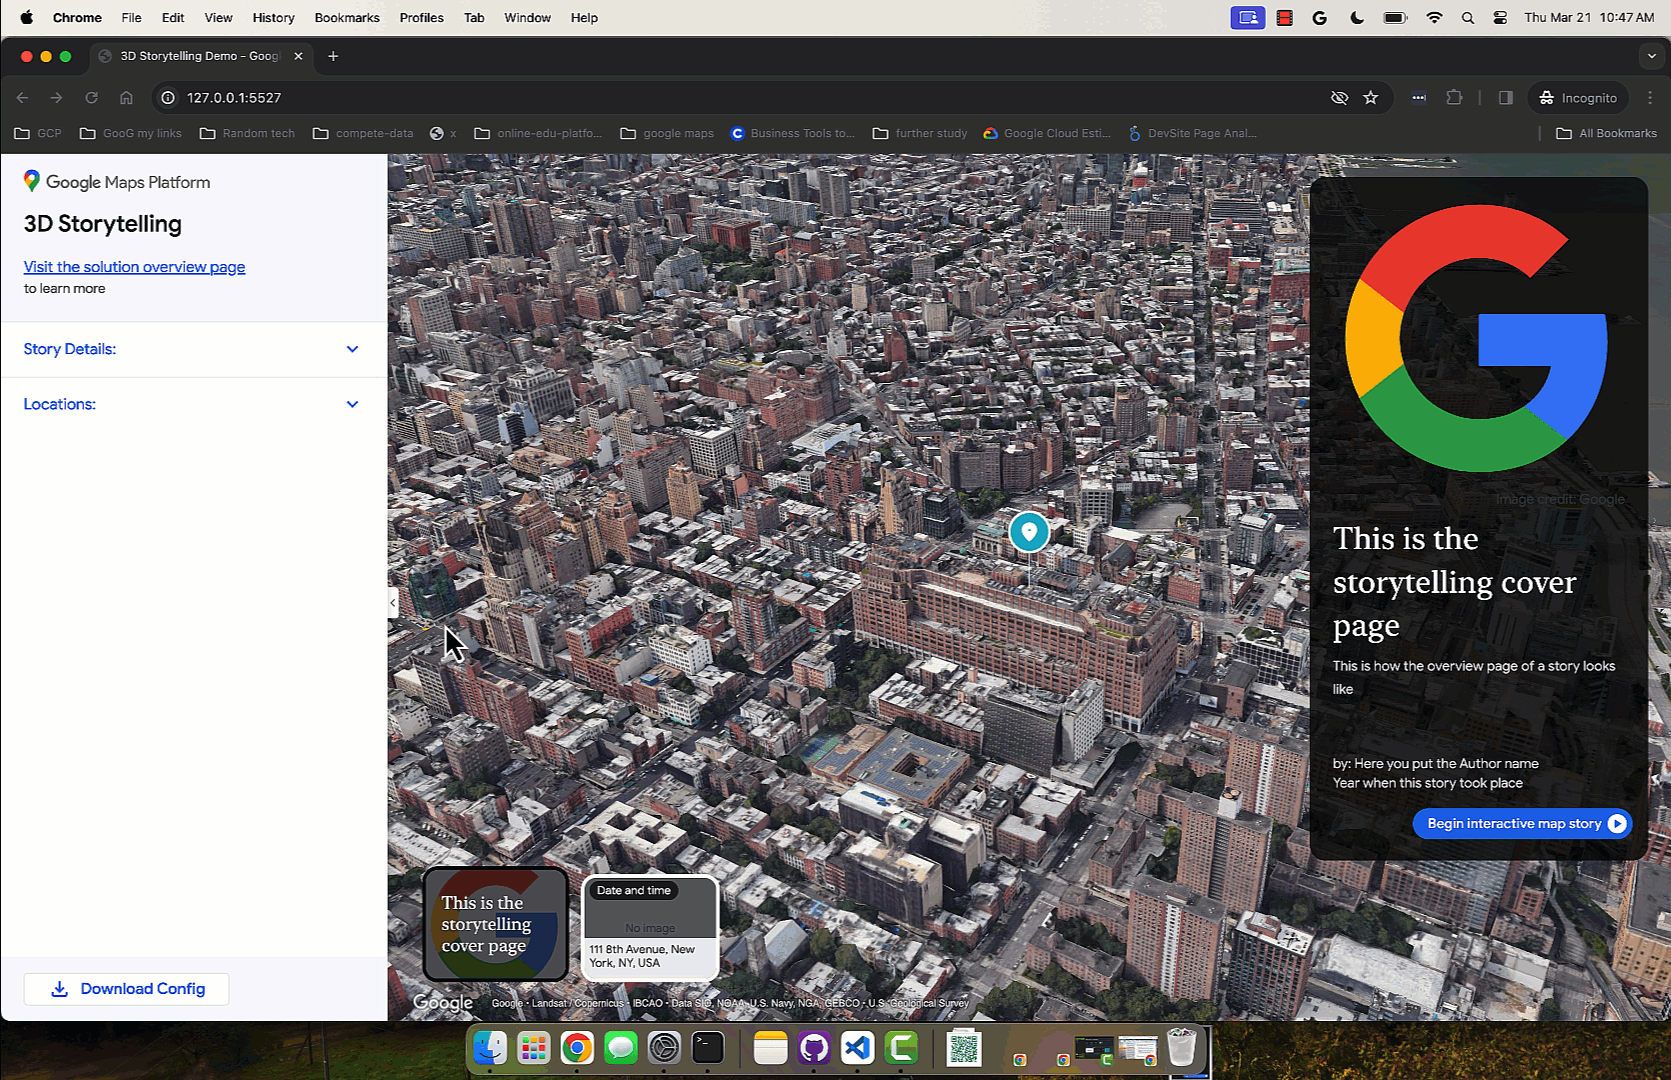
יצירת דף השער
משתמשים בקטע 'פרטי הסיפור' כדי להגדיר שם, תמונה, תיאור ופרטים אחרים. כך הצופים יקבלו מושג לגבי התוכן של הסטורי.

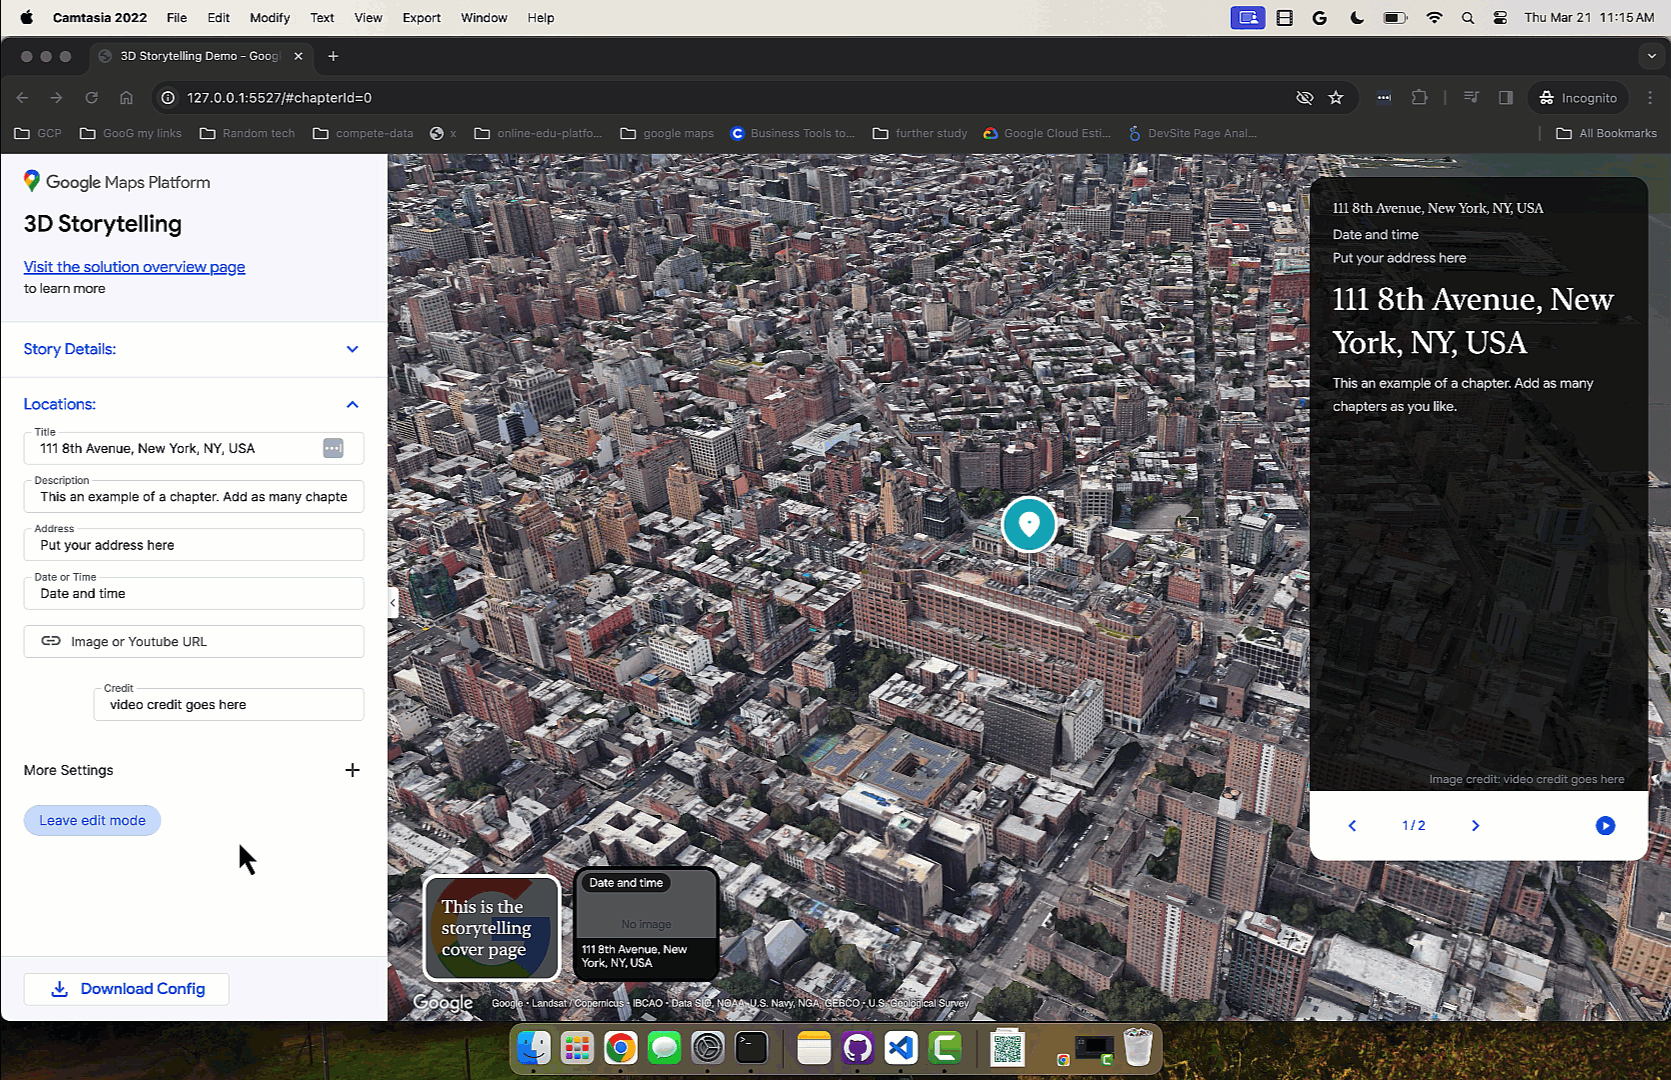
הוספת פרקים
כל פרק הוא כמו עצירה במסע. כך מוסיפים אותם:
מחפשים מיקום באמצעות סרגל החיפוש המובנה עם השלמה אוטומטית.
אחרי שמוסיפים מיקום, אפשר להוסיף פרטים לפרק באמצעות לחיצה על הלחצן עריכה לצד המיקום:

לוחצים על עריכה כדי להזין את השם, התיאור, התמונה והתאריך של הפרק.

אם רוצים למחוק פרק מסוים, יש כפתור מחיקה ממש מתחת לכפתור העריכה.
אפשר לשנות את הסדר של הפרקים על ידי גרירה והזזה באמצעות הסמלים המקווקווים בצד ימין:

שמירת הפרק
כדי לשמור פרק ספציפי, פשוט לוחצים על הלחצן יציאה ממצב עריכה. הכפתור 'יציאה ממצב עריכה' פועל כמו כפתור שמירה.

התאמה אישית של הגדרות המצלמה
אתם יכולים להתאים אישית הגדרות שונות של המצלמה:
הצגה או הסתרה של סמן המיקום יכול להיות שלא תרצו להציג את הסיכה במיקום ספציפי, אלא להציג אזור כללי. מסמנים את התיבה 'הצגת סמן מיקום' כדי להציג סיכה או מבטלים את הסימון שלה כדי להסתיר אותה.

הצגת רדיוס מסביב לאזור אתם יכולים לבחור להציג אזור מסביב למיקום ספציפי באמצעות התכונה 'הצגת רדיוס ממוקד'. כשמסמנים את התיבה, מופיע פס הזזה של רדיוס שיאפשר לכם לשלוט ברדיוס של גבול הפוקוס של המצלמה.

כאן אפשר לראות איך אפשרויות מתקדמות של המצלמה עוזרות ליצור חוויה בהתאמה אישית.
התאמה אישית של מיקום המצלמה אפשר לשנות בקלות את זווית המצלמה שרוצים להציג באמצעות אמצעי בקרה פשוטים:
הטיה: אפשר לראות את המפה מלמעלה או מגובה הקרקע. לוחצים לחיצה ארוכה על מקש Control (או Cmd במחשבים מסוימים) תוך כדי לחיצה וגרירה למעלה או למטה בעזרת העכבר.
סיבוב: מסובבים את המפה כדי לראות אותה ב-360 מעלות. לוחצים לחיצה ארוכה על מקש Control (או Cmd במחשבים מסוימים) תוך כדי לחיצה וגרירה שמאלה או ימינה בעזרת העכבר.
שינוי מרחק התצוגה: אפשר להתקרב או להתרחק. משתמשים בגלגל הגלילה של העכבר או בתנועות מוכרות של הגדלה והקטנה.
כדאי לנסות לשלב בין הטיה, סיבוב ושינוי מרחק התצוגה כדי למצוא את הזווית המושלמת לכל מיקום. יכול להיות שיהיו הבדלים קלים באמצעי הבקרה, בהתאם להגדרות של המחשב.

כדי לקבל את זווית הצילום המושלמת, כדאי לבדוק איך שולטים בלוח התלת-ממדי.
השלמת התהליך והורדה
אחרי שיוצרים את הסטורי ואת הפרקים, מורידים את ההגדרה.
לוחצים על הורדה כדי לקבל את ההגדרה המותאמת אישית בפורמט JSON.

אפשר להשתמש בהגדרה הזו כדי ליצור סיפור תלת-ממדי משלכם על ידי יצירת Fork של הקוד מ-GitHub.