Page Summary
-
Device Actions allow you to control your device via voice, and this guide uses a Built-in Device Action to control an LED.
-
You will need specific hardware components including a breadboard, LED, series resistor, and jumper wires to complete this example.
-
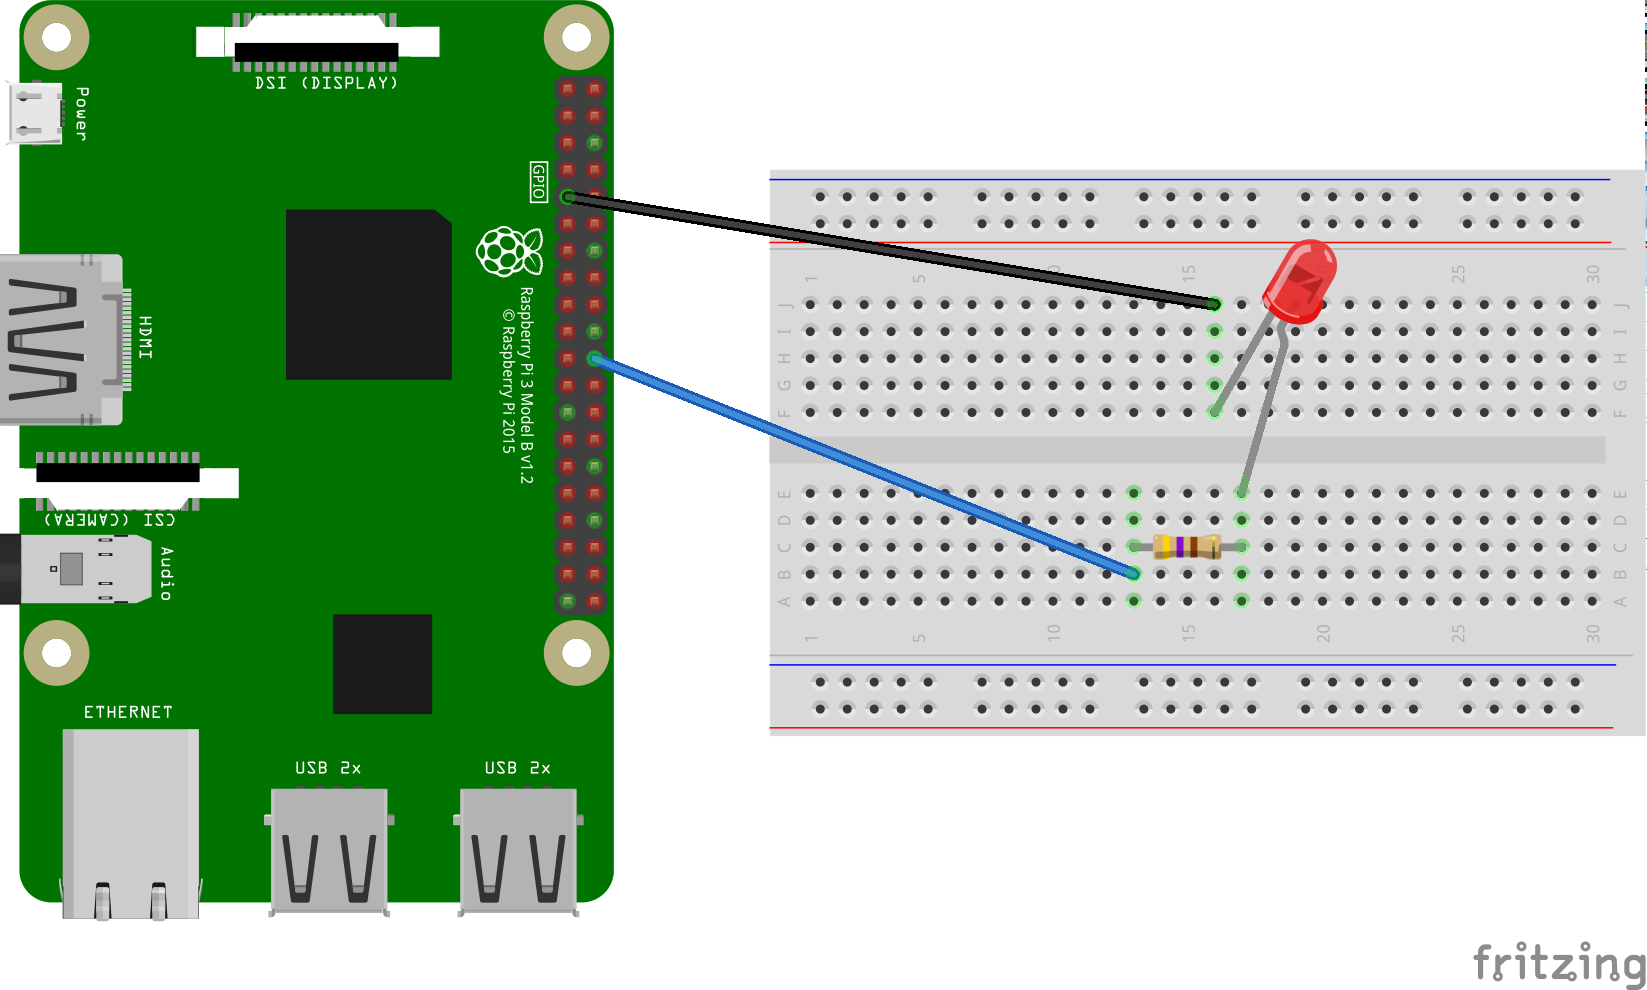
The guide provides instructions and a schematic for connecting the LED and components to the Raspberry Pi 3 Model B.
-
The next step in this process is to register device traits.
Now that you have the Assistant running on the device, it is time to extend it with Device Actions. Device Actions allow you to control your device via voice. For this example, you will be using a Built-in Device Action to turn a light on and off.
Follow these instructions to install an LED on the Raspberry Pi 3 Model B. In a later step, you will modify the sample code to light the LED by voice command.
Hardware requirements
Before you begin this example, you'll need the following components:
- A breadboard
- An LED
- A series resistor
- Two jumper wires, both with a male and female connector
The electrical resistance of the resistor should be tied to the specific LED. To find the correct value, you can use an online calculator (or purchase a kit).
Connect the components
- Connect GPIO output pin BCM25 to one side of a series resistor. Note that this is physical pin 22 on the Raspberry Pi 3.
- Connect the other side of the resistor to the anode side (longer lead) of the LED.
- Connect the cathode side (shorter lead) of the LED to ground.