
Page Summary
-
A device model provides the Google Assistant with information about your specific device, such as its type and manufacturer.
-
Device models are registered within your Actions Console project and are not accessible to other projects.
-
Device models can be registered using the registration UI in the Actions Console, a registration tool, or the REST API.
-
The registration UI requires you to fill out fields for your device, download a credentials file, and specify traits.
-
The credentials file is a JSON file containing a client ID and secret, which is used for authorization and must be located on the device.
In order for the Google Assistant to respond to commands appropriate to your device and the given context, the Assistant needs information about your particular device. You provide this information, which includes fields like device type and manufacturer, as a device model. You can think of this model as a general class of device -- such as a light, speaker, or toy robot.
This information is then accessible to the Assistant and is associated with your Actions Console project. No other projects have access to your model and device information.
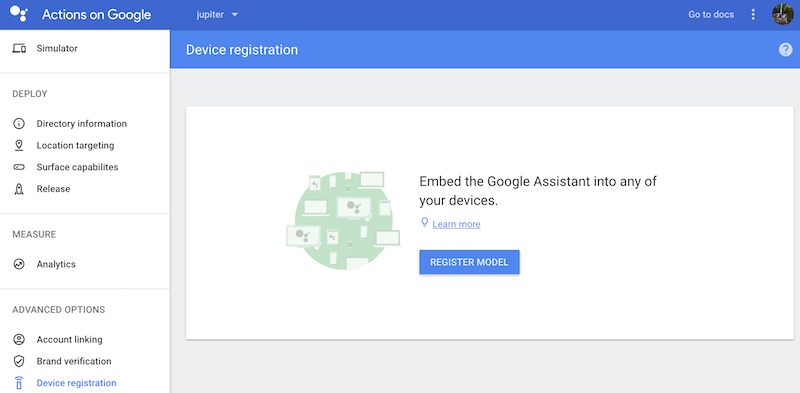
Use the registration UI
Use the registration UI in the Actions Console to register a device model.
Click the REGISTER MODEL button.
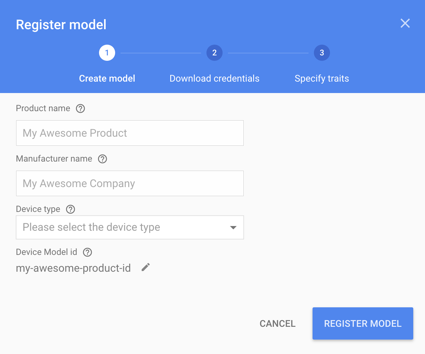
Create model
Fill out all of the fields for your device. Select any device type, such as Light.
See the device model JSON reference for more information on these fields.
When you are finished, click REGISTER MODEL.
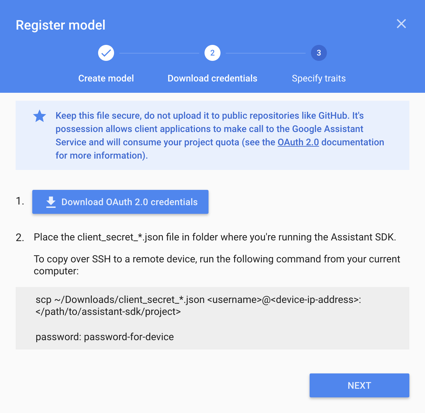
Download credentials
The client_secret_<client-id>.json file must be located on the device. This file contains
a client ID and client secret, but no access token. Later, you will run an
authorization tool and reference this file in order to authorize the Google
Assistant SDK sample to make Google Assistant queries (see the OAuth 2.0
documentation for more information). Do not rename this file.
Download this file and transfer it to the device. Click NEXT.
For the Raspberry Pi only
Make sure this file is located in /home/pi. If you want to upload the file
to the device, do the following:
Open a new terminal window. Run the following command in this new terminal:
scp ~/Downloads/client_secret_client-id.json pi@raspberry-pi-ip-address:/home/pi/
password: password-for-device
Close this terminal window.
Specify traits
Later, you will specify the different abilities that your device supports on this screen. But for now, click the SKIP button.

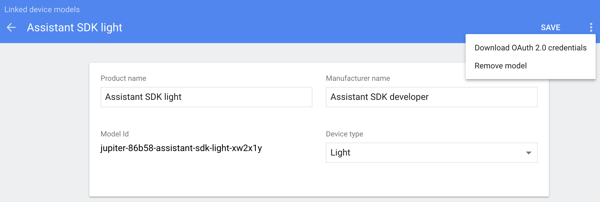
Edit the model
If you need to edit the model, click its row in the list. Make sure to click SAVE after any edits.

If you need to download the credentials file again, click the ellipses. You can delete the model from this menu as well.
Alternative ways to register
You can also use the registration tool (included with the Google Assistant SDK samples) or the REST API to register a device model.
You must be an Owner or Editor of a given Actions Console project to register models for it. Add these roles for other users in the Cloud Platform Console—see the IAM documentation.