
Google Workspace アドオンが、承認を必要とするサードパーティのサービスまたは API に接続する場合、アドオンはユーザーにログインしてアクセスを承認するよう求めるメッセージを表示できます。
このページでは、認可フロー(OAuth など)を使用してユーザーを認証する方法について説明します。手順は次のとおりです。
- 認可が必要なタイミングを検出する。
- サービスにログインするようユーザーに求めるカード インターフェースを返します。
- ユーザーがサービスまたは保護されたリソースにアクセスできるように、アドオンを更新します。
アドオンで必要なのがユーザー ID のみの場合は、Google Workspace ID またはメールアドレスを使用してユーザーを直接認証できます。認証にメールアドレスを使用するには、JSON リクエストの検証をご覧ください。Google Apps Script を使用してアドオンを作成した場合は、OAuth2 for Google Apps Script ライブラリを使用すると、このプロセスを簡単に行うことができます(OAuth1 バージョンもあります)。
認可が必要であることを検出する
アドオンを使用する場合、次のようなさまざまな理由で、ユーザーが保護されたリソースにアクセスする権限が付与されていないことがあります。
- サードパーティ サービスに接続するためのアクセス トークンがまだ生成されていないか、期限切れです。
- アクセス トークンがリクエストされたリソースをカバーしていません。
- アクセス トークンが、リクエストに必要なスコープをカバーしていない。
ユーザーがログインしてサービスにアクセスできるように、アドオンでこれらのケースを検出する必要があります。
Apps Script で構築する場合は、OAuth ライブラリの hasAccess() 関数を使用して、サービスにアクセスできるかどうかを確認できます。または、UrlFetchApp fetch() リクエストを使用する場合は、muteHttpExceptions パラメータを true に設定できます。これにより、リクエストの失敗時にリクエストが例外をスローするのを防ぎ、返された HttpResponse オブジェクトでリクエスト レスポンス コードとコンテンツを調べることができます。
サービスにログインするようユーザーに求める
アドオンが認証が必要であることを検出すると、アドオンはカード インターフェースを返して、ユーザーにサービスへのログインを促す必要があります。ログインカードは、ユーザーをリダイレクトして、インフラストラクチャでサードパーティの認証と認可プロセスを完了させる必要があります。
HTTP エンドポイントを使用してアドオンを構築する場合は、宛先アプリを Google ログインで保護し、ログイン時に発行されたID トークンを使用してユーザー ID を取得することをおすすめします。サブクレームにはユーザーの一意の ID が含まれ、アドオンの ID と関連付けることができます。
ログインカードを作成して返す
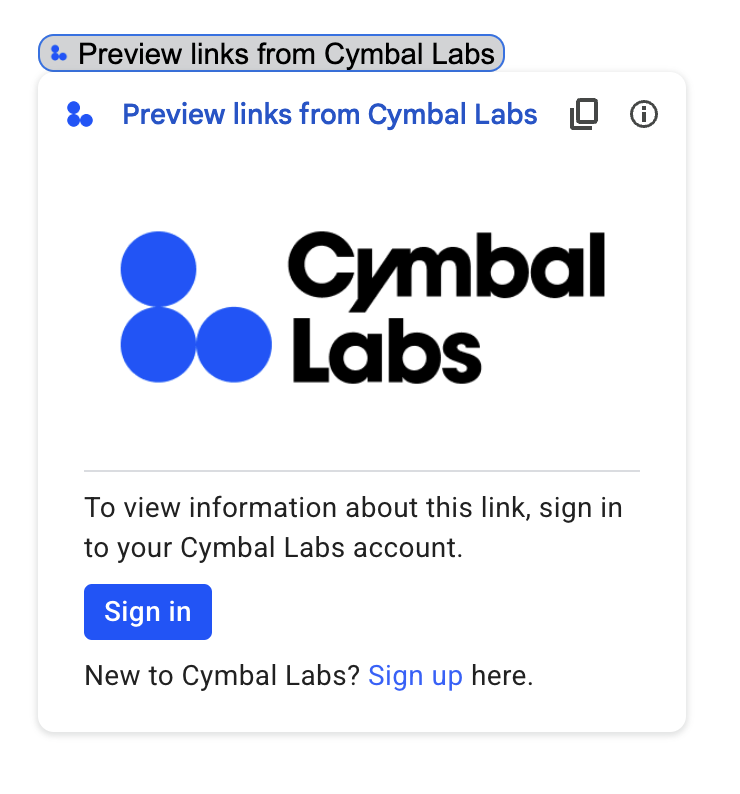
サービスのログインカードには、Google の基本認証カードを使用できます。また、カードをカスタマイズして、組織のロゴなどの追加情報を表示することもできます。アドオンを一般公開する場合は、カスタムカードを使用する必要があります。
基本認証カード
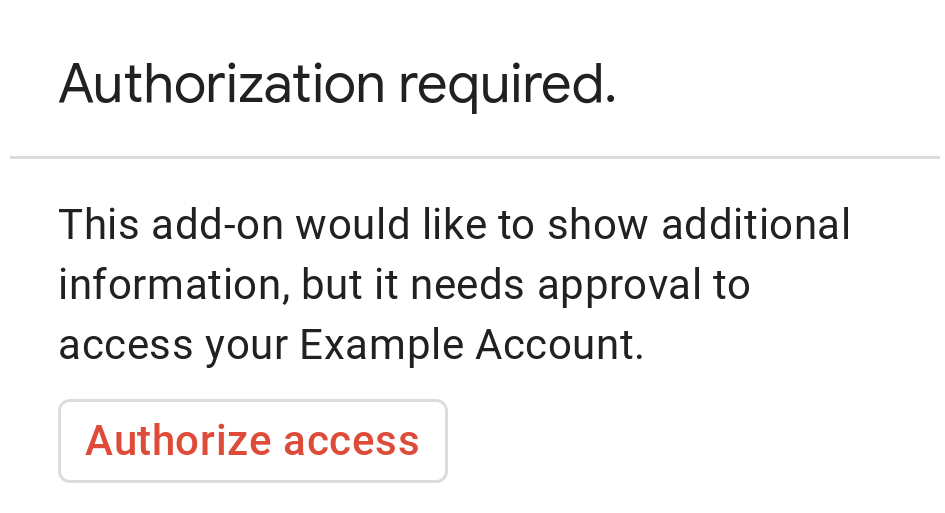
次の図は、Google の基本的な認証カードの例を示しています。


次のコードは、Google の基本的な認証カードの使用例を示しています。
Apps Script
CardService.newAuthorizationException()
    .setAuthorizationUrl('AUTHORIZATION_URL')
    .setResourceDisplayName('RESOURCE_DISPLAY_NAME')
    .throwException();
JSON
次の JSON レスポンスを返します。
{
  "basic_authorization_prompt": {
    "authorization_url": "AUTHORIZATION_URL",
    "resource": "RESOURCE_DISPLAY_NAME"
  }
}
次のように置き換えます。
AUTHORIZATION_URL: 認証を処理するウェブアプリの URL。RESOURCE_DISPLAY_NAME: 保護されたリソースまたはサービスの表示名。この名前は、承認プロンプトでユーザーに表示されます。たとえば、RESOURCE_DISPLAY_NAMEがExample Accountの場合、プロンプトには「このアドオンは追加情報を表示するため、Example Account へのアクセス許可を必要としています」と表示されます。
承認が完了すると、保護されたリソースにアクセスするためにアドオンを更新するよう求めるメッセージが表示されます。
カスタム承認カード
承認プロンプトを変更するには、サービスのログイン エクスペリエンス用のカスタムカードを作成します。
アドオンを一般公開する場合は、カスタム認証カードを使用する必要があります。Google Workspace Marketplace の公開要件について詳しくは、アプリ審査についてをご覧ください。
返品されたカードは、次のことを行う必要があります。
- アドオンがユーザーに代わって Google 以外のサービスにアクセスする権限を求めていることをユーザーに明確に伝えます。
- 承認された場合にアドオンが実行できる操作を明確にします。
- ユーザーをサービスの認可 URL に移動させるボタンなどのウィジェットを含めます。このウィジェットの機能がユーザーにとって明らかであることを確認します。
- 上記のウィジェットでは、
OpenLinkオブジェクトのOnClose.RELOAD設定を使用して、承認が受信された後にアドオンが再読み込みされるようにする必要があります。 - 認証プロンプトから開くリンクはすべて HTTPS を使用する必要があります。
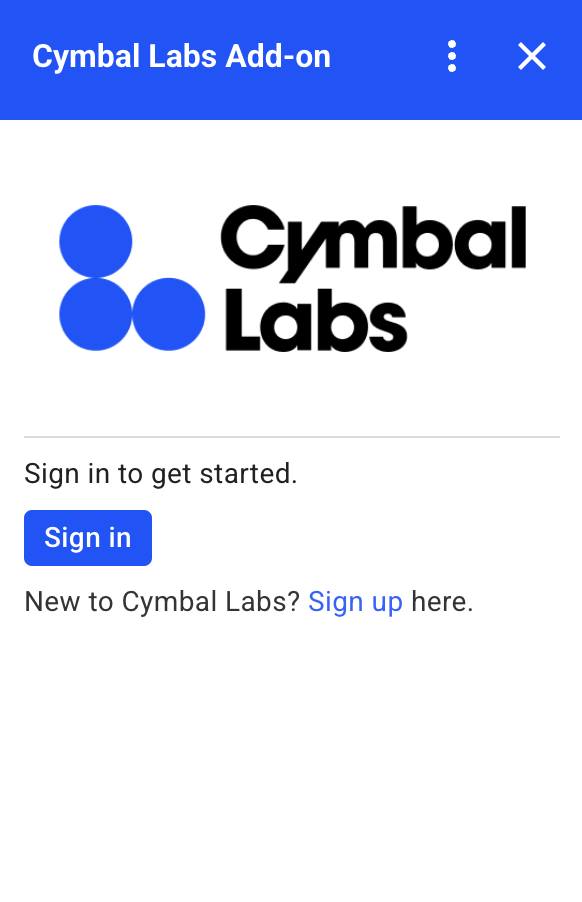
次の図は、アドオンのホームページのカスタム認可カードの例を示しています。カードには、ロゴ、説明、ログインボタンが含まれます。


次のコードは、このカスタム カードの例を使用する方法を示しています。
Apps Script
function customAuthorizationCard() {
    let cardSection1Image1 = CardService.newImage()
        .setImageUrl('LOGO_URL')
        .setAltText('LOGO_ALT_TEXT');

    let cardSection1Divider1 = CardService.newDivider();

    let cardSection1TextParagraph1 = CardService.newTextParagraph()
        .setText('DESCRIPTION');

    let cardSection1ButtonList1Button1 = CardService.newTextButton()
        .setText('Sign in')
        .setBackgroundColor('#0055ff')
        .setTextButtonStyle(CardService.TextButtonStyle.FILLED)
        .setAuthorizationAction(CardService.newAuthorizationAction()
            .setAuthorizationUrl('AUTHORIZATION_URL'));

    let cardSection1ButtonList1 = CardService.newButtonSet()
        .addButton(cardSection1ButtonList1Button1);

    let cardSection1TextParagraph2 = CardService.newTextParagraph()
        .setText('TEXT_SIGN_UP');

    let cardSection1 = CardService.newCardSection()
        .addWidget(cardSection1Image1)
        .addWidget(cardSection1Divider1)
        .addWidget(cardSection1TextParagraph1)
        .addWidget(cardSection1ButtonList1)
        .addWidget(cardSection1TextParagraph2);

    let card = CardService.newCardBuilder()
        .addSection(cardSection1)
        .build();
    return [card];
}

function startNonGoogleAuth() {
    CardService.newAuthorizationException()
        .setAuthorizationUrl('AUTHORIZATION_URL')
        .setResourceDisplayName('RESOURCE_DISPLAY_NAME')
        .setCustomUiCallback('customAuthorizationCard')
        .throwException();
  }
JSON
次の JSON レスポンスを返します。
{
  "custom_authorization_prompt": {
    "action": {
      "navigations": [
        {
          "pushCard": {
            "sections": [
              {
                "widgets": [
                  {
                    "image": {
                      "imageUrl": "LOGO_URL",
                      "altText": "LOGO_ALT_TEXT"
                    }
                  },
                  {
                    "divider": {}
                  },
                  {
                    "textParagraph": {
                      "text": "DESCRIPTION"
                    }
                  },
                  {
                    "buttonList": {
                      "buttons": [
                        {
                          "text": "Sign in",
                          "onClick": {
                            "openLink": {
                              "url": "AUTHORIZATION_URL",
                              "onClose": "RELOAD",
                              "openAs": "OVERLAY"
                            }
                          },
                          "color": {
                            "red": 0,
                            "green": 0,
                            "blue": 1,
                            "alpha": 1,
                          }
                        }
                      ]
                    }
                  },
                  {
                    "textParagraph": {
                      "text": "TEXT_SIGN_UP"
                    }
                  }
                ]
              }
            ]
          }
        }
      ]
    }
  }
}
次のように置き換えます。
LOGO_URL: ロゴまたは画像の URL。公開 URL である必要があります。LOGO_ALT_TEXT: ロゴまたは画像の代替テキスト(Cymbal Labs Logoなど)。DESCRIPTION: ユーザーにログインを求めるコールトゥアクション(Sign in to get startedなど)。- ログインボタンを更新するには:
AUTHORIZATION_URL: 認証を処理するウェブアプリの URL。- 省略可: ボタンの色を変更するには、
colorフィールドの RGBA 浮動小数点値を更新します。Apps Script の場合は、16 進数値を使用してsetBackgroundColor()メソッドを更新します。
TEXT_SIGN_UP: アカウントがない場合はアカウントを作成するようユーザーに促すテキスト。例:New to Cymbal Labs? <a href=\"https://www.example.com/signup\">Sign up</a> here
Google Workspace アプリ全体でサードパーティのログインを管理する
Google Workspace アドオンの一般的な用途の 1 つは、Google Workspace のホスト アプリケーション内からサードパーティ システムを操作するためのインターフェースを提供することです。
サードパーティのシステムでは、多くの場合、ユーザー ID、パスワード、その他の認証情報を使用してログインする必要があります。ユーザーが 1 つの Google Workspace ホストを使用しているときにサードパーティ サービスにログインした場合、別の Google Workspace ホストに切り替えたときに再度ログインしなくても済むようにする必要があります。
Apps Script で構築する場合は、ユーザー プロパティまたは ID トークンを使用して、ログイン リクエストの繰り返しを防ぐことができます。詳細については、以降のセクションで説明します。
ユーザー プロパティ
ユーザーのログインデータを Apps Script のユーザー プロパティに保存できます。たとえば、ログイン サービスから独自の JSON Web Token(JWT)を作成し、ユーザー プロパティに記録したり、サービスのユーザー名とパスワードを記録したりできます。
ユーザー プロパティは、アドオンのスクリプト内のそのユーザーのみがアクセスできるようにスコープが設定されています。他のユーザーや他のスクリプトは、これらのプロパティにアクセスできません。詳しくは、PropertiesService をご覧ください。
ID トークン
Google ID トークンをサービスのログイン認証情報として使用できます。これはシングル サインオンを実現する方法です。ユーザーは Google ホストアプリにいるので、すでに Google にログインしています。
Google 以外の OAuth の構成例
次の Apps Script のコードサンプルは、OAuth を必要とする Google 以外の API を使用するようにアドオンを構成する方法を示しています。このサンプルでは、OAuth2 for Apps Script ライブラリを使用して、API にアクセスするサービスを作成します。
Apps Script
/**
* Attempts to access a non-Google API using a constructed service
* object.
*
* If your add-on needs access to non-Google APIs that require OAuth,
* you need to implement this method. You can use the OAuth1 and
* OAuth2 Apps Script libraries to help implement it.
*
* @param {String} url         The URL to access.
* @param {String} method_opt  The HTTP method. Defaults to GET.
* @param {Object} headers_opt The HTTP headers. Defaults to an empty
*                             object. The Authorization field is added
*                             to the headers in this method.
* @return {HttpResponse} the result from the UrlFetchApp.fetch() call.
*/
function accessProtectedResource(url, method_opt, headers_opt) {
  var service = getOAuthService();
  var maybeAuthorized = service.hasAccess();
  if (maybeAuthorized) {
    // A token is present, but it may be expired or invalid. Make a
    // request and check the response code to be sure.

    // Make the UrlFetch request and return the result.
    var accessToken = service.getAccessToken();
    var method = method_opt || 'get';
    var headers = headers_opt || {};
    headers['Authorization'] =
        Utilities.formatString('Bearer %s', accessToken);
    var resp = UrlFetchApp.fetch(url, {
      'headers': headers,
      'method' : method,
      'muteHttpExceptions': true, // Prevents thrown HTTP exceptions.
    });

    var code = resp.getResponseCode();
    if (code >= 200 && code < 300) {
      return resp.getContentText("utf-8"); // Success
    } else if (code == 401 || code == 403) {
      // Not fully authorized for this action.
      maybeAuthorized = false;
    } else {
      // Handle other response codes by logging them and throwing an
      // exception.
      console.error("Backend server error (%s): %s", code.toString(),
                    resp.getContentText("utf-8"));
      throw ("Backend server error: " + code);
    }
  }

  if (!maybeAuthorized) {
    // Invoke the authorization flow using the default authorization
    // prompt card.
    CardService.newAuthorizationException()
        .setAuthorizationUrl(service.getAuthorizationUrl())
        .setResourceDisplayName("Display name to show to the user")
        .throwException();
  }
}

/**
* Create a new OAuth service to facilitate accessing an API.
* This example assumes there is a single service that the add-on needs to
* access. Its name is used when persisting the authorized token, so ensure
* it is unique within the scope of the property store. You must set the
* client secret and client ID, which are obtained when registering your
* add-on with the API.
*
* See the Apps Script OAuth2 Library documentation for more
* information:
*   https://github.com/googlesamples/apps-script-oauth2#1-create-the-oauth2-service
*
*  @return A configured OAuth2 service object.
*/
function getOAuthService() {
  return OAuth2.createService('SERVICE_NAME')
      .setAuthorizationBaseUrl('SERVICE_AUTH_URL')
      .setTokenUrl('SERVICE_AUTH_TOKEN_URL')
      .setClientId('CLIENT_ID')
      .setClientSecret('CLIENT_SECRET')
      .setScope('SERVICE_SCOPE_REQUESTS')
      .setCallbackFunction('authCallback')
      .setCache(CacheService.getUserCache())
      .setPropertyStore(PropertiesService.getUserProperties());
}

/**
* Boilerplate code to determine if a request is authorized and returns
* a corresponding HTML message. When the user completes the OAuth2 flow
* on the service provider's website, this function is invoked from the
* service. In order for authorization to succeed you must make sure that
* the service knows how to call this function by setting the correct
* redirect URL.
*
* The redirect URL to enter is:
* https://script.google.com/macros/d/<Apps Script ID>/usercallback
*
* See the Apps Script OAuth2 Library documentation for more
* information:
*   https://github.com/googlesamples/apps-script-oauth2#1-create-the-oauth2-service
*
*  @param {Object} callbackRequest The request data received from the
*                  callback function. Pass it to the service's
*                  handleCallback() method to complete the
*                  authorization process.
*  @return {HtmlOutput} a success or denied HTML message to display to
*          the user. Also sets a timer to close the window
*          automatically.
*/
function authCallback(callbackRequest) {
  var authorized = getOAuthService().handleCallback(callbackRequest);
  if (authorized) {
    return HtmlService.createHtmlOutput(
      'Success! <script>setTimeout(function() { top.window.close() }, 1);</script>');
  } else {
    return HtmlService.createHtmlOutput('Denied');
  }
}

/**
* Unauthorizes the non-Google service. This is useful for OAuth
* development/testing.  Run this method (Run > resetOAuth in the script
* editor) to reset OAuth to re-prompt the user for OAuth.
*/
function resetOAuth() {
  getOAuthService().reset();
}
