실시간 업데이트를 하려면 Maps Booking API를 요청해야 합니다. Maps Booking API를 사용하려면 API에 액세스할 수 있고 필요한 QPS가 할당된 GCP 서비스 계정을 사용하여 OAuth 2.0을 통해 요청을 인증해야 합니다. 이 가이드에서는 다음 단계를 안내합니다.
- Google Cloud 프로젝트 설정
- 서비스 계정 만들기
- GCP 프로젝트에서 Maps Booking API 사용 설정
- 일반적인 문제 디버그
API를 요청하는 방법에 관한 자세한 내용은 예약 엔드 투 엔드 가이드의 실시간 API 업데이트 섹션을 참고하세요.
Actions Center로 Google Cloud 프로젝트 설정
- Google Cloud Platform 계정에 로그인합니다.
- 이를 위해 새 프로젝트를 만들거나 기존 프로젝트를 사용할 수 있습니다.
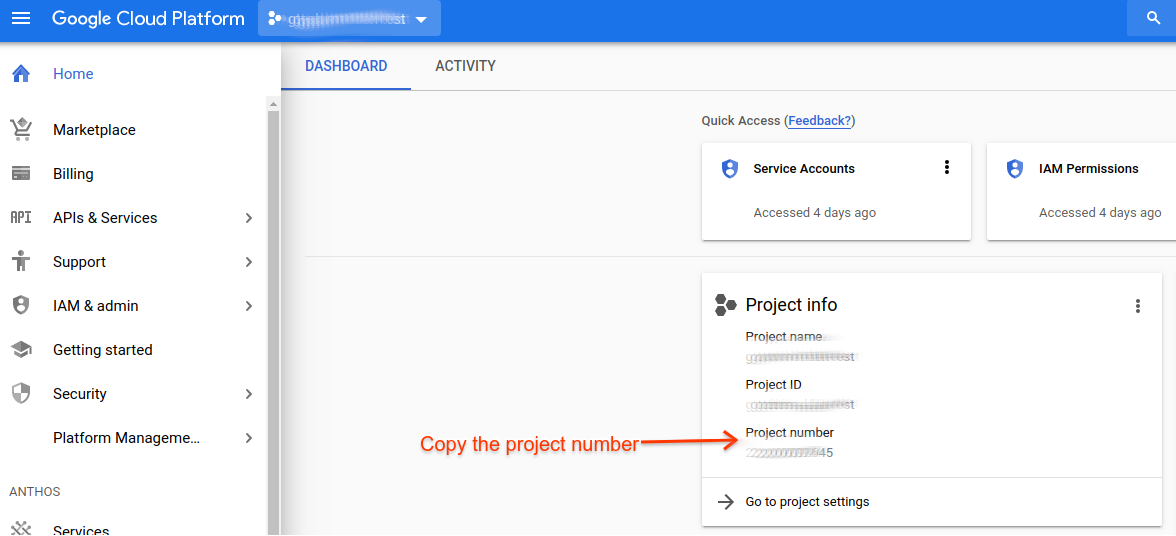
- 다음 단계에서 필요하므로 클라우드 프로젝트 번호를 기록해 둡니다. 클라우드 프로젝트 번호는 Google Cloud Platform 홈페이지에서도 확인할 수 있습니다. 클라우드 프로젝트 번호는 항상 숫자만 사용합니다.
- 다음 단계에서 필요하므로 클라우드 프로젝트 번호를 기록해 둡니다. 클라우드 프로젝트 번호는 Google Cloud Platform 홈페이지에서도 확인할 수 있습니다. 클라우드 프로젝트 번호는 항상 숫자만 사용합니다.
- 파트너 포털에 로그인합니다.
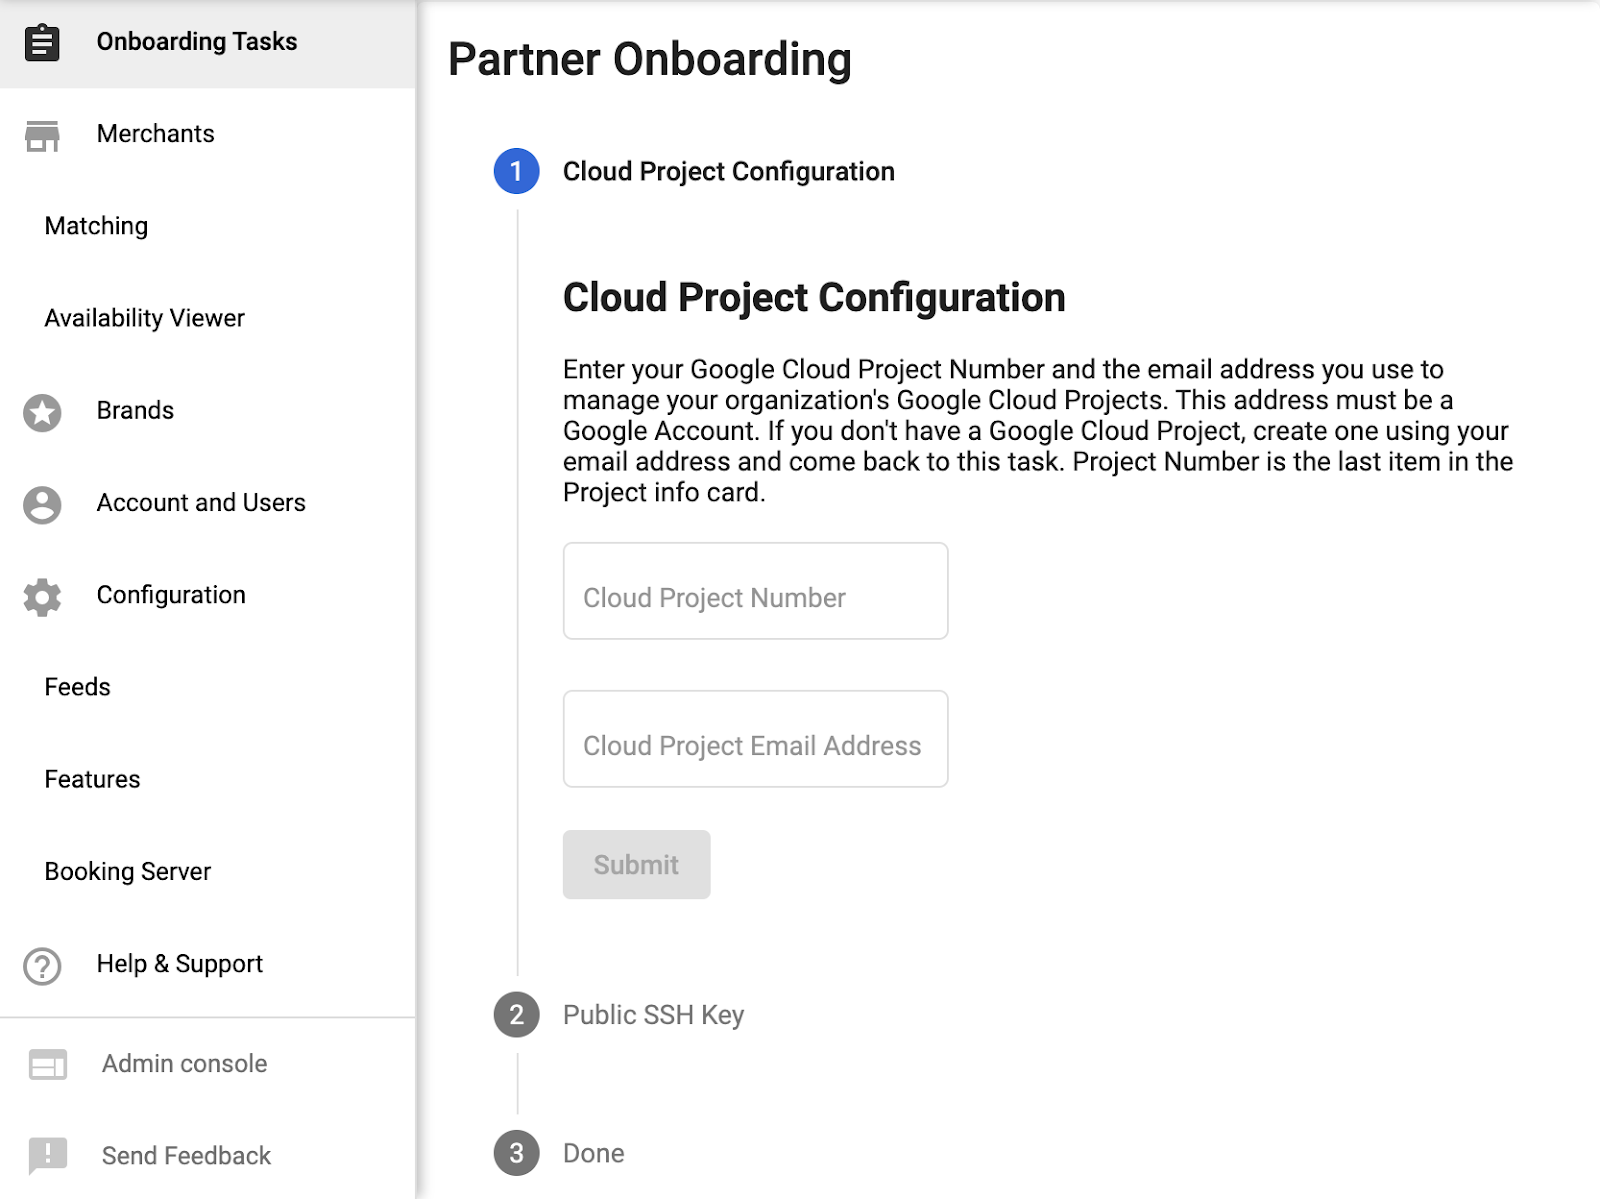
- Cloud 프로젝트 번호와 Cloud 프로젝트 이메일 주소(Cloud 프로젝트를 관리하는 데 사용되는 이메일 주소)를 제출하여 파트너 포털의 온보딩 태스크 페이지에서 1단계를 완료합니다.
서비스 계정 및 OAuth 사용자 인증 정보 만들기
- Google Cloud Platform 계정에 다시 로그인합니다.
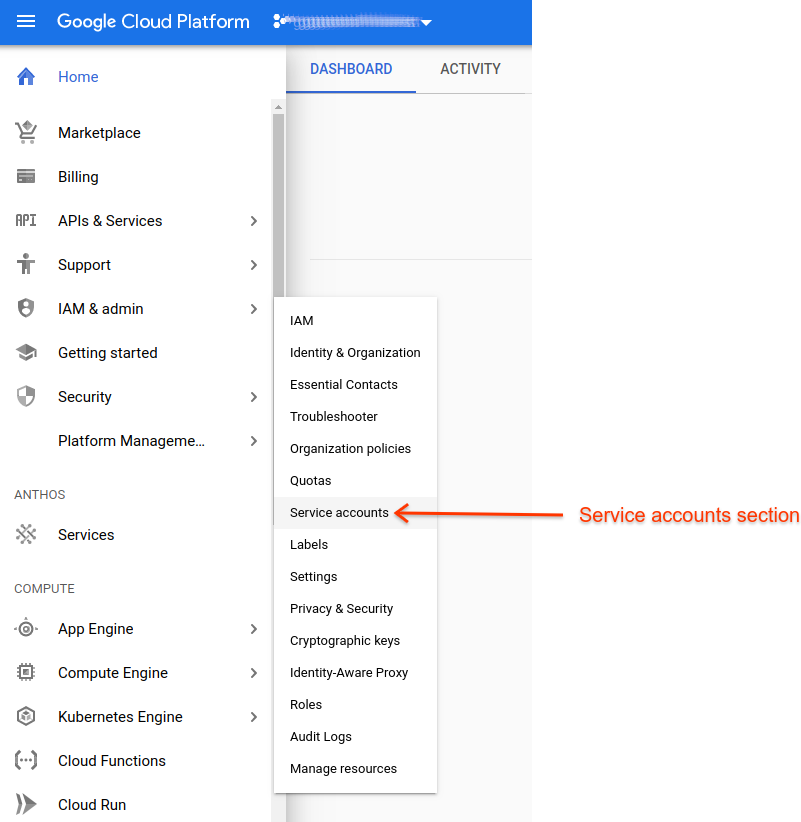
- IAM 및 관리자 > 서비스 계정으로 이동합니다.
- 기존 또는 새로 만든 Cloud 프로젝트 ID를 검색합니다.
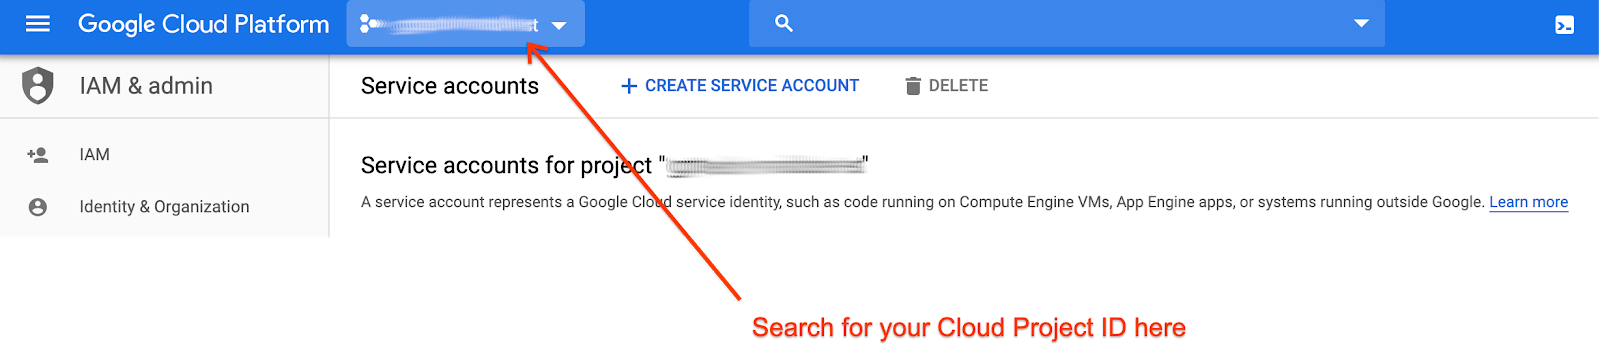
- 서비스 계정을 만듭니다.

- 서비스 계정 세부정보를 입력합니다.
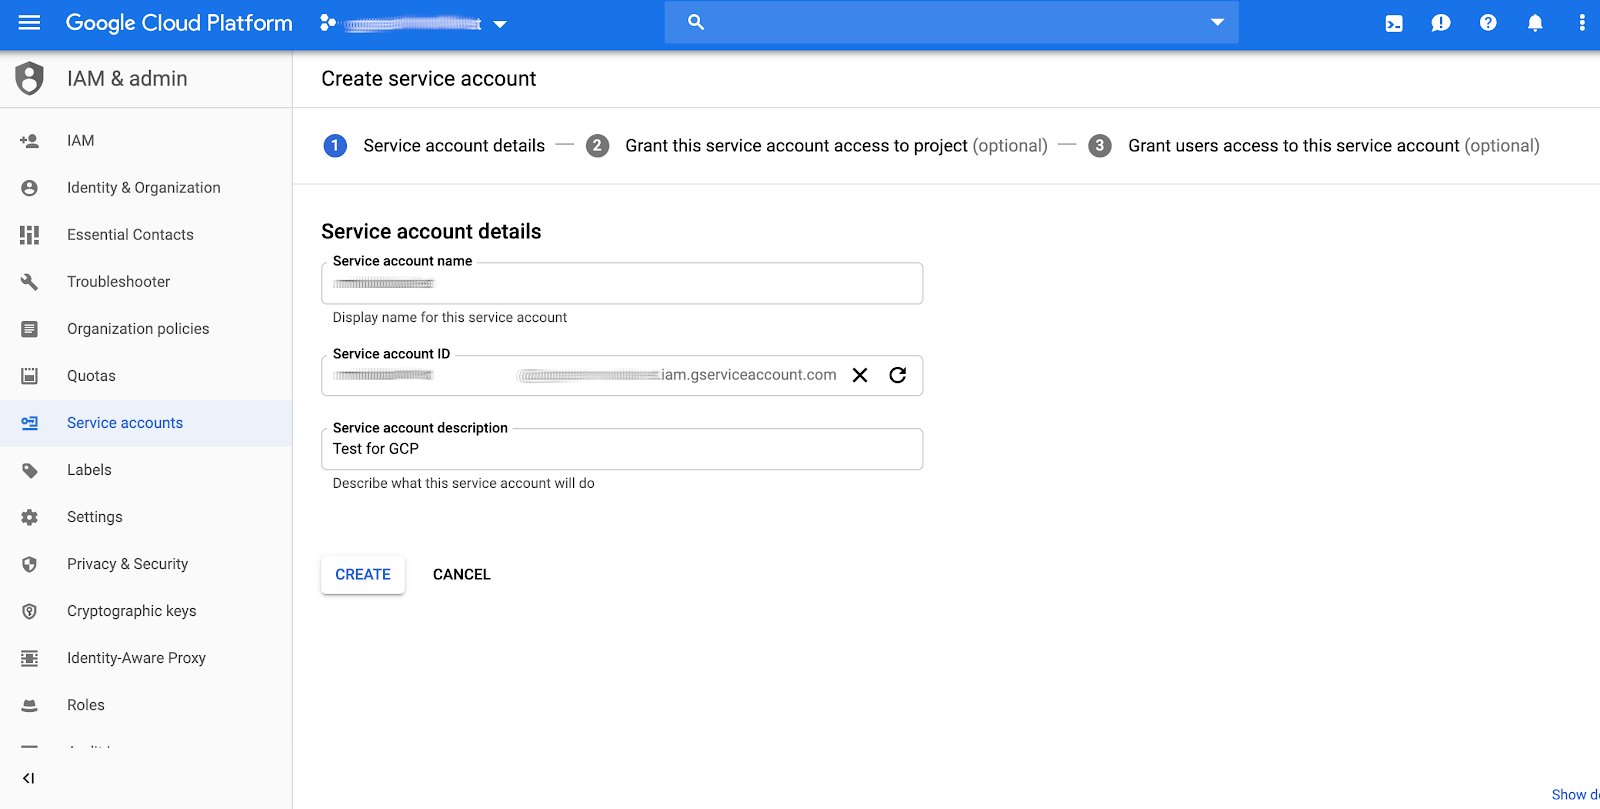
- 새 서비스 계정에 애플리케이션 요구사항에 가장 적합한 역할을 할당합니다. 서비스 계정의 역할 선택은 Google 지도 예약 API를 호출할 수 있는 항목에 영향을 미치지 않습니다. 사용하기 위한 충분한 할당량은 대신 액션 센터 구성에서 프로젝트 번호의 연결에 따라 결정되기 때문입니다. 어떤 역할을 선택해야 할지 잘 모르겠다면 프로젝트 > 뷰어를 선택하세요.
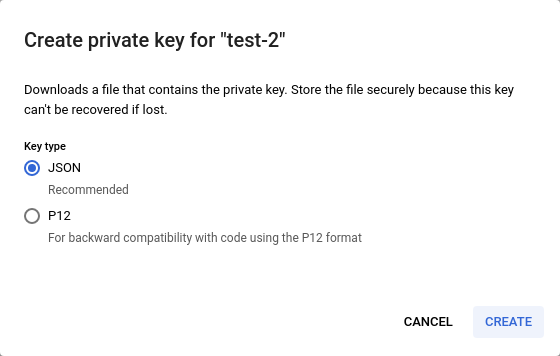
- 6단계에서 '계속'을 클릭하면 JSON 키를 만드는 옵션이 표시됩니다.
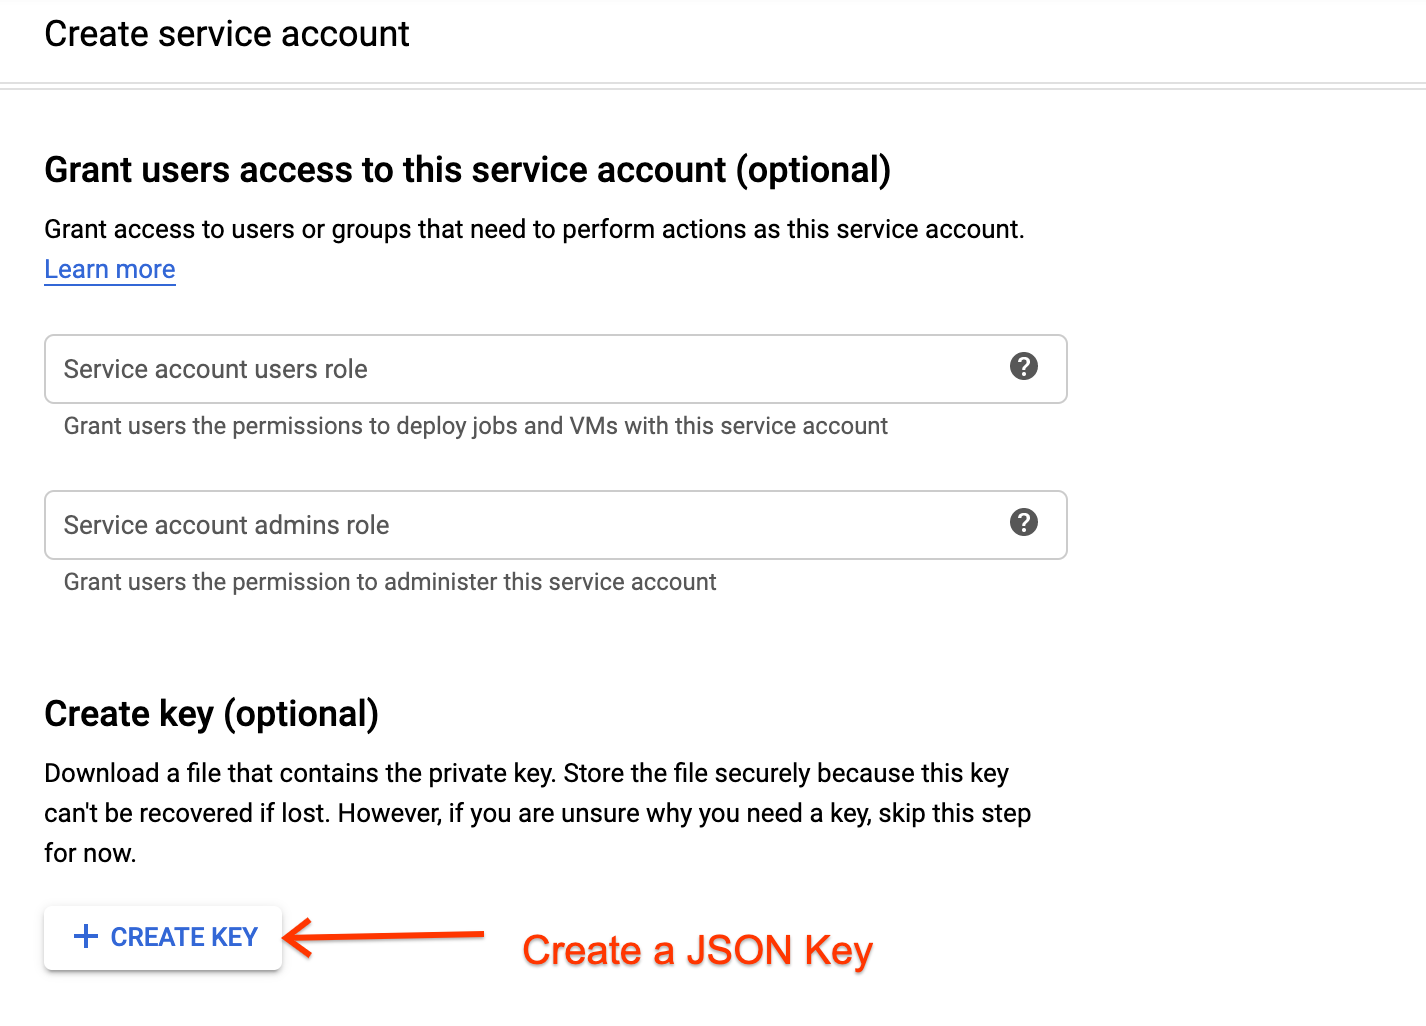
- json 사용자 인증 정보를 저장합니다. 나중에 검색할 수 없으므로 안전한 장소에 보관해야 합니다.
- 파트너 포털에 다시 로그인하고 파트너 포털의 온보딩 작업 페이지에서 남은 작업을 완료합니다.
MapsBooking API 사용 설정
- Google Cloud Platform 계정에 로그인합니다.
- API 및 서비스 > 대시보드로 이동합니다.
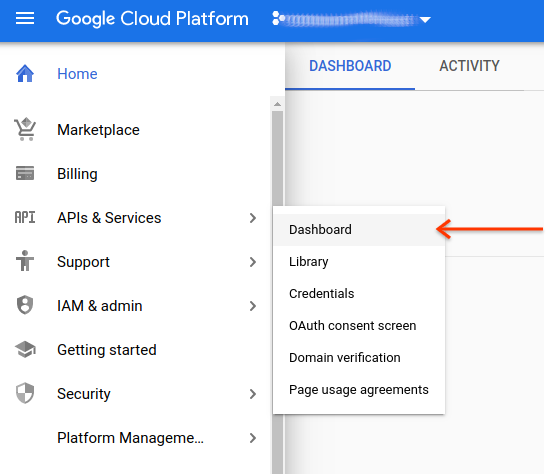
- API 및 서비스 사용 설정을 클릭하고
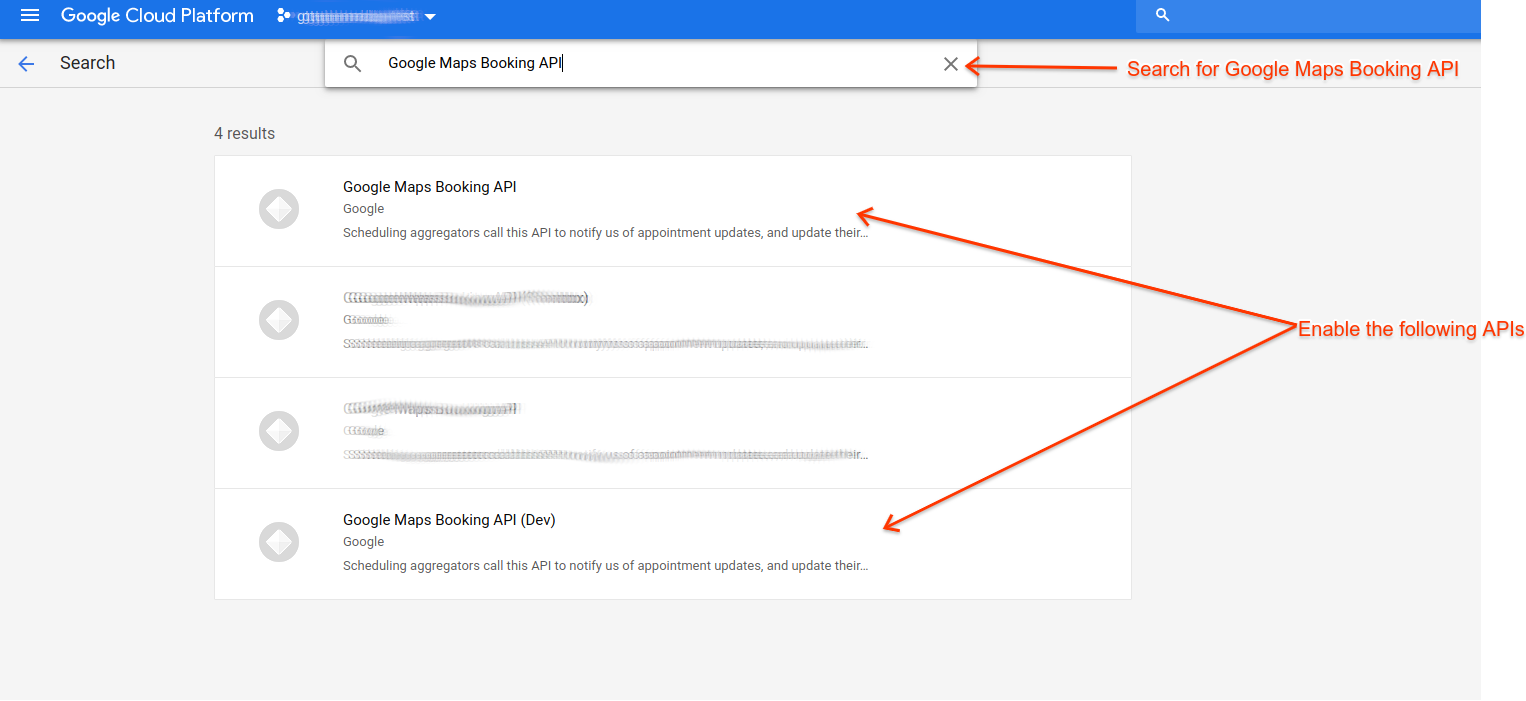
Google Maps Booking API를 검색합니다.
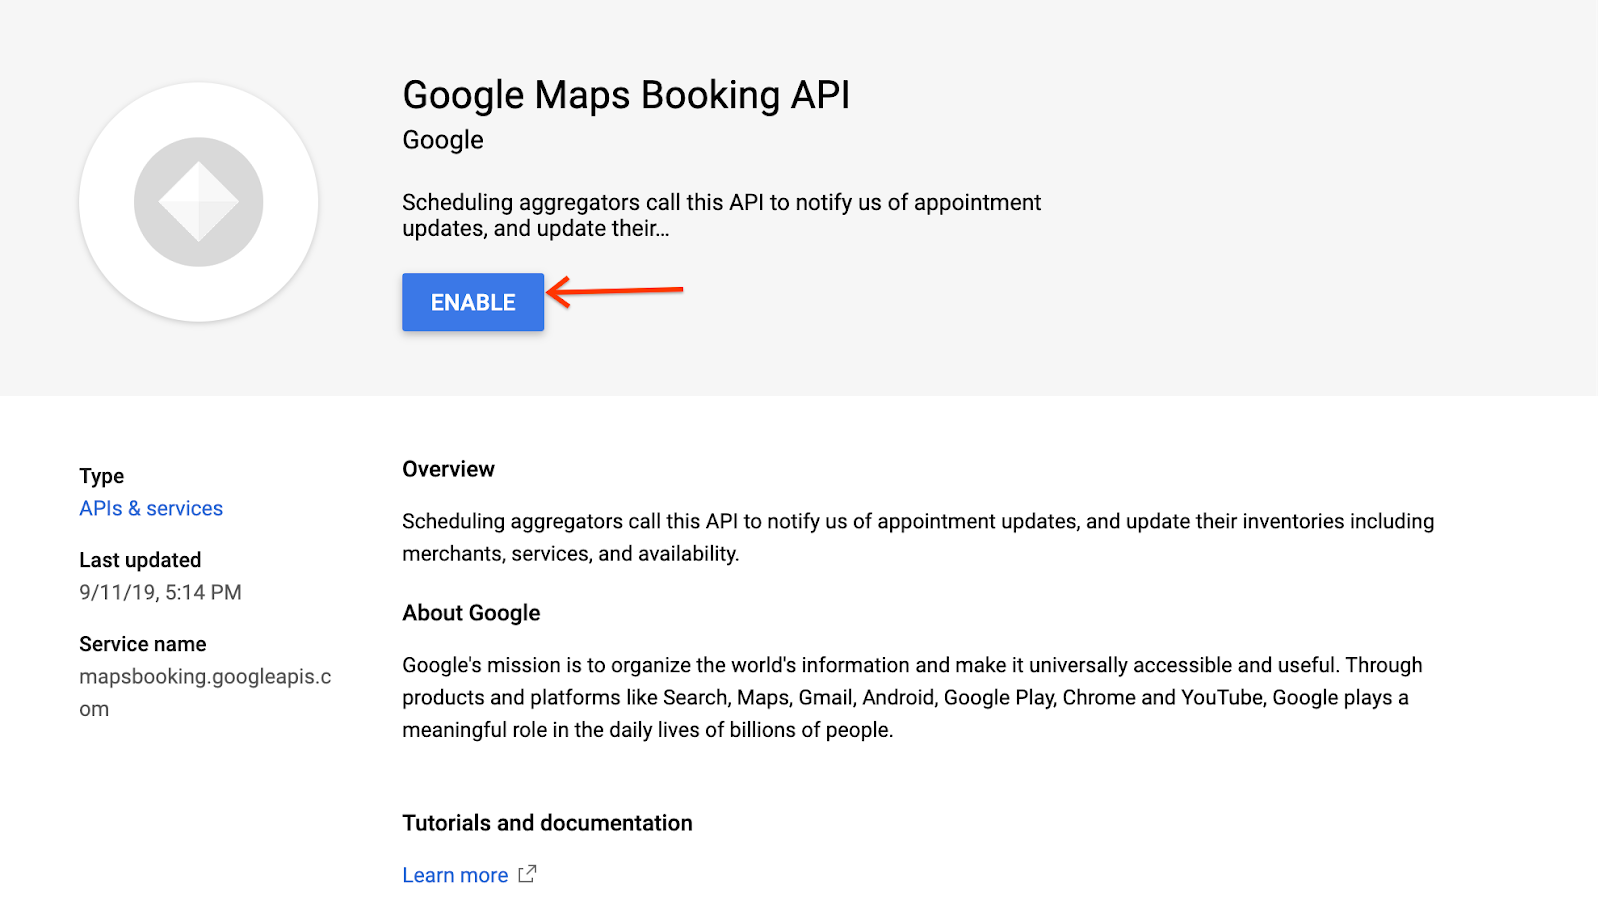
- 다음 API를 사용 설정합니다.
- Google Maps Booking API
- Google Maps Booking API (Dev)
일반적인 오류
실시간 업데이트 요청을 할 때 승인 문제가 발생하는 이유는 다양합니다. 실시간 업데이트 요청을 하는 방법에 관한 일반적인 안내가 필요한 경우 예약 엔드 투 엔드 가이드의 실시간 API 업데이트 섹션을 참고하세요. 코드 샘플 섹션에서 여러 언어로 된 샘플 클라이언트도 확인할 수 있습니다.
403 오류가 발생하면 다음 요구사항을 모두 준수하는지 확인하세요.
- Google 클라이언트 라이브러리를 사용합니다.
- 서비스 계정 인증을 사용하여 OAuth 사용자 인증 정보를 만듭니다.
- 적절한 범위에 대해 승인합니다.
- 적절한 엔드포인트 (아래 나열)를 호출합니다.
올바른 엔드포인트를 호출하는지 확인합니다.
- 샌드박스:
https://partnerdev-mapsbooking.googleapis.com/v1alpha/... - 프로덕션:
https://mapsbooking.googleapis.com/v1alpha/...
OAuth 사용자 인증 정보 요청을 올바르게 승인해야 합니다.
- 'https://www.googleapis.com/auth/mapsbooking' 범위에 대해 승인하고 있습니다.
- 서비스 계정 및 OAuth 사용자 인증 정보 만들기에서 만든 서비스 계정 키를 사용하고 있습니다.
여전히 오류가 표시되나요?
이 단계를 수행한 후에도 오류가 계속 표시되면 다음 정보를 포함하여 Actions Center 담당자에게 문의하세요.
- Cloud 프로젝트 번호 및 프로젝트 ID(스크린샷 포함)
- 서비스 계정 ID
- 서비스 계정 생성에 사용된 이메일
- 엔드포인트 세부정보가 다음에 요청을 시도했습니다.
- 요청 시도 시간
- 요청 시 수신된 전체 요청 및 오류 메시지입니다.