

リアルタイムの運行状況を構成する
リアルタイムの交通状況は、ルート上の交通状況の変化をユーザーに通知し、ユーザーが遭遇した交通状況の変化を報告して確認できるようにする機能の集合です。たとえば、車両事故、交通渋滞、警察や自動速度取締機の存在、工事、車線閉鎖、特定の気象条件などが該当します。このページでは、リアルタイムの交通規制機能とその構成オプションについて説明します。カスタム ナビゲーション UI を使用するアプリに関する考慮事項も含まれます。
交通の乱れに関するリアルタイム機能
Navigation SDK には、コア ナビゲーション エクスペリエンスの一部として、次のリアルタイムの交通情報機能が含まれています。これらの機能は構成可能で、デフォルトで有効になっています。以降のセクションでは、機能と使用可能な構成オプションについて詳しく説明します。
ルート沿いの交通の乱れに関するインタラクティブな吹き出し
アプリがルートの概要またはナビゲーション中にルートを表示すると、現在の交通情報がルート沿いに吹き出しとして表示されます。交通状況レイヤを有効にすると、ルートから外れた場所の交通障害も地図に表示されます。吹き出しには、中断の種類を示すアイコンが表示されます。
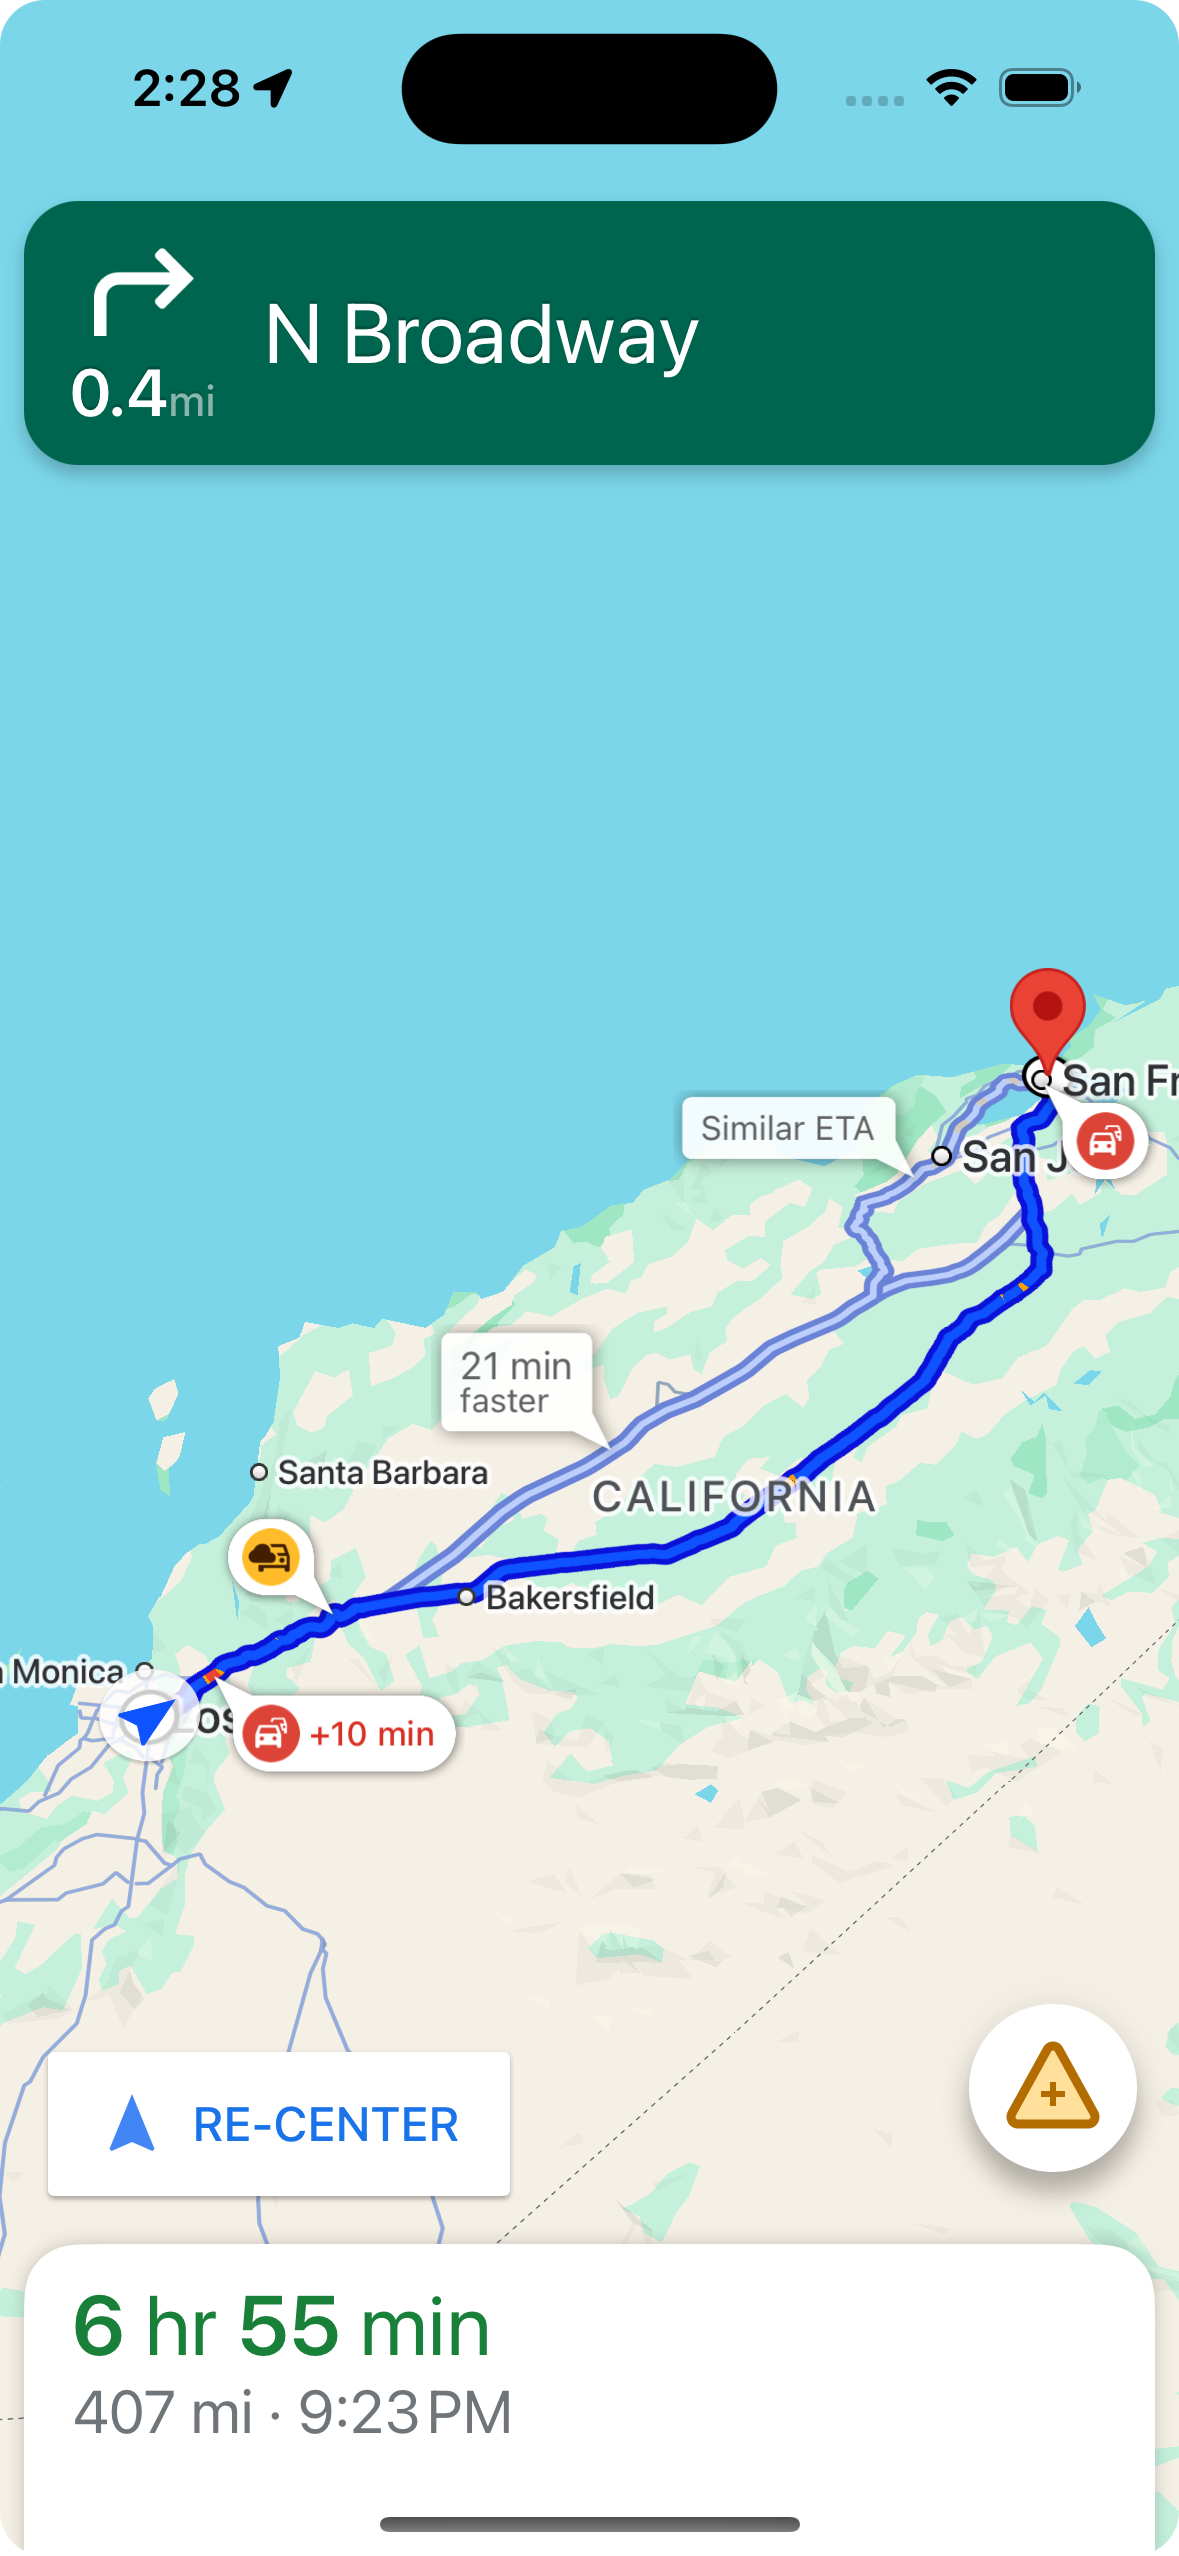
shouldDisplayPrompts を使用して、ルート沿線の運行状況に関する吹き出しの表示を制御できます。この設定は、ユーザーが運行状況に関する情報に近づいたときに自動アラートを表示するかどうかも制御します。
mapView.navigator.shouldDisplayPrompts = true
ユーザーが吹き出しをタップしたときにサービス停止の詳細を表示する
サービス停止の吹き出しをタップすると、詳細情報を含む情報カードが開きます。これは、ルート上の吹き出しとルート外の吹き出しの両方に適用されます。ただし、ルート外の吹き出しは交通状況レイヤが有効になっている場合にのみ表示されます。カードには、障害の種類、最後に報告された時刻が表示されます。障害がまだ発生しているかどうかを投票するオプションが表示されることもあります。情報カードのタイプとその構成オプションは、ユーザーがアクティブなナビゲーション中かどうかによって異なります。
アクティブなナビゲーションを開始する前のルートの概要に表示される吹き出し情報カード
ナビを開始する前に、地図またはルートの概要でルート上またはルート外の吹き出しをタップして、情報カードを開くことができます。ルート外の吹き出しを表示するには、交通状況レイヤを有効にする必要があります。情報カードには、サービス停止に関する詳細が表示されます。
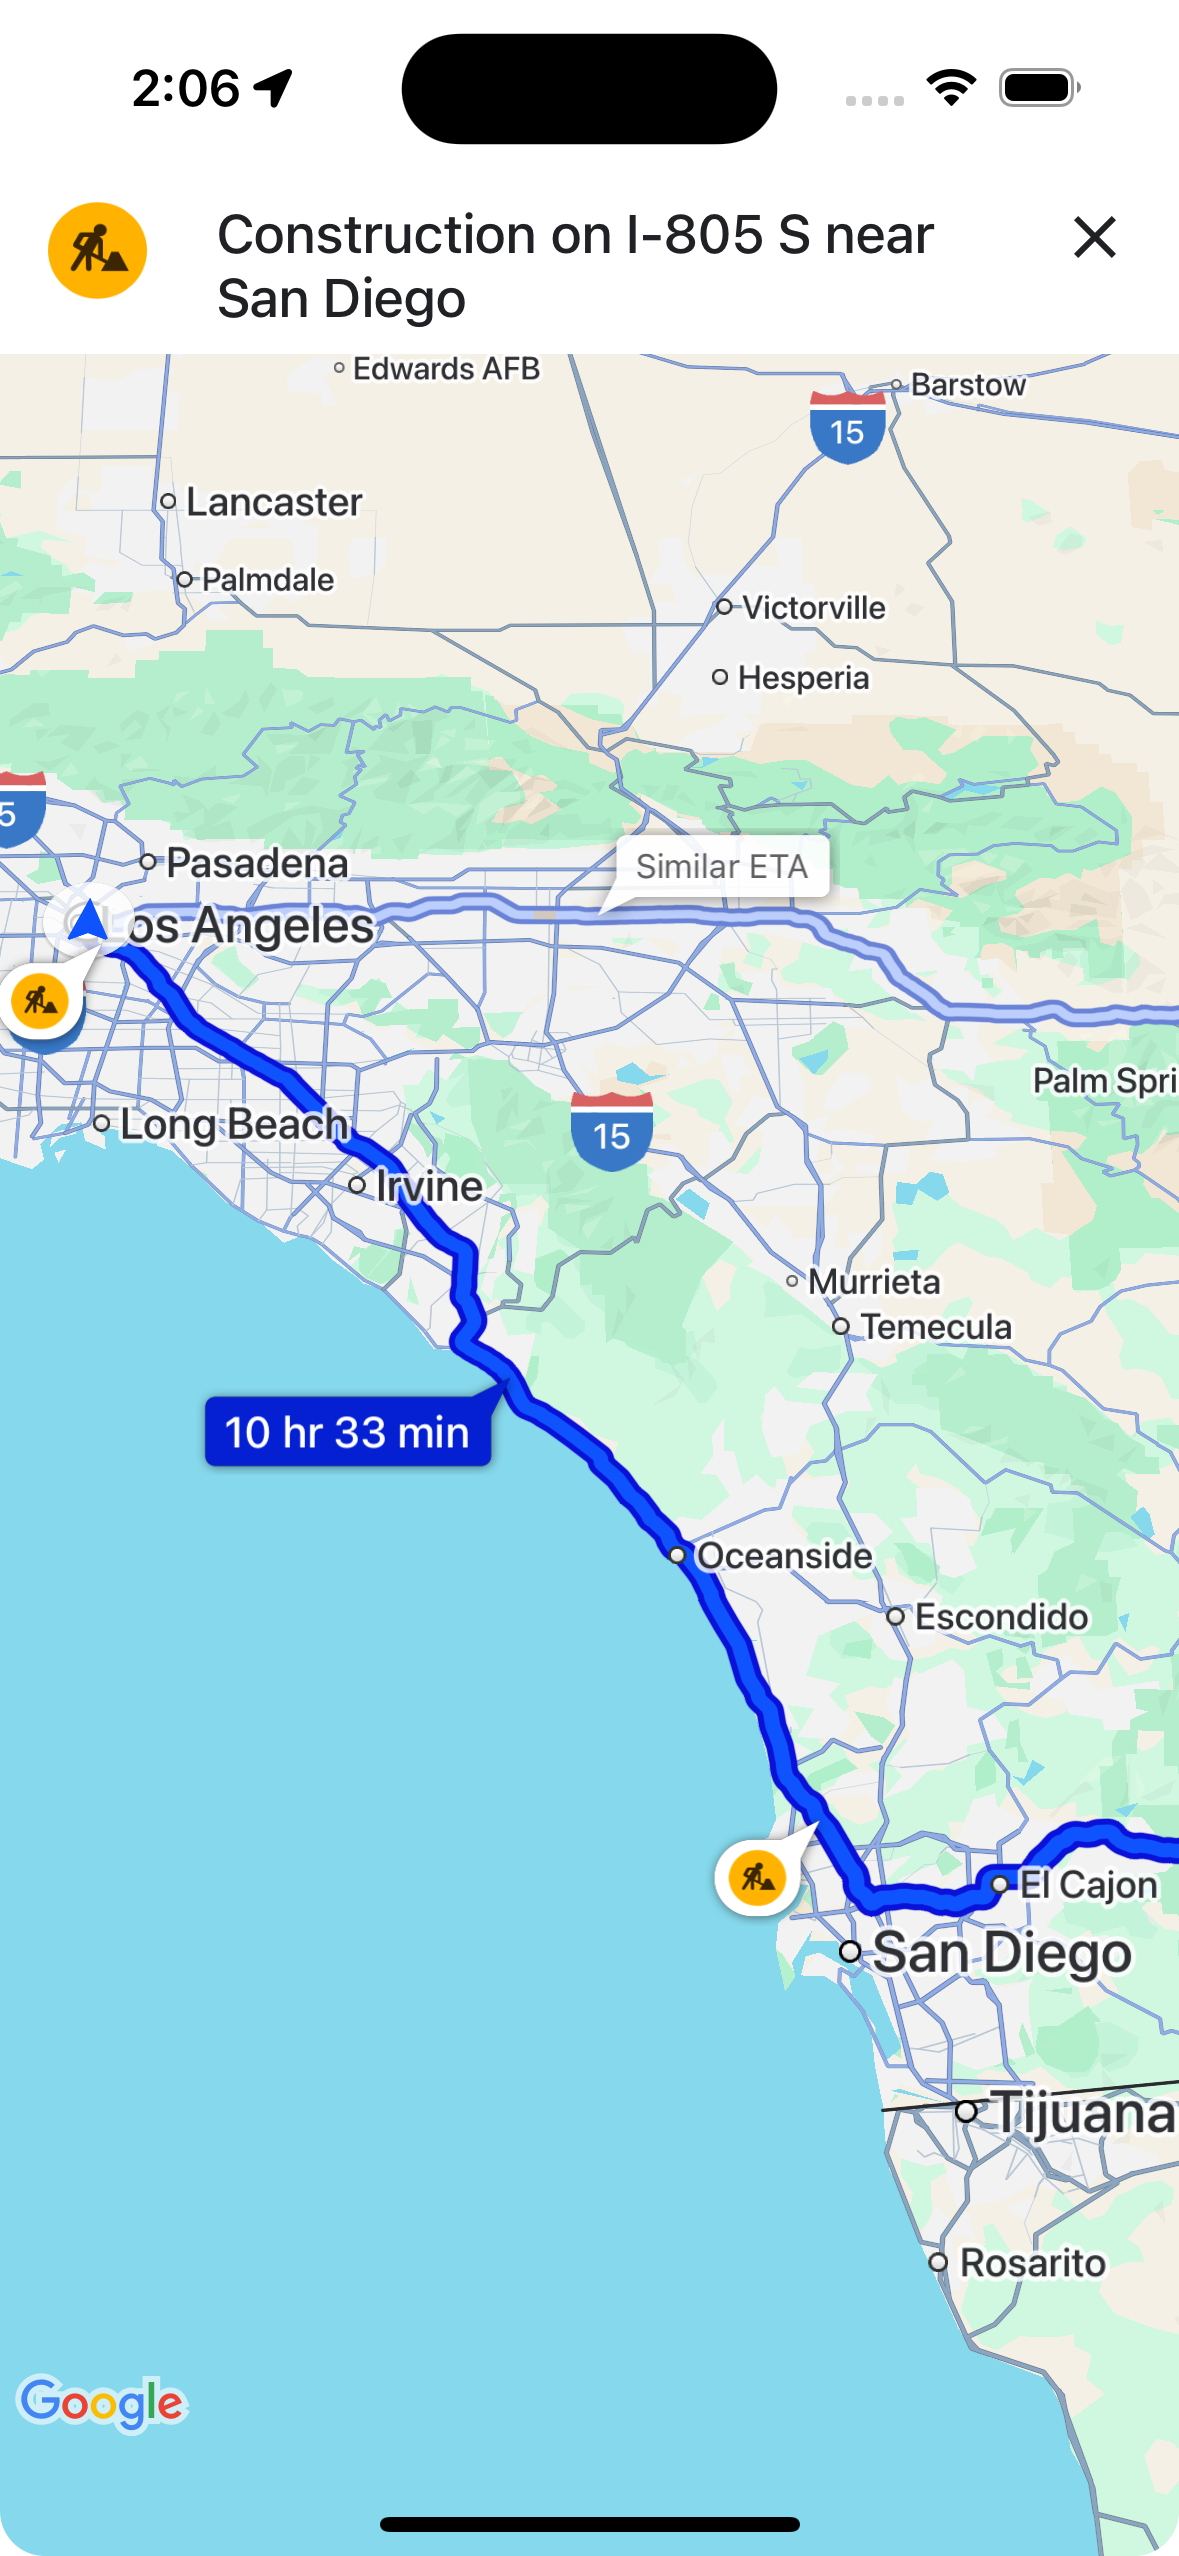
showsIncidentCards を使用して、ルートの概要でユーザーが障害の吹き出しをタップして詳細情報を表示できるかどうかを制御できます。
mapView.settings.showsIncidentCards = true
ナビゲーション中に表示される吹き出し情報カード
ナビゲーション中に、ルート上またはルート外の交通規制の吹き出しをタップすると、情報カードが開きます。カードには、障害の種類と最後に報告された時刻が表示されます。また、障害がまだ発生しているかどうかをユーザーが投票できるボタンも含まれています。
投票は、ユーザーから 5 km 以内のルート上またはルート外の交通障害(通行止めを除く)に対して行うことができます。Google はこれらの投票を処理して、サービスの中断の表示を継続するかどうかを判断します。投票は、Google マップと Navigation SDK の他のユーザーの地図にも表示されることがあります。
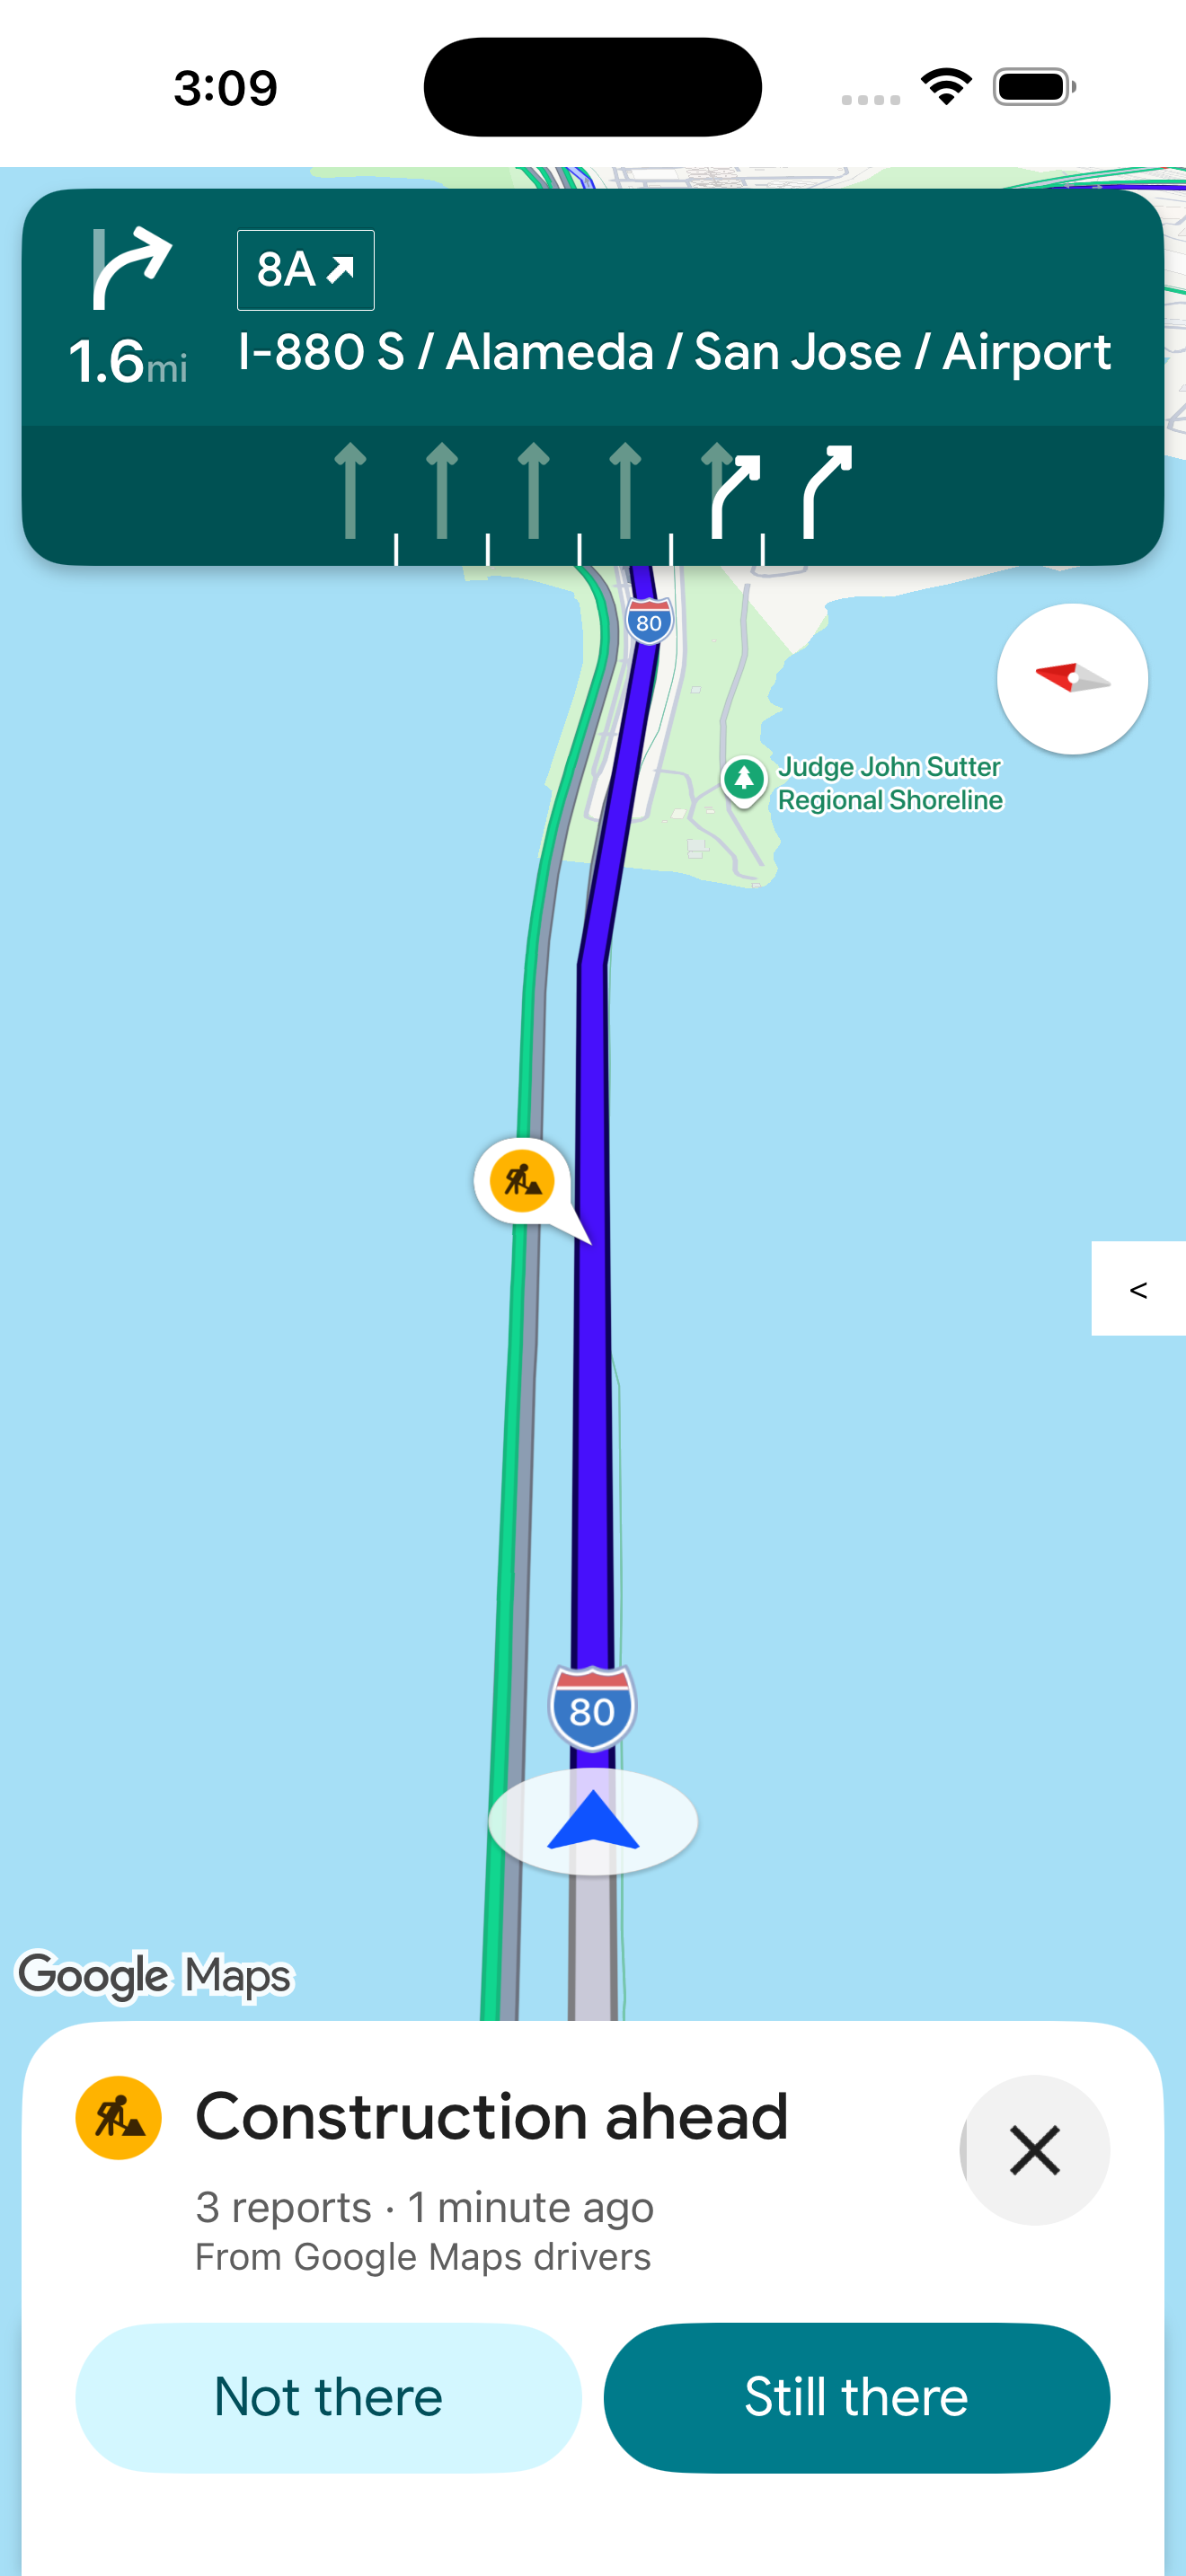
shouldDisplayPrompts を使用して、アクティブ ナビゲーション中の交通障害の吹き出しの表示とタップ可能性を制御できます。この設定は、ルート沿いの吹き出しの表示と、ユーザーが交通障害に近づいたときに自動アラートを表示する設定も制御します。
mapView.navigator.shouldDisplayPrompts = true
ナビゲーション実行中の投票による交通情報アラートの自動化
ナビゲーション中に、ユーザーがルート上の交通規制に近づくと、交通規制に関する情報と、交通規制がまだ存在するかどうかを投票するためのボタンが表示されます。ユーザーが送信した投票は Google によって処理され、他の Google Maps SDK ユーザーや Navigation SDK ユーザーのマップに表示されることがあります。また、交通規制の表示を継続するかどうかを判断するために使用されることもあります。
shouldDisplayPrompts を使用して、ナビゲーション中にアラート プロンプトを表示するかどうかを設定できます。この設定は、ルート沿いの吹き出しの表示も制御します。
mapView.navigator.shouldDisplayPrompts = true
ナビゲーション中に交通の乱れを報告する
ナビゲーション モードが有効になっている間、ナビゲーション UI にボタンが表示され、ユーザーはルート沿線の新しい交通障害を報告できます。ユーザーがボタンをタップすると、報告できる運行状況の乱れの種類が表示されたメニューが表示されます。ユーザーが送信したレポートは Google によって処理され、他の Google マップおよび Navigation SDK ユーザーの地図上に表示されることがあります。
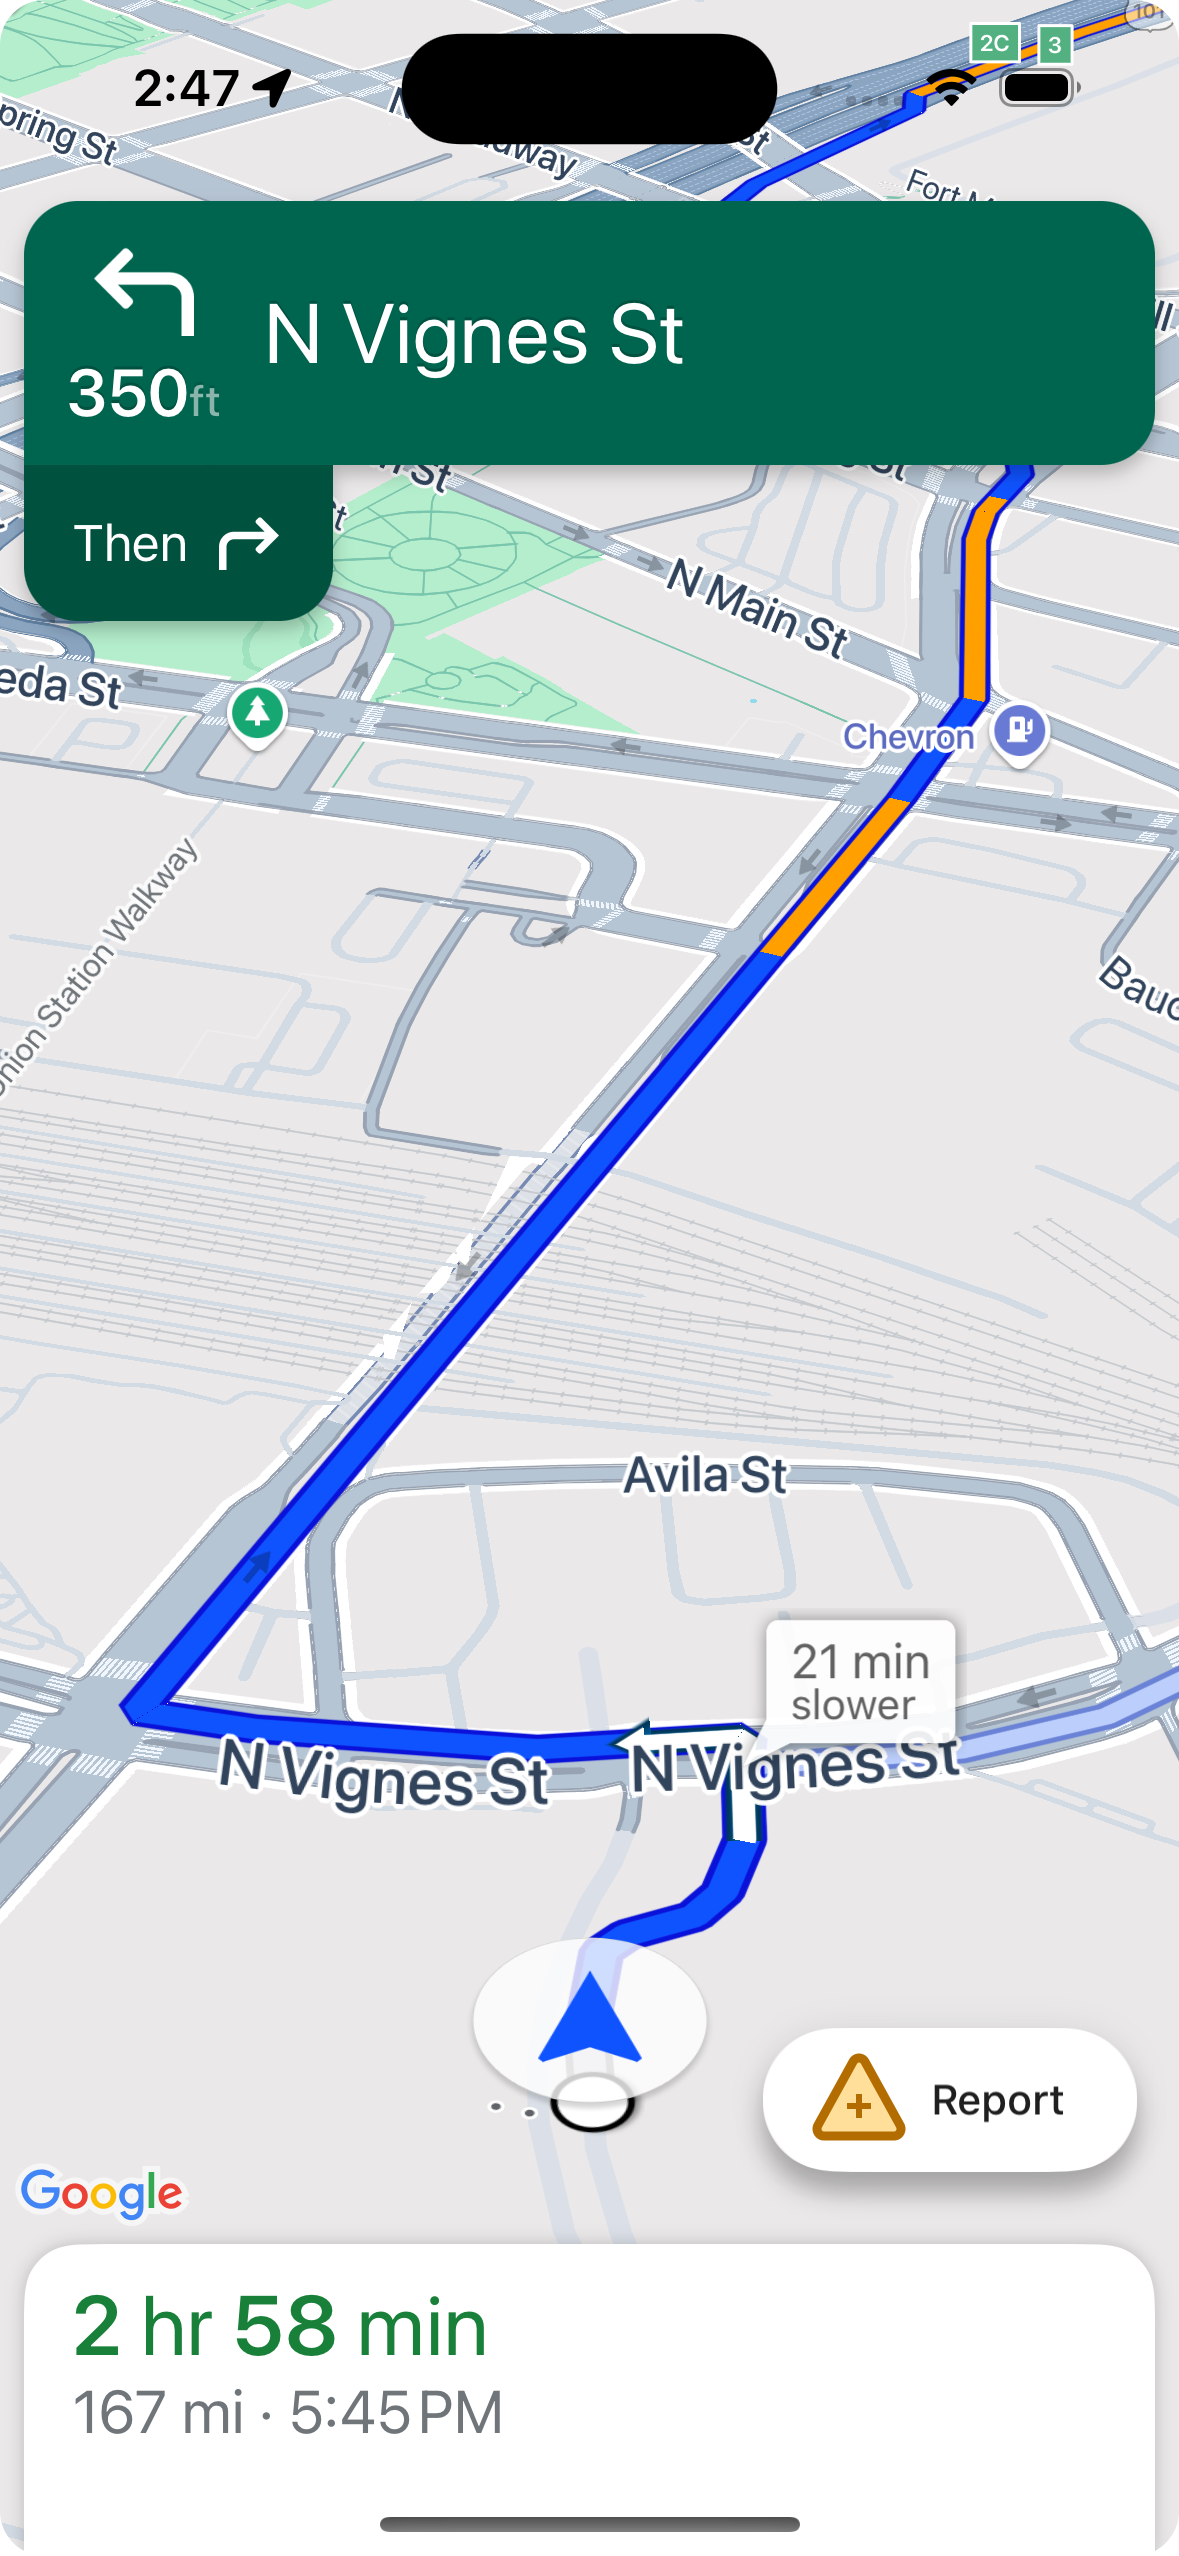
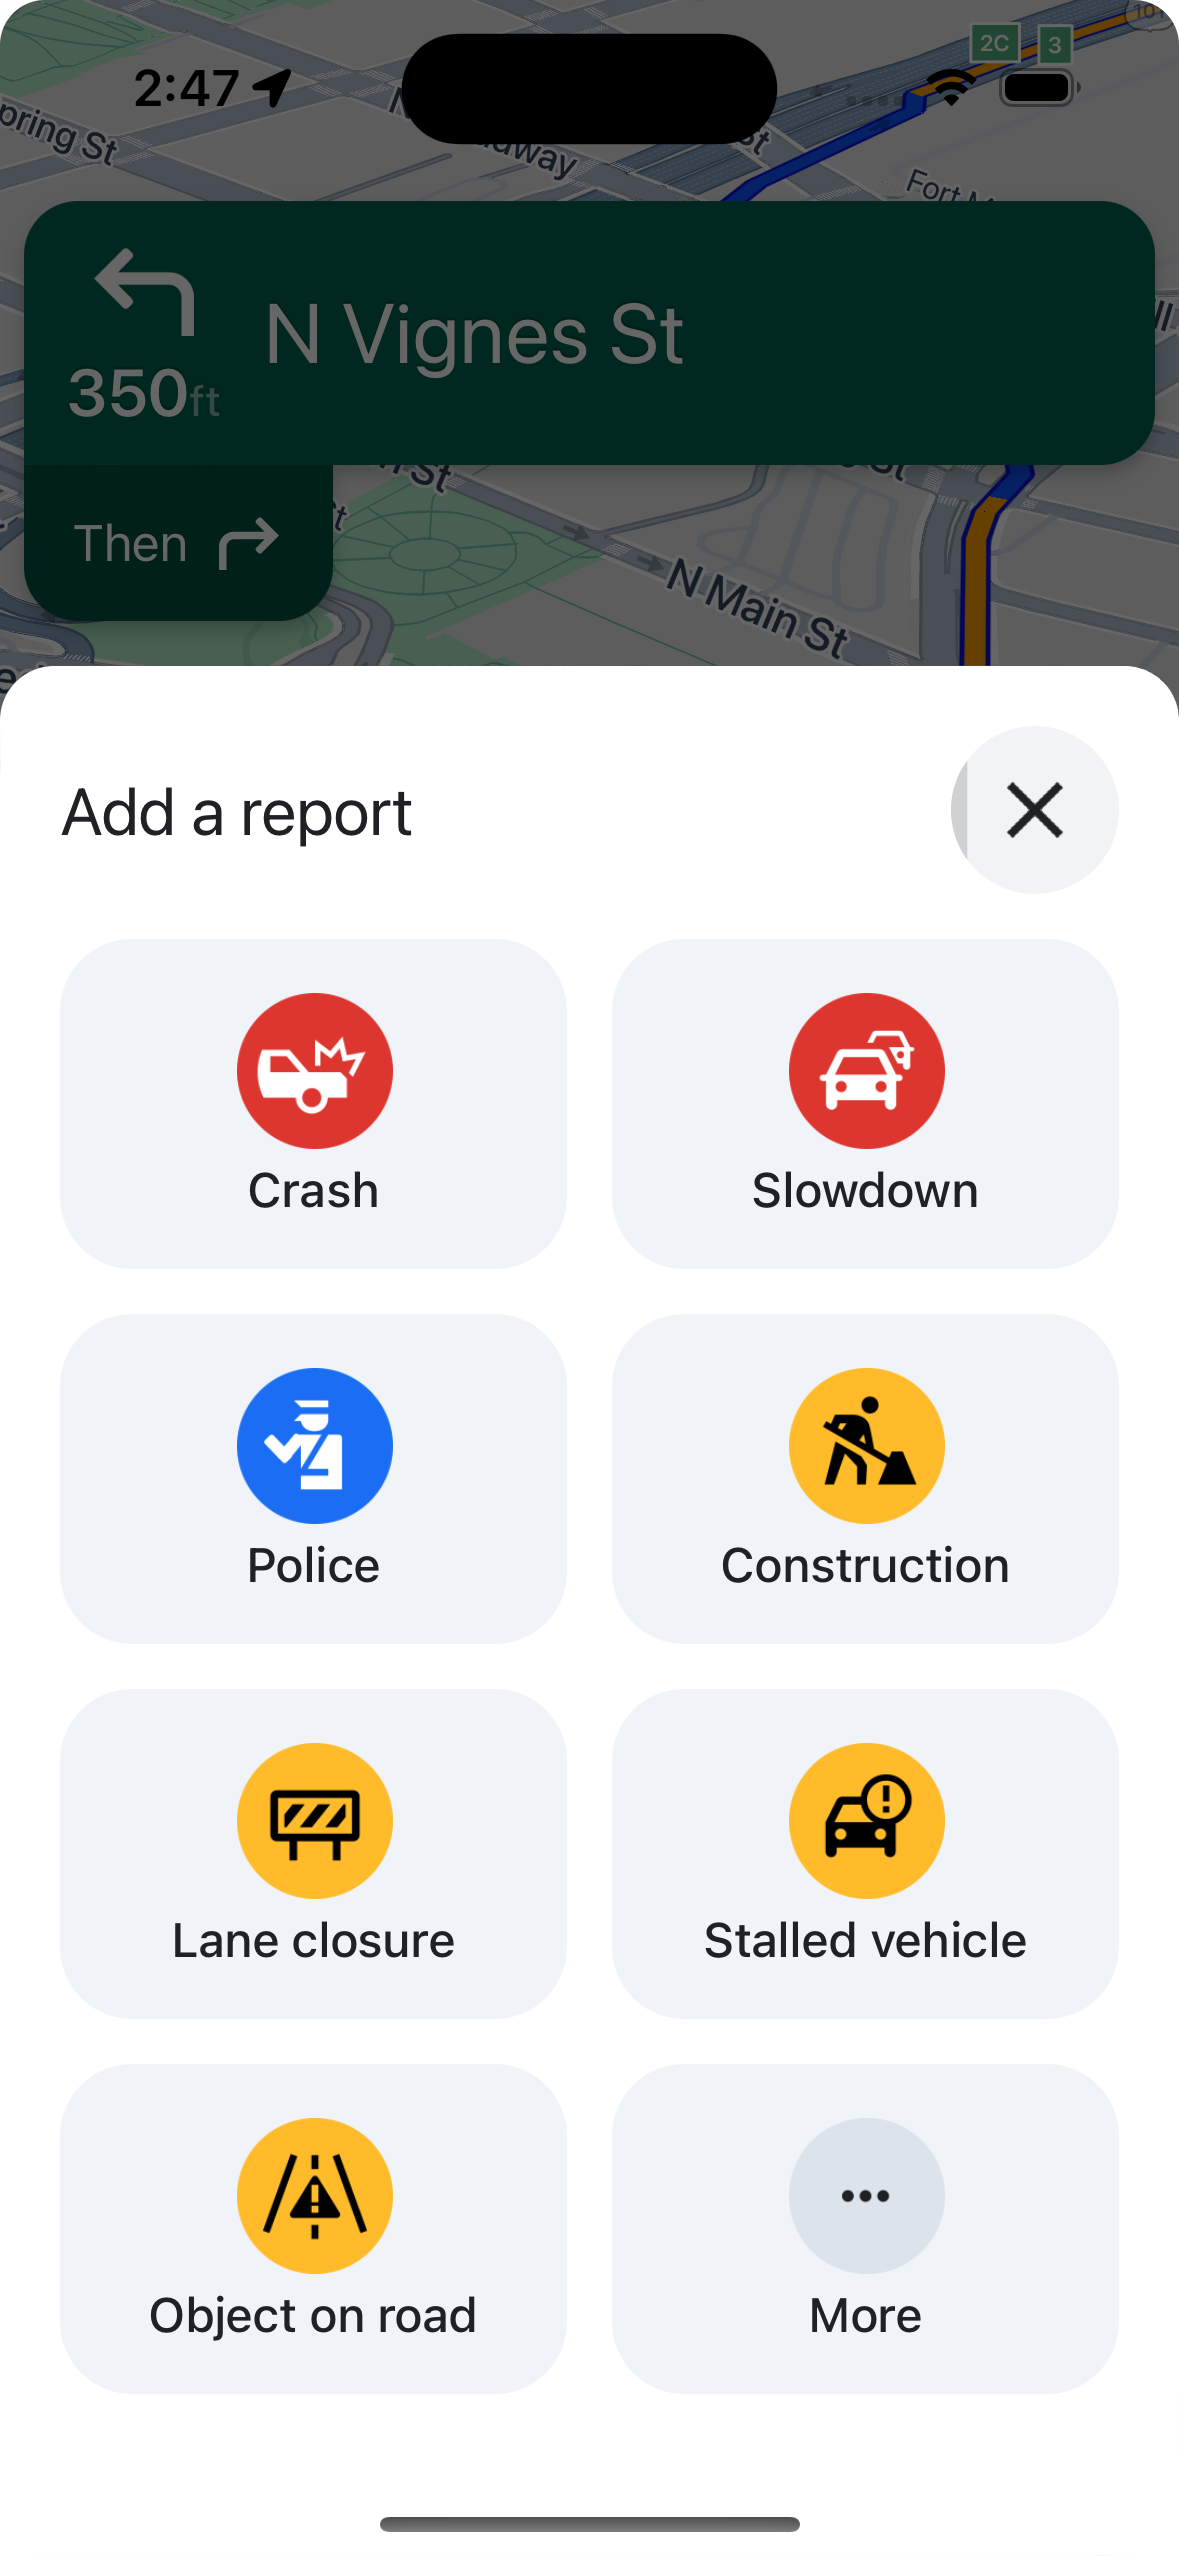
標準レポート ボタンの表示と非表示を切り替える
navigationReportIncidentButtonEnabled を使用すると、アクティブなナビゲーション中の標準レポート ボタンの表示 / 非表示を設定できます。
// Enables the incident reporting FAB to show in situations where incident
// reporting is possible.
mapView.settings.navigationReportIncidentButtonEnabled = true
カスタムの報告ボタンを追加する
標準のサービス停止レポート ボタンの代わりに、カスタム レポート ボタンをナビゲーション UI に追加できます。ユーザーがカスタムボタンをクリックしたときに、presentReportIncidentsPanel メソッドを呼び出してレポート メニューの表示をトリガーできます。カスタム レポートボタンを追加する前に、reportIncidentsAvailable を呼び出して、アプリがアクティブなナビゲーション状態にあり、ユーザーがレポートが有効になっている国にいることを確認します。いずれかの条件が満たされていない場合、レポート メニューは表示されません。
  // Check if reporting is available before displaying your button
  let isReportingAvailable = mapview.isIncidentReportingAvailable()
  customReportingIncidentButton.isHidden = !isReportingAvailable
  customReportingIncidentButton.addTarget(self, action: #selector(didTapReportIncidentButton), for: .touchUpInside)

  // Trigger the reporting flow if the button is clicked
  func didTapReportIncidentButton() {
          mapView.presentReportIncidentsPanel(self) { [weak self] error in
              guard let self = self else { return }
              if let error = error as NSError? {
                  if error.domain == GMSMapViewPresentReportIncidentPanelErrorDomain {
                      let errorCode = GMSMapViewPresentReportIncidentPanelErrorCode(rawValue: error.code)

                      switch errorCode {
                      case .internal:
                          self.showErrorMessage(
                              title: "Error Presenting Report Incident Panel",
                              message: "An internal error occurred."
                          )
                      case .reportingNotAvailable:
                          self.showErrorMessage(
                              title: "Error Presenting Report Incident Panel",
                              message: "Reporting is not available."
                          )
                      case .none:
                          self.showErrorMessage(
                              title: "Error Presenting Report Incident Panel",
                              message: "An unknown error occurred."
                          )
                      }
                  } else {
                      // Handle other potential errors (e.g., network errors)
                      self.showErrorMessage(
                          title: "Error Presenting Report Incident Panel",
                          message: "An unexpected error occurred: \(error.localizedDescription)"
                      )
                  }
              }
              // If error is nil, the panel was presented successfully. You can add any extra logic here.
          }
     }
カスタム ナビゲーション UI を操作する
Navigation SDK の実装にカスタム UI 要素が含まれている場合は、競合を避けるためにリアルタイムの交通情報要素を考慮する必要があります。
報告ボタンの配置
デフォルトでは、障害レポート ボタンは地図の下端/末尾の隅に配置されます。左から右に読む言語の場合は右側、右から左に読む言語の場合は左側です。カスタム UI 要素のスペースを確保するためにレポートボタンを移動する必要がある場合は、bottomTrailingButtonsLayoutGuide を使用します。Swift
// Create a new layout guide
let topRightLayoutGuide = UILayoutGuide()
self.view.addLayoutGuide(topRightLayoutGuide)

// Activate constraints using fixed constants here as an example
// assuming the current reporting button is of fixed height
topRightLayoutGuide.topAnchor.constraint(equalTo: _mapView.navigationHeaderLayoutGuide.bottomAnchor, constant: 50).isActive = true
topRightLayoutGuide.trailingAnchor.constraint(equalTo: self.view.safeAreaLayoutGuide.trailingAnchor, constant: -14).isActive = true

// Assign the layout guide
_mapView.bottomTrailingButtonsLayoutGuide = topRightLayoutGuide

// Create an alternate layout guide to use when the header and the footer are not full width
let topRightAlternateLayoutGuide = UILayoutGuide()
self.view.addLayoutGuide(topRightAlternateLayoutGuide)

// Activate constraints using fixed constants here as an example
// assuming the current RTD button is of fixed height
topRightAlternateLayoutGuide.topAnchor.constraint(equalTo: _mapView.navigationHeaderLayoutGuide.bottomAnchor, constant: 20).isActive = true
topRightAlternateLayoutGuide.trailingAnchor.constraint(equalTo: self.view.safeAreaLayoutGuide.trailingAnchor, constant: -10).isActive = true

// Assign the layout guide
_mapView.bottomTrailingButtonsAlternateLayoutGuide = topRightAlternateLayoutGuide
Objective-C
// Create a new layout guide
UILayoutGuide *topRightLayoutGuide = [[UILayoutGuide alloc] init];
[self.view addLayoutGuide:topRightLayoutGuide];

// Activate constraints using fixed constants here as an example
// assuming the current RTD button is of fixed height
[[topRightLayoutGuide.topAnchor
    constraintEqualToAnchor:_mapView.navigationHeaderLayoutGuide.bottomAnchor
                   constant:50]
    setActive:YES];

[[topRightLayoutGuide.trailingAnchor
    constraintEqualToAnchor:self.view.safeAreaLayoutGuide.trailingAnchor
                   constant:-14]
    setActive:YES];

// Assign the layout guide
_mapView.bottomTrailingButtonsLayoutGuide = topRightLayoutGuide;

// Create an alternate layout guide to use when the header and the footer are not full width
UILayoutGuide *topRightAlternateLayoutGuide = [[UILayoutGuide alloc] init];
[self.view addLayoutGuide:topRightAlternateLayoutGuide];

// Activate constraints using fixed constants here as an example
// assuming the current RTD button is of fixed height
[[topRightAlternateLayoutGuide.topAnchor
    constraintEqualToAnchor:_mapView.navigationHeaderLayoutGuide.bottomAnchor
                   constant:50]
    setActive:YES];

[[topRightAlternateLayoutGuide.trailingAnchor
    constraintEqualToAnchor:self.view.safeAreaLayoutGuide.trailingAnchor
                   constant:-14]
    setActive:YES];

// Assign the layout guide
_mapView.bottomTrailingButtonsAlternateLayoutGuide = topRightAlternateLayoutGuide;
Prompt Visibility API(試験運用版)
プロンプトの可視性 API を使用すると、Navigation SDK によって生成された UI 要素と独自のカスタム UI 要素の競合を回避できます。この API では、Navigation SDK の UI 要素が表示される直前と、要素が削除された直後にコールバックを受け取るリスナーを追加します。情報カード、プロンプト、交通情報メニューなどのリアルタイムの交通情報要素や、Navigation SDK によって生成されたその他の通知のコールバックを受け取ることができます。Swift
// Additional methods added to GMSNavigatorListener
...
func navigatorWillPresentPrompt(_ navigator: GMSNavigator) {
  // Hide any sort of custom UI element.
}

func navigatorDidDismissPrompt(_ navigator: GMSNavigator) {
  // Show any sort of custom UI element.
}
...
Objective-C
// Additional methods added to GMSNavigatorListener
...
- (void)navigatorWillPresentPrompt:(GMSNavigator *)navigator {
  // Hide any sort of custom UI element.
}

- (void)navigatorDidDismissPrompt:(GMSNavigator *)navigator {
  // Show any sort of custom UI element.
}
...