はじめに
マーカーは、地図上の場所を特定するものです。デフォルトでは、マーカーは標準画像を使用しますが、カスタム画像を表示することも可能です。この場合、通常は「アイコン」と呼ばれます。マーカーとアイコンは、Marker タイプのオブジェクトです。カスタム アイコンは、マーカーのコンストラクタ内に設定するか、マーカー上で setIcon() を呼び出して設定できます。詳しくは、マーカー画像をカスタマイズするをご覧ください。
大まかに言うと、マーカーはオーバーレイの一種です。オーバーレイのその他の種類については、地図上での図形描画をご覧ください。
マーカーは、インタラクティブに動作するように設計されています。たとえば、デフォルトでマーカーは 'click' イベントを受信します。したがって、イベント リスナーを追加すると、カスタム情報を表示する情報ウィンドウを表示できます。マーカーの draggable プロパティを true に設定して、ユーザーに地図上のマーカーの移動を許可することもできます。ドラッグ可能なマーカーについて詳しくは、下記をご覧ください。
マーカーを追加する
google.maps.Marker コンストラクタでは、単一の Marker options オブジェクト リテラルを受け取ってマーカーの初期プロパティを指定します。
以下のフィールドは特に重要であり、通常、マーカーの構築時に設定します。
-
position(必須)はLatLngを指定し、マーカーの初期位置を特定します。LatLngを取得する方法のひとつとして、ジオコーディング サービスを使用できます。 -
map(省略可)は、マーカーを配置するMapを指定します。マーカーの構築時に地図を指定しない場合、マーカーは作成されますが、地図に関連付けられません(表示されません)。マーカーのsetMap()メソッドを呼び出して、マーカーを後で追加することもできます。
次のサンプルでは、単純なマーカーを、オーストラリアの中央部にあるウルルに追加しています。
TypeScript
function initMap(): void {
const myLatLng = { lat: -25.363, lng: 131.044 };
const map = new google.maps.Map(
document.getElementById("map") as HTMLElement,
{
zoom: 4,
center: myLatLng,
}
);
new google.maps.Marker({
position: myLatLng,
map,
title: "Hello World!",
});
}
declare global {
interface Window {
initMap: () => void;
}
}
window.initMap = initMap;
JavaScript
function initMap() {
const myLatLng = { lat: -25.363, lng: 131.044 };
const map = new google.maps.Map(document.getElementById("map"), {
zoom: 4,
center: myLatLng,
});
new google.maps.Marker({
position: myLatLng,
map,
title: "Hello World!",
});
}
window.initMap = initMap;
サンプルを試す
上記のサンプルでは、マーカーは、マーカー オプションの map プロパティを使用して、マーカーの構築時に地図上に配置されます。または、次のサンプルに示すように、マーカーの setMap() メソッドを使用して、マーカーを地図に直接追加することもできます。
var myLatlng = new google.maps.LatLng(-25.363882,131.044922);
var mapOptions = {
  zoom: 4,
  center: myLatlng
}
var map = new google.maps.Map(document.getElementById("map"), mapOptions);

var marker = new google.maps.Marker({
    position: myLatlng,
    title:"Hello World!"
});

// To add the marker to the map, call setMap();
marker.setMap(map);
マーカーの title が、ツールチップとして表示されます。
マーカーのコンストラクタ内のどの Marker options も渡さない場合は、コンストラクタの最後の引数に空のオブジェクト {} を渡します。
マーカーを除去する
地図からマーカーを除去するには、setMap() メソッドを呼び出して、引数として null を渡します。
marker.setMap(null);
上記のメソッドでは、マーカーは削除されないことにご注意ください。地図からマーカーが除去されるだけです。マーカーを削除する場合は、マーカーを地図から除去して、そのマーカー自体を null に設定します。
複数のマーカーを同時に管理する場合、配列を作成して複数のマーカーを保持します。マーカーの除去が必要な場合は、この配列を使用して、配列内の各マーカー上で順に setMap() を呼び出すことができます。複数のマーカーを削除するには、地図から除去して、次に配列の length を 0 に設定します。これで、マーカーへのすべての参照が除去されます。
マーカー画像をカスタマイズする
マーカーの外観は、デフォルトの Google マップの押しピンアイコンの代わりに、画像ファイルまたはベクターベースのアイコンを指定することで、カスタマイズできます。マーカーラベルを使用してテキストを追加したり、複雑なアイコンを使用してクリック可能なリージョンを定義したり、マーカーのスタックの順序を設定したりできます。
画像アイコンを使用したマーカー
最も基本的なケースでは、Google マップのデフォルトの押しピンアイコンの代わりに使用する画像を、アイコンとして指定できます。このようなアイコンを指定するには、マーカーの icon プロパティに画像の URL を設定します。アイコンのサイズは、Maps JavaScript API により自動的に変更されます。
TypeScript
// This example adds a marker to indicate the position of Bondi Beach in Sydney,
// Australia.
function initMap(): void {
const map = new google.maps.Map(
document.getElementById("map") as HTMLElement,
{
zoom: 4,
center: { lat: -33, lng: 151 },
}
);
const image =
"https://developers.google.com/maps/documentation/javascript/examples/full/images/beachflag.png";
const beachMarker = new google.maps.Marker({
position: { lat: -33.89, lng: 151.274 },
map,
icon: image,
});
}
declare global {
interface Window {
initMap: () => void;
}
}
window.initMap = initMap;
JavaScript
// This example adds a marker to indicate the position of Bondi Beach in Sydney,
// Australia.
function initMap() {
const map = new google.maps.Map(document.getElementById("map"), {
zoom: 4,
center: { lat: -33, lng: 151 },
});
const image =
"https://developers.google.com/maps/documentation/javascript/examples/full/images/beachflag.png";
const beachMarker = new google.maps.Marker({
position: { lat: -33.89, lng: 151.274 },
map,
icon: image,
});
}
window.initMap = initMap;
サンプルを試す
ベクターベースのアイコンを使用したマーカー
カスタム SVG ベクターパスを使用して、マーカーの外観を定義できます。それには、希望するパスを含む Symbol オブジェクト リテラルをマーカーの icon プロパティに渡します。カスタムパスを定義するには、SVG パスの表記法を使用するか、google.maps.SymbolPath にある定義済みのパスのいずれかを使用します。ズームレベルが変更されたときにマーカーが正しくレンダリングされるようにするには、anchor プロパティが必要です。詳しくは、マーカー(およびポリライン)に記号を使用してベクターベースのアイコンを作成する方法についての記事をご覧ください。
TypeScript
// This example uses SVG path notation to add a vector-based symbol
// as the icon for a marker. The resulting icon is a marker-shaped
// symbol with a blue fill and no border.
function initMap(): void {
const center = new google.maps.LatLng(-33.712451, 150.311823);
const map = new google.maps.Map(
document.getElementById("map") as HTMLElement,
{
zoom: 9,
center: center,
}
);
const svgMarker = {
path: "M-1.547 12l6.563-6.609-1.406-1.406-5.156 5.203-2.063-2.109-1.406 1.406zM0 0q2.906 0 4.945 2.039t2.039 4.945q0 1.453-0.727 3.328t-1.758 3.516-2.039 3.070-1.711 2.273l-0.75 0.797q-0.281-0.328-0.75-0.867t-1.688-2.156-2.133-3.141-1.664-3.445-0.75-3.375q0-2.906 2.039-4.945t4.945-2.039z",
fillColor: "blue",
fillOpacity: 0.6,
strokeWeight: 0,
rotation: 0,
scale: 2,
anchor: new google.maps.Point(0, 20),
};
new google.maps.Marker({
position: map.getCenter(),
icon: svgMarker,
map: map,
});
}
declare global {
interface Window {
initMap: () => void;
}
}
window.initMap = initMap;
JavaScript
// This example uses SVG path notation to add a vector-based symbol
// as the icon for a marker. The resulting icon is a marker-shaped
// symbol with a blue fill and no border.
function initMap() {
const center = new google.maps.LatLng(-33.712451, 150.311823);
const map = new google.maps.Map(document.getElementById("map"), {
zoom: 9,
center: center,
});
const svgMarker = {
path: "M-1.547 12l6.563-6.609-1.406-1.406-5.156 5.203-2.063-2.109-1.406 1.406zM0 0q2.906 0 4.945 2.039t2.039 4.945q0 1.453-0.727 3.328t-1.758 3.516-2.039 3.070-1.711 2.273l-0.75 0.797q-0.281-0.328-0.75-0.867t-1.688-2.156-2.133-3.141-1.664-3.445-0.75-3.375q0-2.906 2.039-4.945t4.945-2.039z",
fillColor: "blue",
fillOpacity: 0.6,
strokeWeight: 0,
rotation: 0,
scale: 2,
anchor: new google.maps.Point(0, 20),
};
new google.maps.Marker({
position: map.getCenter(),
icon: svgMarker,
map: map,
});
}
window.initMap = initMap;
サンプルを試す
マーカーラベル
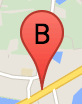
マーカーラベルは、マーカー内に表示される文字または数値です。このセクションのマーカー画像には、文字「B」を示すマーカーラベルが表示されています。マーカーラベルは、文字列、または文字列などのラベル プロパティを含む MarkerLabel オブジェクトのいずれかとして指定できます。
マーカーを作成する際に、MarkerOptions オブジェクトで label プロパティを指定できます。または、Marker オブジェクトで setLabel() を呼び出して、既存のマーカーにラベルを設定することもできます。
次のサンプルでは、ユーザーが地図上でクリックすると、ラベル付きマーカーが表示されます。
TypeScript
// In the following example, markers appear when the user clicks on the map.
// Each marker is labeled with a single alphabetical character.
const labels = "ABCDEFGHIJKLMNOPQRSTUVWXYZ";
let labelIndex = 0;
function initMap(): void {
const bangalore = { lat: 12.97, lng: 77.59 };
const map = new google.maps.Map(
document.getElementById("map") as HTMLElement,
{
zoom: 12,
center: bangalore,
}
);
// This event listener calls addMarker() when the map is clicked.
google.maps.event.addListener(map, "click", (event) => {
addMarker(event.latLng, map);
});
// Add a marker at the center of the map.
addMarker(bangalore, map);
}
// Adds a marker to the map.
function addMarker(location: google.maps.LatLngLiteral, map: google.maps.Map) {
// Add the marker at the clicked location, and add the next-available label
// from the array of alphabetical characters.
new google.maps.Marker({
position: location,
label: labels[labelIndex++ % labels.length],
map: map,
});
}
declare global {
interface Window {
initMap: () => void;
}
}
window.initMap = initMap;
JavaScript
// In the following example, markers appear when the user clicks on the map.
// Each marker is labeled with a single alphabetical character.
const labels = "ABCDEFGHIJKLMNOPQRSTUVWXYZ";
let labelIndex = 0;
function initMap() {
const bangalore = { lat: 12.97, lng: 77.59 };
const map = new google.maps.Map(document.getElementById("map"), {
zoom: 12,
center: bangalore,
});
// This event listener calls addMarker() when the map is clicked.
google.maps.event.addListener(map, "click", (event) => {
addMarker(event.latLng, map);
});
// Add a marker at the center of the map.
addMarker(bangalore, map);
}
// Adds a marker to the map.
function addMarker(location, map) {
// Add the marker at the clicked location, and add the next-available label
// from the array of alphabetical characters.
new google.maps.Marker({
position: location,
label: labels[labelIndex++ % labels.length],
map: map,
});
}
window.initMap = initMap;
サンプルを試す
複雑なアイコン
複雑なシェイプを指定してクリック可能なリージョンを示し、他のオーバーレイに対してアイコンをどのように表示するか(重ね順序)を指定できます。この方法で指定するアイコンには、icon プロパティを Icon タイプのオブジェクトに設定する必要があります。
Icon オブジェクトで画像を定義します。これらのオブジェクトで、アイコンの size、アイコンの origin(画像がスプライトの大画像の一部である場合など)、およびアイコンのホットスポットが位置する anchor(原点を基準)も定義します。
カスタム マーカーでラベルを使用している場合、Icon オブジェクトの labelOrigin プロパティでラベルの位置を指定できます。
TypeScript
// The following example creates complex markers to indicate beaches near
// Sydney, NSW, Australia. Note that the anchor is set to (0,32) to correspond
// to the base of the flagpole.
function initMap(): void {
const map = new google.maps.Map(
document.getElementById("map") as HTMLElement,
{
zoom: 10,
center: { lat: -33.9, lng: 151.2 },
}
);
setMarkers(map);
}
// Data for the markers consisting of a name, a LatLng and a zIndex for the
// order in which these markers should display on top of each other.
const beaches: [string, number, number, number][] = [
["Bondi Beach", -33.890542, 151.274856, 4],
["Coogee Beach", -33.923036, 151.259052, 5],
["Cronulla Beach", -34.028249, 151.157507, 3],
["Manly Beach", -33.80010128657071, 151.28747820854187, 2],
["Maroubra Beach", -33.950198, 151.259302, 1],
];
function setMarkers(map: google.maps.Map) {
// Adds markers to the map.
// Marker sizes are expressed as a Size of X,Y where the origin of the image
// (0,0) is located in the top left of the image.
// Origins, anchor positions and coordinates of the marker increase in the X
// direction to the right and in the Y direction down.
const image = {
url: "https://developers.google.com/maps/documentation/javascript/examples/full/images/beachflag.png",
// This marker is 20 pixels wide by 32 pixels high.
size: new google.maps.Size(20, 32),
// The origin for this image is (0, 0).
origin: new google.maps.Point(0, 0),
// The anchor for this image is the base of the flagpole at (0, 32).
anchor: new google.maps.Point(0, 32),
};
// Shapes define the clickable region of the icon. The type defines an HTML
// <area> element 'poly' which traces out a polygon as a series of X,Y points.
// The final coordinate closes the poly by connecting to the first coordinate.
const shape = {
coords: [1, 1, 1, 20, 18, 20, 18, 1],
type: "poly",
};
for (let i = 0; i < beaches.length; i++) {
const beach = beaches[i];
new google.maps.Marker({
position: { lat: beach[1], lng: beach[2] },
map,
icon: image,
shape: shape,
title: beach[0],
zIndex: beach[3],
});
}
}
declare global {
interface Window {
initMap: () => void;
}
}
window.initMap = initMap;
JavaScript
// The following example creates complex markers to indicate beaches near
// Sydney, NSW, Australia. Note that the anchor is set to (0,32) to correspond
// to the base of the flagpole.
function initMap() {
const map = new google.maps.Map(document.getElementById("map"), {
zoom: 10,
center: { lat: -33.9, lng: 151.2 },
});
setMarkers(map);
}
// Data for the markers consisting of a name, a LatLng and a zIndex for the
// order in which these markers should display on top of each other.
const beaches = [
["Bondi Beach", -33.890542, 151.274856, 4],
["Coogee Beach", -33.923036, 151.259052, 5],
["Cronulla Beach", -34.028249, 151.157507, 3],
["Manly Beach", -33.80010128657071, 151.28747820854187, 2],
["Maroubra Beach", -33.950198, 151.259302, 1],
];
function setMarkers(map) {
// Adds markers to the map.
// Marker sizes are expressed as a Size of X,Y where the origin of the image
// (0,0) is located in the top left of the image.
// Origins, anchor positions and coordinates of the marker increase in the X
// direction to the right and in the Y direction down.
const image = {
url: "https://developers.google.com/maps/documentation/javascript/examples/full/images/beachflag.png",
// This marker is 20 pixels wide by 32 pixels high.
size: new google.maps.Size(20, 32),
// The origin for this image is (0, 0).
origin: new google.maps.Point(0, 0),
// The anchor for this image is the base of the flagpole at (0, 32).
anchor: new google.maps.Point(0, 32),
};
// Shapes define the clickable region of the icon. The type defines an HTML
// <area> element 'poly' which traces out a polygon as a series of X,Y points.
// The final coordinate closes the poly by connecting to the first coordinate.
const shape = {
coords: [1, 1, 1, 20, 18, 20, 18, 1],
type: "poly",
};
for (let i = 0; i < beaches.length; i++) {
const beach = beaches[i];
new google.maps.Marker({
position: { lat: beach[1], lng: beach[2] },
map,
icon: image,
shape: shape,
title: beach[0],
zIndex: beach[3],
});
}
}
window.initMap = initMap;
サンプルを試す
MarkerImage オブジェクトを Icon タイプに変換する
Google Maps JavaScript API のバージョン 3.10 までは、複雑なアイコンは MarkerImage オブジェクトとして定義されていました。Icon オブジェクト リテラルがバージョン 3.10 で追加され、3.11 以降では MarkerImage の代わりとなりました。Icon オブジェクト リテラルは、MarkerImage と同じパラメータをサポートしているため、コンストラクタを削除し、以前のパラメータを {} で囲み、各パラメータの名前を追加することで、MarkerImage を簡単に Icon に変換できます。次がそのサンプルです。
var image = new google.maps.MarkerImage(
    place.icon,
    new google.maps.Size(71, 71),
    new google.maps.Point(0, 0),
    new google.maps.Point(17, 34),
    new google.maps.Size(25, 25));
上記は次のようになります。
var image = {
  url: place.icon,
  size: new google.maps.Size(71, 71),
  origin: new google.maps.Point(0, 0),
  anchor: new google.maps.Point(17, 34),
  scaledSize: new google.maps.Size(25, 25)
};
マーカーを最適化する
最適化すると、多数のマーカーが単一の静的要素としてレンダリングされ、パフォーマンスが向上します。最適化は、多くのマーカーが必要な場合に便利です。デフォルトでは、Maps JavaScript API がマーカーの最適化を行うかどうかを判断します。マーカーが多数ある場合、Maps JavaScript API は最適化してマーカーのレンダリングを試みます。ただし、すべてのマーカーを最適化できるわけではありません。状況によっては、最適化せずにマーカーをレンダリングする必要があります。アニメーション GIF または PNG の場合、または各マーカーを個別の DOM 要素としてレンダリングする場合、レンダリングの最適化は無効化されます。次のサンプルは、最適化されたマーカーを作成する方法を示しています。
var marker = new google.maps.Marker({
    position: myLatlng,
    title:"Hello World!",
    optimized: true
});
マーカーをアクセス可能にする
クリック リスナー イベントを追加し、optimized を false に設定すると、マーカーをアクセス可能にできます。クリック リスナーを使うと、マーカーがボタンの意味を持つようになるため、キーボード操作やスクリーン リーダーなどを使用してマーカーにアクセスできるようになります。マーカーのユーザー補助テキストを表示するには、title オプションを使用します。
次のサンプルでは、ユーザーが Tab キーを押すと最初のマーカーがフォーカスされ、その後、矢印キーを使用するとマーカー間を移動します。地図上の他のコントロール間を移動するには Tab キーをもう一度押します。マーカーに情報ウィンドウがある場合は、マーカーをクリックするか、マーカーを選択して Enter キーまたは Space キーを押すと、情報ウィンドウが開きます。情報ウィンドウが閉じると、関連付けられたマーカーにフォーカスが戻ります。
TypeScript
// The following example creates five accessible and
// focusable markers.
function initMap(): void {
const map = new google.maps.Map(
document.getElementById("map") as HTMLElement,
{
zoom: 12,
center: { lat: 34.84555, lng: -111.8035 },
}
);
// Set LatLng and title text for the markers. The first marker (Boynton Pass)
// receives the initial focus when tab is pressed. Use arrow keys to
// move between markers; press tab again to cycle through the map controls.
const tourStops: [google.maps.LatLngLiteral, string][] = [
[{ lat: 34.8791806, lng: -111.8265049 }, "Boynton Pass"],
[{ lat: 34.8559195, lng: -111.7988186 }, "Airport Mesa"],
[{ lat: 34.832149, lng: -111.7695277 }, "Chapel of the Holy Cross"],
[{ lat: 34.823736, lng: -111.8001857 }, "Red Rock Crossing"],
[{ lat: 34.800326, lng: -111.7665047 }, "Bell Rock"],
];
// Create an info window to share between markers.
const infoWindow = new google.maps.InfoWindow();
// Create the markers.
tourStops.forEach(([position, title], i) => {
const marker = new google.maps.Marker({
position,
map,
title: `${i + 1}. ${title}`,
label: `${i + 1}`,
optimized: false,
});
// Add a click listener for each marker, and set up the info window.
marker.addListener("click", () => {
infoWindow.close();
infoWindow.setContent(marker.getTitle());
infoWindow.open(marker.getMap(), marker);
});
});
}
declare global {
interface Window {
initMap: () => void;
}
}
window.initMap = initMap;
JavaScript
// The following example creates five accessible and
// focusable markers.
function initMap() {
const map = new google.maps.Map(document.getElementById("map"), {
zoom: 12,
center: { lat: 34.84555, lng: -111.8035 },
});
// Set LatLng and title text for the markers. The first marker (Boynton Pass)
// receives the initial focus when tab is pressed. Use arrow keys to
// move between markers; press tab again to cycle through the map controls.
const tourStops = [
[{ lat: 34.8791806, lng: -111.8265049 }, "Boynton Pass"],
[{ lat: 34.8559195, lng: -111.7988186 }, "Airport Mesa"],
[{ lat: 34.832149, lng: -111.7695277 }, "Chapel of the Holy Cross"],
[{ lat: 34.823736, lng: -111.8001857 }, "Red Rock Crossing"],
[{ lat: 34.800326, lng: -111.7665047 }, "Bell Rock"],
];
// Create an info window to share between markers.
const infoWindow = new google.maps.InfoWindow();
// Create the markers.
tourStops.forEach(([position, title], i) => {
const marker = new google.maps.Marker({
position,
map,
title: `${i + 1}. ${title}`,
label: `${i + 1}`,
optimized: false,
});
// Add a click listener for each marker, and set up the info window.
marker.addListener("click", () => {
infoWindow.close();
infoWindow.setContent(marker.getTitle());
infoWindow.open(marker.getMap(), marker);
});
});
}
window.initMap = initMap;
サンプルを試す
マーカーをアニメーション表示する
マーカーをアニメーション表示すると、さまざまな状況で動きのある表示が可能になります。マーカーをアニメーション表示する方法を指定するには、マーカーの animation プロパティ(google.maps.Animation タイプ)を使用します。次の Animation 値がサポートされます。
-
DROPを指定すると、マーカーを最初に地図上に配置するときに、マーカーが地図の上部から最終的な場所まで落ちてきます。マーカーが止まるとアニメーションが終了し、animationがnullに戻ります。このタイプのアニメーションは、通常Markerの作成時に指定します。 -
BOUNCEを指定するとマーカーが所定の位置で弾み、animationプロパティが明示的にnullに設定されるまで弾み続けます。
Marker オブジェクト上で setAnimation() を呼び出すことで、既存のマーカーでアニメーションを開始できます。
TypeScript
// The following example creates a marker in Stockholm, Sweden using a DROP
// animation. Clicking on the marker will toggle the animation between a BOUNCE
// animation and no animation.
let marker: google.maps.Marker;
function initMap(): void {
const map = new google.maps.Map(
document.getElementById("map") as HTMLElement,
{
zoom: 13,
center: { lat: 59.325, lng: 18.07 },
}
);
marker = new google.maps.Marker({
map,
draggable: true,
animation: google.maps.Animation.DROP,
position: { lat: 59.327, lng: 18.067 },
});
marker.addListener("click", toggleBounce);
}
function toggleBounce() {
if (marker.getAnimation() !== null) {
marker.setAnimation(null);
} else {
marker.setAnimation(google.maps.Animation.BOUNCE);
}
}
declare global {
interface Window {
initMap: () => void;
}
}
window.initMap = initMap;
JavaScript
// The following example creates a marker in Stockholm, Sweden using a DROP
// animation. Clicking on the marker will toggle the animation between a BOUNCE
// animation and no animation.
let marker;
function initMap() {
const map = new google.maps.Map(document.getElementById("map"), {
zoom: 13,
center: { lat: 59.325, lng: 18.07 },
});
marker = new google.maps.Marker({
map,
draggable: true,
animation: google.maps.Animation.DROP,
position: { lat: 59.327, lng: 18.067 },
});
marker.addListener("click", toggleBounce);
}
function toggleBounce() {
if (marker.getAnimation() !== null) {
marker.setAnimation(null);
} else {
marker.setAnimation(google.maps.Animation.BOUNCE);
}
}
window.initMap = initMap;
サンプルを試す
多数のマーカーがある場合、これらのマーカーを同時に地図上に落とすことが望ましくない場合があります。setTimeout() を利用すると、次に示すようなパターンを使用して、複数のマーカーのアニメーションに一定の間隔を空けることができます。
function drop() {
  for (var i =0; i < markerArray.length; i++) {
    setTimeout(function() {
      addMarkerMethod();
    }, i * 200);
  }
}
マーカーをドラッグ可能にする
ユーザーが地図上の別の場所にマーカーをドラッグできるようにするには、マーカーのオプションで draggable を true に設定します。
var myLatlng = new google.maps.LatLng(-25.363882,131.044922);
var mapOptions = {
  zoom: 4,
  center: myLatlng
}
var map = new google.maps.Map(document.getElementById("map"), mapOptions);

// Place a draggable marker on the map
var marker = new google.maps.Marker({
    position: myLatlng,
    map: map,
    draggable:true,
    title:"Drag me!"
});
マーカーをさらにカスタマイズする
完全にカスタマイズされたマーカーについては、カスタマイズされたポップアップのサンプルをご覧ください。
Marker クラスの拡張、マーカーのクラスタリングと管理、オーバーレイのカスタマイズについては、オープンソース ライブラリをご覧ください。