
Email annotations bring email messages in the Promotions tab to life with features such as images, deals, and expiration dates.
When you annotate emails, Gmail users view and interact with your promotions directly from their inbox. From the Promotions tab, users can click on the annotated text or image to learn more about the promotion, without having to open the email.
This page explains how to annotate emails using JSON-LD and Microdata. To learn more about email markup, review the Getting Started guide. For a list of markup fields that you can use in email annotations, visit the reference documentation.
Build email annotations
You can annotate emails to display the following features in the Promotions tab:
The following sections explain how to create each type of email annotation.
Create a product carousel
Product carousels display multiple image previews for a promotion, such as the following:
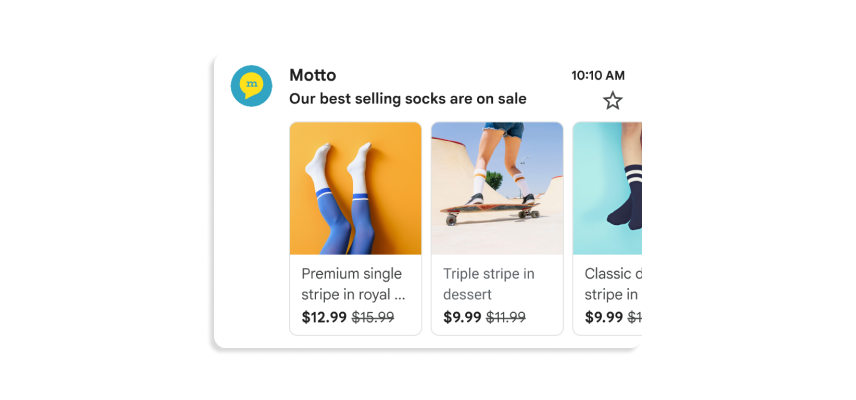
You can include up to 10 image previews in a carousel, and each image must be unique.
To create a product carousel:
- In your marketing email platform, create an email and open the email’s HTML editor.
In the
headsection, add ascripttag. For each image in your product carousel, add aPromotionCardobject:JSON-LD
<!DOCTYPE html PUBLIC "-//W3C//DTD HTML 4.01//EN">
<html>
  <head>
    <script type="application/ld+json">
      [
        // Build the first image preview in your product carousel:
        {
          "@context": "http://schema.org/",
          "@type": "PromotionCard",
          "image": "IMAGE_URL1",
          "url": "PROMO_URL1",

          // Optionally, include the following PromotionCard properties:
          "headline": "HEADLINE1",
          "price": PRICE1,
          "priceCurrency": "PRICE_CURRENCY1",
          "discountValue": DISCOUNT_VALUE1,
          "position": POSITION
        },

        // Build the second image preview in your product carousel:
        {
          "@context": "http://schema.org/",
          "@type": "PromotionCard",
          "image": "IMAGE_URL2",
          "url": "PROMO_URL2",

          // Optionally, include the following PromotionCard properties:
          "headline": "HEADLINE2",
          "price": PRICE2,
          "priceCurrency": "PRICE_CURRENCY2",
          "discountValue": DISCOUNT_VALUE2,
          "position": POSITION
        }

        // To include more image previews, add additional PromotionCard objects.
        // You can include up to 10 image previews in a product carousel.

      ]
    </script>
  </head>

  <body>
    // The message of your email
  </body>
</html>
Microdata
<!DOCTYPE html PUBLIC "-//W3C//DTD HTML 4.01//EN">
<html>
  <head>
    // Build the first image preview in your product carousel:
    <div itemscope itemtype="http://schema.org/PromotionCard">
      <meta itemprop="image" content="IMAGE_URL1"/>
      <meta itemprop="url" content="PROMO_URL1"/>

      // Optionally, include the following PromotionCard properties:
      <meta itemprop="headline" content="HEADLINE1"/>
      <meta itemprop="price" content="PRICE1"/>
      <meta itemprop="priceCurrency" content="PRICE_CURRENCY1"/>
      <meta itemprop="discountValue" content="DISCOUNT_VALUE1"/>
      <meta itemprop="position" content="POSITION"/>
    </div>

    // Build the second image preview in your product carousel:
    <div itemscope itemtype="http://schema.org/PromotionCard">
      <meta itemprop="image" content="IMAGE_URL2"/>
      <meta itemprop="url" content="PROMO_URL2"/>

      // Optionally, include the following PromotionCard properties:
      <meta itemprop="headline" content="HEADLINE2"/>
      <meta itemprop="price" content="PRICE2"/>
      <meta itemprop="priceCurrency" content="PRICE_CURRENCY2"/>
      <meta itemprop="discountValue" content="DISCOUNT_VALUE2"/>
      <meta itemprop="position" content="POSITION"/>
    </div>

    // To include more image previews, add additional PromotionCard objects.
    // You can include up to 10 image previews in a product carousel.
  </head>

  <body>
    // The message of your email
  </body>
</html>
For each
PromotionCardobject, replace the following values. For the optional properties, you can either include a value, or omit the property from your code.IMAGE_URL: The URL to your image in PNG or JPEG format, such ashttps://www.example.com/image.png. The supported aspect ratios are 4:5, 1:1, 1.91:1. For product carousels, each image must have a unique URL and use the same aspect ratio.PROMO_URL: The URL for the promotion. When users click the image from the Promotions tab, they visit this URL.HEADLINE(Optional): A 1 to 2-line description of the promotion that displays under the preview image.PRICE(Optional): The price of the promotion.PRICE_CURRENCY(Optional): The currency of the price in 3-letter ISO 4217 format, such asUSD. Determines the currency symbol displayed with theprice.DISCOUNT_VALUE(Optional): The amount subtracted from thepriceto display an adjusted price. The adjusted price is displayed next to the original price.For example, if the
discountValueis25, thepriceis100, and thepriceCurrencyisUSD, the adjusted price displays as$75.POSITION(Optional): The position of the card in the carousel.
In the
bodytag, write the message for your email.
Create a single image preview
Single image preview annotations display one image to showcase an important product in the Gmail Promo Tab, such as the following:

You can use this feature for a single image. All recipients must receive the same image and image URL. See our frequently-asked-questions documentation for more information.
To create a single image preview:
- In your marketing email platform, create an email and open the email's HTML editor.
In the
headsection, add ascripttag that includes the data typePromotionCard:JSON-LD
<!DOCTYPE html PUBLIC "-//W3C//DTD HTML 4.01//EN">
<html>
  <head>
    <script type="application/ld+json">
      [{
        "@context": "http://schema.org/",
        "@type": "PromotionCard",
        "image": "IMAGE_URL",
        "url": "PROMO_URL",

        // Optionally, include the following PromotionCard properties:
        "headline": "HEADLINE",
        "price": PRICE,
        "priceCurrency": "PRICE_CURRENCY",
        "discountValue": DISCOUNT_VALUE
      }]
    </script>
  </head>

  <body>
    // The message of your email
  </body>
</html>
Microdata
<!DOCTYPE html PUBLIC "-//W3C//DTD HTML 4.01//EN">
<html>
  <head>
    // Build the first image preview in your product carousel:
    <div itemscope itemtype="http://schema.org/PromotionCard">
      <meta itemprop="image" content="IMAGE_URL"/>
      <meta itemprop="url" content="PROMO_URL"/>

      // Optionally, include the following PromotionCard properties:
      <meta itemprop="headline" content="HEADLINE"/>
      <meta itemprop="price" content="PRICE"/>
      <meta itemprop="priceCurrency" content="PRICE_CURRENCY"/>
      <meta itemprop="discountValue" content="DISCOUNT_VALUE"/>
    </div>

  </head>

  <body>
    // The message of your email
  </body>
</html>
Replace the following values. For the optional properties, you can either include a value, or omit the property from your code.
IMAGE_URL: The URL for the preview image in PNG or JPEG format, such ashttps://www.example.com/image.png. The supported aspect ratio is 1.91:1.PROMO_URL: When users click theimage, the URL that directs to the promotion.HEADLINE(Optional): A 1 to 2-line description of the promotion that displays under the preview image.PRICE(Optional): The price of the promotion.PRICE_CURRENCY(Optional): The currency of the price in 3-letter ISO 4217 format, such asUSD. Determines the currency symbol displayed with theprice.DISCOUNT_VALUE(Optional): The amount subtracted from thepriceto display an adjusted price. The adjusted price is displayed next to the original price.For example, if the
discountValueis25, thepriceis100, and thepriceCurrencyisUSD, the adjusted price displays as$75.
In the
bodytag, write the message for your email.
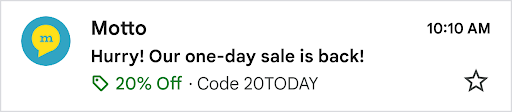
Create a deal annotation
Make your email stand out with a Deal Annotation. This feature adds a promotional badge directly to your email in the inbox, calling out key information—like a discount code or offer details—right next to your subject line.
To enable Deal Annotation, follow these steps:
Add the schema to your email's HTML: In your marketing email platform, open the HTML editor for your campaign. In the
headsection, add ascripttag that include the data typeDiscountOfferwith the following structure:JSON-LD
<!DOCTYPE html PUBLIC "-//W3C//DTD HTML 4.01//EN">
<html>
  <head>
    <script type="application/ld+json">
      [{
        "@context": "http://schema.org/",
        "@type": "DiscountOffer",
        "description": "DESCRIPTION",
        "discountCode": "DISCOUNT_CODE",
        "availabilityStarts": "START_DATE_TIME",
        "availabilityEnds": "END_DATE_TIME"
      }]
    </script>
  </head>

  <body>
    // The message of your email
  </body>
</html>
Microdata
<!DOCTYPE html PUBLIC "-//W3C//DTD HTML 4.01//EN">
<html>
  <head>
    <div itemscope itemtype="http://schema.org/DiscountOffer">
      <meta itemprop="description" content="DESCRIPTION"/>
      <meta itemprop="discountCode" content="DISCOUNT_CODE"/>
      <meta itemprop="availabilityStarts" content="START_DATE_TIME"/>
      <meta itemprop="availabilityEnds" content="END_DATE_TIME"/>
    </div>
  </head>

  <body>
    // The message of your email.
  </body>
</html>
Customize the Deal Annotation properties: update the values in the script to match your specific promotion.
Required values: In the sample code, replace at least one of the following variables to generate a Deal Annotation.
DESCRIPTION: A short, compelling summary of your offer.- Example: "20% off sitewide" or "Buy one, get one free".
DISCOUNT_CODE: The promo code a user needs to apply at checkout.- Example: 20TODAY.
END_DATE_TIME: The end date and time of the promotion in ISO 8601 format.- Example: 2025-09-23T18:44:37-07:00.
Highly recommended properties:
START_DATE_TIME: The start date and time of the promotion in ISO 8601 format.- Example: 2025-08-24T18:44:37-07:00.
Write your email message: in the
<body>tag, write the message and design the layout for your email as you normally would.Validate and preview your card: before sending your campaign, validate your code and see a preview of how your Deal Annotation will look.
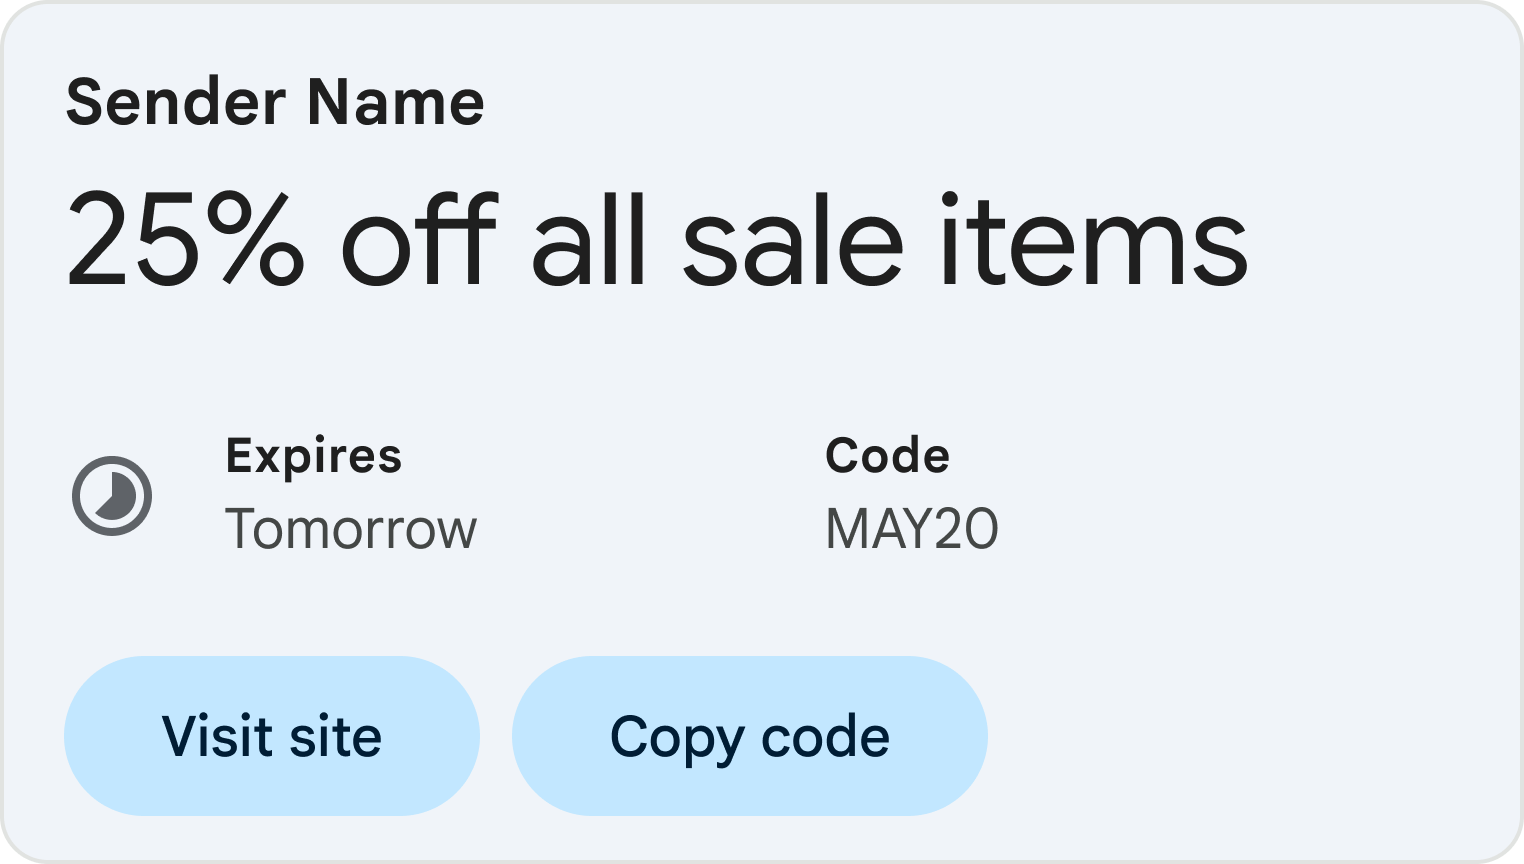
Create a deal card
Deal Cards are visual summaries of your promotions that are generated by Gmail. They can appear in the Promotions tab and within the email itself, giving your offers maximum visibility.
To enable Deal Cards, follow these steps:
Add the schema to your email's HTML: In your marketing email platform, open the HTML editor for your campaign. In the
headsection, add ascripttag that include the data typeDiscountOfferwith the following structure:JSON-LD
<!DOCTYPE html PUBLIC "-//W3C//DTD HTML 4.01//EN">
<html>
  <head>
    <script type="application/ld+json">
      [{
        "@context": "http://schema.org/",
        "@type": "DiscountOffer",
        "description": "DESCRIPTION",
        "discountCode": "DISCOUNT_CODE",
        "availabilityStarts": "START_DATE_TIME",
        "availabilityEnds": "END_DATE_TIME",
        "offerPageUrl": "OFFER_PAGE_URL",
        "merchantHomepageUrl": "MERCHANT_HOMEPAGE_URL"
      }]
    </script>
  </head>

  <body>
    // The message of your email
  </body>
</html>
Microdata
<!DOCTYPE html PUBLIC "-//W3C//DTD HTML 4.01//EN">
<html>
  <head>
    <div itemscope itemtype="http://schema.org/DiscountOffer">
      <meta itemprop="description" content="DESCRIPTION"/>
      <meta itemprop="discountCode" content="DISCOUNT_CODE"/>
      <meta itemprop="availabilityStarts" content="START_DATE_TIME"/>
      <meta itemprop="availabilityEnds" content="END_DATE_TIME"/>
      <meta itemprop="offerpageurl" content="OFFER_PAGE_URL"/>
      <meta itemprop="merchantHomepageUrl" content="MERCHANT_HOMEPAGE_URL"/>
    </div>
  </head>

  <body>
    // The message of your email.
  </body>
</html>
Customize the Deal Card properties: Update the values in the script to match your specific promotion.
Required values:
DESCRIPTION: A short, compelling summary of your offer.- Example: "20% off sitewide" or "Buy one, get one free".
At least one of the following URLs: We recommend providing an offer page URL.
OFFER_PAGE_URL: The URL for this specific offer landing page. This will create a "Shop now" (or similar) button on the Deal Card. If this is provided, we will prefer offer page URL.MERCHANT_HOMEPAGE_URL: Use this only if a specific offer page is not available. This will link to your main homepage.
Highly recommended values:
DISCOUNT_CODE: The promo code a user needs to apply at checkout.- Example: 20TODAY.
START_DATE_TIME: The start date and time of the promotion in ISO 8601 format.- Example: 2025-08-24T18:44:37-07:00.
END_DATE_TIME: The end date and time of the promotion in ISO 8601 format.- Example: 2025-09-23T18:44:37-07:00.
Write your email message: in the
<body>tag, write the message and design the layout for your email as you normally would.Validate and preview your card: before sending your campaign, validate your code and see a preview of how your Deal Annotation will look.
Next steps
- View the reference documentation to learn about the available email markup fields.
- Learn about best practices for email annotations.